やりたいこと
Cloud ComposerのAirflow WorkerからのアクセスをIPアドレス固定したい。
手順
ComposerのworkerはGKE上で動いているので、GKEでのCloudNATと同じような手順で出来ます。
- VPC・サブネット作る(GKEでのCloudNATのStep1)
- CloudNATを設定(GKEでのCloudNATのStep6 )
-
プライベート IP Cloud Composer 環境を作る
- Airflowコマンドを使ったりSSHでworkerに入りたい人は、後述の「GKEマスタへのアクセス」の設定が必要
細かい注意点
ComposerのVPCネイティブとプライベートIP環境はベータ
ので、Composer環境作る時にベータ機能を有効にする必要があります(下図)

Airflowコマンドを使いたい・Airflow workerに入りたい
Composerではgcloud composer environments runでAirflowのコマンドを実行出来ます(※)。
※ 全部のコマンドが実行出来るわけではないです
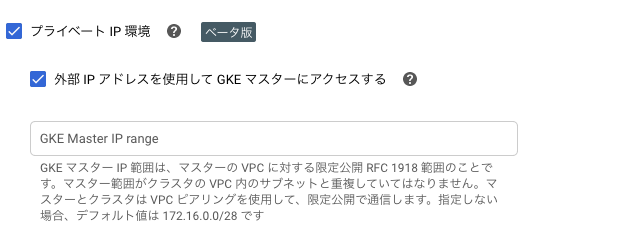
プライベートIP環境で実行するには、Composer環境を作る時に「外部 IP アドレスを使用して GKE マスターにアクセスする」の設定が必要です(下図の項目)。
アクセス元のIPアドレスの範囲を設定してあげてください。
kubectlコマンドでAirflow workerに入ったりしたい時にも必要です。
補足
普通のComposer環境ではなく、プライベートIP環境(パブリックIP(external IP)持たない環境)なのは、Cloud NATがパブリックIPを持たないインスタンスからしか使えないためです。
If your VM has an external IP address, then packets sent from the primary IP address of that interface do not use Cloud NAT.
