TensorFlow
2015年11月に発表された、Google製の機械学習ライブラリ。「テンソルフロー」と読むそうです。同社のサービスでも実際に使われているとのこと。
いろいろ書いている人もいるが、本家が一番なので、早速入れてみる入れてみる
https://www.tensorflow.org/versions/r0.8/get_started/os_setup.html
# 準備もろもろ
sudo easy_install pip
sudo easy_install --upgrade six
sudo pip install --upgrade https://storage.googleapis.com/tensorflow/mac/tensorflow-0.8.0-py2-none-any.whl
sudo pip install --upgrade virtualenv
sudo virtualenv --system-site-packages ~/tensorflow
source ~/tensorflow/bin/activate

# TensorFlow をインストール
pip install --upgrade https://storage.googleapis.com/tensorflow/mac/tensorflow-0.8.0-py2-none-any.whl
source ~/tensorflow/bin/activate
python
pythonへまずは用意されたテストをやる
>>> import tensorflow as tf
>>> hello = tf.constant('Hello, TensorFlow!')
>>> hello
<tf.Tensor 'Const:0' shape=() dtype=string>
>>> sess = tf.Session()
>>> print(sess.run(hello))
Hello, TensorFlow!
>>> a = tf.constant(10)
>>> b = tf.constant(32)
>>> print(sess.run(a + b))
42
動いたー
ビギナー向けのチュートリアルをやる
やっぱり本家のを見る
https://www.tensorflow.org/versions/master/tutorials/mnist/beginners/index.html
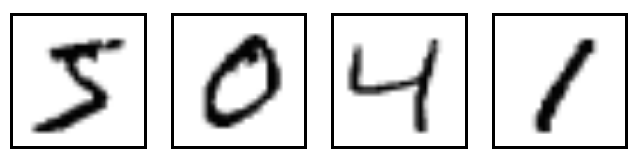
MNISTという上記の手書きの数字のイメージのデータセットを使って、機械学習を行います。
これは、プログラミングのHello Worldのような基礎動作の確認という位置付けになります
まず、データを取得するんですが、以下を打てばすでに自動で取得できるみたいです。
>>> from tensorflow.examples.tutorials.mnist import input_data
>>> mnist = input_data.read_data_sets("MNIST_data/", one_hot=True)
Successfully downloaded train-images-idx3-ubyte.gz 9912422 bytes.
Extracting MNIST_data/train-images-idx3-ubyte.gz
Successfully downloaded train-labels-idx1-ubyte.gz 28881 bytes.
Extracting MNIST_data/train-labels-idx1-ubyte.gz
Successfully downloaded t10k-images-idx3-ubyte.gz 1648877 bytes.
Extracting MNIST_data/t10k-images-idx3-ubyte.gz
Successfully downloaded t10k-labels-idx1-ubyte.gz 4542 bytes.
Extracting MNIST_data/t10k-labels-idx1-ubyte.gz
どんなデータかというと、例えばこんな感じ
train-images-idx3-ubyte.gz: training set images (9912422 bytes)
0000 0803 0000 ea60 0000 001c 0000 001c
0000 0000 0000 0000 0000 0000 0000 0000
0000 0000 0000 0000 0000 0000 0000 0000
0000 0000 0000 0000 0000 0000 0000 0000
0000 0000 0000 0000 0000 0000 0000 0000
0000 0000 0000 0000 0000 0000 0000 0000
0000 0000 0000 0000 0000 0000 0000 0000
0000 0000 0000 0000 0000 0000 0000 0000
0000 0000 0000 0000 0000 0000 0000 0000
0000 0000 0000 0000 0000 0000 0000 0000
0000 0000 0000 0000 0312 1212 7e88 af1a
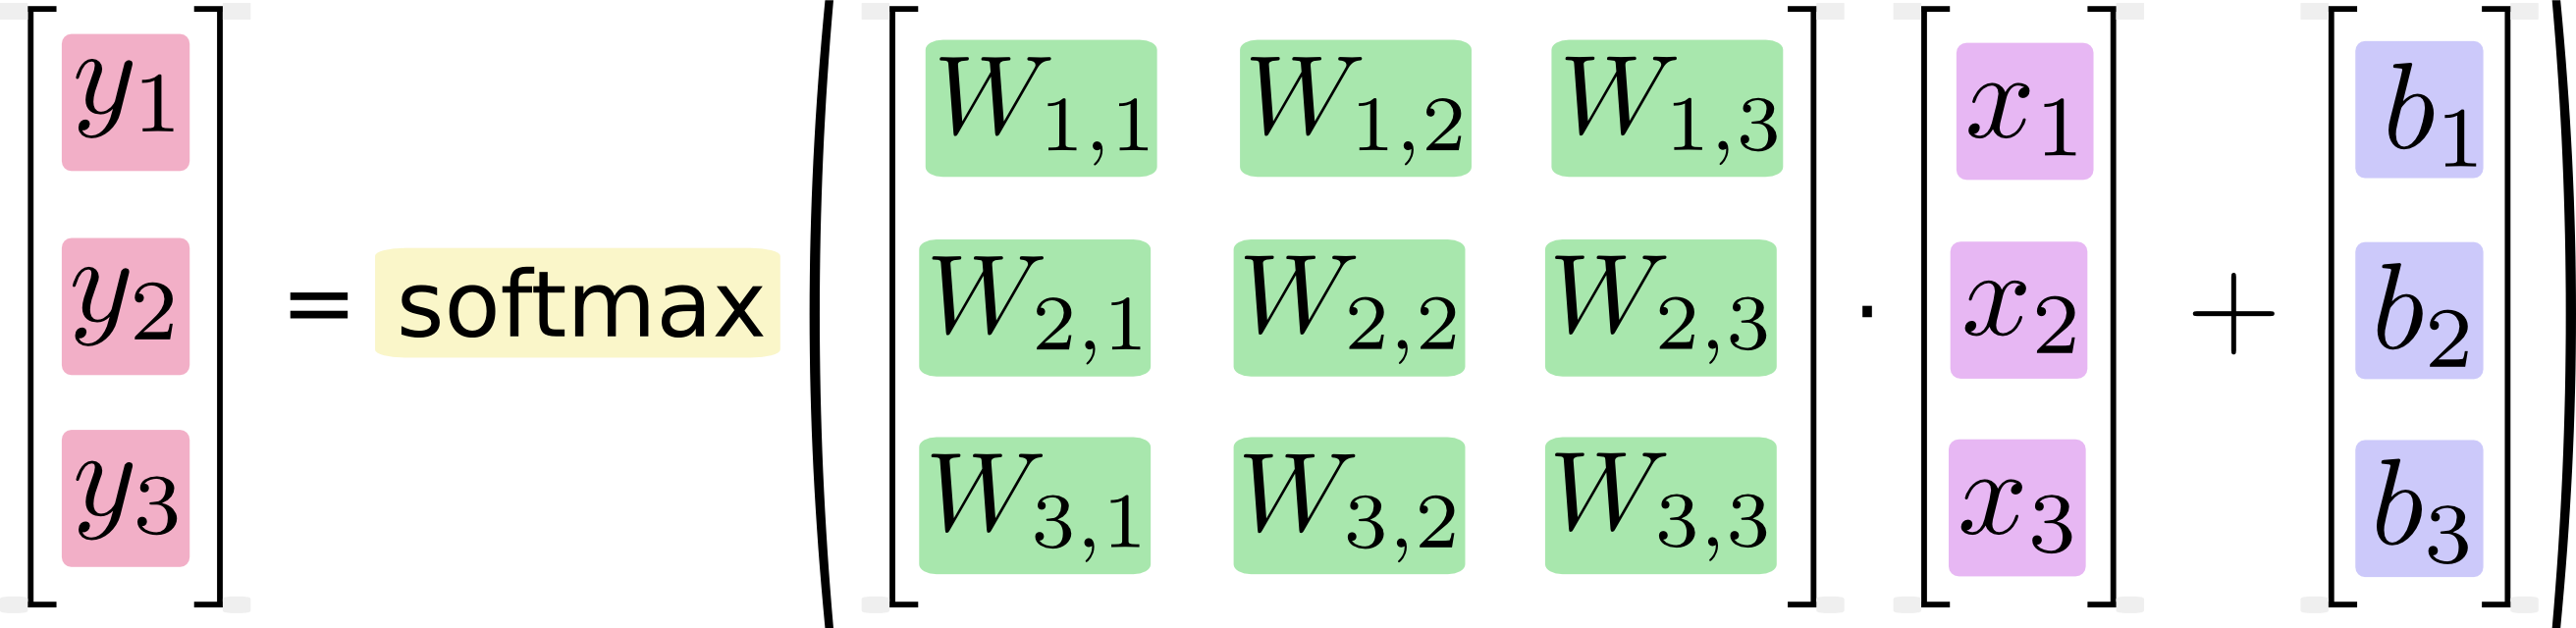
で、実際にやってみるが、中の計算方法の説明は、重いので飛ばします。
>>> import tensorflow as tf
>>> x = tf.placeholder(tf.float32, [None, 784])
>>> W = tf.Variable(tf.zeros([784, 10]))
>>> b = tf.Variable(tf.zeros([10]))
>>> y = tf.nn.softmax(tf.matmul(x, W) + b)
まず、入れる箱を作っています。画像が28x28 = 784ピクセルなので、784次元のベクトルが必要で、それを数字なので、0から9までの10次元=10個の特徴量にするための箱です
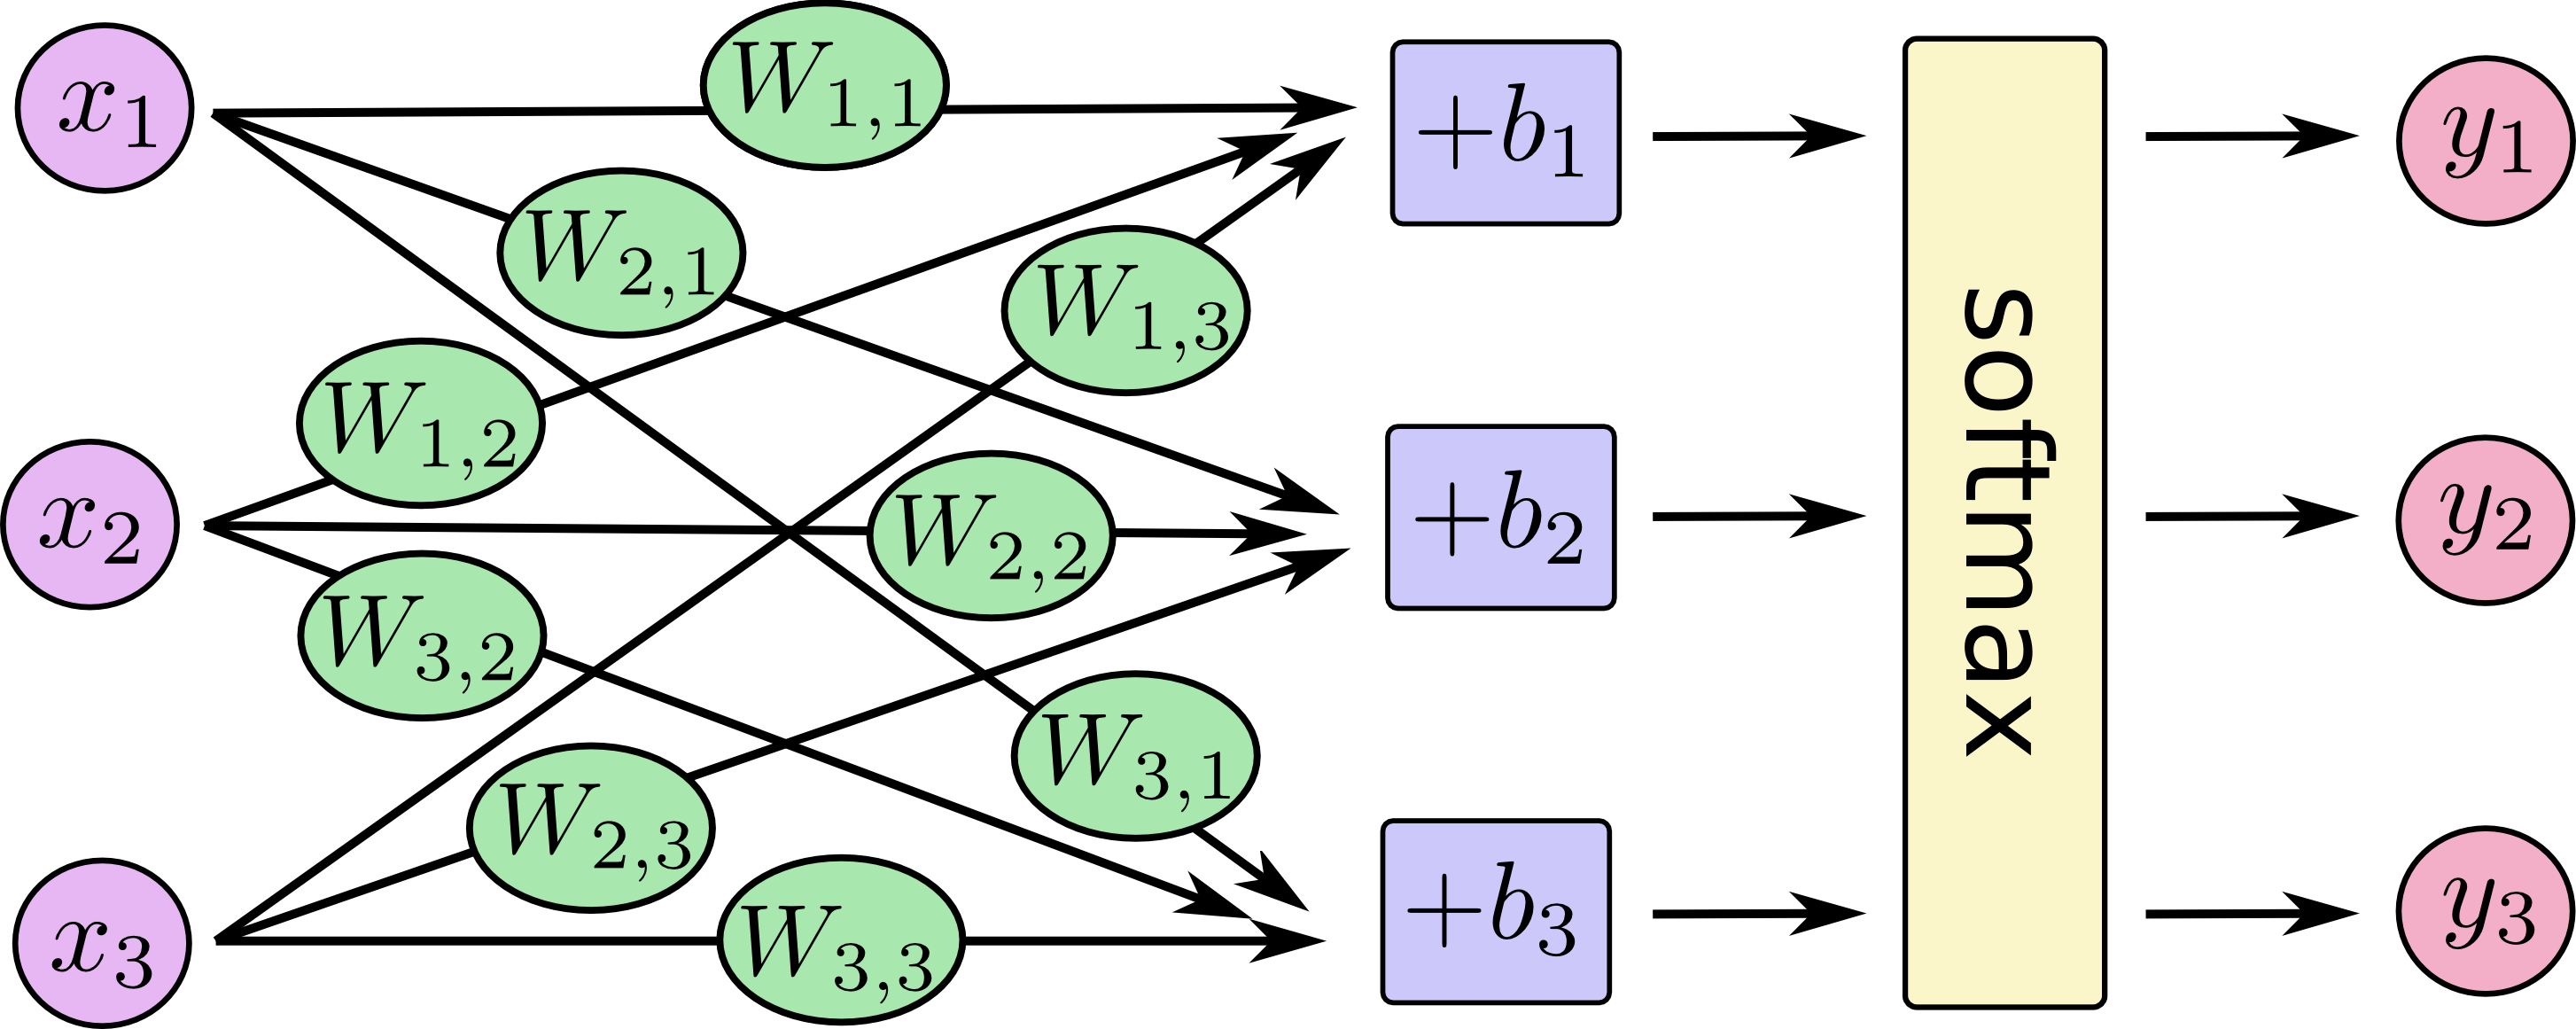
式にすると y=softmax(w*x+b)
ここからトレーニング部分を作ります
>>> y_ = tf.placeholder(tf.float32, [None, 10])
>>> cross_entropy = tf.reduce_mean(-tf.reduce_sum(y_ * tf.log(y),reduction_indices=[1]))
>>> train_step = tf.train.GradientDescentOptimizer(0.5).minimize(cross_entropy)
学習には、何が良くて何が悪かという定義を作らなければいけないです。ここでは、コスト関数「クロスエントロピー」を使って、学習させます。正解データの箱y_もここで作っておきます。
クロスエントリピーを計算させ、ここでは、最小限にすることTensorFlowを求めるcross_entropy 0.5の学習率で勾配降下アルゴリズムを使用します。
最後にセッションと初期化します
>>> init = tf.initialize_all_variables()
>>> sess = tf.Session()
>>> sess.run(init)
じゃあ、準備ができたので、レッツ!トレーニング、、、1000回ステップを実行
for i in range(1000):
  batch_xs, batch_ys = mnist.train.next_batch(100)
  sess.run(train_step, feed_dict={x: batch_xs, y_: batch_ys})
MNISTのトレーニングセットから百のランダムなデータポイントの「バッチ」を取得し、ステップを実行しています
モデルの評価をします。まずは、計算セットを作ります
>>> correct_prediction = tf.equal(tf.argmax(y,1), tf.argmax(y_,1))
>>> accuracy = tf.reduce_mean(tf.cast(correct_prediction, tf.float32))
実行
>>> print(sess.run(accuracy, feed_dict={x: mnist.test.images, y_: mnist.test.labels}))
0.9188
9割の正解率みたいです。しかし、これは精度としては、高くなく、細かい調整をすれば、99.7%まであげれるとのこと、、、マジカw
詳しい説明はこちらもあるみたいです
https://drive.google.com/file/d/0B04ol8GVySUubjVsUDdXc0hla00/view
もっと精度を上げるために、いろいろやります。続きはその2へ
http://qiita.com/northriver/items/4f4690053e1770311335