チュートリアルでblogを作るところから入ったはいいものの、見よう見まねでやってきたので素でホームページ的なものを作るやり方がいまいちわからず、勉強のためまとめました。
この次の投稿では簡単に作ったHPによくあるDjangoブログを組み込む方法をアップします。
次の記事はこちら
0.注意
今回はあくまで練習なので、この記事の通りにやってできるページはHPと呼ぶに足りないものです。あくまでDjangoの構造理解の助けになればと思います。
HPらしくするにはHTMLでコンテンツをどんどん増やしたりCSSを追加してください。
1.環境
django2.0
仮想環境
2.プロジェクトを作成し管理画面にアクセスしてみる
①プロジェクト(親)を作る
プロジェクトを作る場所をあらかじめ作ります。
ターミナルで
mkdir djangotest
cd djangotestでつくったファイルに入った状態で、
django-admin startproject mysite .
②アプリを作成
python manage.py startapp myhp
myhpは任意の名前でいいですが後から変えるのはとっても大変そうなので
なんの機能があるのかわかるようにしておくと良い、ここではホームページなのでmyhp
③親プロジェクトに子アプリ名を追加
INSTALLED_APPS = [
    'django.contrib.admin',
    'django.contrib.auth',
    'django.contrib.contenttypes',
    'django.contrib.sessions',
    'django.contrib.messages',
    'django.contrib.staticfiles',
    'myhp', #追加
]
(省略)
LANGUAGE_CODE = 'ja' #変更
TIME_ZONE = 'Asia/Tokyo' #変更
(省略)
USE_TZ =  False #変更
④migrateします
blog作成だとここにmodel.pyの編集が入るが、今回はとりあえずHPができればいいのでもうmigrateしてしまう
(よくセットでと言われる[python manage.py makemigrations myhp]はいらない模様、モデルを追加したわけじゃないから?だと思います)
ターミナルで
python manage.py migrate
成功すれば以下のように出力されるはず
Operations to perform:
  Apply all migrations: admin, auth, contenttypes, sessions
Running migrations:
  Applying contenttypes.0001_initial... OK
  Applying auth.0001_initial... OK
  Applying admin.0001_initial... OK
  Applying admin.0002_logentry_remove_auto_add... OK
  Applying contenttypes.0002_remove_content_type_name... OK
  Applying auth.0002_alter_permission_name_max_length... OK
  Applying auth.0003_alter_user_email_max_length... OK
  Applying auth.0004_alter_user_username_opts... OK
  Applying auth.0005_alter_user_last_login_null... OK
  Applying auth.0006_require_contenttypes_0002... OK
  Applying auth.0007_alter_validators_add_error_messages... OK
  Applying auth.0008_alter_user_username_max_length... OK
  Applying auth.0009_alter_user_last_name_max_length... OK
  Applying sessions.0001_initial... OK
⑤ユーザーを作る
python manage.py createsuperuser
ターミナルの指示にしたがって必要項目を入力
(Passwordは入力したものは画面に表示されませんので間違えないように打つ)
ターミナルでpython manage.py runserverした状態で
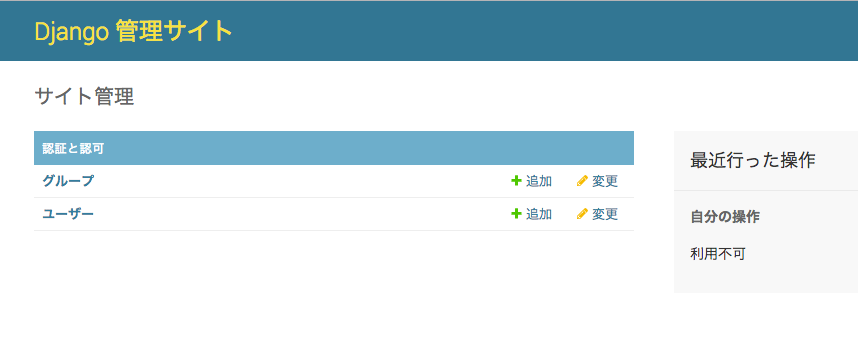
localhost:8000/adminにアクセスし、先ほど設定したアカウントとパスワードでログインすると下記のような管理画面が現れる。

19/12/4追記:うまくいったらターミナルでControl+Cで一旦サーバーを止めておいてください。
3.超単純なHPの作成
Djangoの機能を使うことによってHTMLを入れ子にすることができる。
これを利用できればHPの全ページ共通で使うもの(メニューバーなど)を簡単に再利用できるので便利。
今回はこれを実装することを想定する。
①親mysiteが子myhpをincludeするように設定
from django.urls import path, include #追加

urlpatterns = [
    path('admin/', admin.site.urls),
    path('', include('myhp.urls')), #追加
]
これによりmysiteはあとで作るmyhpのurlsを呼べる
②新たなHTMLを追加
mysite、myhpなどがある階層で
mkdir templates
この中に下記のHTMLを作成
【2019/7/23追記】純粋に外部テンプレートを読み込むだけなら、
{% include "index.html" %}
だけでもOKぽいです…。
下記はblock(オーバーライド対象ブロック)の説明。これを使うと、親htmlの内容が、親をextendsしている子テンプレートの内容に書き換わるらしい。例えばtitleタグの内容をテンプレートごとに変えたい場合とかに使える。
<html>
    <head>
        <title>ホームページ</title>
    </head>
    <body>
        <p>ここがbase.htmlです。</p>

	{% block main_containts %}
	{% endblock %}

        <p>ここがbase.htmlです。</p>
    </body>

</html>
{% extends "base.html" %}
{% block main_containts %}
{% load static %}

  <main>
    ここがindex.htmlです。
  </main>

{% endblock %}
上記の通り、index.htmlがbase.htmlを呼んでいる。
{% block 〜〜〜 %}の〜〜〜が両方のHMTLで一致していればOK
③メソッドの定義
# すでにある行はそのまま
from django.http import HttpResponse
from django.template import Context, loader

def index(request):
    template = loader.get_template('index.html')
    context = {}
    return HttpResponse(template.render(context, request))
④urls.pyパスを記載
mysiteにもurls.pyがあるが、こちらは3-①で編集した通り。
myhpの下にurls.pyを新規作成する。中身は以下の通り。
from django.urls import path
from . import views

app_name = 'myhp' #django2.0から必要になったnamespace定義
urlpatterns = [
    path('', views.index, name='index'),
]
必ずextendする側(index.html)のメソッドを書く。
⑤親mysiteがフォルダ「templates」を読むようにする
TEMPATESのDIRSにtemplatesを追加
TEMPLATES = [
    {
        'BACKEND': 'django.template.backends.django.DjangoTemplates',
        'DIRS': ['templates'], #追加
        'APP_DIRS': True,
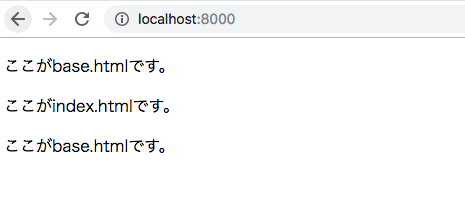
これでpython manage.py runserverしてlocalhost:8000にアクセスすると下記のような画面になる。

次回はここにNEWS欄をつけ、HTMLをいじらなくても管理画面の投稿から最新投稿を指定した数だけ取り出してくるようにします。
