タイトルの通りKotlinとFirebase Cloud Messagingを使ってプッシュ通知を実装する方法。
長い記事だけど上から順番にやっていけばできるように書いた(はず)。
準備
プロジェクトの追加
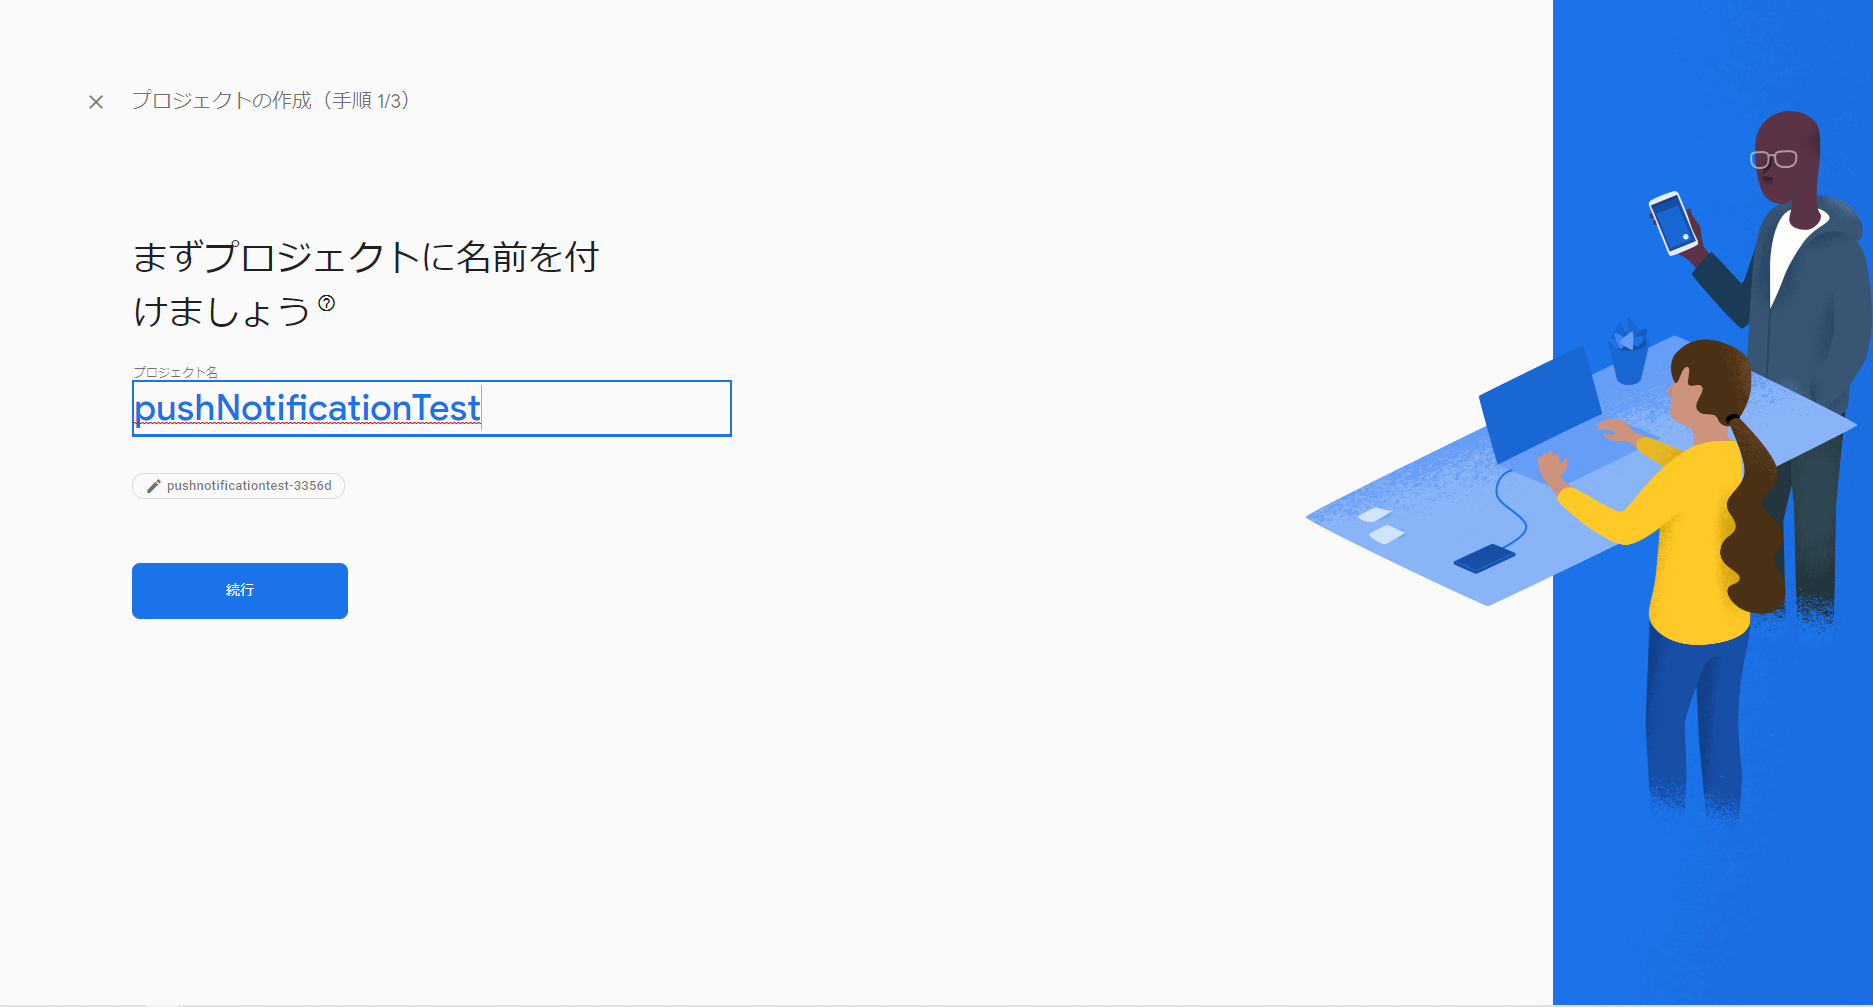
Firebaseコンソールにアクセスし、プロジェクトを追加。
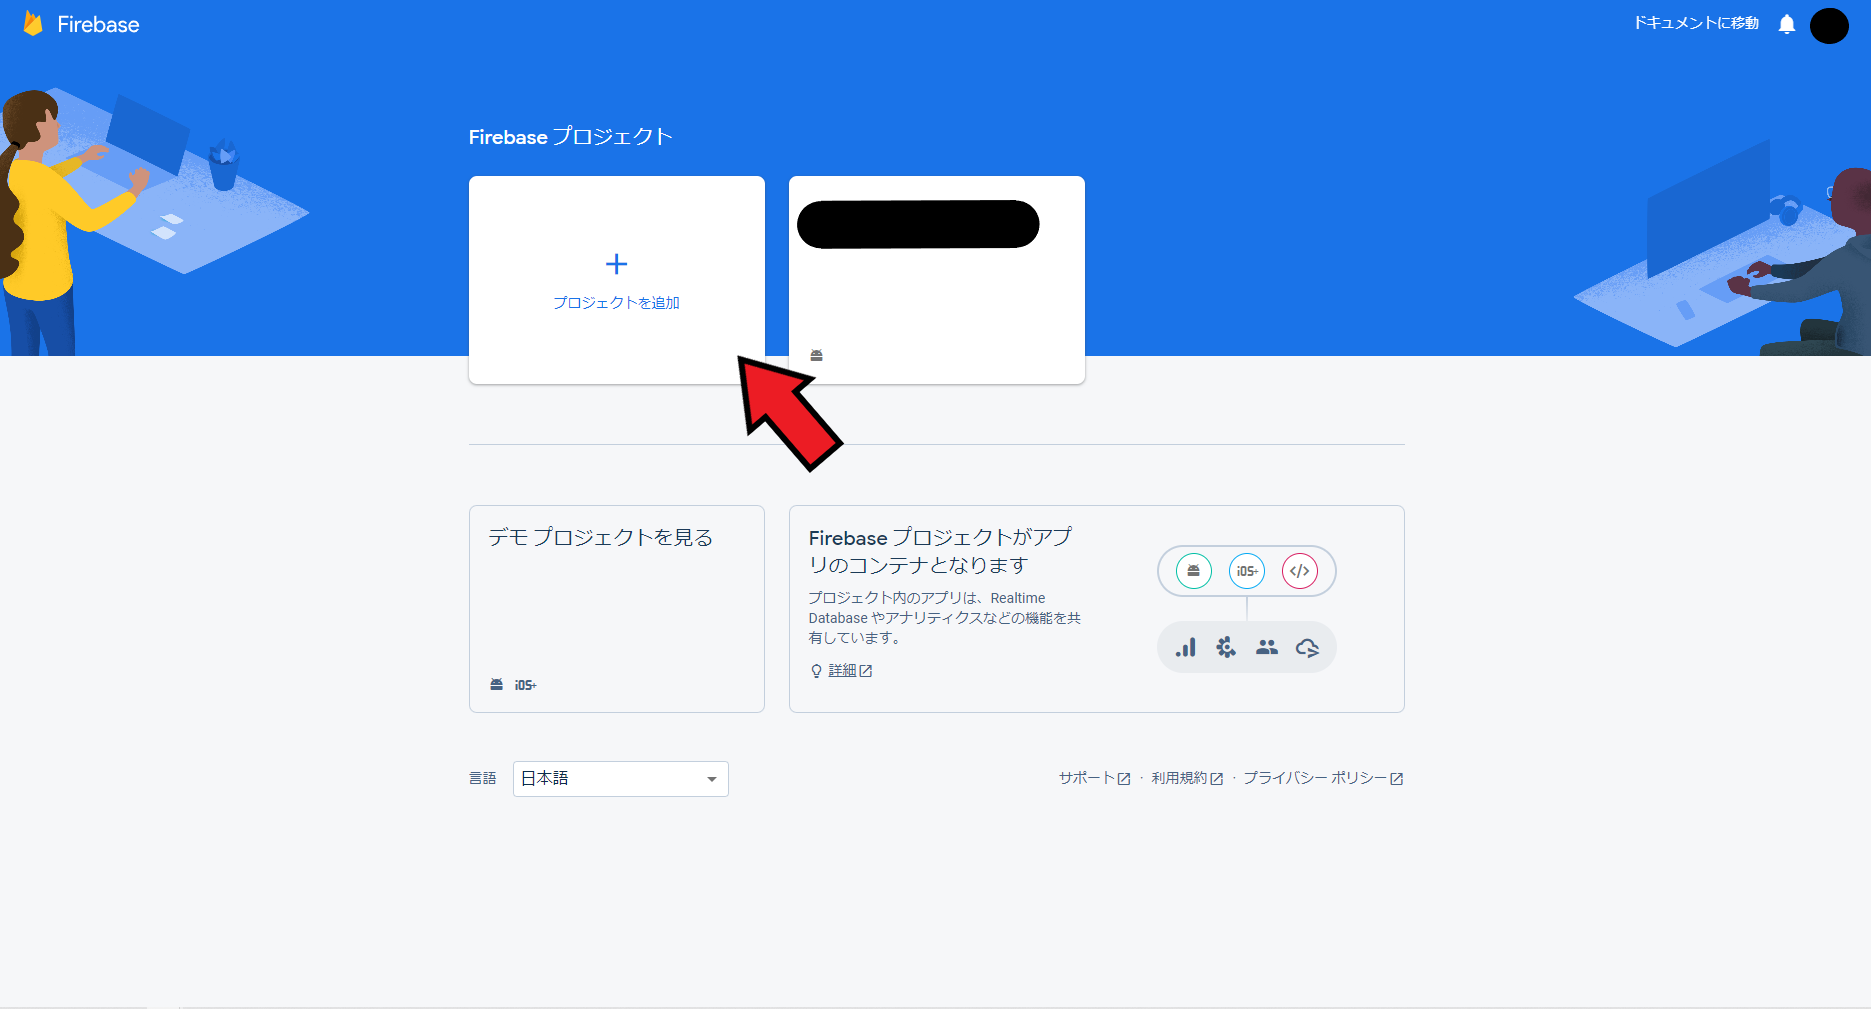
表示される画面の指示通りに進めていくと追加できる。
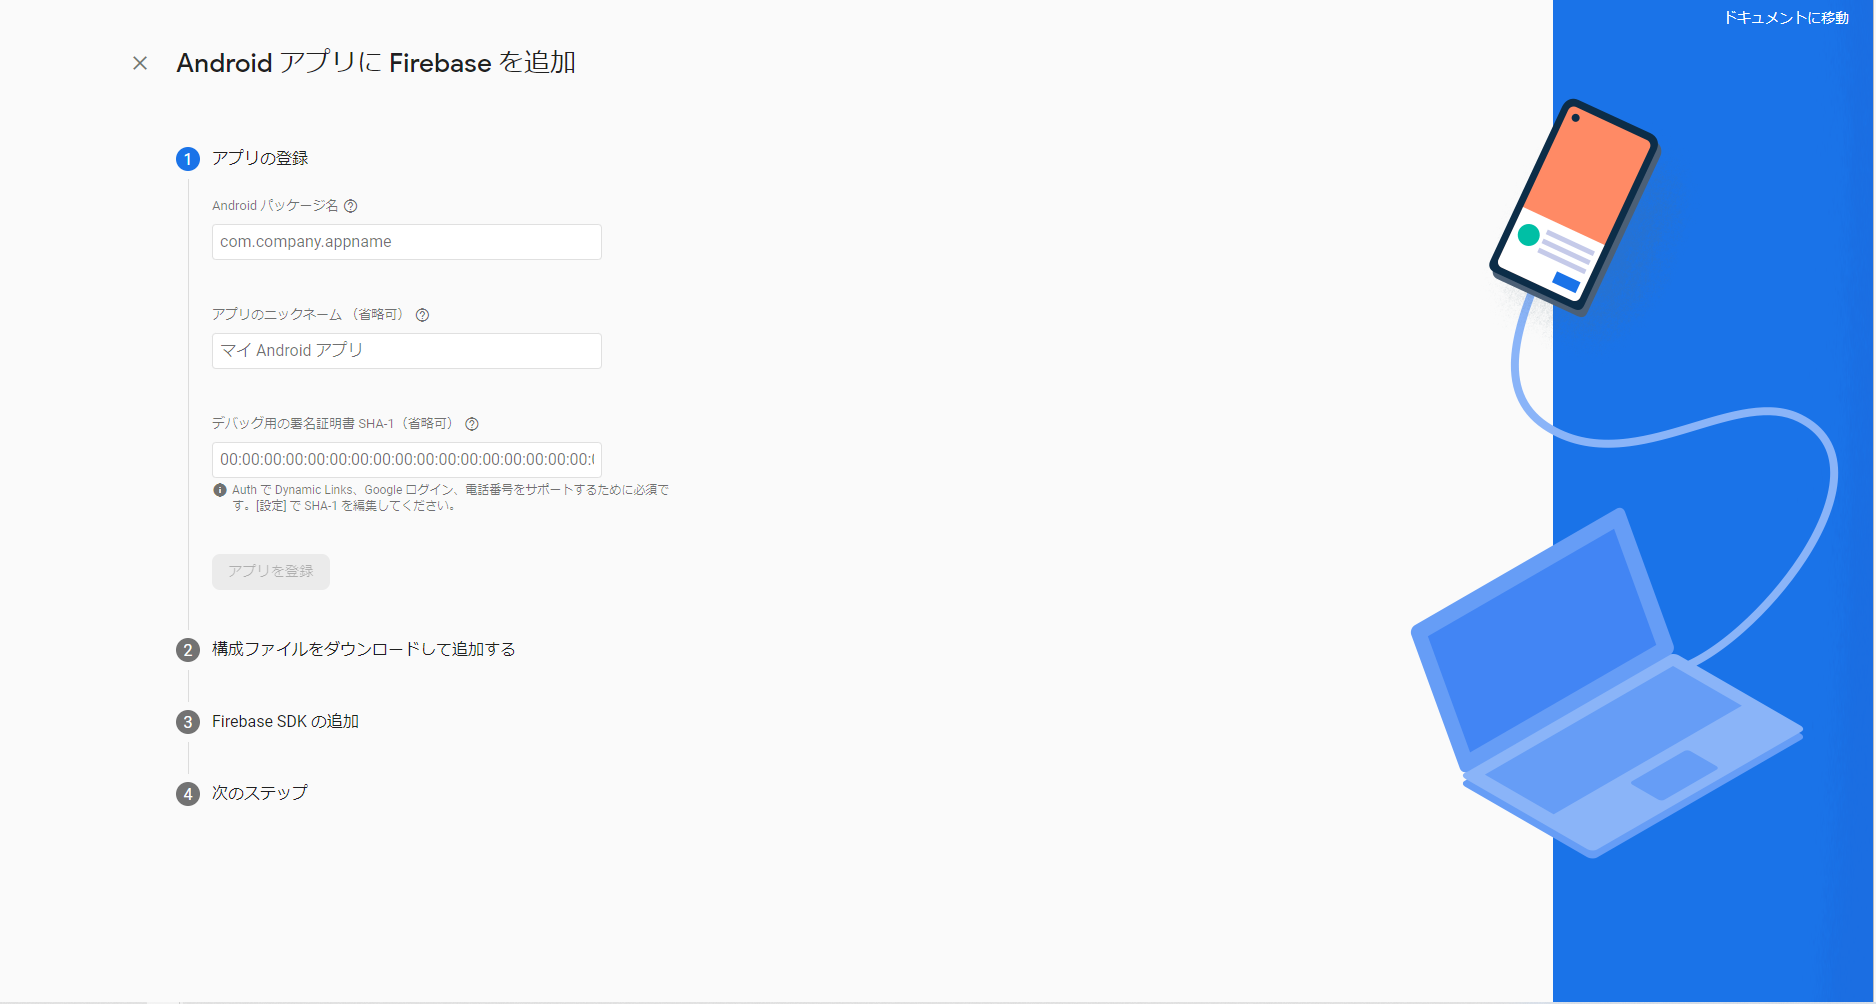
アプリの追加
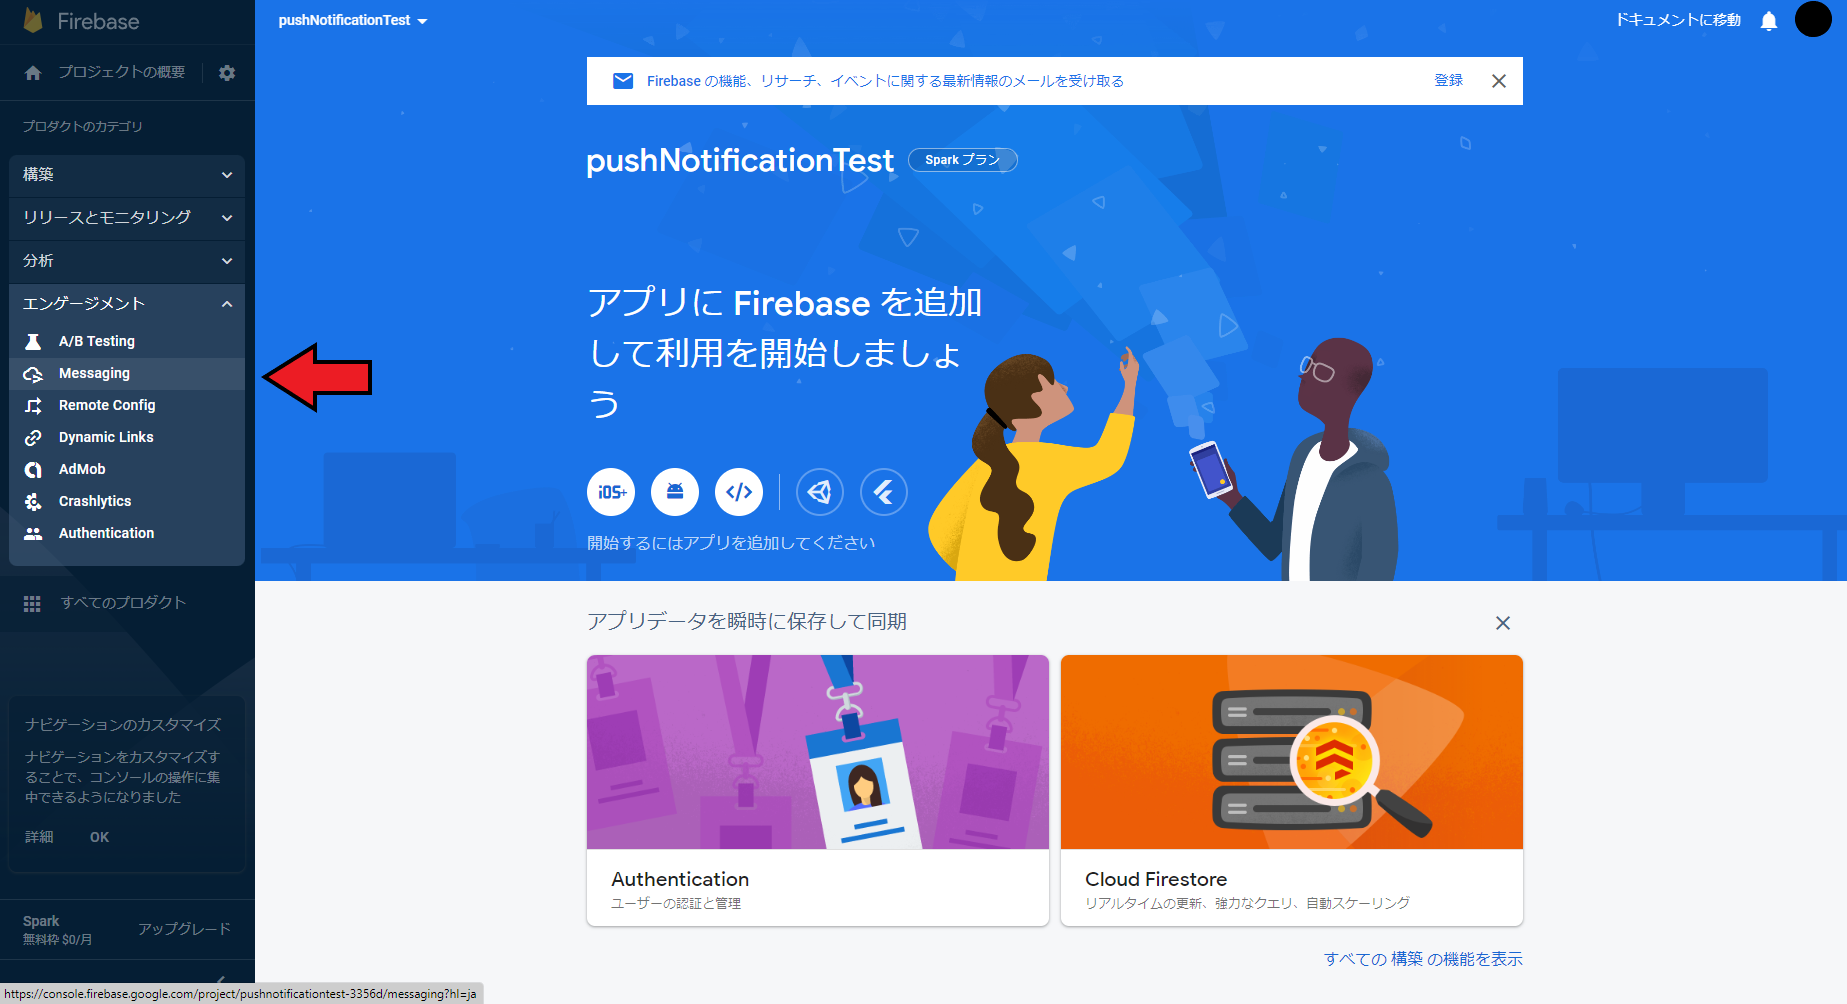
Firebase Cloud Messaging(以降FCM)を使うためにアプリを追加する。
コンソール画面のエンゲージメント -> Messaging
Androidマークをクリック
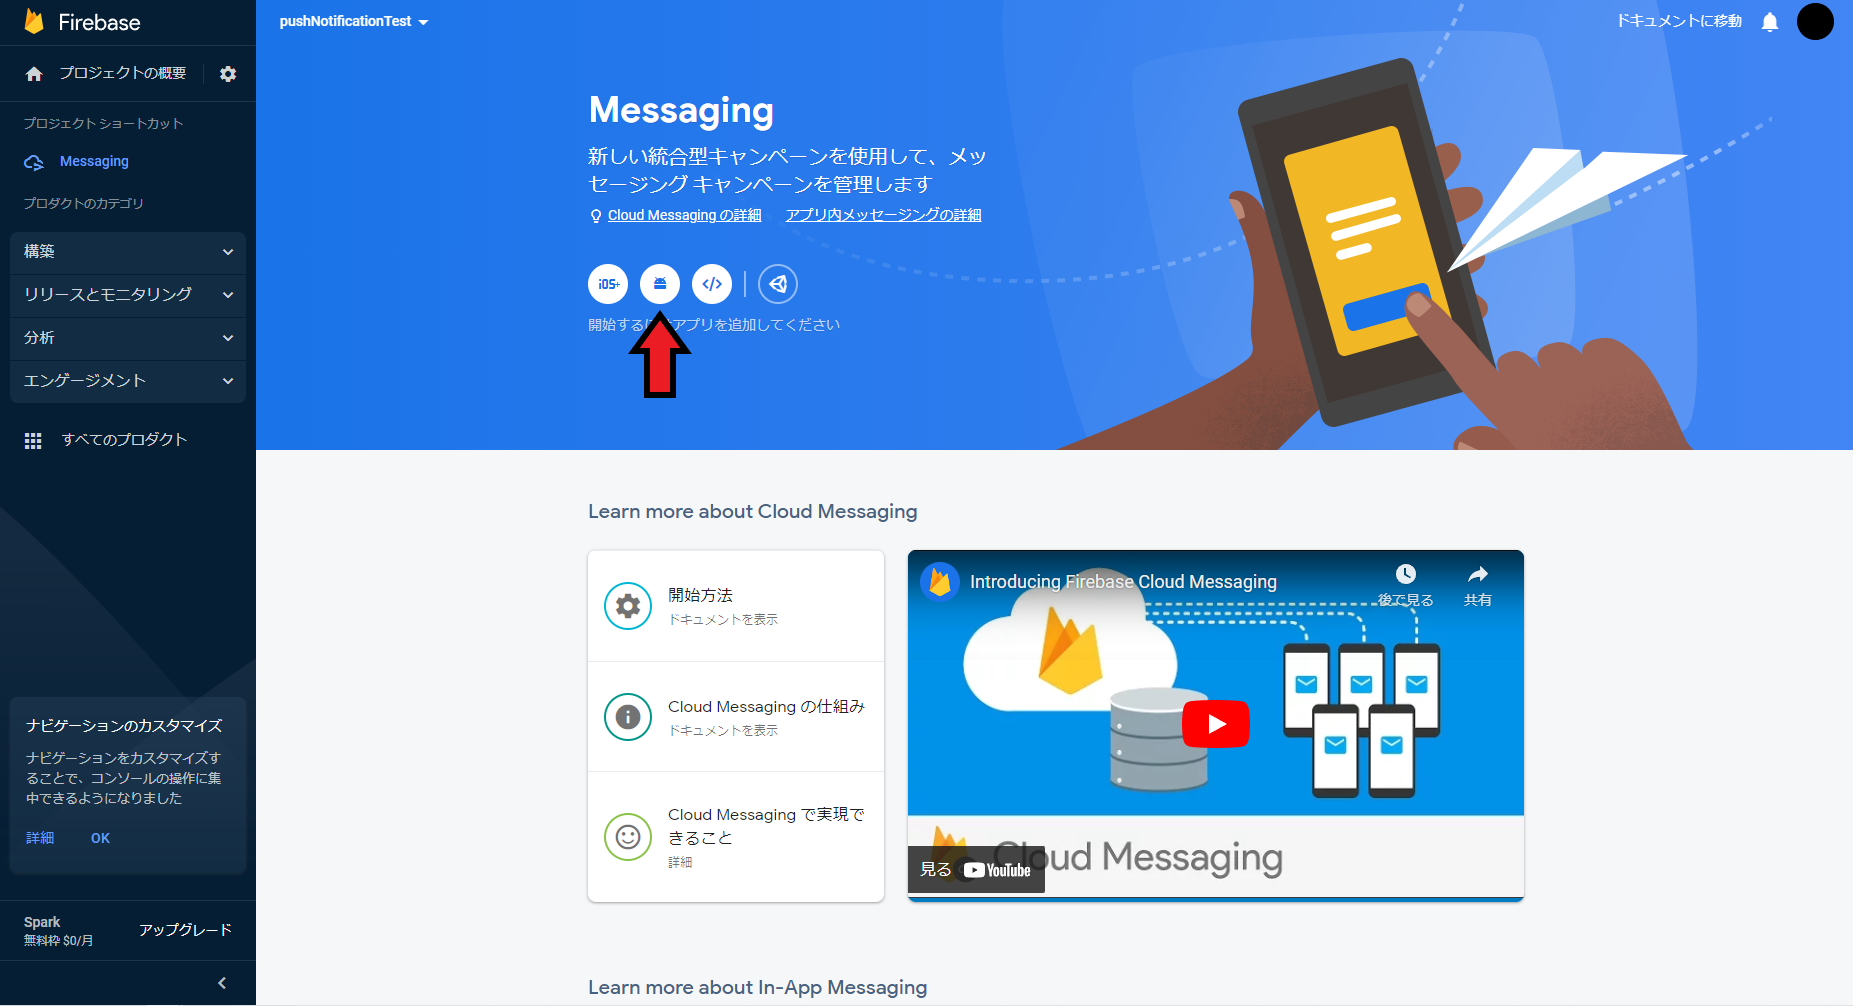
あとは表示される画面の指示通りに進めれば追加完了。
実装
実際の実装方法をコード例とともに説明。
通知チャンネルの追加
Android 8.0(API レベル 26)以降、通知はすべてチャンネルに割り当てる必要があるため、とりあえずデフォルトで使用する通知チャンネルのidと名前をstrings.xmlに追加。
<resources>
+    <string name="default_notification_channel_id">fcm_default_channel</string>
+    <string name="default_notification_channel_name">デフォルトの通知</string>
</resources>
ActivityのonCreate内でチャンネルを追加する。
class MainActivity : AppCompatActivity() {

    override fun onCreate(savedInstanceState: Bundle?) {
        super.onCreate(savedInstanceState)
        setContentView(R.layout.activity_main)

+        if (Build.VERSION.SDK_INT >= Build.VERSION_CODES.O) {
+            // Create channel to show notifications.
+            val channelId = getString(R.string.default_notification_channel_id)
+            val channelName = getString(R.string.default_notification_channel_name)
+            val notificationManager = getSystemService(NotificationManager::class.java)
+            notificationManager?.createNotificationChannel(
+                NotificationChannel(
+                    channelId,
+                    channelName,
+                    NotificationManager.IMPORTANCE_DEFAULT,
+                ),
+            )
+        }
+    }

}
通知チャンネルの詳細については下記記事で説明しているので、詳しく知りたい人は読んでみてください。
[AndroidStudio]Kotlinでの通知チャンネルの追加方法
Firebase SDKの追加
プロジェクトレベルのbuild.gradleにGoogleサービスプラグインの追加
buildscript {
    repositories {
        // Make sure that you have the following two repositories
        google()  // Google's Maven repository

        mavenCentral()  // Maven Central repository

    }
    dependencies {
        // Add the dependency for the Google services Gradle plugin
+        classpath 'com.google.gms:google-services:4.3.15'

    }
}
アプリレベルのbuild.gradleにFirebase SDKの追加。
dependencies {
  // ...

  // Import the Firebase BoM
  implementation platform('com.google.firebase:firebase-bom:32.0.0')

  // When using the BoM, you don't specify versions in Firebase library dependencies

  // Add the dependency for the Firebase SDK for Google Analytics
  implementation 'com.google.firebase:firebase-analytics-ktx'
 // Add the dependency for the Firebase SDK for Cloud Messaging
 implementation 'com.google.firebase:firebase-messaging:23.1.2'

}
FirebaseMessagingServiceの追加
新たにclassファイルを作成。(ファイル名は任意、今回の場合はMyFirebaseMessagingService)
class MyFirebaseMessagingService: FirebaseMessagingService() {
}
作成したファイルをAndroidManifestに追加。
また、オプションとしてデフォルトの通知アイコンと色、通知チャンネルを設定することができる。
<manifest xmlns:android="http://schemas.android.com/apk/res/android"
    xmlns:tools="http://schemas.android.com/tools">

    <application
        android:allowBackup="true"
        android:dataExtractionRules="@xml/data_extraction_rules"
        android:fullBackupContent="@xml/backup_rules"
        android:icon="@mipmap/ic_launcher"
        android:label="@string/app_name"
        android:roundIcon="@mipmap/ic_launcher_round"
        android:supportsRtl="true"
        android:theme="@style/Theme.FCMPushNotificationTest"
        tools:targetApi="31">

+        <service
+            android:name=".MyFirebaseMessagingService"
+            android:exported="false">
+            <intent-filter>
+                <action android:name="com.google.firebase.MESSAGING_EVENT" />
+            </intent-filter>
+        </service>

        <!-- ここから下はオプション -->
        <!-- デフォルトの通知チャンネルを設定 -->
+        <meta-data
+            android:name="com.google.firebase.messaging.default_notification_channel_id"
+            android:value="@string/default_notification_channel_id" />
        <!-- デフォルトの通知アイコンを設定 -->
+        <meta-data
+            android:name="com.google.firebase.messaging.default_notification_icon"
+            android:resource="@drawable/baseline_notifications_24" /> <!-- 任意のアイコンを設定 -->
        <!-- デフォルトの通知の色を設定 -->
+        <meta-data
+            android:name="com.google.firebase.messaging.default_notification_color"
+            android:resource="@color/purple_200" /> <!-- 任意の色を設定 -->

        <activity
            android:name=".MainActivity"
            android:exported="true"
            android:label="@string/app_name"
            android:theme="@style/Theme.FCMPushNotificationTest">
            <intent-filter>
                <action android:name="android.intent.action.MAIN" />

                <category android:name="android.intent.category.LAUNCHER" />
            </intent-filter>
        </activity>
    </application>

</manifest>
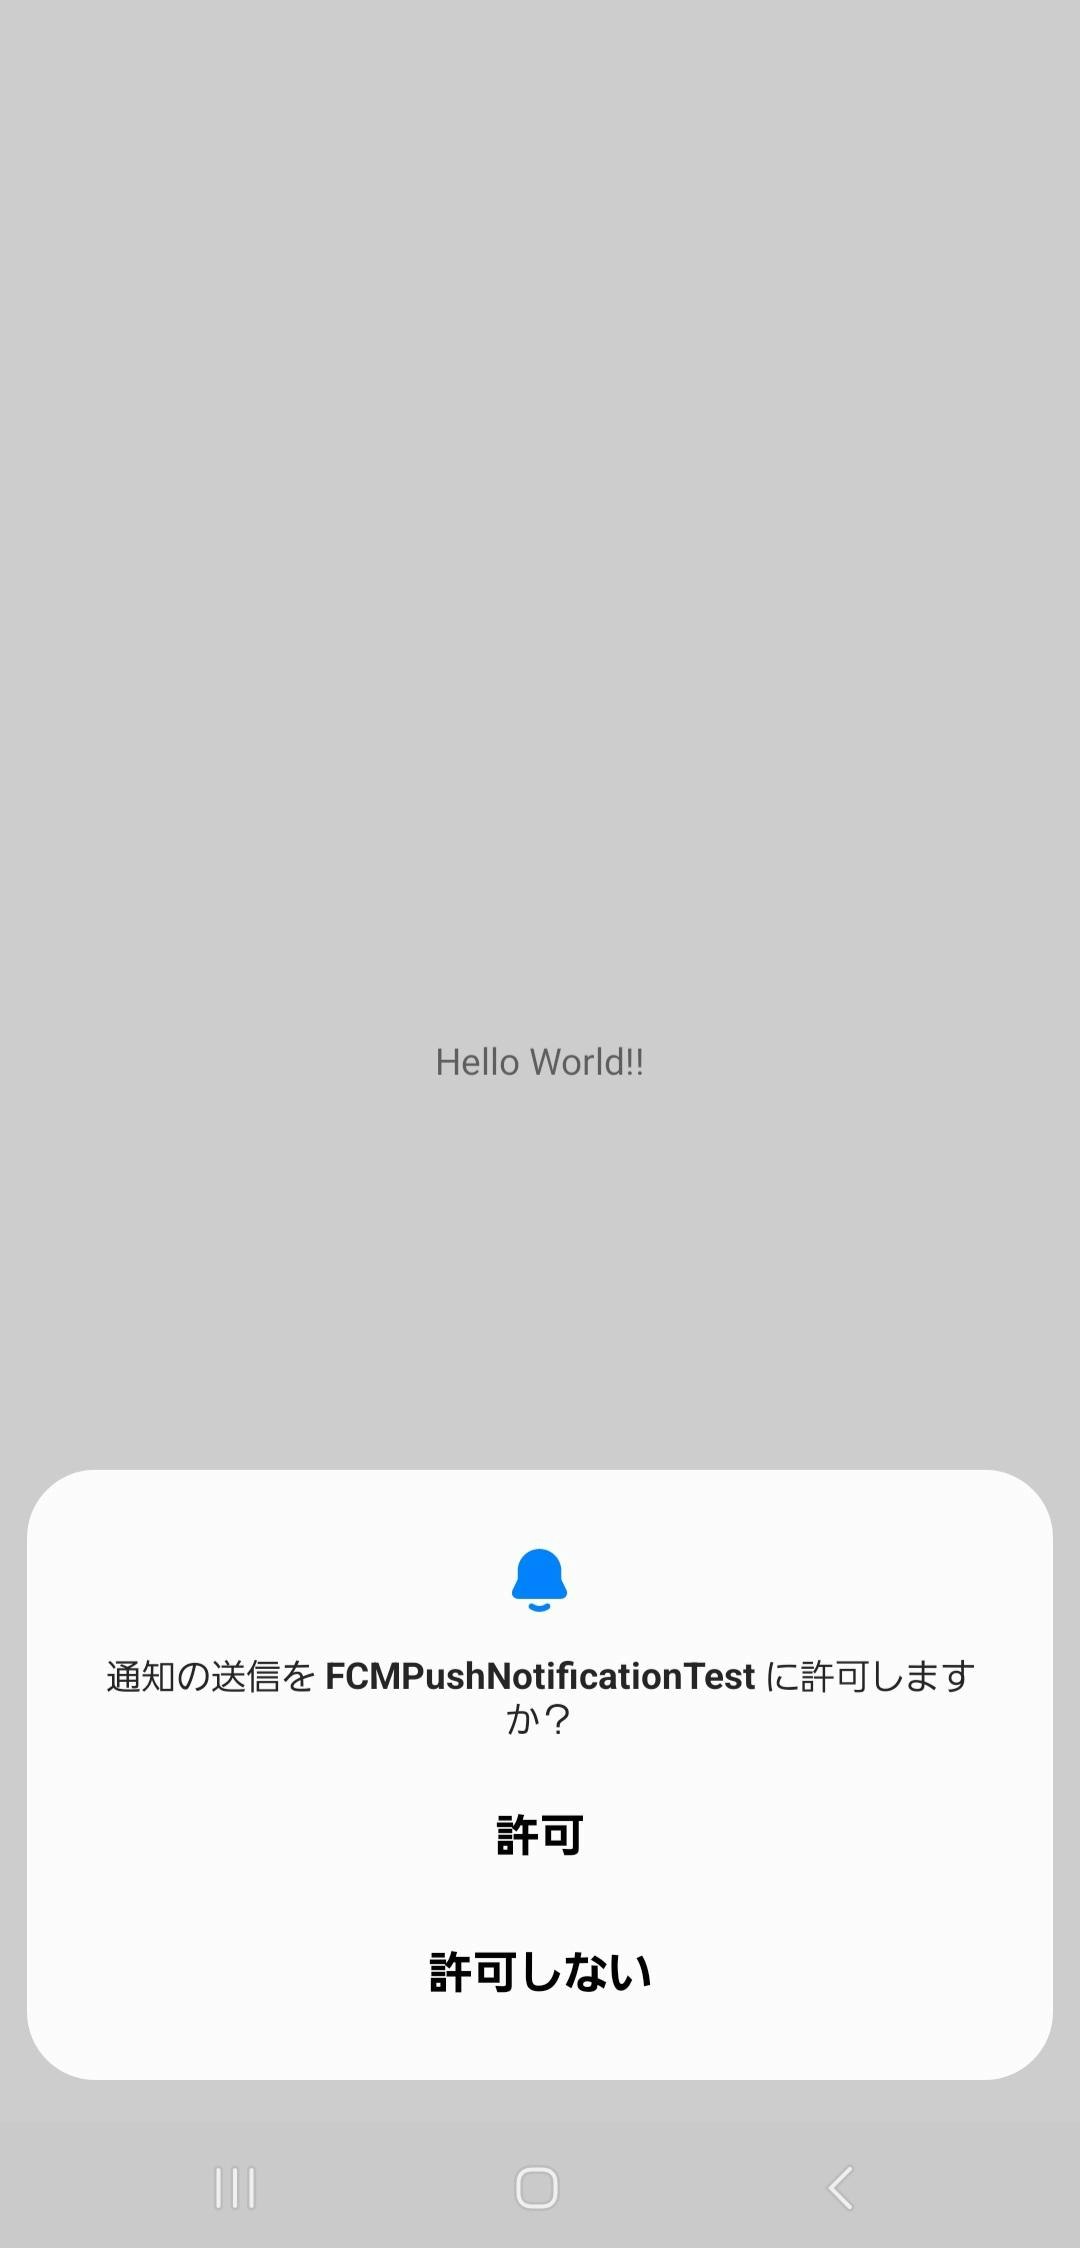
通知権限のリクエスト(Android13以降)
Android13以降のアプリでは通知を表示するために新しい権限が導入されているため、通知の許可をリクエストする必要がある。
AndroidManifestでLANCHERに設定しているActivityに以下を追加する。
class MainActivity : AppCompatActivity() {

    // Declare the launcher at the top of your Activity/Fragment:
+    private val requestPermissionLauncher = registerForActivityResult(
+        ActivityResultContracts.RequestPermission(),
+    ) { isGranted: Boolean ->
+        if (isGranted) {
+            // FCM SDK (and your app) can post notifications.
+            Toast.makeText(this, "Notifications permission granted", Toast.LENGTH_SHORT)
+                .show()
+        } else {
+            // TODO: Inform user that that your app will not show notifications.
+            Toast.makeText(
+                this,
+                "FCM can't post notifications without POST_NOTIFICATIONS permission",
+                Toast.LENGTH_LONG,
+            ).show()
+        }
+    }

    override fun onCreate(savedInstanceState: Bundle?) {
        super.onCreate(savedInstanceState)
        setContentView(R.layout.activity_main)
+        askNotificationPermission()
    }

+    private fun askNotificationPermission() {
+        // This is only necessary for API level >= 33 (TIRAMISU)
+        if (Build.VERSION.SDK_INT >= Build.VERSION_CODES.TIRAMISU) {
+            if (ContextCompat.checkSelfPermission(this, Manifest.permission.POST_NOTIFICATIONS) ==
+                PackageManager.PERMISSION_GRANTED
+            ) {
+                // FCM SDK (and your app) can post notifications.
+            } else if (shouldShowRequestPermissionRationale(Manifest.permission.POST_NOTIFICATIONS)) {
+                // TODO: display an educational UI explaining to the user the features that will be enabled
+                //       by them granting the POST_NOTIFICATION permission. This UI should provide the user
+                //       "OK" and "No thanks" buttons. If the user selects "OK," directly request the permission.
+                //       If the user selects "No thanks," allow the user to continue without notifications.
+            } else {
+                // Directly ask for the permission
+                requestPermissionLauncher.launch(Manifest.permission.POST_NOTIFICATIONS)
+            }
+        }
+    }

}
この記述があると、Android13以降のスマホでアプリを起動すると以下のように許可を求められる。
デバイス登録トークンの確認と生成
アプリを初めて起動するとデバイスの登録トークンが生成される。
このトークンを使ってサーバー側から通知を送信する。
トークンは一度生成されると基本的に変更されないが、次のような場合に変更される。
- アプリを別のデバイスで復元した場合
- アプリをアンインストール、再インストールした場合
- アプリのデータを削除した場合
現在のトークンの確認
現在のトークンを確認するためには以下のように書く。
// Current Notificationトークンの取得
FirebaseMessaging.getInstance().token
    .addOnCompleteListener(OnCompleteListener { task ->
         if (!task.isSuccessful) {
            // token取得失敗
            Log.d("getInstanceId failed ${task.exception}", "a")
            return@OnCompleteListener
        }
        // new Instance ID token
        val token = task.result

        val msg = "InstanceID Token: $token"
        Log.d("msg",msg)
        Toast.makeText(baseContext, msg, Toast.LENGTH_SHORT).show()
    })
トークンの生成
最初に作成したMyFirebaseMessagingServiceに記述する。
class MyFirebaseMessagingService: FirebaseMessagingService() {
+    override fun onNewToken(token: String) {
+        Log.i("Refreshed token: $token", "a")
+
+        // サーバーへtokenを送りたい場合は記述
+        sendRegistrationToServer(token)
+    }

+    private fun sendRegistrationToServer(token: String?) {
+        // tokenをserverへ送る処理
+        Log.i("sendRegistrationTokenToServer($token)", "a")
+    }
}
サーバーから通知を送信したい場合はトークンをサーバーへ送信する必要があるため、送信に関することはsendRegistrationToServerへ記述する。
サーバーでは送信されたトークンを保存しておき、通知を行いたい場合はそのトークンへ向けて通知を送信する。
通知の受信、作成と表示
通知を受信したときの処理と通知を生成して表示する処理をMyFirebaseMessagingServiceに記述する。
通知を受信したときの処理
override fun onMessageReceived(remoteMessage: RemoteMessage) {
        super.onMessageReceived(remoteMessage)
        Log.i("From:", "${remoteMessage.from}")

        // Check if message contains a notification payload.
        remoteMessage.notification?.let {
            it.body?.let { body ->
                it.title?.let { title ->
                    it.channelId?.let { channelId -> sendNotification(body, title, channelId) } ?: sendNotification(body, title, getString(R.string.default_notification_channel_id))
                } ?: sendNotification(body, getString(R.string.default_notification_title), getString(R.string.default_notification_channel_id))
            }
        }
    }
ここでは通知にタイトルがない場合、通知チャンネルが指定されていない場合、どちらもない場合の3通りに分けてsendNotificationを行っている。実際の様子は後ほど紹介する。
getString(R.string.default_notification_title)にはstrings.xmlで「通知」という文字を定義している。
通知の生成と表示
private fun sendNotification(messageBody: String, messageTitle: String, channelId: String) {
        // 通知タップ時に開くActivityを設定
        val intent = Intent(this, MainActivity::class.java)
        intent.addFlags(Intent.FLAG_ACTIVITY_CLEAR_TOP)
        val pendingIntent = PendingIntent.getActivity(this, 0 /* Request code */, intent,
            PendingIntent.FLAG_IMMUTABLE)

        // 通知の作成
        val defaultSoundUri = RingtoneManager.getDefaultUri(RingtoneManager.TYPE_NOTIFICATION)
        val notificationBuilder = NotificationCompat.Builder(this, channelId)
            .setSmallIcon(R.drawable.baseline_notifications_24)
            .setContentTitle(messageTitle)
            .setContentText(messageBody)
            .setAutoCancel(true)
            .setSound(defaultSoundUri)
            .setContentIntent(pendingIntent)

        val notificationManager = getSystemService(Context.NOTIFICATION_SERVICE) as NotificationManager

        // Since android Oreo notification channel is needed.
        if (Build.VERSION.SDK_INT >= Build.VERSION_CODES.O) {
            val channel = NotificationChannel(channelId,
                "Channel human readable title",
                NotificationManager.IMPORTANCE_DEFAULT)
            notificationManager.createNotificationChannel(channel)
        }

        notificationManager.notify(0 /* ID of notification */, notificationBuilder.build())
    }
ここでは通知の生成と表示を行う。
通知がタップされた時に開くActivityや通知のアイコン、タイトル、を設定している。
NotificationCompat.Builder内で書いているものそれぞれの役割は以下の通り。
| 名前 | 役割 |
|---|---|
setSmallIcon |
通知アイコンを設定 |
setContentTitle |
通知のタイトルを設定 |
setContentText |
通知のメッセージを設定 |
setAutoCancel |
通知をタップして起動したら通知を消すかどうかtrue=消えるfalse=消えない |
setSound |
通知音を設定 |
setContentIntent |
通知にIntentを設定 |
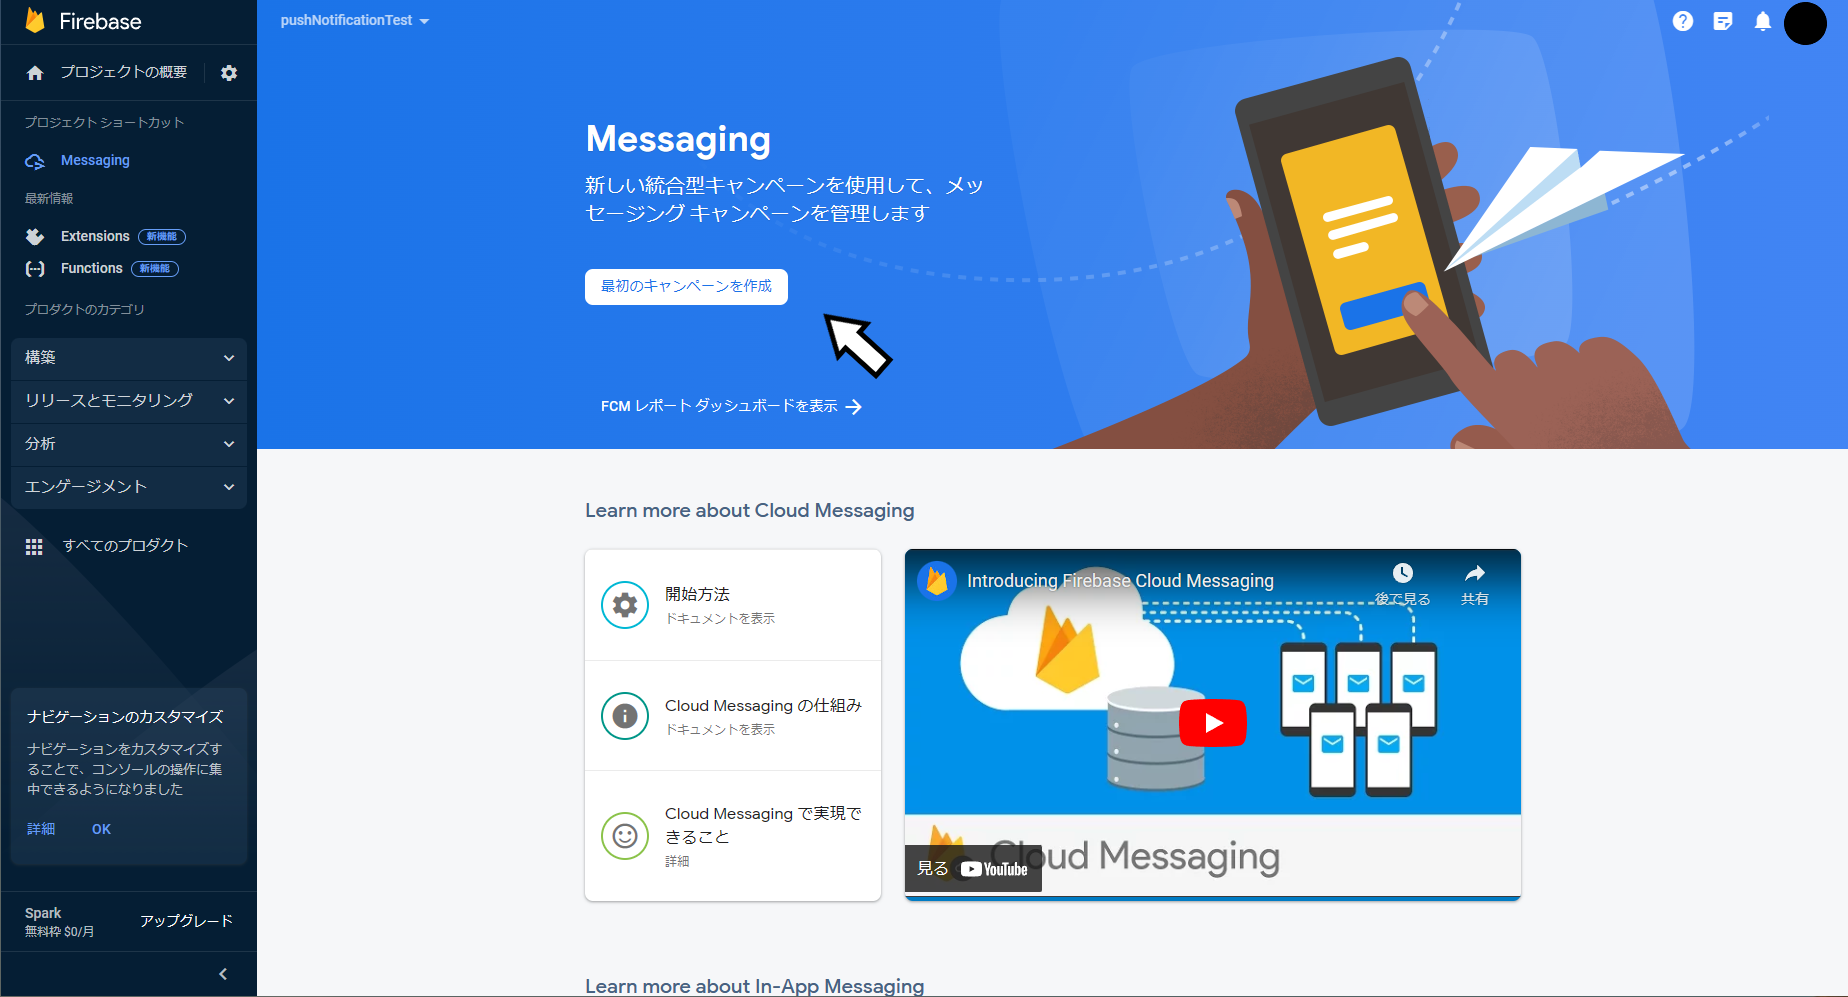
通知の送信
Firebaseコンソールから通知の送信が行える。
-
初回の場合、最初のキャンペーンを作成をクリック
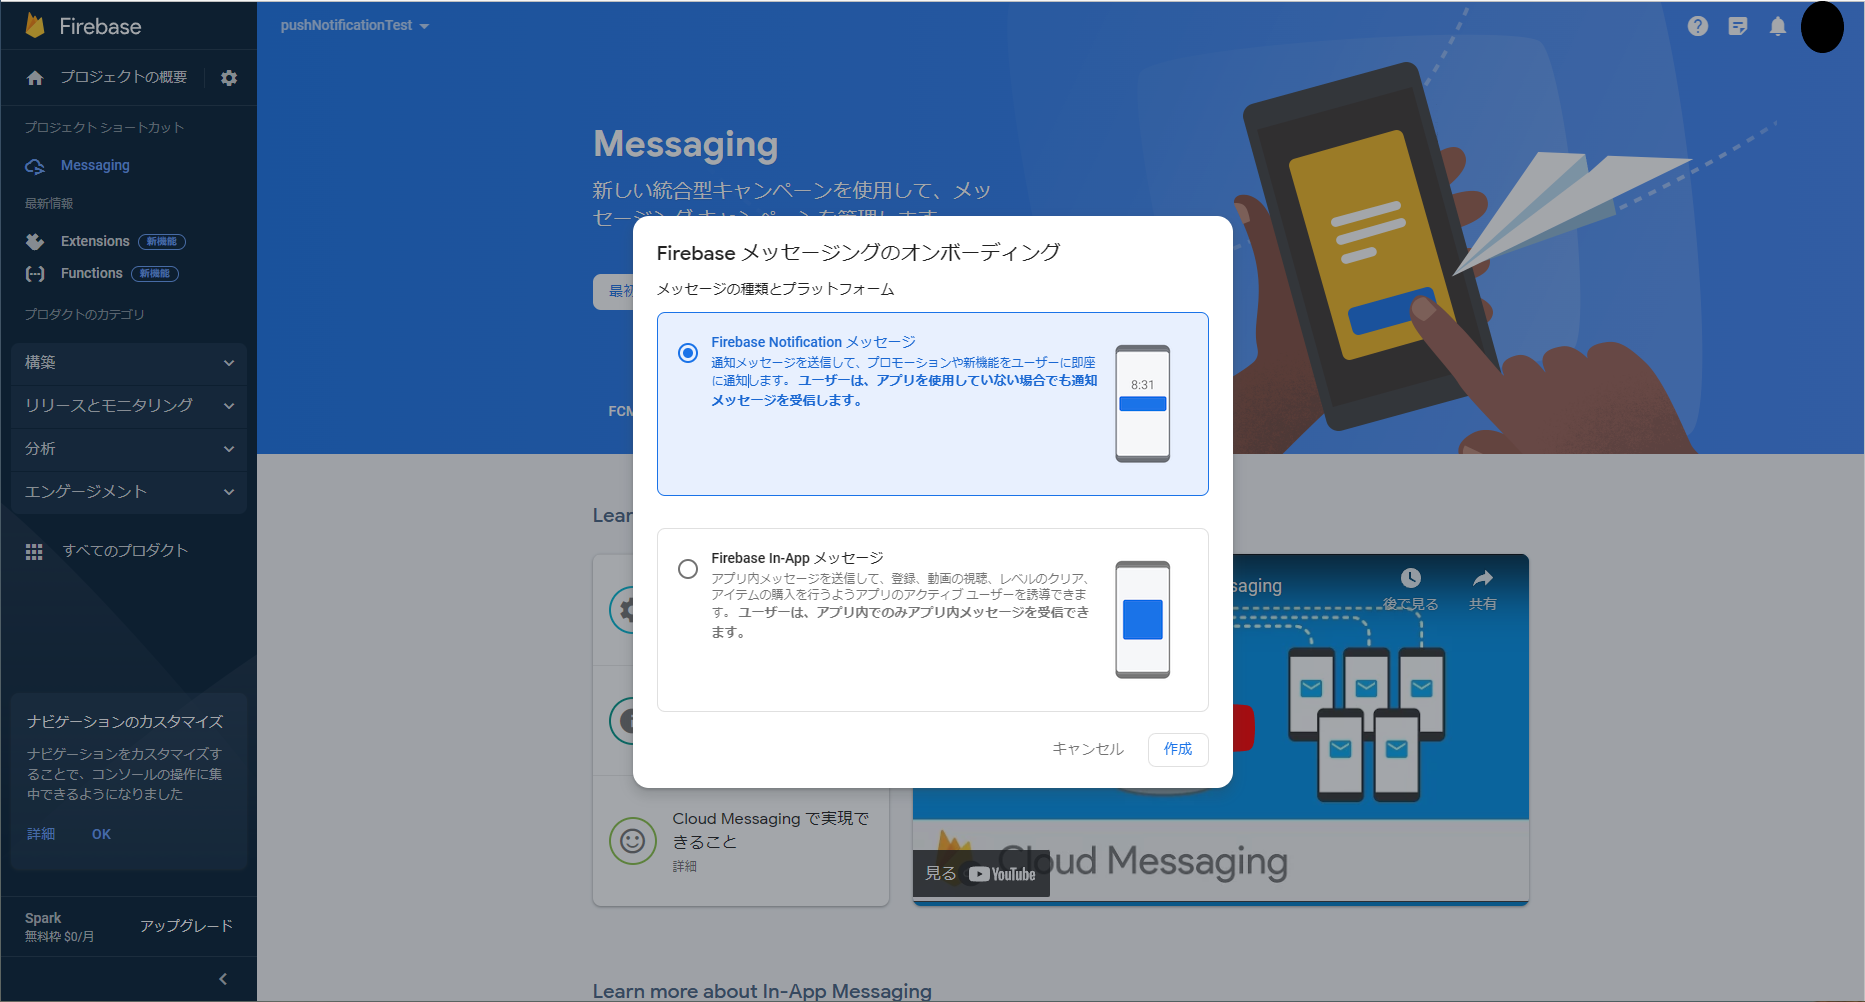
-
通知の種類の選択。今回はFirebase Notification メッセージを選択する。
-
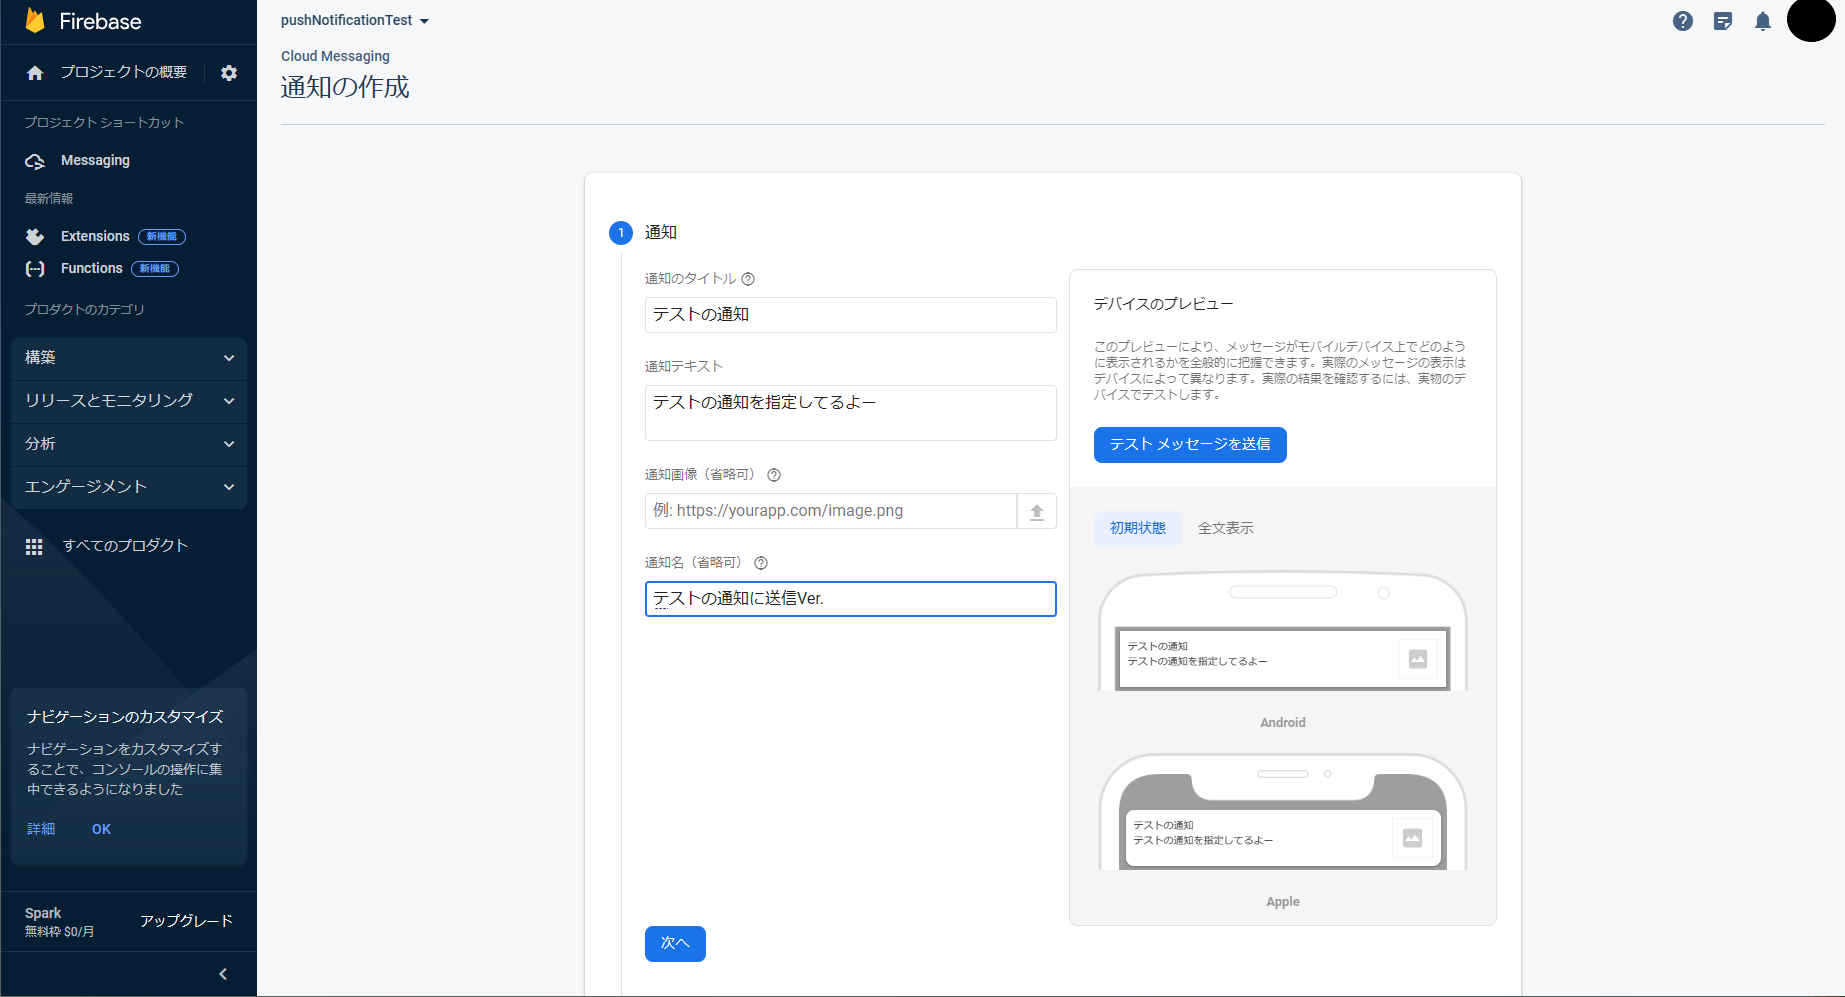
通知のタイトルとメッセージの入力
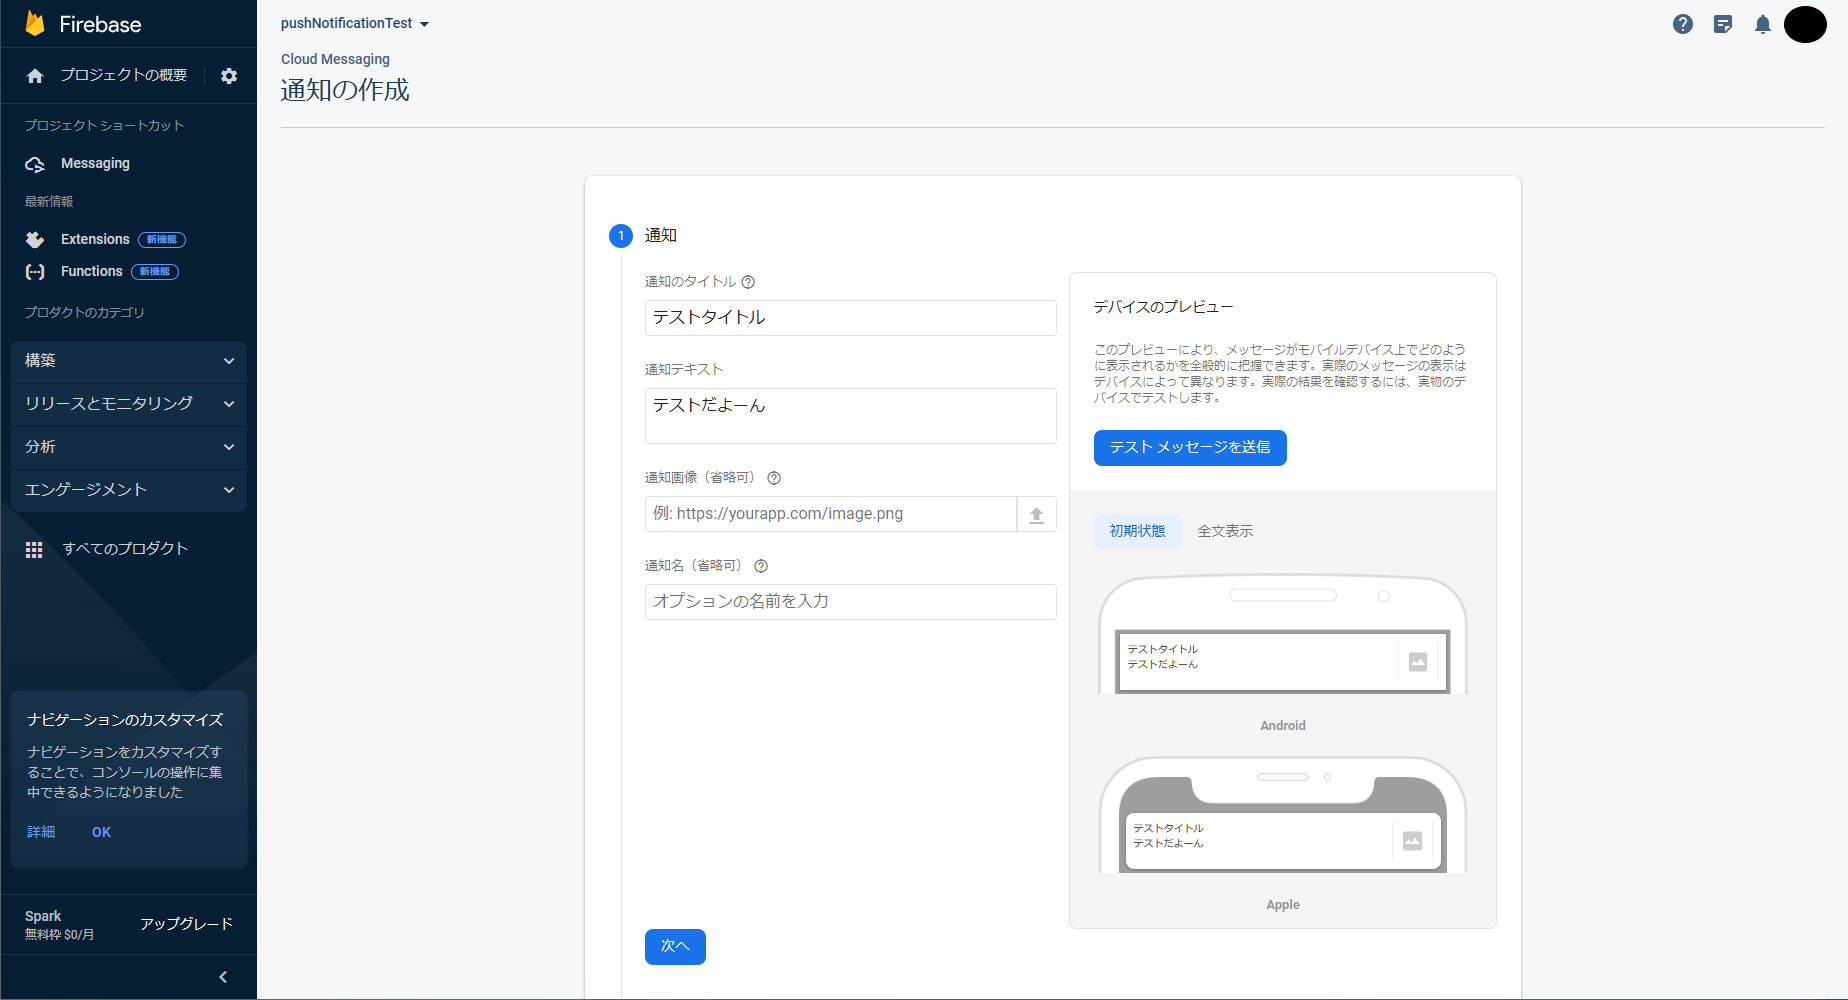
ここでは通知のプレビューが確認できる。
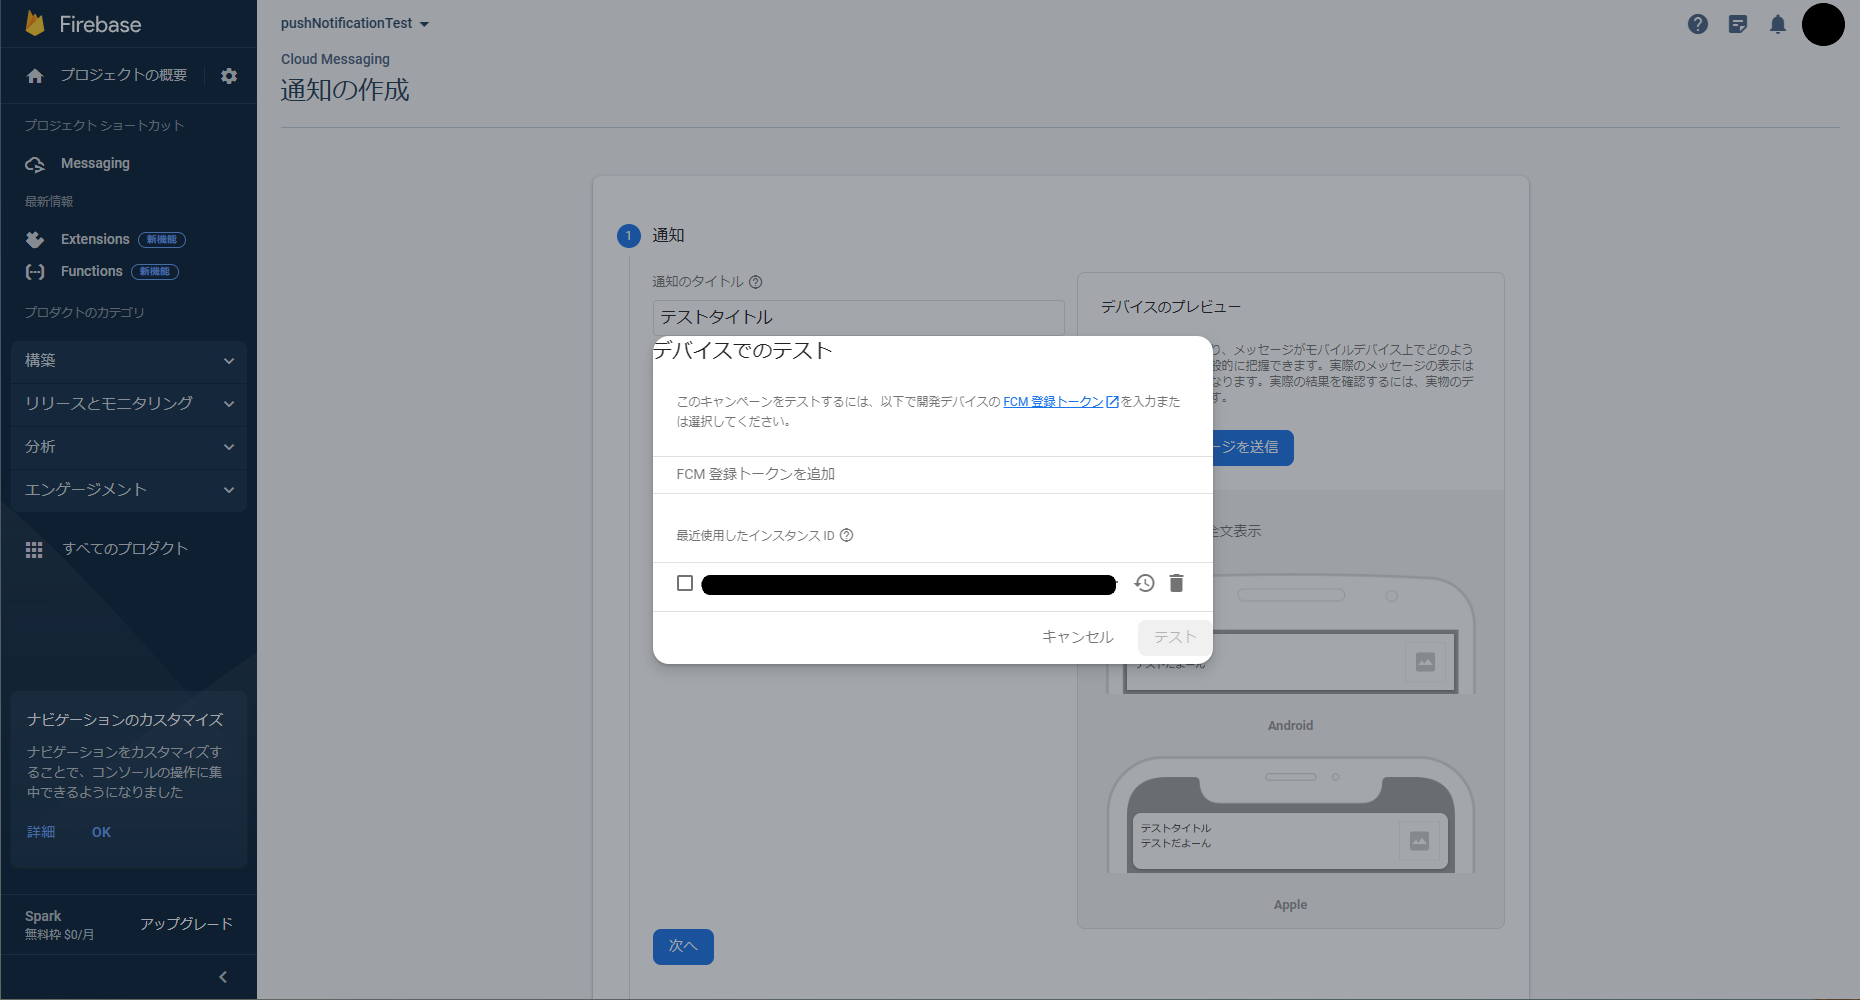
「テストメッセージを送信」をクリックすると以下のようになり、通知を送信するデバイスを指定してテストメッセージの送信ができる。FCM登録トークンを追加という部分に本記事内「現在のトークンの確認」のやり方で確認できるトークンを入力することで、デバイスの指定ができる。
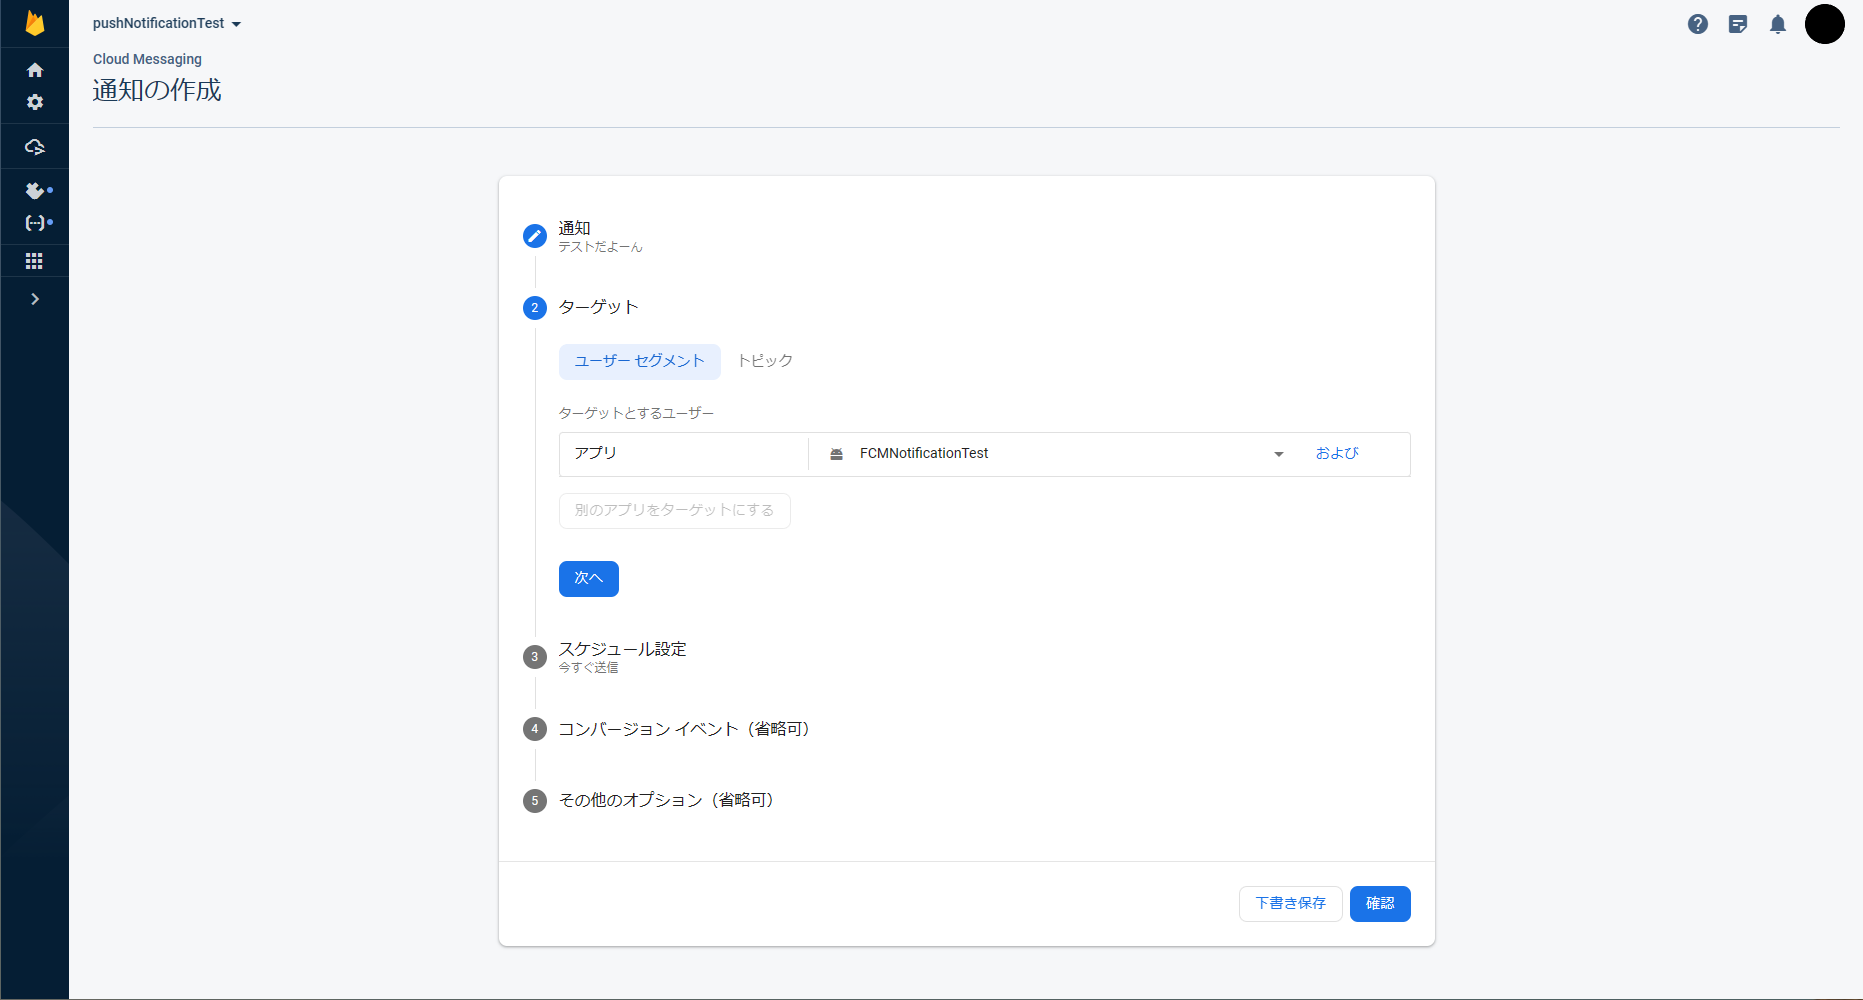
-
通知のターゲットの設定
テストメッセージを送信を使わなくても通知の送信ができる。
ここではアプリをインストールしている端末すべてに向けて通知の送信ができる。
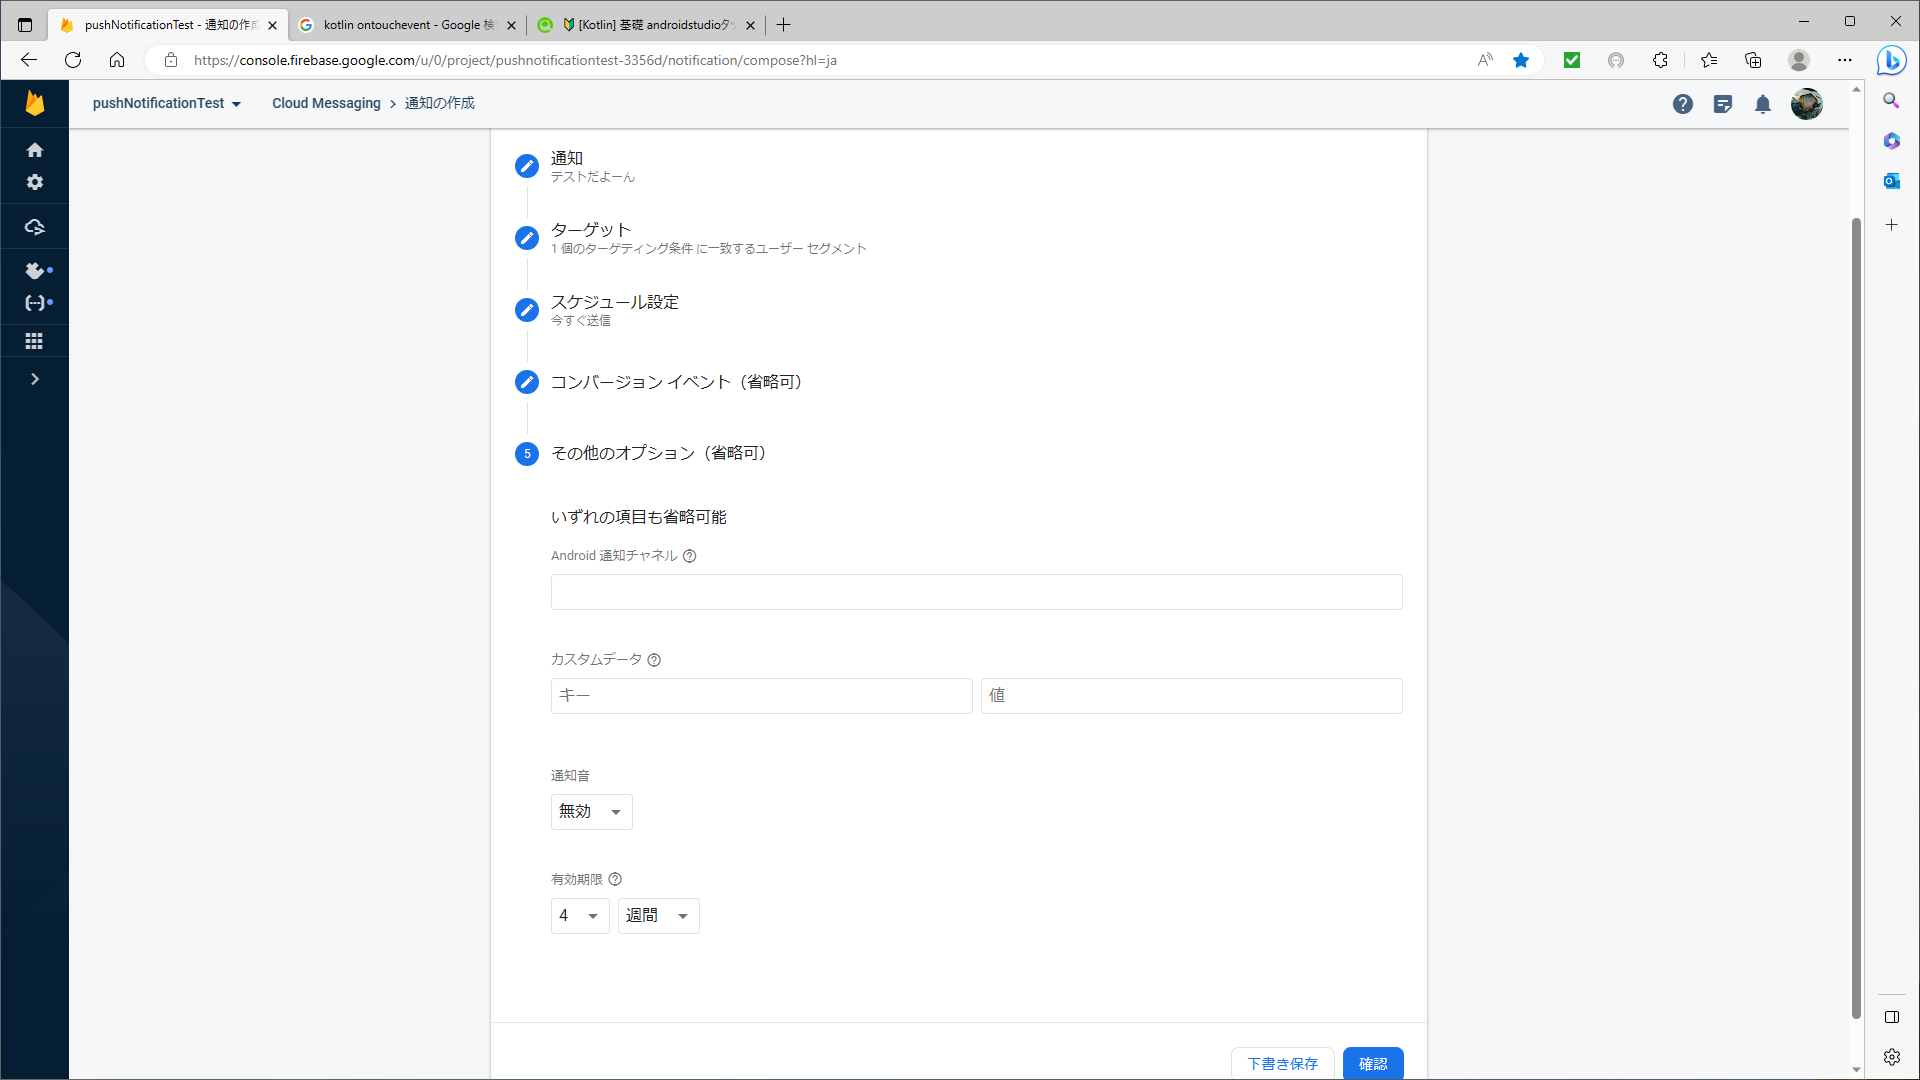
-
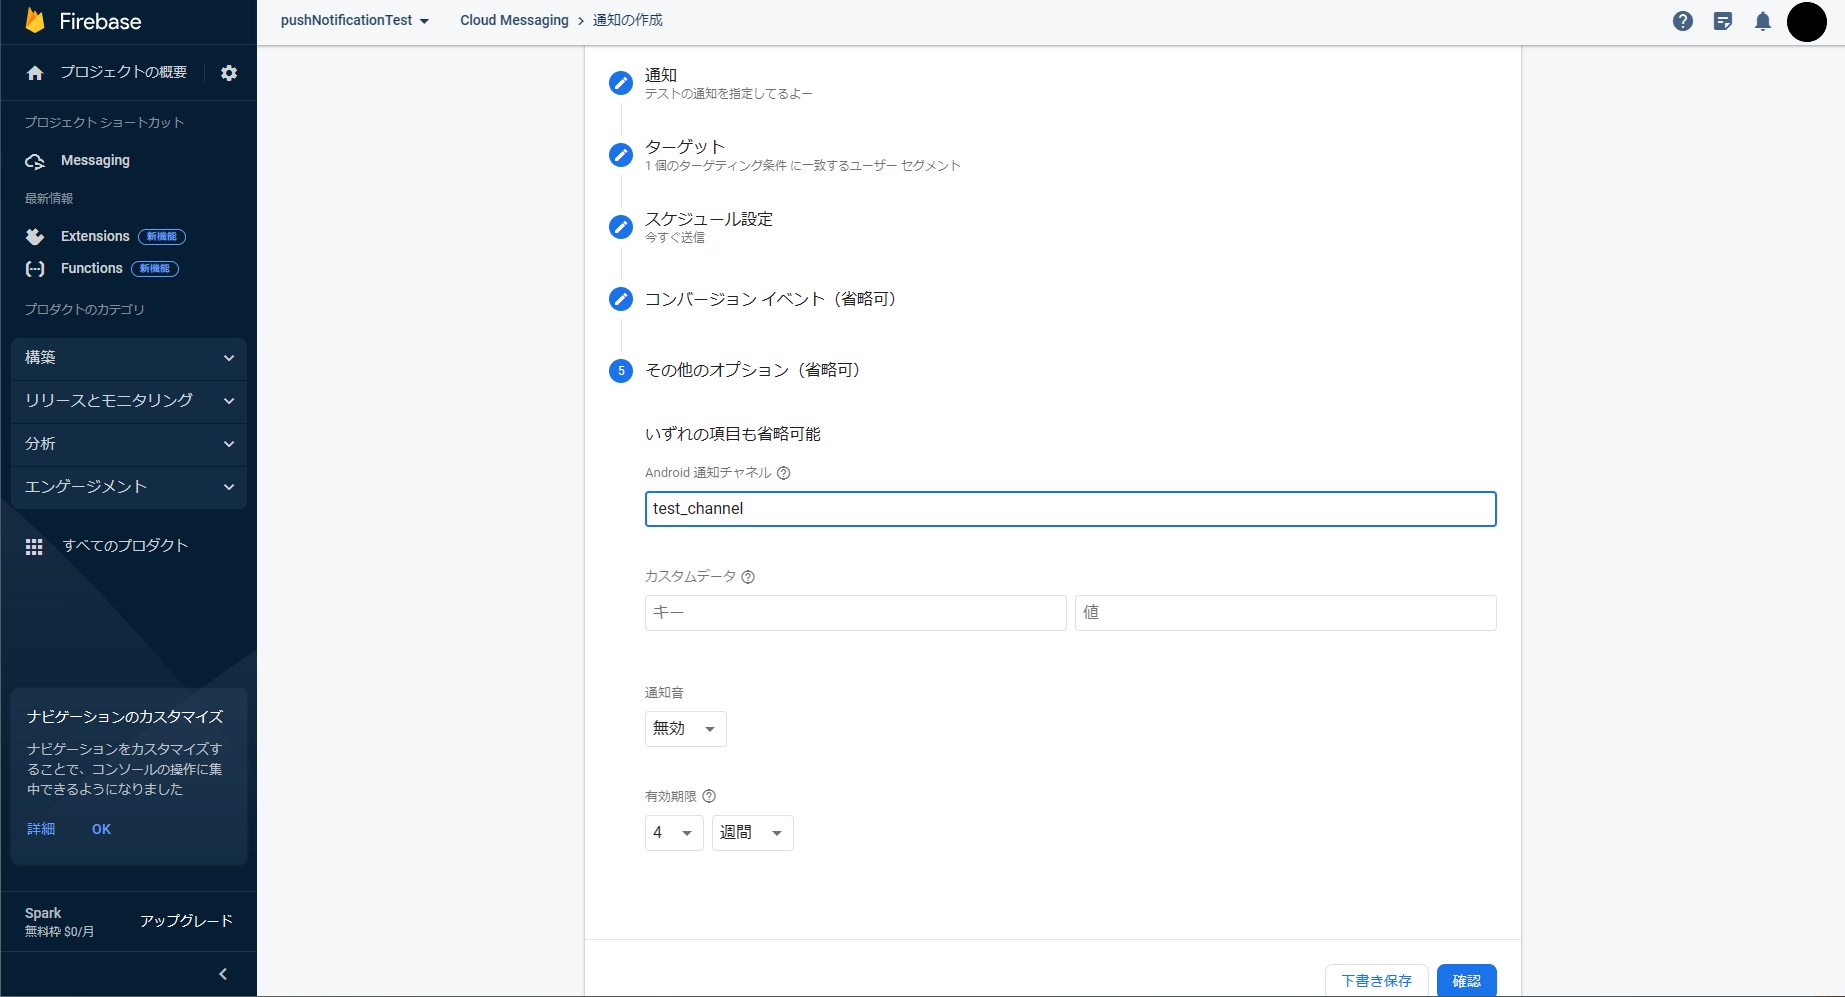
通知チャンネルの指定
「Android 通知チャネル」という欄に「通知チャンネルの追加」で追加した通知チャンネルIDを入力することで、指定した通知チャンネルに振り分けられる。何も入力しなかった場合、AndroidManifestでしていたデフォルトの通知チャンネルに割り振られる。
通知の送信、受信例
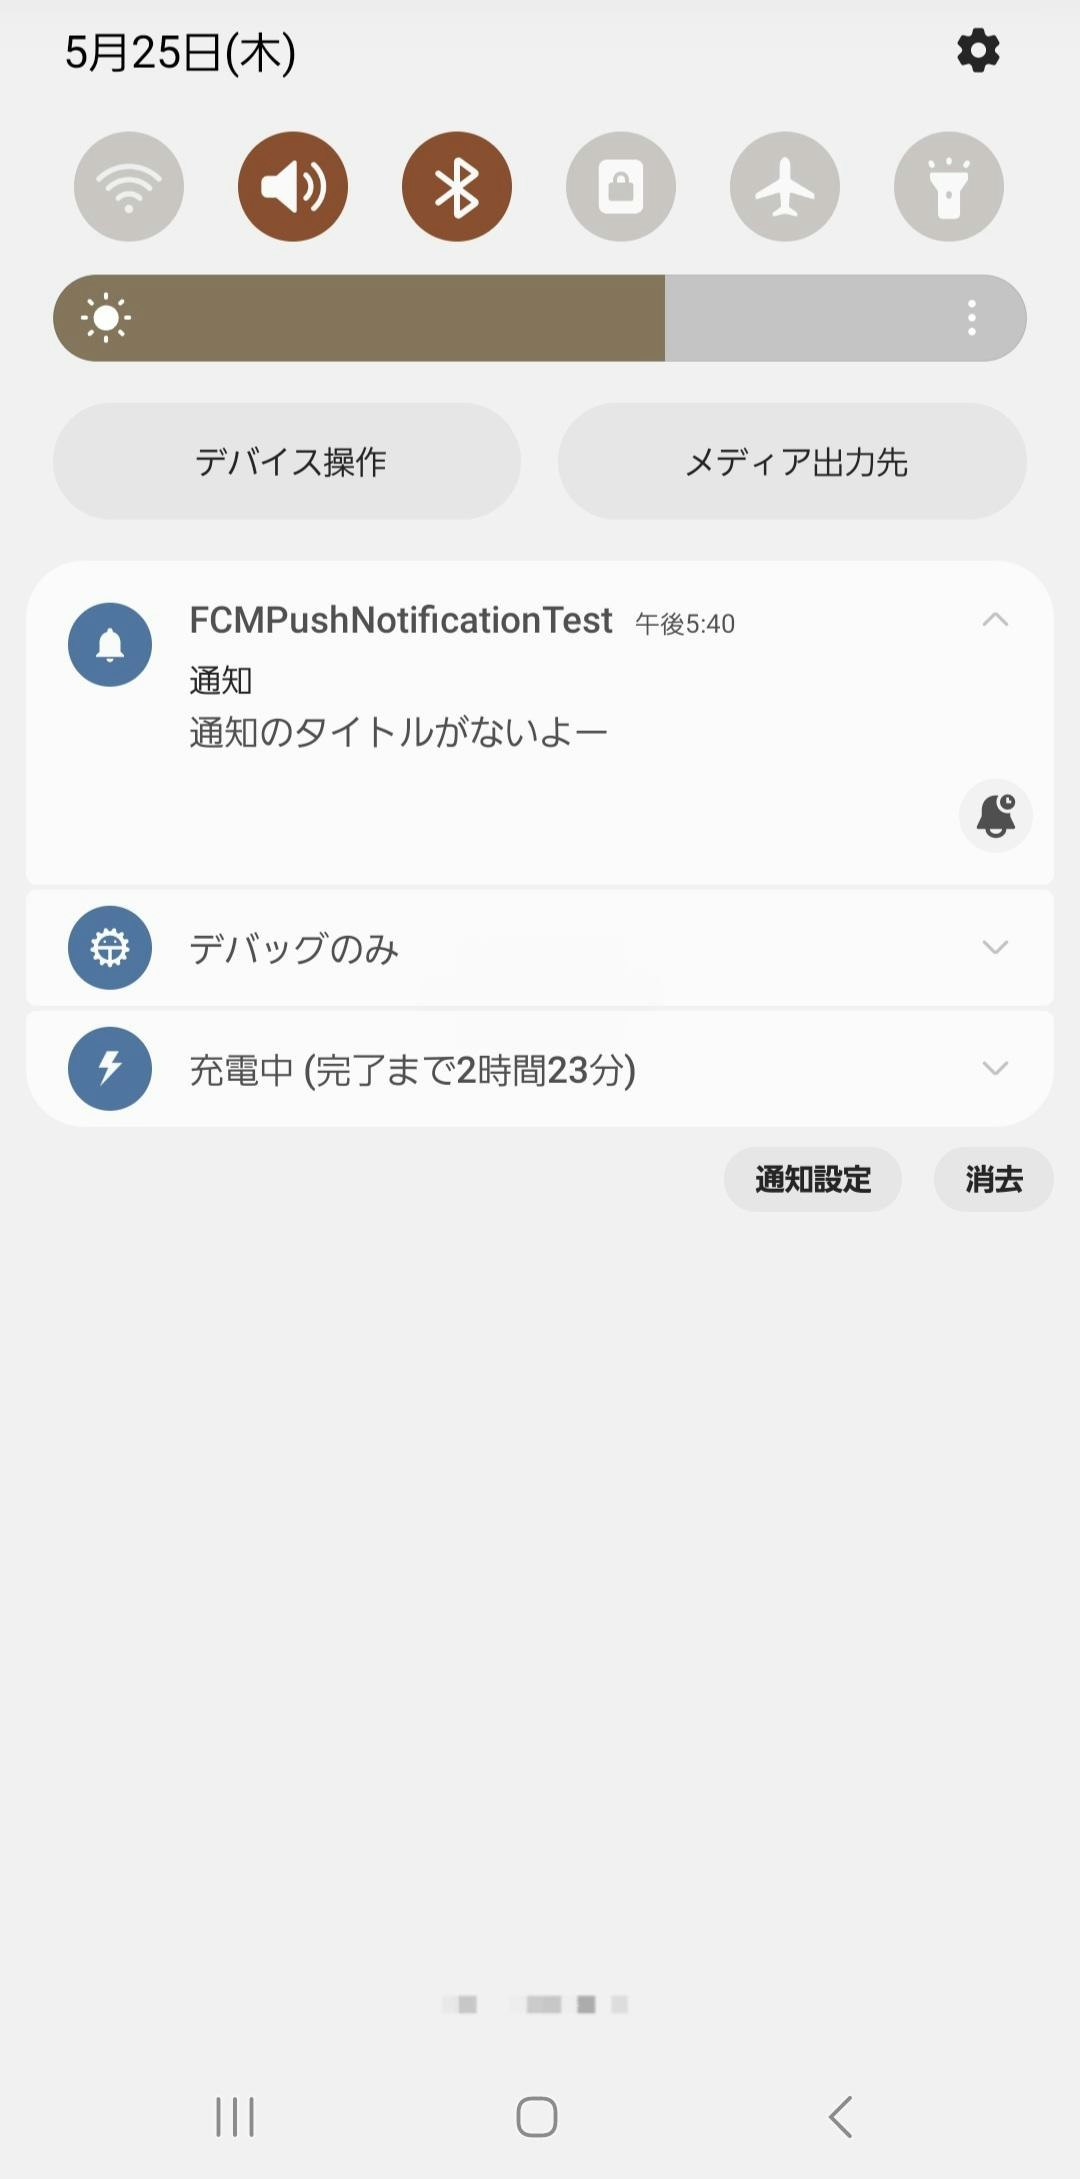
通知のタイトルがない場合
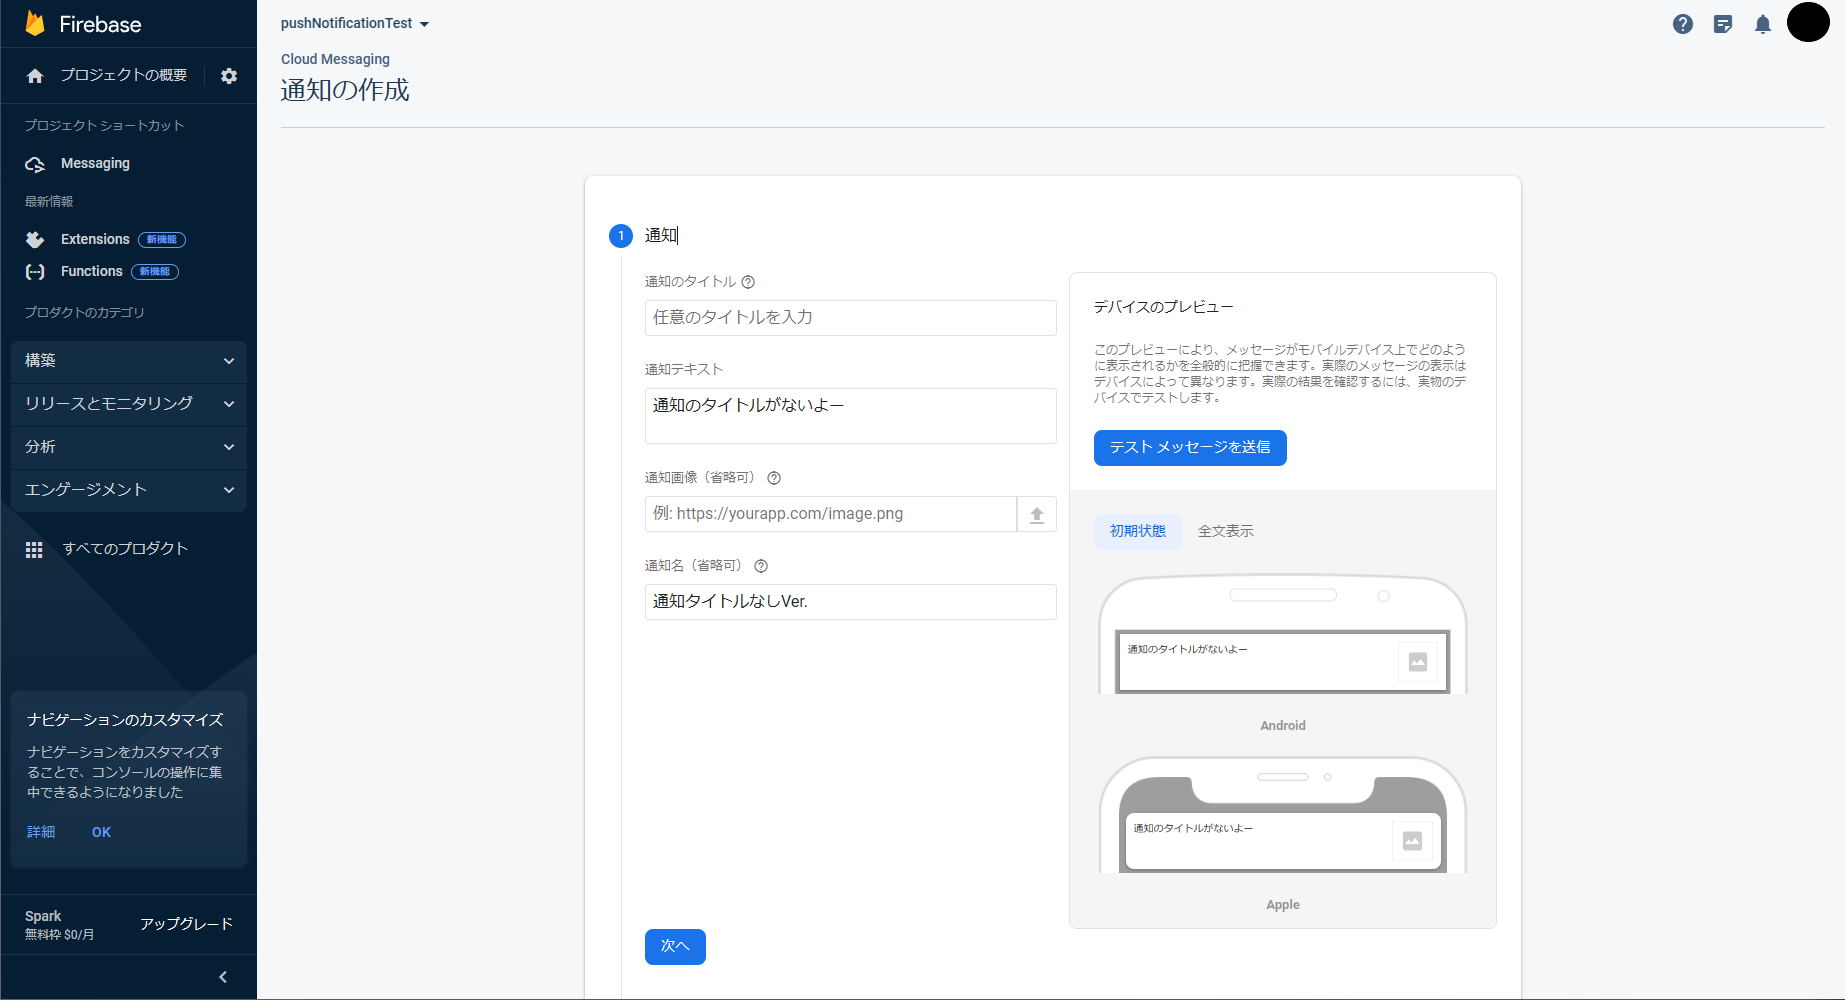
このように通知を設定すると以下の画像のように届く。通知のタイトルを設定していないため、デフォルトのタイトル「通知」と表示されている。
通知チャンネルを指定した場合
通知チャンネルについて別で書いた記事「[AndroidStudio]Kotlinでの通知チャンネルの追加方法」で記述した通りにした状態で、test_channelというチャンネルを指定している。
アプリの通知設定からチャンネルごとに通知音を変えてみると指定したチャンネルによって通知音が変わり、割り振れていることが確認できる。画像ではわからないので、ぜひ自分の手で試してみてほしい。

まとめ
今回はFCMとKotlinを使用したプッシュ通知の実装方法について説明した。
個人的には通知の受信部分でlet文が複数重なっていて読みにくいので、何かもうちょっとすっきりと読みやすい書き方はないのかなぁと思っている。
通知チャネルと通知チャンネルってどちらが正しいとかあるのかしらと思ったり。英語はchannelでどちらでも読めるからどっちでもいいのかなって。