Androidアプリを開発していくなかで通知機能を作るとき、Android8以降では通知チャンネルというものを作る必要がある。
今回は通知チャンネルとは何か、Kotlinでの追加方法を説明する。
通知チャンネルとは
Android8以降ではすべての通知を通知チャンネルに割り当てる必要があり、もし割り当てずに通知を行った場合、通知が表示されないという事態になる。
通知をチャンネルに割り当てることで、アプリを使うユーザーが通知を表示するか否かを種類ごとに設定できるようになる。また、表示する通知の詳細な設定ができる。
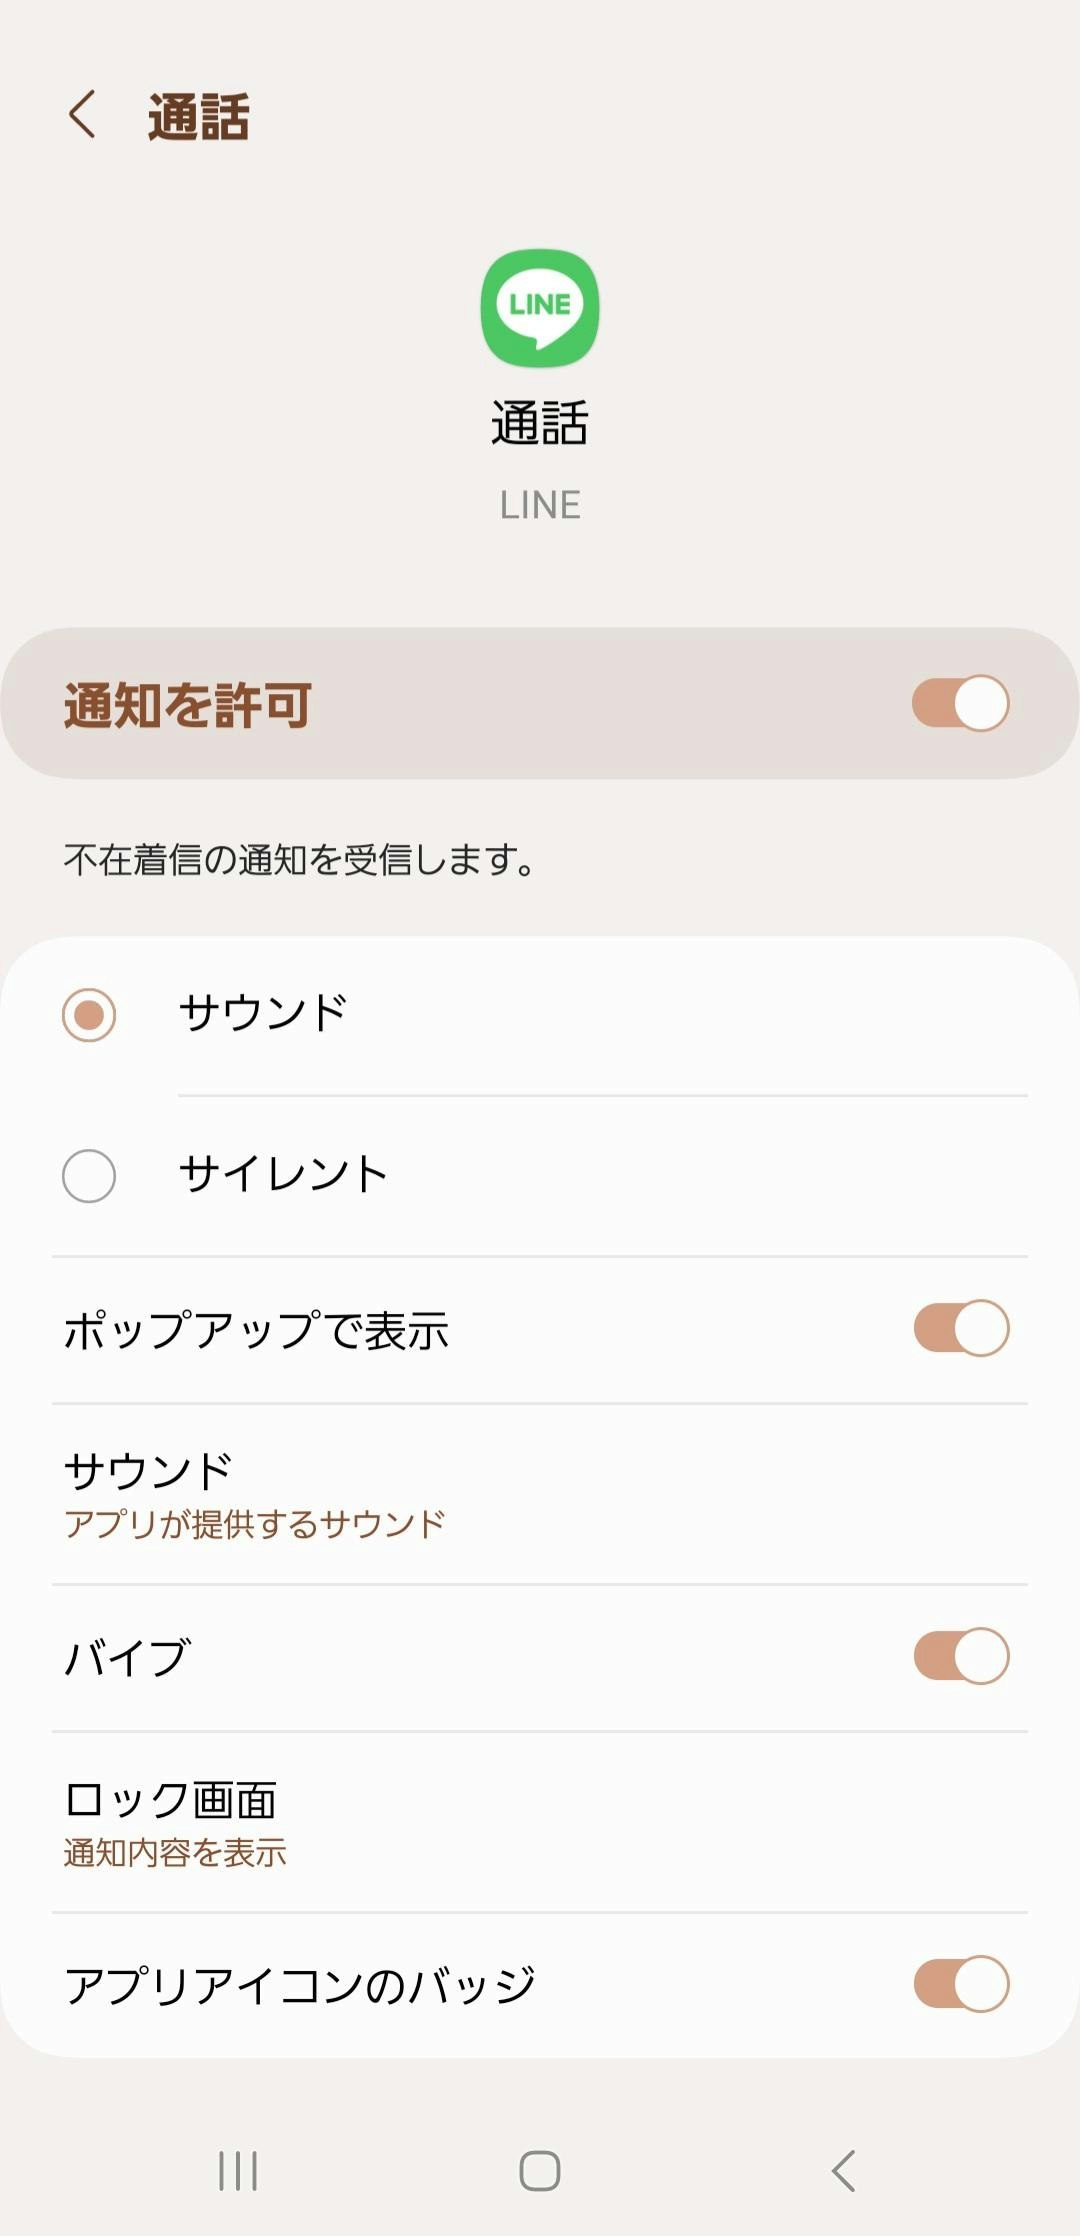
例えばLINEの場合、以下の画像のように通知チャンネルがある(通知チャンネルはUIでは通知カテゴリと表示される)。「通話」の通知は表示したいけど「友達リクエスト」は表示したくない場合、友達リクエストの通知を無効にすることで表示する通知の種類を設定できる。

また、「通話」のところをタップすると以下の画像のようになり、サウンドの設定といった詳細な設定ができる。
通知チャンネルの追加方法
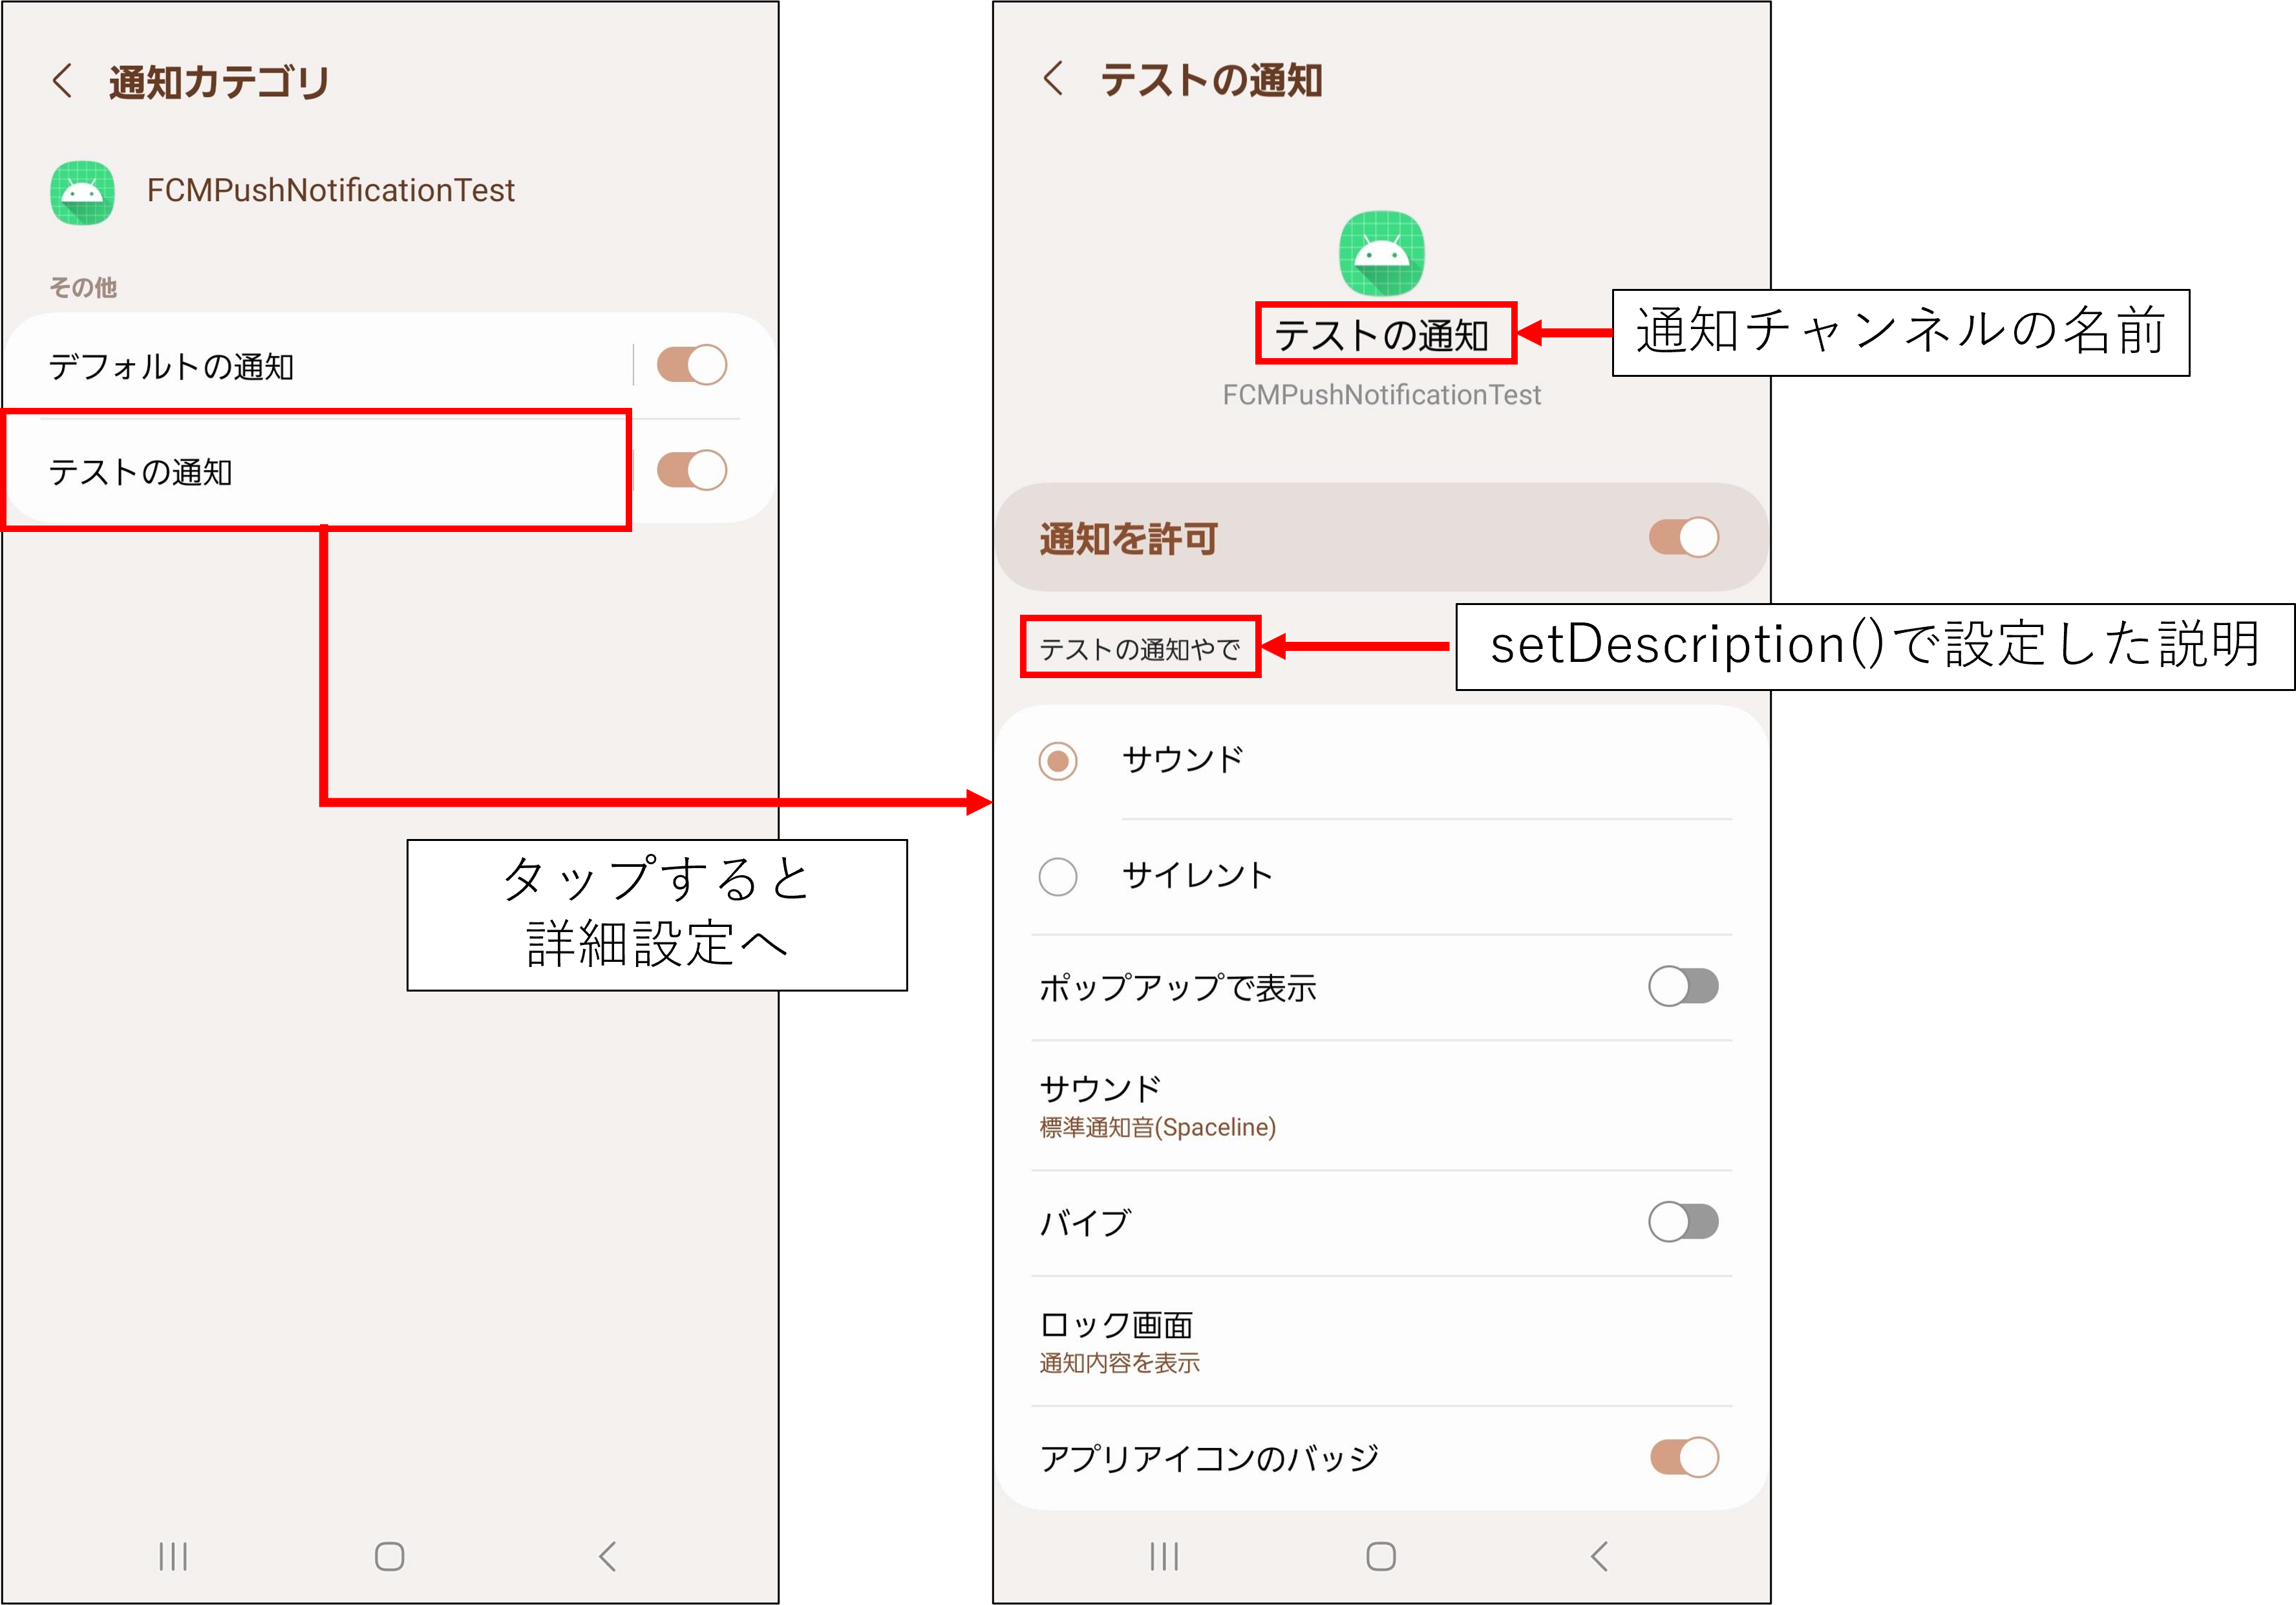
まずはstrings.xmlに通知チャンネルのIDと名前を追加する。必要に応じてそのチャンネルの説明も追加する。
名前に設定したものがユーザーに表示される。
<resources>
    <string name="default_notification_channel_id">fcm_default_channel</string>
    <string name="default_notification_channel_name">デフォルトの通知</string>
    <string name="test_notification_channel_id">test_channel</string>
    <string name="test_notification_channel_name">テストの通知</string>
    <string name="test_notification_channel_description">テストの通知やで</string>
</resources>
各種追加したらLANCHERに設定しているActivityのonCreate内で通知チャンネルの追加を行う。
追加する手順としては
-
NotificationChannelにチャンネルID、ユーザーに表示する名前、重要度を設定。 - 必要であれば
setDescription()でユーザーに表示するチャンネルの説明を設定(Kotlinの場合はチャンネルの変数.description)。 -
createNotificationChannel()に通知チャンネルを渡して登録。
となる。実際にコードにすると以下のようになる。
class MainActivity : AppCompatActivity() {

    override fun onCreate(savedInstanceState: Bundle?) {
        super.onCreate(savedInstanceState)
        setContentView(R.layout.activity_main)

        if (Build.VERSION.SDK_INT >= Build.VERSION_CODES.O) {
            // Create channel to show notifications.
            val notificationManager = getSystemService(NotificationManager::class.java)

            val defaultChannelId = getString(R.string.default_notification_channel_id)
            val defaultChannelName = getString(R.string.default_notification_channel_name)
            // 通知チャンネルのID、名前、重要度を設定
            val defaultChannel = NotificationChannel(
                defaultChannelId,
                defaultChannelName,
                NotificationManager.IMPORTANCE_DEFAULT
            )
            // 通知チャンネルの登録
            notificationManager?.createNotificationChannel(defaultChannel)

            val testChannelId = getString(R.string.test_notification_channel_id)
            val testChannelName = getString(R.string.test_notification_channel_name)
            // 通知チャンネルのID、名前、重要度を設定
            val testChannel = NotificationChannel(
                testChannelId,
                testChannelName,
                NotificationManager.IMPORTANCE_DEFAULT
            )
            // 通知チャンネルの説明を設定
            testChannel.description = getString(R.string.test_notification_channel_description)
            // 通知チャンネルの登録
            notificationManager?.createNotificationChannel(testChannel)
        }
    }

}
このような記述をするとユーザには以下のように見える。
通知チャンネルの重要度
チャンネルの重要度を設定することで音が鳴るか鳴らないかなどが変わる。
以下がユーザーへの表示のされ方と重要度の種類の一覧である。
| ユーザーへの表示 | 重要度 |
|---|---|
|
緊急 音が鳴り、ヘッドアップ通知として表示 |
IMPORTANCE_HIGH |
|
高 音が鳴る |
IMPORTANCE_DEFAULT |
|
中 音が鳴らない |
IMPORTANCE_LOW |
|
低 音が鳴らず、ステータスバーにも表示されない |
IMPORTANCE_MIN |
まとめ
今回は通知チャンネルとは何か、Kotlinでどうやって追加するかについて説明した。
いろんな人が解説していたり、Android Develoersでも説明されているが、詳細な例や説明が欲しかったので自分流にまとめた。