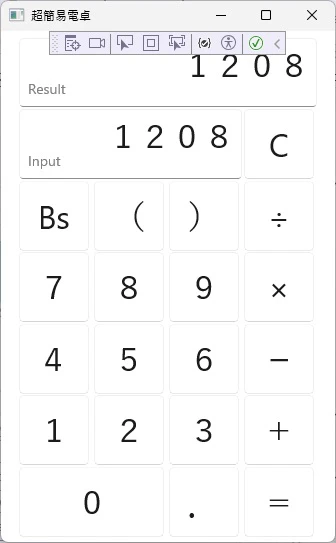
WinUI3を学びたく、練習として簡単な電卓を作ってみることにしました。
今回はクリア・計算ボタンの処理の実装を行います。
C#とxamlに関しても初心者ですのでお手柔らかにお願いします。
前回の記録
一文字分消去するボタン(Bsボタン)の実装
まず最初は一文字消去のボタンを実装しようと思います。
最初に一文字消去用のボタンイベントをMainWindow.xaml.csに追加します。
MainWindow.xaml.cs
namespace Calculator;

public sealed partial class MainWindow : Window
{
       // 省略

+   /// <summary>
+   /// BSキー押下時の処理です。
+   /// 入力領域にデータが存在する場合、末尾の一文字を除去します。
+   /// </summary>
+   /// <param name="sender"></param>
+   /// <param name="e"></param>
+   private void Bs_Button_Click(object sender, RoutedEventArgs e)
+   {
+       // 現在の入力データを取得します。
+       string formula = InputViewModel.Formula;
+
+       // 末尾の一文字を除去したデータを設定します。
+       // ただし、入力データが空の場合は処理しません。
+       InputViewModel.Formula =
+           formula != string.Empty ? formula[0..(formula.Length - 1)] : string.Empty;
+   }
}
作成したイベントをMainWindow.xamlに適用します。
MainWindow.xaml
 <Button Content="Bs" FontSize="32"
+        Click="Bs_Button_Click"
         Width="70" Height="70"
         Grid.Row="2" Grid.Column="0" Margin="1" />
 <Button Content="(" FontSize="32"
イコールボタンの実装
次にイコールボタンを実装します。
本来はイコールボタン押下で計算処理を行い、その結果を結果領域に出力するのですが、そこまでするのは現段階では工数が多くなってしまいますので、まずは入力領域のデータを転写するだけに留めます。
結果領域のバインド設定
まずはViewModelフォルダにResultViewModelを作成します。
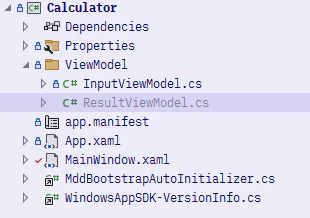
InputViewModel.csを参考に、結果を保持するプロパティを作成します。
ResultViewModel.cs
using System.ComponentModel;
using System.Runtime.CompilerServices;

namespace Calculator.ViewModel;

public partial class ResultViewModel : INotifyPropertyChanged
{
    public event PropertyChangedEventHandler? PropertyChanged = delegate { };

    private string _result = string.Empty;
    public string Result
    {
        get { return _result; }
        set
        {
            _result = value;
            OnPropertyChanged();
        }
    }

    public void OnPropertyChanged([CallerMemberName] string? propertyName = null)
    {
        PropertyChanged?.Invoke(this, new PropertyChangedEventArgs(propertyName));
    }
}
このソースに更に計算用のメソッドを追加しておきます。
(内部の実装自体は今後行います。今は結果をそのまま返すこととします。)
ResultViewModel.cs
namespace Calculator.ViewModel;

public partial class ResultViewModel : INotifyPropertyChanged
{
      // 省略

+   /// <summary>
+   /// 入力されたデータを元に計算処理を行います。
+   /// その結果をReulstに設定します。
+   /// </summary>
+   public void Calculation(string formula)
+   {
+       Result = formula;
+   }
}
MainWindow.xaml.csに作成したビューモデルを登録します。
MainWindow.xaml.cs
namespace Calculator;

public sealed partial class MainWindow : Window
{
    public InputViewModel InputViewModel { get; set; }
+   public ResultViewModel ResultViewModel { get; set; }

    public MainWindow()
    {
        // 省略

        // ViewModelを初期化します。
        InputViewModel = new InputViewModel();
+       ResultViewModel = new ResultViewModel();
    }
        // 省略
}
MainWindow.xamlにモデルをバインドします。
MainWindow.xaml
        <!-- 結果表示領域 -->
-       <TextBox Text="" FontSize="32"
+       <TextBox Text="{x:Bind ResultViewModel.Result, Mode=OneWay}" FontSize="32"
                 TextAlignment="End" IsReadOnly="True"
                 Grid.ColumnSpan="4" Margin="1" />
        <TextBlock Text="Result" Foreground="Gray"
                   VerticalAlignment="Bottom"
                   Grid.Row="0" Margin="10" />
イベントの実装
次にボタンを押下した際のイベントをMainWindow.xaml.csに実装します。
MainWindow.xaml.cs
namespace Calculator;

public sealed partial class MainWindow : Window
{
         // 省略

+   /// <summary>
+   /// =ボタン押下時の処理です。
+   /// 入力領域にデータが存在する場合、データを元に計算処理をし、
+   /// その結果を結果領域に出力します。
+   /// </summary>
+   /// <param name="sender"></param>
+   /// <param name="e"></param>
+   private void Equal_Button_Click(object sender, RoutedEventArgs e)
+   {
+       // 現在の入力データを取得します。
+       string formula = InputViewModel.Formula;
+
+       // 入力データが空の場合は処理をしません。
+       if (formula == string.Empty)
+       {
+           return;
+       }
+       // 入力データを元に計算処理を行います。
+       ResultViewModel.Calculation(formula);
+   }
}
最後にMainWIndow.xamlにイベント追加します。
MainWindow.xaml
        <Button Content="." FontSize="32"
                Click="Button_Click"
                Width="70" Height="70"
                Grid.Row="6" Grid.Column="2" Margin="1" />
        <Button Content="=" FontSize="32"
+               Click="Equal_Button_Click"
                Width="70" Height="70"
                Grid.Row="6" Grid.Column="3" Margin="1" />
    </Grid>
クリアボタンの実装
クリアボタンはボタン側の実装だけで済みそうです。
最初にイベント処理をMainWindow.xaml.csに追加します。
MainWindow.xaml.cs
namespace Calculator;

public sealed partial class MainWindow : Window
{
          //省略

+   /// <summary>
+   /// Cボタン押下時の処理です。
+   /// 入力領域と結果領域のデータを空にします。
+   /// </summary>
+   /// <param name="sender"></param>
+   /// <param name="e"></param>
+   private void Clear_Button_Click(object sender, RoutedEventArgs e)
+   {
+       InputViewModel.Formula = string.Empty;
+       ResultViewModel.Result = string.Empty;
+   }
}
次に追加したイベントをMainWindow.xamlに登録します。
MainWindow.xaml
        <Button Content="C" FontSize="32"
+               Click="Clear_Button_Click"
                Width="70" Height="70"
                Grid.Row="1" Grid.Column="3" Margin="1" />

        <!-- 一段目 -->
        <Button Content="Bs" FontSize="32"
                Click="Bs_Button_Click"
                Width="70" Height="70"
                Grid.Row="2" Grid.Column="0" Margin="1" />
おわりに
今回は機能自体が簡単な機能でしたので、実装も容易にできました。
これから解析処理などを行うので、じわじわというか一気に難しくなっていきそうです。
次の記事