はじめに
sasazame/ccresumeは、Claude CodeのセッションをターミナルUIで管理できる便利なツールです。今回、このツールをOpenAI Codex CLI向けに移植したccresume-codexを開発しました。
本記事では、ccresume-codexがどのようなアプリなのか、実装の主要部分、そして実際の使い方を詳しく解説します。
リポジトリ: https://github.com/nogataka/ccresume-codex
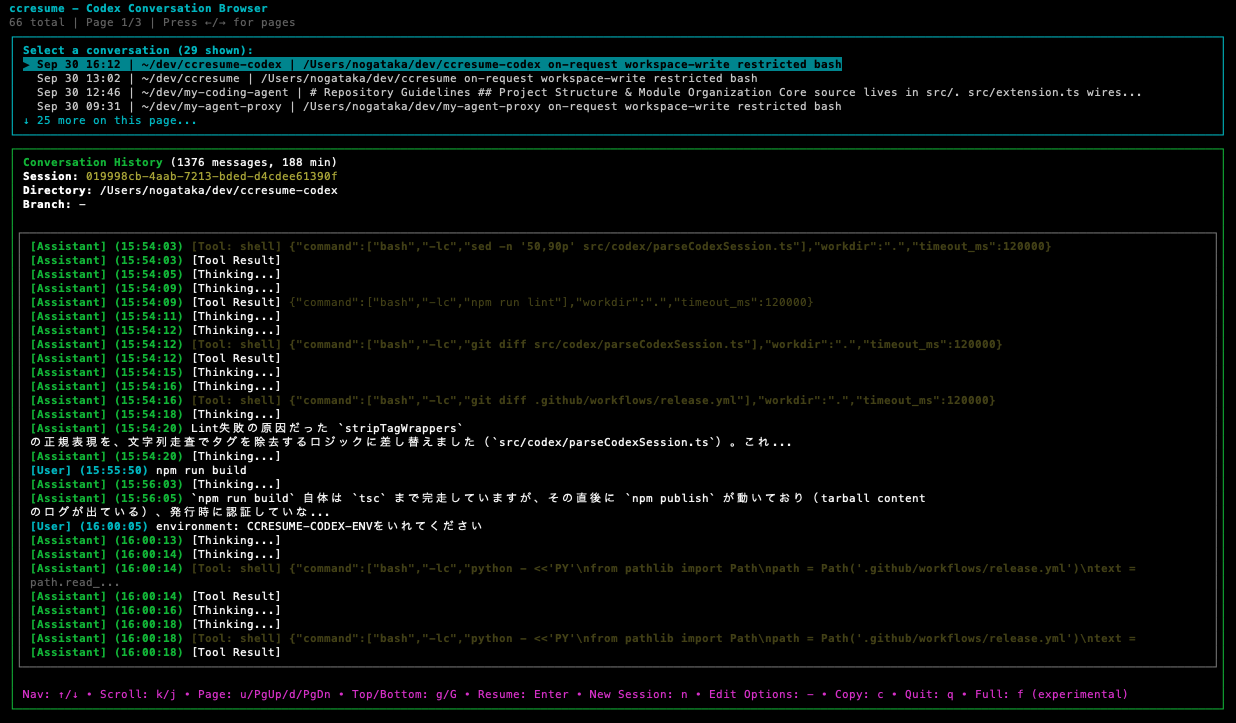
画面サンプル
ccresume-codexとは
ccresume-codexは、OpenAI Codex CLIの会話履歴を閲覧し、過去のセッションを再開したり、新しいセッションを開始したりできるターミナルユーザーインターフェース(TUI)ツールです。
主な特徴
-
プロジェクト横断のセッション一覧:
~/.codex/sessions/配下のすべてのセッションを最終更新順に表示 - メッセージプレビュー: ユーザー、アシスタント、ツール出力、reasoning を含む会話内容をプレビュー
- セッション管理: 選択したセッションの再開や、特定ディレクトリでの新規セッション開始が可能
- 高度なフィルタリング: カレントディレクトリのみに絞り込んだり、特定のメッセージタイプを非表示にしたりできる
- コマンドエディタ: Codex CLIに渡すオプションをインタラクティブに編集可能
- クリップボード連携: セッションUUIDをワンキーでコピー
技術スタック
- UI Framework: Ink (React for CLIs)
- Language: TypeScript
- Testing: Jest + ink-testing-library
- Build: tsc (TypeScript Compiler)
Web版 codex-viewer
- Qiita: https://qiita.com/nogataka/items/28d04db421663a4a46fd
- Zenn: https://zenn.dev/taka000/articles/74a60c37fae5bb
実装の解説
1. エントリーポイント: cli.tsx
src/cli.tsxは、アプリケーションのエントリーポイントです。ここでコマンドライン引数の解析とInkアプリのレンダリングを行います。
主要な処理:
const args = process.argv.slice(2);
const currentDirOnly = args.includes('.');
let filteredArgs = args.filter(arg => arg !== '.');

// --hide オプションの解析
let hideOptions: string[] = [];
const hideIndex = filteredArgs.findIndex(arg => arg === '--hide');
if (hideIndex !== -1) {
  const validHideOptions = ['tool', 'thinking', 'user', 'assistant'];
  // --hide の後の引数を収集
  // ...
}
ポイント:
-
.オプションでカレントディレクトリのみにフィルタリング -
--hideオプションで特定のメッセージタイプ(tool、thinking、user、assistant)を非表示にできる - Windows環境では入力が効かない問題への対処として、起動時に一時停止メッセージを表示
2. メインアプリケーション: App.tsx
src/App.tsxは、アプリケーションのコアロジックを担当します。
主要な状態管理:
const [conversations, setConversations] = useState<Conversation[]>([]);
const [selectedIndex, setSelectedIndex] = useState(0);
const [currentPage, setCurrentPage] = useState(0);
const [showCommandEditor, setShowCommandEditor] = useState(false);
const [showFullView, setShowFullView] = useState(false);
レイアウト設計:
固定レイアウトで画面を構成しています:
const ITEMS_PER_PAGE = 30;
const HEADER_HEIGHT = 2;
const LIST_MAX_HEIGHT = 9;
const MAX_VISIBLE_CONVERSATIONS = 4;

// ヘッダー + リスト + プレビューで画面を分割
const headerHeight = HEADER_HEIGHT;
const listHeight = Math.min(listMaxHeight, LIST_BASE_HEIGHT + visibleConversations);
const previewHeight = Math.max(MIN_PREVIEW_HEIGHT, dimensions.height - totalUsedHeight);
Codexコマンドの実行:
セッション再開時と新規開始時で異なるコマンドを構築します:
const buildCommandArgs = (
  conversation: Conversation,
  args: string[],
  actionType: 'resume' | 'start'
) => {
  if (actionType === 'resume') {
    const sessionIdentifier = conversation.sessionUuid ?? conversation.sessionId;
    return [...args, 'resume', sessionIdentifier];
  }
  if (args.length === 0) {
    return ['chat'];
  }
  return [...args];
};
3. セッション読み込み: conversationReader.ts
src/utils/conversationReader.tsは、Codexのログファイルを読み込み、会話データに変換します。
主要な処理フロー:
-
listCodexSessionRecords():~/.codex/sessions/配下のすべてのJSONLファイルを探索 -
parseCodexSession(): JSONLファイルをパースしてエントリに変換 -
convertEntryToMessage(): Codexのエントリ形式を内部Message形式に変換 -
buildConversationFromFile(): メッセージから会話オブジェクトを構築
型変換の例:
const convertEntryToMessage = (
  entry: CodexConversationEntry,
  sessionId: string,
  workspacePath: string,
): Message | null => {
  switch (entry.type) {
    case 'user':
      return {
        sessionId,
        timestamp: entry.timestamp ?? new Date().toISOString(),
        type: 'user',
        message: {
          role: 'user',
          content: [{ type: 'text', text: entry.text }],
        },
        cwd: workspacePath,
      };
    case 'assistant':
      // ...
  }
};
4. Codexセッションのパース: parseCodexSession.ts
src/codex/parseCodexSession.tsは、Codex CLIのJSONL形式ログを解析します。
対応するログタイプ:
-
session_meta: セッションのメタデータ(UUID、作業ディレクトリ、開始時刻) -
response_item/response_message: ユーザーとアシスタントのメッセージ -
reasoning: アシスタントの思考過程 -
function_call: ツール呼び出し -
function_call_output: ツールの実行結果 -
event_msg: イベントメッセージ
パース処理の概要:
export const parseCodexSession = (content: string) => {
  const entries: CodexConversationEntry[] = [];
  const turns: CodexSessionTurn[] = [];

  const lines = content
    .split('\n')
    .map((line) => line.trim())
    .filter((line) => line.length > 0);

  for (const line of lines) {
    const parsed = JSON.parse(line);

    if (parsed.type === 'response_item') {
      // メッセージやreasoning、ツール呼び出しを処理
    }
    if (parsed.type === 'event_msg') {
      // イベントメッセージを処理
    }
    // ...
  }

  return { entries, turns, metaEvents, sessionMeta };
};
5. UIコンポーネント群
ConversationList.tsx
会話一覧を表示するコンポーネント。スクロール可能なリストを実装しています。
const visibleConversations = conversations.slice(startIndex, endIndex);
const hasMoreBelow = endIndex < conversations.length;

return (
  <Box flexDirection="column" borderStyle="single">
    {visibleConversations.map((conv, visibleIndex) => {
      const isSelected = actualIndex === safeSelectedIndex;
      const summary = generateConversationSummary(conv);
      // ...
    })}
    {hasMoreBelow && <Text>↓ {conversations.length - endIndex} more...</Text>}
  </Box>
);
ConversationPreview.tsx
選択された会話のプレビューを表示します。メッセージのスクロール、フィルタリングに対応。
const filteredMessages = conversation.messages.filter(msg => {
  if (hideOptions.includes('tool') && content.startsWith('[Tool:')) {
    return false;
  }
  if (hideOptions.includes('thinking') && content === '[Thinking...]') {
    return false;
  }
  // ...
});
CommandEditor.tsx
Codex CLIオプションをインタラクティブに編集できるエディタ。
const codexOptions: CodexOption[] = [
  { flags: ['chat'], description: 'Start an interactive Codex chat session', hasValue: false },
  { flags: ['--model'], description: 'Specify the Codex model', hasValue: true },
  { flags: ['--sandbox'], description: 'Select sandbox mode', hasValue: true },
  // ...
];
オートコンプリート機能を実装:
useEffect(() => {
  const currentWord = getCurrentWord();
  if (currentWord.startsWith('-') || currentWord.length === 0) {
    const matching = codexOptions.filter(opt =>
      opt.flags.some(flag => flag.toLowerCase().startsWith(currentWord.toLowerCase()))
    );
    setSuggestions(matching);
  }
}, [commandLine, cursorPosition]);
6. 設定ファイルの読み込み: configLoader.ts
~/.config/ccresume/config.tomlからキーバインド設定を読み込みます。
export const loadConfig = (): Config => {
  try {
    const configContent = fs.readFileSync(configPath, 'utf-8');
    const parsed = toml.parse(configContent);
    // TOMLから設定を読み込み、デフォルトとマージ
    return mergeConfig(defaultConfig, parsed);
  } catch {
    return defaultConfig;
  }
};
使い方
📦 インストール方法
ccresume-codexは、npmパッケージとして公開されているため、インストール不要で即座に利用できます!
✨ 推奨:npxで即座に実行(インストール不要)
npx @nogataka/ccresume-codex@latest
このコマンド一つで、最新版のccresume-codexをダウンロードして実行できます。インストールや設定は不要です。
🔧 グローバルインストールして使う
頻繁に使用する場合は、グローバルインストールがおすすめです:
# グローバルインストール
npm install -g @nogataka/ccresume-codex

# インストール後は短いコマンドで実行可能
ccresume-codex
ccresume-codex .
ccresume-codex --hide tool
🛠️ 開発者向け:ソースコードから実行
開発やカスタマイズをする場合は、リポジトリをクローンして実行できます:
# リポジトリをクローン
git clone https://github.com/nogataka/ccresume-codex.git
cd ccresume-codex

# 依存関係をインストール
npm install

# 開発モードで実行
npm run dev

# ビルドして実行
npm run build
node dist/cli.js
基本的な使い方
# 基本的な起動
npx @nogataka/ccresume-codex@latest
# または(グローバルインストール済みの場合)
ccresume-codex

# カレントディレクトリのセッションのみ表示
npx @nogataka/ccresume-codex@latest .

# toolとthinkingメッセージを非表示
npx @nogataka/ccresume-codex@latest --hide tool thinking

# Codex CLIにオプションを渡す
npx @nogataka/ccresume-codex@latest -- --model o1-mini --json

# 組み合わせ
npx @nogataka/ccresume-codex@latest . --hide tool -- --sandbox workspace-write
💡 Tip: グローバルインストールした場合は、npx @nogataka/ccresume-codex@latestをccresume-codexに置き換えて実行できます。
キーバインド
| キー | 機能 |
|---|---|
q |
終了 |
↑/↓ |
会話リストの上下移動 |
←/→ |
ページ移動 |
Enter |
選択したセッションを再開 |
n |
選択したディレクトリで新規セッション開始 |
- |
コマンドエディタを開く |
c |
セッションUUIDをクリップボードにコピー |
j/k |
メッセージ履歴のスクロール(1行) |
d/u |
メッセージ履歴のスクロール(ページ単位) |
g/G |
メッセージ履歴の先頭/末尾へ移動 |
f |
フルビュー表示の切り替え |
コマンドエディタの使い方
-キーを押すとコマンドエディタが開きます。
- テキストを入力すると、候補が表示される
-
↑/↓で候補を選択 -
TabまたはEnterで候補を挿入 - オプションの入力が完了したら
Enterで確定 -
Escでキャンセル
編集したオプションは、その後のEnter(セッション再開)やn(新規開始)で使用されます。
設定ファイルのカスタマイズ
~/.config/ccresume/config.tomlでキーバインドをカスタマイズできます:
[keybindings]
quit = ["q"]
selectPrevious = ["up"]
selectNext = ["down"]
pageNext = ["right", "pagedown"]
pagePrevious = ["left", "pageup"]
confirm = ["return"]
copySessionId = ["c"]
startNewSession = ["n"]
openCommandEditor = ["-"]
scrollUp = ["k"]
scrollDown = ["j"]
scrollPageUp = ["u"]
scrollPageDown = ["d"]
scrollTop = ["g"]
scrollBottom = ["G"]
toggleFullView = ["f"]
移植時の工夫と課題
Claude CodeからCodexへの主な変更点
-
ログファイルの場所
- Claude Code:
~/.claude/sessions/ - Codex:
~/.codex/sessions/
- Claude Code:
-
履歴ファイルの形式
- Claude Code:
history.jsonlに履歴情報 - Codex: セッションファイル自体にメタデータが含まれる
- Claude Code:
-
CLIコマンド
- Claude Code:
claudeコマンド - Codex:
codexコマンド
- Claude Code:
-
セッション識別子
- 両方ともUUIDを使用するが、フォールバックとしてファイルパスからエンコードしたIDも使用
Windows環境への対応
Windows環境では、Codex CLI起動直後に入力が効かなくなる問題があります。これに対して、起動時に一時停止メッセージを表示し、ユーザーにEnterを押すよう促す対策を実装しました。
if (process.platform === 'win32') {
  console.log('📝 Windows ユーザー向けの注意: Codex CLI 起動後に入力できない場合は ENTER を押してください。');
  const pause = spawn('cmd.exe', ['/c', 'pause'], { stdio: 'inherit' });
  await new Promise((resolve) => {
    pause.on('close', resolve);
  });
}
型安全性の確保
TypeScriptの型システムを活用し、Codexのログ形式を厳密に型定義しました。これにより、ログ形式の変更に早期に気づくことができます。
export type CodexConversationEntry =
  | { type: 'user'; id: string; timestamp: string | null; text: string; source: string }
  | { type: 'assistant'; id: string; timestamp: string | null; text: string; source: string }
  | { type: 'assistant-reasoning'; id: string; timestamp: string | null; summary: string | null; text: string; encrypted: boolean }
  | { type: 'tool-call'; id: string; timestamp: string | null; name: string; arguments: string | null; callId: string | null }
  | { type: 'tool-result'; id: string; timestamp: string | null; callId: string | null; output: string | null }
  | { type: 'system'; id: string; timestamp: string | null; subtype: string; text: string | null };
まとめ
ccresume-codexは、Claude Code向けのccresumeをOpenAI Codex向けに移植したTUIツールです。InkとReactを使用した豊富なインタラクティブ機能、TypeScriptによる型安全性、柔軟なカスタマイズ性が特徴です。
Codex CLIを日常的に使用している方にとって、過去のセッションを素早く確認・再開できるこのツールは作業効率の向上に貢献するはずです。
ぜひお試しいただき、フィードバックやコントリビューションをお待ちしております!
リポジトリ: https://github.com/nogataka/ccresume-codex