はじめまして! 記事をご覧くださりありがとうございます。
半分NEETのようなフリーランスエンジニアのたつのぶと申します。
今回は、M5stickCで始める細マッチョ計画💪と題してM5StickCを用いて
レッグマシンとエアロバイクの回数を可視化する記事です。ぜひ最後まで読んでくださると幸いです!!
はじめに
前回の記事(M5stickCで始める筋肉ムキムキ計画💪)では、腹筋ワンダーコアという腹筋マシンのトレーニング回数を可視化させました。
今回はついでに、家にあるレッグマシンとエアロバイクも回数を可視化させたいと思い記事を書くに至りました。
準備するもの
- レンタルサーバー
- PC: WindowsPC
- M5StickC本体/付属USBType-Cケーブル/付属リストバンド×2
- 100均(セリア)で購入したLED自動点灯ライト×2⇒これに入っているマグネットスイッチを利用
 - 抵抗10kΩ
- レッグマシン
- 抵抗10kΩ
- レッグマシン

- エアロバイク

システム構成図/M5stickCに書き込む準備
前回の記事(M5stickCで始める筋肉ムキムキ計画💪)を参照ください!
回路接続
マグネットスイッチの一方をGNDへ
マグネットスイッチのもう一方を3.3Vプルアップ抵抗させて36ピンへ
脚トレ&エアロバイク回数サーバーにPOSTするファームウェア
⇒URLはレッグマシン用とエアロバイク用で分けてください。
⇒実際の可視化画面とサーバ側の基本ロジックは前回の記事同様なので省略します。
post.ino
# include <WiFi.h>
# include <HTTPClient.h>
# include <M5StickC.h>
const char* ssid = "yourssid";
const char* password =  "yourpass";
const char* url = "https://hogehoge.jp/legtrain.php";
const int swpin=36;
int swdata;
int swold;
bool sensorflgresult = false;
void setup() {
  M5.begin();
  M5.Lcd.setCursor(0, 0, 1);
  M5.Lcd.print("legtrain");
  // put your setup code here, to run once:
  Serial.begin(115200);
  pinMode(swpin,INPUT);
  //gpio_set_pull_mode( GPIO_NUM_36, GPIO_PULLDOWN_ONLY);
  delay(4000);   //Delay needed before calling the WiFi.begin

  WiFi.begin(ssid, password);

  while (WiFi.status() != WL_CONNECTED) { //Check for the connection
    delay(1000);
    Serial.println("Connecting to WiFi..");
  }

  Serial.println("Connected to the WiFi network");
}
void svrPost(){
  if(WiFi.status()== WL_CONNECTED){   //Check WiFi connection status
           HTTPClient http;
           http.begin(URL);  //Specify destination for HTTP request
           http.addHeader("Content-Type", "text/plain");             //Specify content-type header
           int httpResponseCode = http.POST("{ \"data\": \"" + String("leg_earo") + "\"}");   //Send the actual POST request
           if(httpResponseCode>0){
              String response = http.getString();                       //Get the response to the request
              Serial.println(httpResponseCode);   //Print return code
              Serial.println(response);           //Print request answer
           }else{
              Serial.print("Error on sending POST: ");
              Serial.println(httpResponseCode);
           }
           http.end();  //Free resources
       }else{
           Serial.println("Error in WiFi connection");
       }
}
void loop() {
  // put your main code here, to run repeatedly:
  swdata= !analogRead(swpin);
  if(swdata==0){
      if(swold==1){
       Serial.println(1);
       svrPost();
      }else{
        //Serial.println(0);
      }
  }else{
    //Serial.println(0);
  }
  swold = swdata;
  M5.update();
  delay(500);
}
マグネットスイッチをレッグマシンに取り付けた様子

 # マグネットスイッチをエアロバイクに取り付けた様子

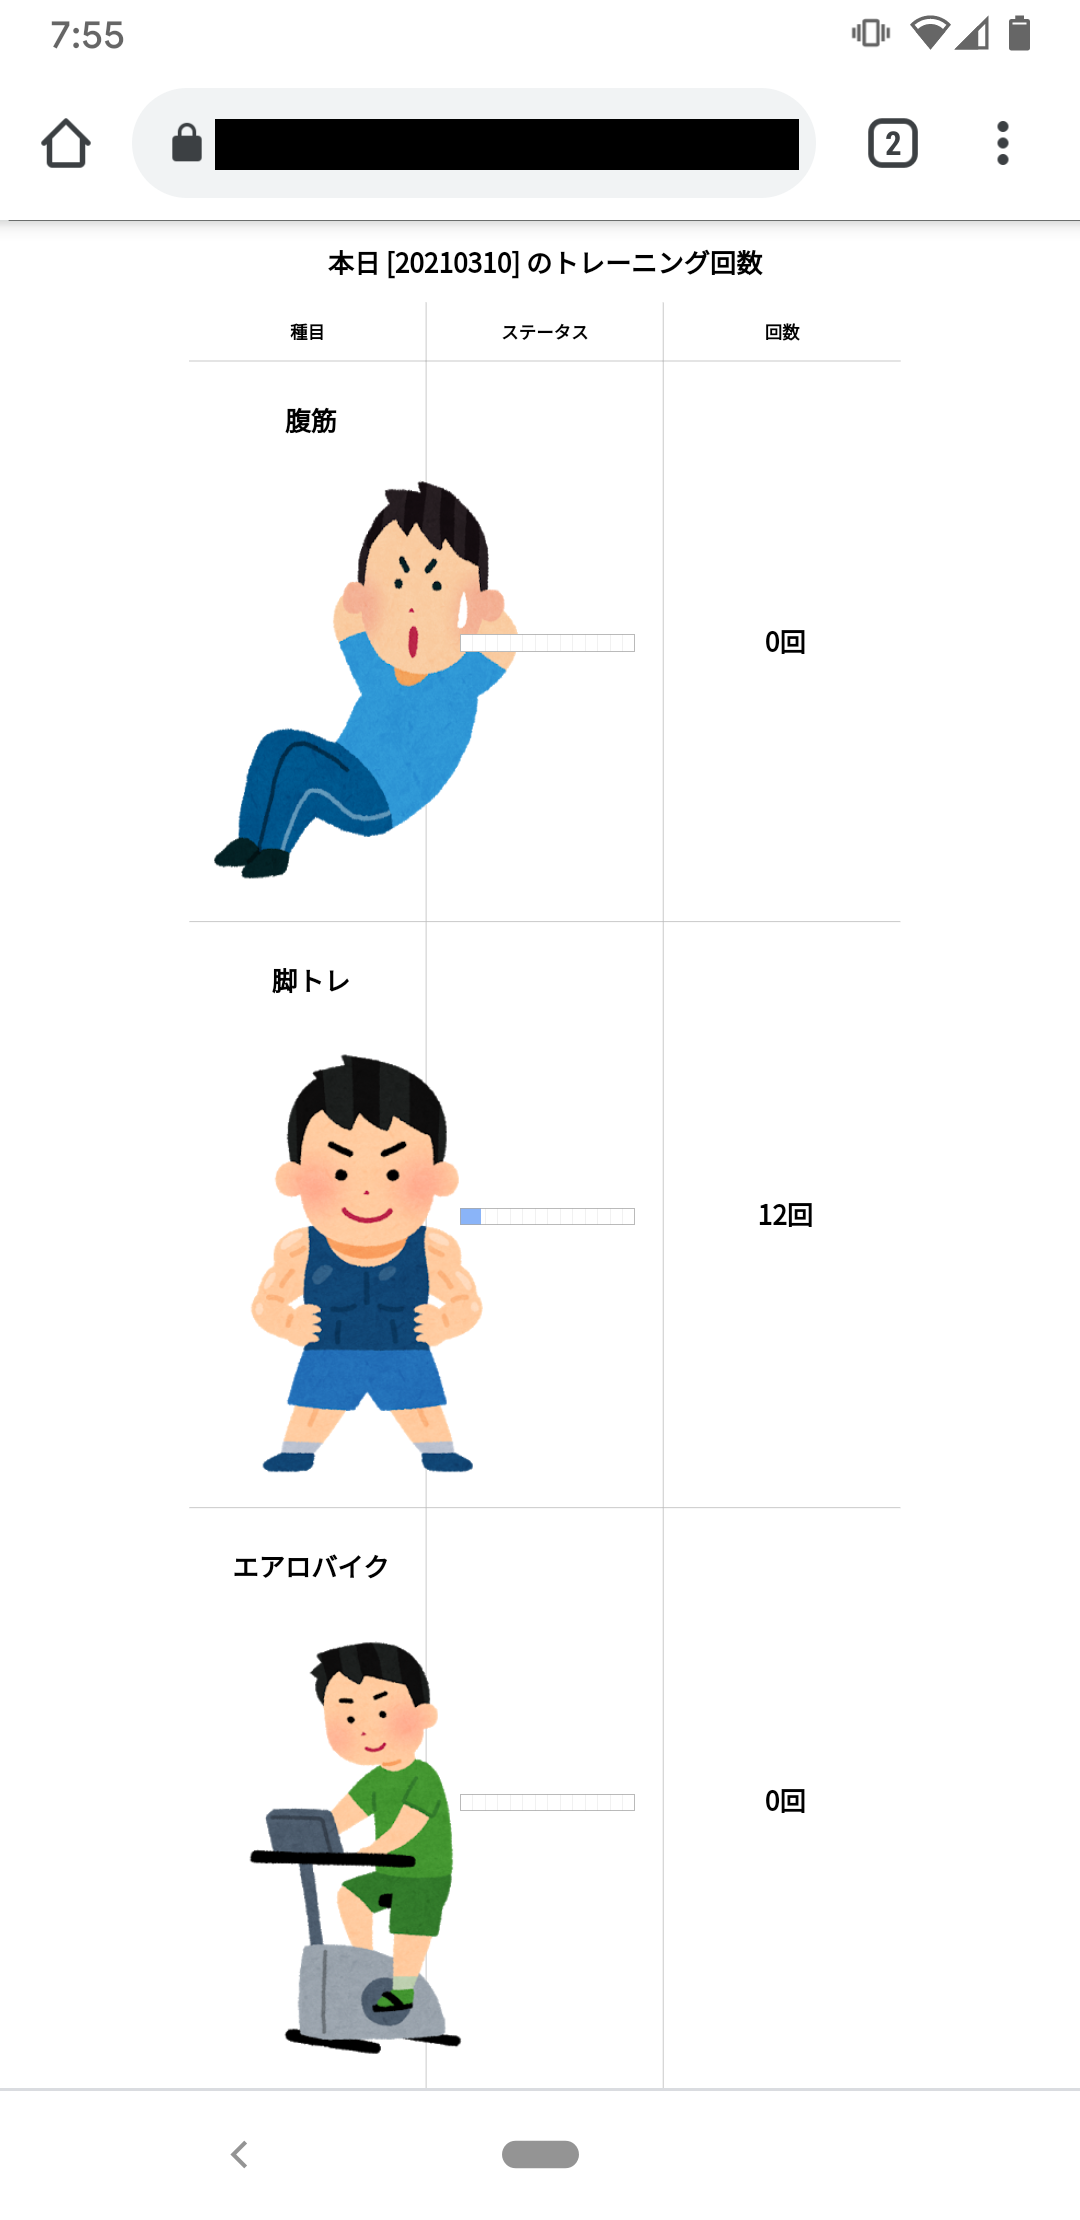
可視化画面
⇒こんな感じで腹筋+脚トレ+エアロバイクの回数を可視化できました!!
最後に
腹筋回数を可視化させるのも面白いですが、せっかくなので筋トレを維持させるためにも
定期時間になると一日のトレーニング回数を集計ツイートしてくれるようにしました!!
毎日夕方6時になると自動ツイートされます()
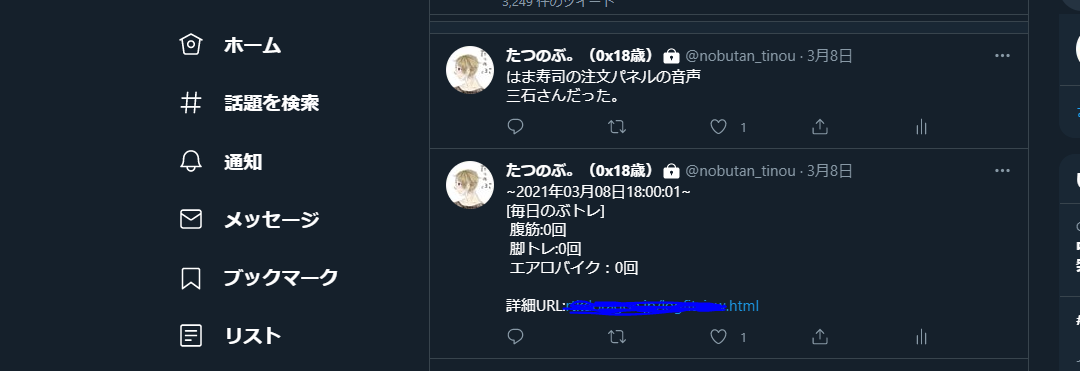
これにより、自分のトレーニングの状況を毎日チェックしやすくなりました。
あとツイートされるのでさぼりにくくなっています🤔
みなさんも、家にトレーニングマシンなどお持ちでしたらぜひIoT化させてみてください。
とれも面白い+自分のトレーニング管理にもなりますよ👍
それでは✋