概要
Blazor向けのUIフレームワークであるRadzen Blazor Componentsを導入して試すまでのメモ。
Demo
https://nobu17.github.io/RadzenBlazorTest/
ソース
https://github.com/nobu17/RadzenBlazorTest/
背景
Blazor単体にはSPA用のUIフレームワークは用意されていないので別途インストールが必要です。
Boootstrap等の一般的なHTML,css用のフレームワークを使用してゴリゴリHTMLを書く方法も考えられますが、今回はBlazorに特化されたものを使用してみようと思います。
前提
使用している.NET Core及びBlazorのテンプレートのバージョン等は下記です。
-
.NET Core 3.0 Preview SDK 3.0.100-preview7-012821
-
Microsoft.AspNetCore.Blazor.Templates::3.0.0-preview7.19365.7
-
Visual Studio 2019 Preview
-
Radzen.Blazor 0.0.52
インストール手順
プロジェクトの作成
まずは、公式サイトの手順に沿ってテンプレートから新規Blazorプロジェクトを作成します。
今回はclient-side版を使用します。
公式ドキュメント
Radzen.blazorのインストール及び設定
Radzenのページに紹介されている手順に沿ってインストールしてみます。
NuGetからインストール
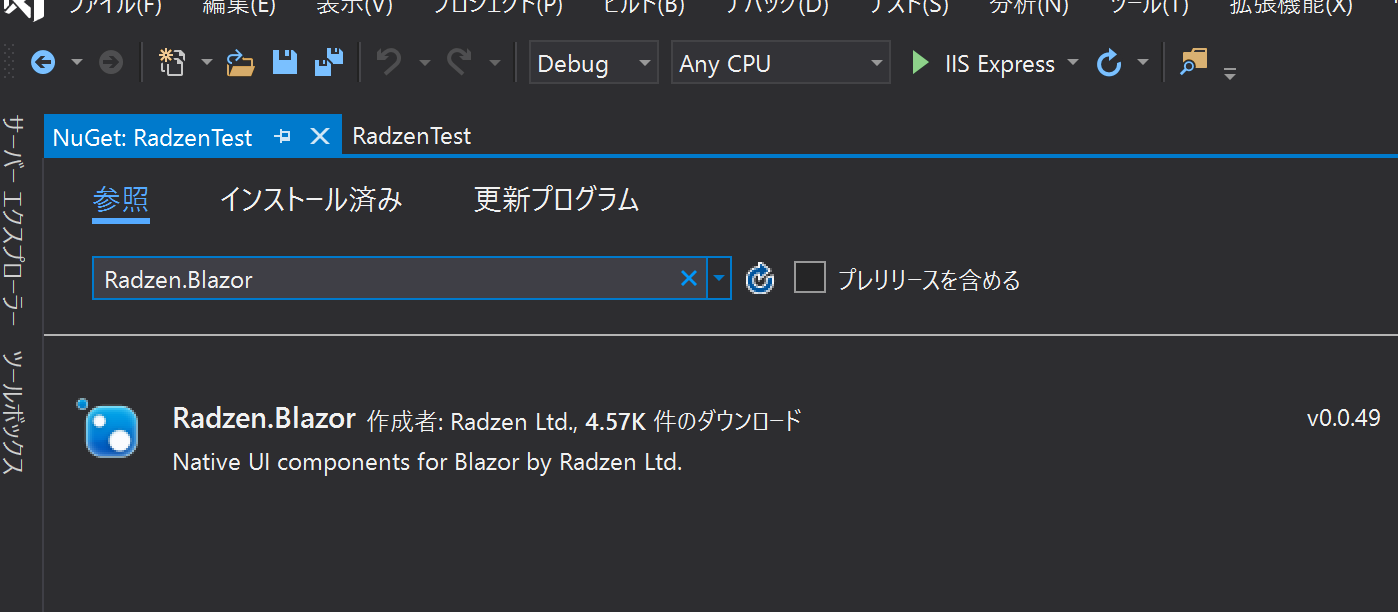
NugetからRadzen.blazorをインストールします。
ソリューションエクスプローラの依存関係を右クリック→NuGetパッケージの管理 を選択します。
Radzen.blazorで検索してインストールします。

プロジェクトの編集
インストールが終わったら、プロジェクト内の_Imports.razorにRadzen.blazorの参照を追加します。
// 略
// 追加
@using Radzen.Blazor
フォント及びCSSのインストールと設定
テーマファイルを公式サイトからDLしてインストール
https://github.com/akorchev/blazor.radzen.com/raw/master/Radzen.Blazor.Themes.zip
distフォルダ以下にfontsフォルダとcssフォルダがあるので、
Blazorのプロジェクト内のwwwrootルートフォルダ内にコピー&ペーストします。
次に、_Host.cshtml file (server-side Blazor) or wwwroot/index.html (client-side Blazor)
を開いてcssの参照を追加します。今回はClientSideなのでindex.htmlになります。
<!DOCTYPE html>
<html>
<head>
    // 略
    <link rel="stylesheet" href="css/default.css">
</head>
<body>
    // 略
</body>
</html>
プロジェクトファイルの編集
ClientSideのプロジェクトの場合、csprojファイルを開いて、
RazorLangVersionの後にBlazorLinkOnBuildにfalseに設定した要素を追加する
<Project Sdk="Microsoft.NET.Sdk.Web">

  <PropertyGroup>
    <TargetFramework>netstandard2.0</TargetFramework>
    <LangVersion>7.3</LangVersion>
    <RazorLangVersion>3.0</RazorLangVersion>
    <!-- 追加  -->
    <BlazorLinkOnBuild>false</BlazorLinkOnBuild>
  </PropertyGroup>

  <ItemGroup>
    <PackageReference Include="Microsoft.AspNetCore.Blazor" Version="3.0.0-preview7.19365.7" />
    <PackageReference Include="Microsoft.AspNetCore.Blazor.Build" Version="3.0.0-preview7.19365.7" PrivateAssets="all" />
    <PackageReference Include="Microsoft.AspNetCore.Blazor.DevServer" Version="3.0.0-preview7.19365.7" PrivateAssets="all" />
    <PackageReference Include="Radzen.Blazor" Version="0.0.49" />
  </ItemGroup>

</Project>
セットアップは終了です。
まずはここまででビルドが通るか確認します。
コンポーネント紹介
何点かコンポーネントを紹介してみます。
Button
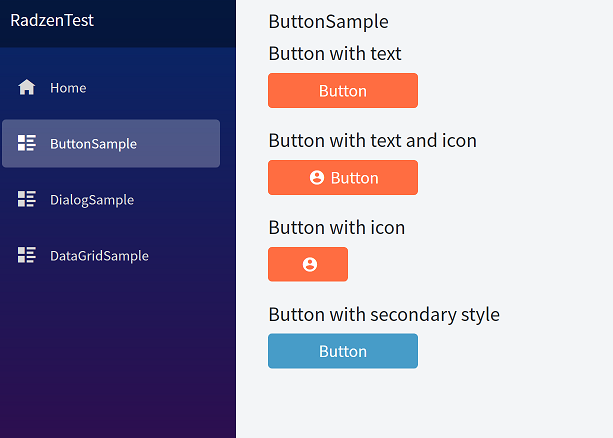
定番のボタン。
Clickイベントを渡す、おなじみの使い方です。
IconプロパティでMaterial iconsのアイコン名を指定すると使えます。
<RadzenButton Click="@ButtonClicked" Icon="account_circle" Text="Test"></RadzenButton>

@code {
  void ButtonClicked()
  {
    //
  }
}
DatePicker
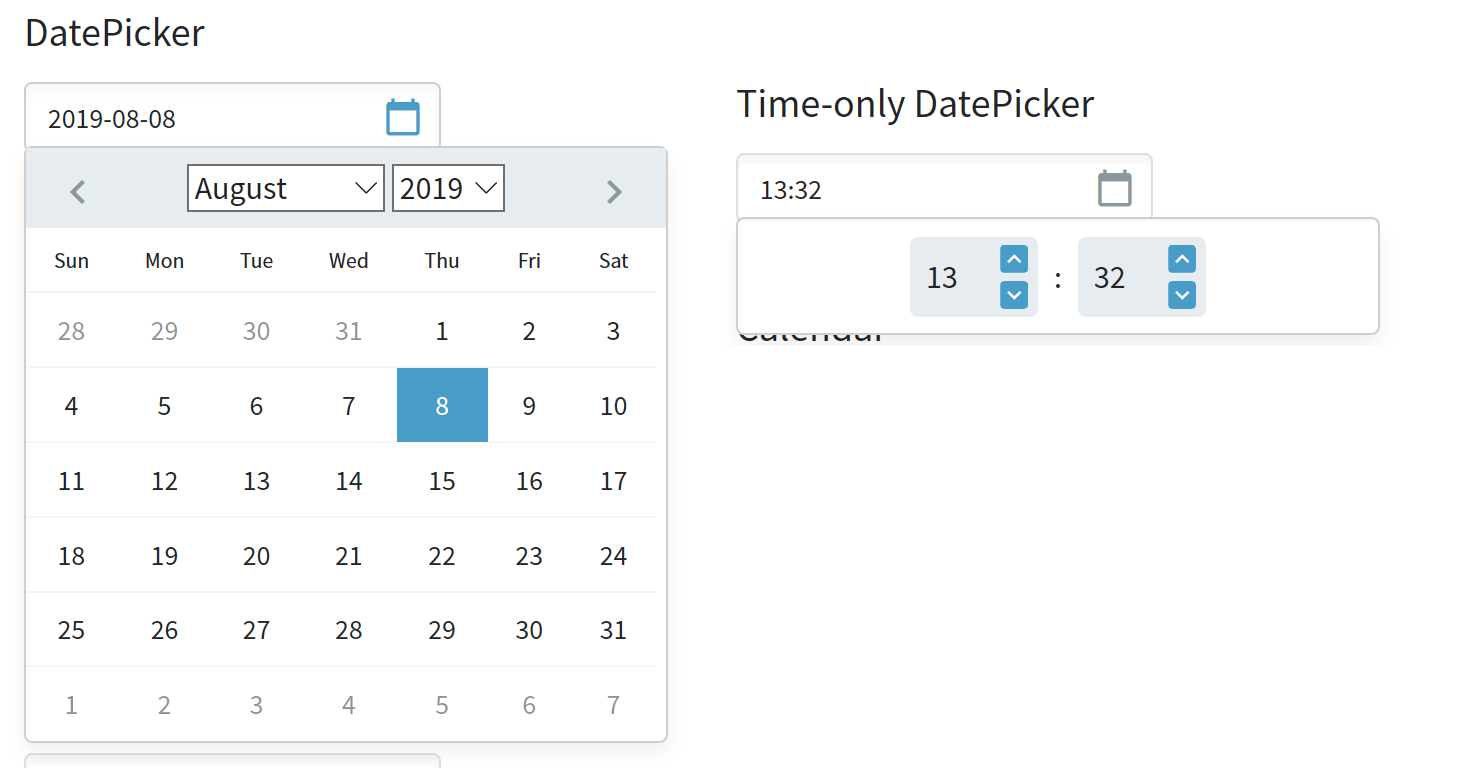
これも、NET開発者ならおなじみのやつです。
日付のみのものから時刻まで選択可能なものまで揃っています。
(日付、時刻両方入力可能な形式もあり)
- ValueにDatetime型のプロパティとバインディングを行います。
- ShowTime、ShowSeconds、TimeOnlyプロパティで表示形式を変更できます。
- DateFormat、HourFormatで表示形式を変更可能。
@page "/datepicker_sample"


<h3>DatePickerSample</h3>
<RadzenCard>
    <div class="row">
        <div class="col-md-12">
            <h3>DatePicker</h3>
            <RadzenDatePicker  Value="CurrentTime" Change="Change" />
            <h3 style="margin-top: 40px">DatePicker with time</h3>
            <RadzenDatePicker Value="CurrentTime" ShowTime="true" Change="Change" />
            <h3 style="margin-top: 40px">DatePicker with 12 hour time format</h3>
            <RadzenDatePicker Value="CurrentTime" ShowTime="true" Change="Change" HourFormat="12" />
            <h3 style="margin-top: 40px">Time-only DatePicker</h3>
            <RadzenDatePicker Value="CurrentTime" ShowTime="true" TimeOnly="true" DateFormat="HH:mm" Change="Change" />
            <h3 style="margin-top: 40px">Calendar</h3>
            <RadzenDatePicker Value="CurrentTime" Inline="true" Change="Change" />
        </div>
    </div>
</RadzenCard>

@code {

    public DateTime CurrentTime { get; set; }

    protected override void OnInit()
    {
        CurrentTime = DateTime.Now;
    }

    void Change(DateTime? value)
    {
        CurrentTime = value.GetValueOrDefault();
        StateHasChanged();
    }
}
DataGrid
.NET開発者ならよく使う、みんな大好きDataGrid。
XAMLとかで記述するのと同じように設定できます。
- データソースのコレクションを渡す(Dataプロパティ)、
- 内部にカラムを定義して、コレクションの1要素内でバインドするプロパティを設定(TItemで型を指定し、Propertyでプロパティ名を指定)
@if (@persons == null)
{
    <p><em>Loading...</em></p>
}
else
{
    <RadzenGrid AllowFiltering="true" AllowPaging="true" PageSize="4" AllowSorting="true" Data="@(persons)" TItem="Person" RowSelect="RowSelect">
        <Columns>
            <RadzenGridColumn TItem="Person" Property="Name" Title="Name" Type="string" />
            <RadzenGridColumn TItem="Person" Property="Age" Title="Age" Type="integer" />
            <RadzenGridColumn TItem="Person" Property="Birthdate" Title="Birth Date" Format="date-time" FormatString="{0:yyyy/MM/dd HH:mm:ss}">
            </RadzenGridColumn>
        </Columns>
    </RadzenGrid>

    if (@selectedPerson != null)
    {
        <div class="row">
            <div class="col-md-12">
                <div>@selectedPerson.Name が選択されました。</div>
            </div>
        </div>
    }
}

@code {
    public class Person
    {
        public string Name { get; set; }
        public int Age { get; set; }
        public DateTime Birthdate { get; set; }
    }
    Person selectedPerson = null;
    IEnumerable<Person> persons = null;

    protected override void OnInit()
    {
        persons = Enumerable.Range(0, 10).Select(p => new Person() { Name = p + "さん", Age = p + 10, Birthdate = DateTime.Now });
    }

    void RowSelect(Person p)
    {
        selectedPerson = p;
    }
}
ダイアログ
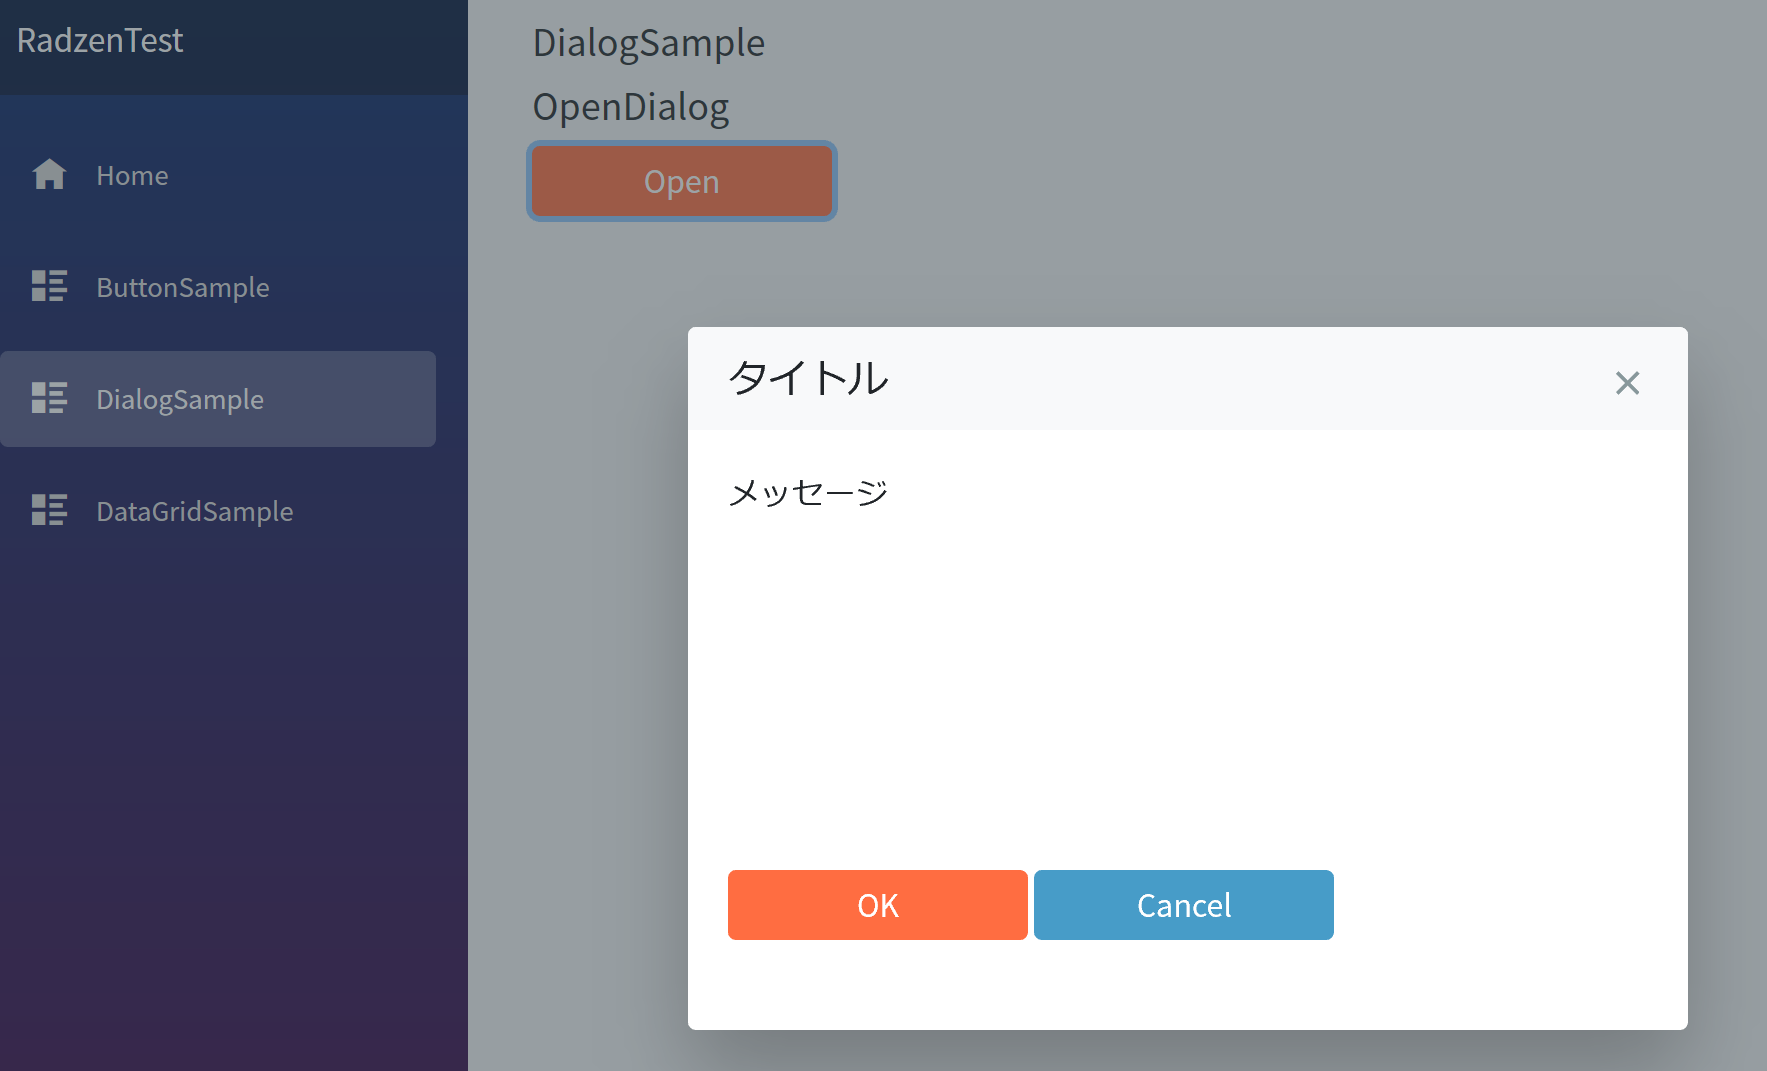
これもよく使うやつです。
ダイアログの中身もrazorコンポーネントとして作成します。
ダイアログ表示は一手間かかるので順に手順を説明します。
DialogServiceの登録
ダイアログを表示するためのサービスをDIする必要があるため、まずはStartup.csにDialogServiceを追加します。(ネームスペースはRadzen)
    public class Startup
    {
        public void ConfigureServices(IServiceCollection services)
        {
            services.AddSingleton<DialogService>();
        }

        public void Configure(IComponentsApplicationBuilder app)
        {
            app.AddComponent<App>("app");
        }
    }
ダイアログのレイアウト用コンポーネントの作成
次にDialog自体のレイアウトのレイアウトを定義したコンポーネントを作成します。
Dialogserviceをindjectしてボタン押下時にダイアログを閉じて結果を返すようにしています。
@inject Radzen.DialogService dialogService

<div class="row">
    <div class="col-md-12" style="height:200px;">
        <div>@Message</div>
    </div>
</div>
<div class="row">
    <div class="col-md-12">
        <RadzenButton Click="@((args) => dialogService.Close(true))" Text="OK" Style="margin-bottom: 10px; width: 150px" />
        <RadzenButton Click="@((args) => dialogService.Close(false))" ButtonStyle="secondary" Text="Cancel" Style="margin-bottom: 10px; width: 150px" />
    </div>
</div>

@code {

    [Parameter]
    public string Message { get; set; }
}
ダイアログを呼び出すページの作成
次にダイアログを表示するページを作成します。
ボタンを押下したらダイアログを表示させるとします。
- RadzenDialogのタグを記述
- 先ほどと同様にdialogServiceをinject
- ボタンのClickイベント内でdialogServiceのOpenメソッドを呼び出す。(ジェネリクスに先ほど作成したダイアログコンポーネントの型及びパラメータを指定します。)
@page "/dialog_sample"

@inject Radzen.DialogService dialogService

<RadzenDialog />
<h3>DialogSample</h3>
<div class="row">
    <div class="col-md-6">
        <h3>OpenDialog</h3>
        <RadzenButton Click="Click" Text="Open" Style="margin-bottom: 20px; width: 150px" />
        <br />
        @resultText
    </div>
</div>

@code {
    string resultText = "";

    protected override void OnInit()
    {
        dialogService.OnClose += OnClose;
    }

    void Click()
    {
        // ダイアログの表示
        var dParam = new Dictionary<string, object>() { { "Message", "メッセージ" } };
        var dOpt = new Radzen.DialogOptions() { Width = "500px", Height = "300px", Left = "30%", Top = "20%" };
        dialogService.Open<TestDialog>("タイトル", dParam, dOpt);
    }

    void OnClose(dynamic result)
    {
        // ダイアログが閉じたとの結果を取得
        resultText = result.ToString();
        // 変更通知
        Invoke(() => { StateHasChanged(); });
    }
}
その他
テキストボックスやチェックボックス、数値入力、タブ等々、よく見る入力コントールはそろっている感じです。
気になる方は公式サイトを見てみてください。
まとめ
ということでBlazorのUIフレームワークのRadzen.Blazorを紹介してみました。
まだまだ発展途上ということで、詳細なドキュメントや機能自体が少なく、一般的なSPAのUIフレームワークと比較すると実装するべき点が多く大変ですが、様々なUIのコンポーネントが用意されているのは良いですね。
現状はドキュメントが無いため、GitHub上のサンプルのソースコードを見ながら実装という形ですが、ドキュメントが充実する事を期待したいですね。
Angular,React,Vue等のSPAフレームワークといえば、豊富なUIコンポーネント群がセットで使えることがメリットなのでBlazorにも今後こういったフレームワークが充実する事を期待したいですね。
Demo
https://nobu17.github.io/RadzenBlazorTest/
ソース
https://github.com/nobu17/RadzenBlazorTest/
その他、過去投稿したBlazor関連記事
Blazorで作成したウェブサイトをGitHub Pagesで公開する
Blazorで作成したウェブサイトをFirebaseで公開する


