概要
この記事は中学高校生向けプログラミング教室の教材として作ったものを一部改変したものです。
Rubyでプログラミングの初歩を学んだ次のステップとして、ゲームライブラリDXRubyを使って「ブロック崩し」ゲームを作っていきます。
0から少しずつ「ブロック崩し」を作っていきます。Rubyだと完成しても100行足らずで「ブロック崩し」ができてしまいます。

前の記事
・Ruby用2Dゲームライブラリ DXRuby:使い方の初歩 - Qiita
続編
・DXRuby:「当たり判定」を自分で作ってみよう - Qiita
・プログラミングの基礎力をつける:なるべく基本命令だけで作る「ブロック崩し」 on DXRuby - Qiita
技術解説
ソースコード
使用ライブラリ
Windows向けRuby用2DゲームライブラリDXRubyを使用します。
バージョン1.4.2以上を想定しています。
1.4.2より前のバージョンとの主な相違点
-
Window.loopが複数置ける -
マウス位置を取得する
Input.mouse_pos_x、Input.mouse_pos_yの新しい書き方として、Input.mouse_x、Input.mouse_yが追加
→ DXRuby 1.4.6:更新履歴
DXRubyインストールの注意点
→ DXRuby 1.4.6 をWindows10で使う時の注意点とインストール方法 - noanoa07 - Qiita
https://qiita.com/noanoa07/items/0ce14c2404df38de94b7
参考サイト
-
DXRuby のホームページ
http://dxruby.osdn.jp -
DXRuby 1.4.6 リファレンスマニュアル
http://mirichi.github.io/dxruby-doc/index.html
困ったときは、このページの「チュートリアル」と「マニュアル」にだいたい書いてあります。
- DXRuby 1.4.1 リファレンスマニュアル
http://dxruby.osdn.jp/DXRubyReference/20095313382446.htm
古いバージョンのリファレンスも役に立つときがあります。
- DXRubyで 0から作る「ブロック崩し」 - noanoa 日々の日記
http://blog.livedoor.jp/noanoa07/archives/2045851.html
このテキストのブログ記事での解説です。
オリジナル
※「2014-03-17 松江Ruby会議05に参加してきた - mirichiの日記」より改変
http://d.hatena.ne.jp/mirichi/20140317/p1
ライセンス
ソースコード、本解説ともにパブリックドメイン
プログラム解説
1.DXRubyの練習
→ Ruby用2Dゲームライブラリ DXRuby:使い方の初歩 - Qiita
を見てください。
2.「ブロック崩し」を作る
いよいよ「ブロック崩し」を作っていきます。
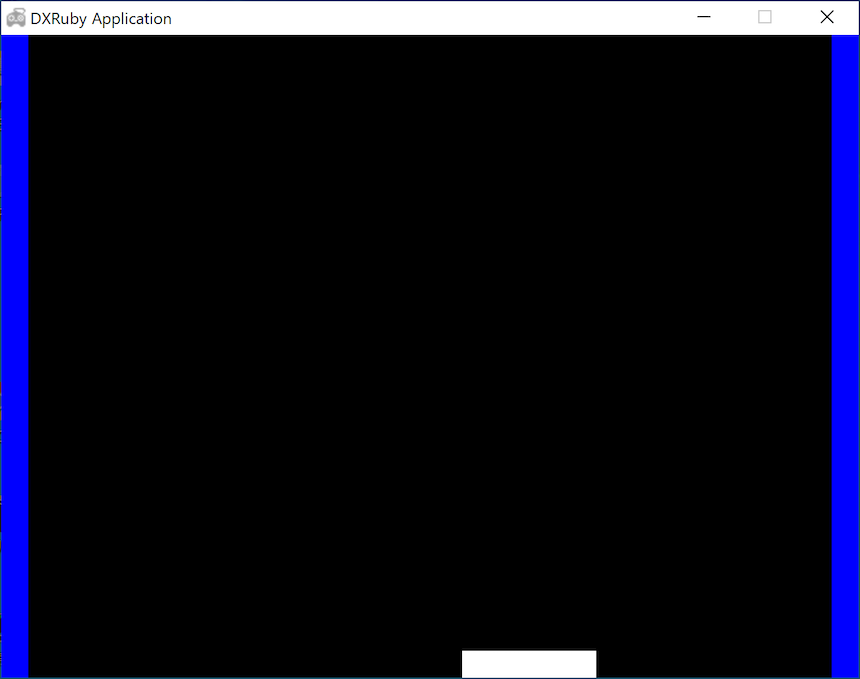
2-1. バーを出す(block01.rb)
横100、縦20大きさの白い長方形を、ボールを打ち返すバーとして作ります。
まず、 Image.new でイメージを作成します。さらに、ボールとの衝突判定をするために Spite.new でスプライト化します。初期位置は、x = 0、y = 460にしますが、実際の描画ではxはマウスの横位置(mouse_pos_x)に追従するようにします。
ウィンドウの初期サイズは、指定しないと横640、縦480になります。そのため、バーの縦位置yはウィンドウの一番下480に合わせるため、バーの縦幅を引いた480 - 20 = 460にしています。
バーを表示させるには、Window.loop do 〜 endの中でdrawメソッド(命令)を使います。
require 'dxruby'

img_bar = Image.new(100, 20, C_WHITE)

bar = Sprite.new(0, 460, img_bar)


Window.loop do
  bar.x = Input.mouse_pos_x

  bar.draw
end

2-2. 壁を出す(左側)(block02.rb)
左側の縦の壁を作ります。まず、横20、縦は(ウィンドウの縦幅と同じ)480の大きさの青い長方形のイメージimg_hwallを作ります。
これを壁として、ボールとの衝突判定をするためにスプライト化します(lwall)。位置は、左上隅(x = 0、y = 0)に配置します。
require 'dxruby'

img_bar   = Image.new(100,  20, C_WHITE)
img_hwall = Image.new( 20, 480, C_BLUE)

bar   = Sprite.new(0, 460, img_bar)
lwall = Sprite.new(0,   0, img_hwall)


Window.loop do
  bar.x = Input.mouse_pos_x
  bar.draw

  lwall.draw
end

2-3. 壁を出す(右側も)(block03.rb)
右側の縦の壁を作ります。左側の壁と同じ大きさなので、同じイメージimg_hwallを使ってスプライト化し(rwall)、右上隅(x = 620、y = 0)に配置します。
右壁の横位置xはウィンドウ幅640から壁の横幅20を引いた640 - 20 = 620にします。
require 'dxruby'

img_bar   = Image.new(100,  20, C_WHITE)
img_hwall = Image.new( 20, 480, C_BLUE)

bar   = Sprite.new(  0, 460, img_bar)
lwall = Sprite.new(  0,   0, img_hwall)
rwall = Sprite.new(620,   0, img_hwall)


Window.loop do
  bar.x = Input.mouse_pos_x
  bar.draw

  lwall.draw
  rwall.draw
end
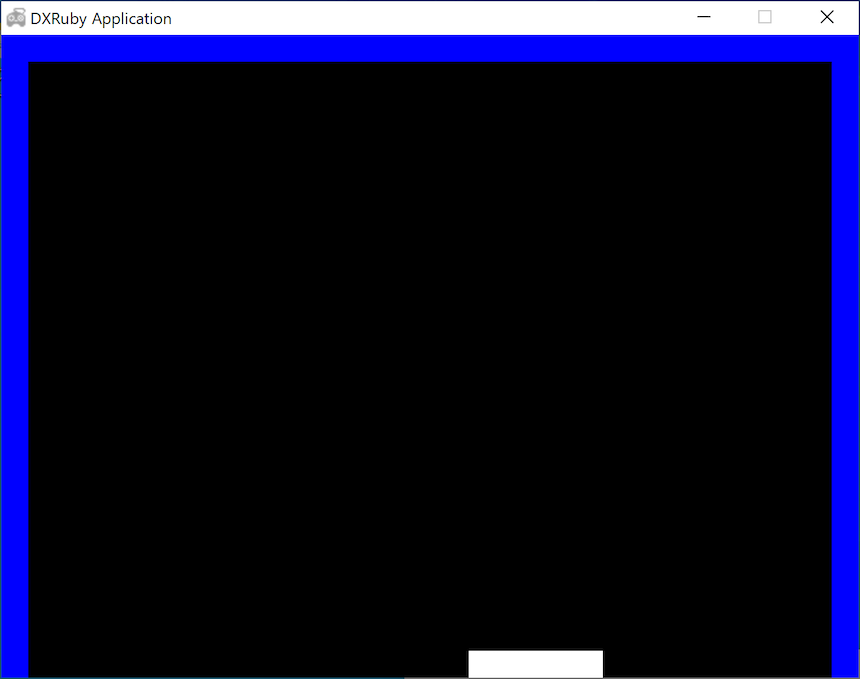
2-4. 壁を出す(上側も)(block04.rb)
上側の横の壁を作ります。まず、横は(ウィンドウの横幅と同じ)640、縦20の大きさの白い長方形のイメージimg_vwallを作ります。
これもボールとの衝突判定をするためにスプライト化します(twall)。位置は、左上隅(x = 0、y = 0)に配置します。
require 'dxruby'

img_bar   = Image.new(100,  20, C_WHITE)
img_hwall = Image.new( 20, 480, C_BLUE)
img_vwall = Image.new(640,  20, C_BLUE)

bar   = Sprite.new(  0, 460, img_bar)
lwall = Sprite.new(  0,   0, img_hwall)
rwall = Sprite.new(620,   0, img_hwall)
twall = Sprite.new(  0,   0, img_vwall)


Window.loop do
  bar.x = Input.mouse_pos_x
  bar.draw

  lwall.draw
  rwall.draw
  twall.draw
end

2-5. 壁とバーをまとめて描く:配列(block05.rb)
壁とバーの描画が4行と増えたので、まとめて描くようにします。
バーと壁をまとめて配列wallsにします。そして、スプライトの配列をまとめて描画できるSprite.drawで一気に表示させます。
require 'dxruby'

img_bar   = Image.new(100,  20, C_WHITE)
img_hwall = Image.new( 20, 480, C_BLUE)
img_vwall = Image.new(640,  20, C_BLUE)

bar   = Sprite.new(  0, 460, img_bar)
lwall = Sprite.new(  0,   0, img_hwall)
rwall = Sprite.new(620,   0, img_hwall)
twall = Sprite.new(  0,   0, img_vwall)

walls = [bar, lwall, rwall, twall]


Window.loop do
  bar.x = Input.mouse_pos_x
  Sprite.draw(walls)
end
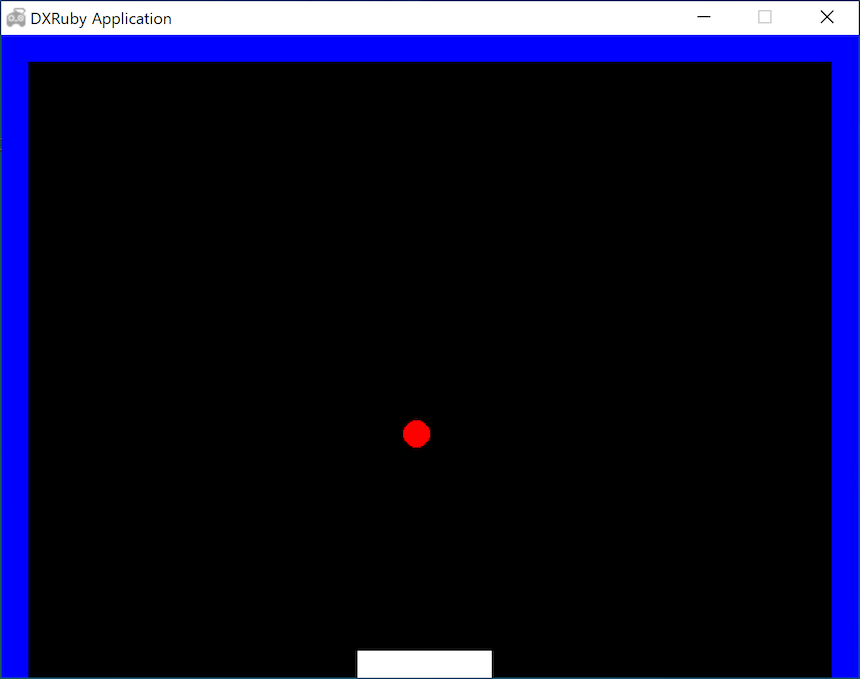
2-6. ボールを出す(block06.rb)
ボールを作ります。横20、縦20の正方形の中に、中心が x=10、y = 10、半径が10(つまり正方形目一杯)の赤い円のイメージimg_ballを作ります。
壁、バーと衝突判定するためにスプライト化します(ball)。初期位置はとりあえず x = 300、y = 400 にして、表示します。
require 'dxruby'

img_bar   = Image.new(100,  20, C_WHITE)
img_hwall = Image.new( 20, 480, C_BLUE)
img_vwall = Image.new(640,  20, C_BLUE)
img_ball  = Image.new( 20,  20).circle_fill(10, 10, 10, C_RED)

bar   = Sprite.new(  0, 460, img_bar)
lwall = Sprite.new(  0,   0, img_hwall)
rwall = Sprite.new(620,   0, img_hwall)
twall = Sprite.new(  0,   0, img_vwall)

walls = [bar, lwall, rwall, twall]

ball  =  Sprite.new(300, 400, img_ball)


Window.loop do
  bar.x = Input.mouse_pos_x
  Sprite.draw(walls)

  ball.draw
end

2-7. ボールを動かす(横方向)(block07.rb)
ボールを横方向(x方向)に動かします。(xは右がプラス方向)
スピードdxを2として、ballのx位置にloopで回ってくる(1/60秒)毎にdx分を足していきます。
require 'dxruby'

img_bar   = Image.new(100,  20, C_WHITE)
img_hwall = Image.new( 20, 480, C_BLUE)
img_vwall = Image.new(640,  20, C_BLUE)
img_ball  = Image.new( 20,  20).circle_fill(10, 10, 10, C_RED)

bar   = Sprite.new(  0, 460, img_bar)
lwall = Sprite.new(  0,   0, img_hwall)
rwall = Sprite.new(620,   0, img_hwall)
twall = Sprite.new(  0,   0, img_vwall)

walls = [bar, lwall, rwall, twall]

ball  =  Sprite.new(300, 400, img_ball)
dx =  2


Window.loop do
  bar.x = Input.mouse_pos_x
  Sprite.draw(walls)

  ball.x = ball.x + dx

  ball.draw
end

2-8. ボールを動かす(横方向):別の書き方(block08.rb)
ball.x = ball.x + dxを別の書き方である、
ball.x += dxに書き換えてみます。同じことですが、慣れればこちらの方が見やすいかも?
require 'dxruby'

img_bar   = Image.new(100,  20, C_WHITE)
img_hwall = Image.new( 20, 480, C_BLUE)
img_vwall = Image.new(640,  20, C_BLUE)
img_ball  = Image.new( 20,  20).circle_fill(10, 10, 10, C_RED)

bar   = Sprite.new(  0, 460, img_bar)
lwall = Sprite.new(  0,   0, img_hwall)
rwall = Sprite.new(620,   0, img_hwall)
twall = Sprite.new(  0,   0, img_vwall)

walls = [bar, lwall, rwall, twall]

ball  =  Sprite.new(300, 400, img_ball)
dx =  2


Window.loop do
  bar.x = Input.mouse_pos_x
  Sprite.draw(walls)

  ball.x += dx

  ball.draw
end

2-9. ボールを動かす(縦方向)(block09.rb)
今度は縦方向(y方向)に動かします。(yは下がプラス方向)
いったん横方向のスピードdxは0にして、縦方向のスピードdyを-2にします。ballのy位置にloopで回ってくる毎にdy分を足していきます。
require 'dxruby'

img_bar   = Image.new(100,  20, C_WHITE)
img_hwall = Image.new( 20, 480, C_BLUE)
img_vwall = Image.new(640,  20, C_BLUE)
img_ball  = Image.new( 20,  20).circle_fill(10, 10, 10, C_RED)

bar   = Sprite.new(  0, 460, img_bar)
lwall = Sprite.new(  0,   0, img_hwall)
rwall = Sprite.new(620,   0, img_hwall)
twall = Sprite.new(  0,   0, img_vwall)

walls = [bar, lwall, rwall, twall]

ball  =  Sprite.new(300, 400, img_ball)
dx =  0
dy = -2


Window.loop do
  bar.x = Input.mouse_pos_x
  Sprite.draw(walls)

  ball.x += dx
  ball.y += dy

  ball.draw
end

2-10. ボールを動かす(縦横方向)(block10.rb)
ボールの横方向のスピードdxを2、縦方向のスピードdyを-2にすると、斜めに動いていきます。
require 'dxruby'

img_bar   = Image.new(100,  20, C_WHITE)
img_hwall = Image.new( 20, 480, C_BLUE)
img_vwall = Image.new(640,  20, C_BLUE)
img_ball  = Image.new( 20,  20).circle_fill(10, 10, 10, C_RED)

bar   = Sprite.new(  0, 460, img_bar)
lwall = Sprite.new(  0,   0, img_hwall)
rwall = Sprite.new(620,   0, img_hwall)
twall = Sprite.new(  0,   0, img_vwall)

walls = [bar, lwall, rwall, twall]

ball  =  Sprite.new(300, 400, img_ball)
dx =  2
dy = -2


Window.loop do
  bar.x = Input.mouse_pos_x
  Sprite.draw(walls)

  ball.x += dx
  ball.y += dy

  ball.draw
end

2-11. 動かすをまとめる(block11.rb)
横に動かすball.x += dxと縦に動かすball.y += dyは、いつも一緒に使うので、まとめて書いてみます。
ここではmoveという命令を作ります(def 〜 endで定義)
。引数としては、ボールのような動かすもの(スプライト)、横方向(x方向)のスピード、縦方向(y方向)のスピードを指定します。
require 'dxruby'

img_bar   = Image.new(100,  20, C_WHITE)
img_hwall = Image.new( 20, 480, C_BLUE)
img_vwall = Image.new(640,  20, C_BLUE)
img_ball  = Image.new( 20,  20).circle_fill(10, 10, 10, C_RED)

bar   = Sprite.new(  0, 460, img_bar)
lwall = Sprite.new(  0,   0, img_hwall)
rwall = Sprite.new(620,   0, img_hwall)
twall = Sprite.new(  0,   0, img_vwall)

walls = [bar, lwall, rwall, twall]

ball  =  Sprite.new(300, 400, img_ball)
dx =  2
dy = -2

def move(sprite, speed_x, speed_y)
  sprite.x += speed_x
  sprite.y += speed_y
end


Window.loop do
  bar.x = Input.mouse_pos_x
  Sprite.draw(walls)

  move(ball, dx, dy)

  ball.draw
end

2-12. ボールが跳ね返る(横方向)(block12.rb)
ボールを跳ね返らせます。まずは、縦方向(y方向)のスピードdyを0にして、横方向(x方向)だけ動かします。
衝突判定には===を使います。もし、ボールballと壁やバーwallsが衝突したら、ボールのx位置ball.xを衝突前の位置に戻し(ball.x -= dx)、ボールのx方向のスピードdxのプラス/マイナスを反対にして、逆方向に動くようにします。
require 'dxruby'

img_bar   = Image.new(100,  20, C_WHITE)
img_hwall = Image.new( 20, 480, C_BLUE)
img_vwall = Image.new(640,  20, C_BLUE)
img_ball  = Image.new( 20,  20).circle_fill(10, 10, 10, C_RED)

bar   = Sprite.new(  0, 460, img_bar)
lwall = Sprite.new(  0,   0, img_hwall)
rwall = Sprite.new(620,   0, img_hwall)
twall = Sprite.new(  0,   0, img_vwall)

walls = [bar, lwall, rwall, twall]

ball  =  Sprite.new(300, 400, img_ball)
dx =  2
dy = -2

def move(sprite, speed_x, speed_y)
  sprite.x += speed_x
  sprite.y += speed_y
end


Window.loop do
  bar.x = Input.mouse_pos_x
  Sprite.draw(walls)

  move(ball, dx, 0)      #横方向だけ動かす
  if ball === walls
    ball.x -= dx
    dx = -dx
  end

  ball.draw
end

2-13. ボールが跳ね返る(縦方向)(block13.rb)
今度は縦方向(y方向)だけ動かします。
require 'dxruby'

img_bar   = Image.new(100,  20, C_WHITE)
img_hwall = Image.new( 20, 480, C_BLUE)
img_vwall = Image.new(640,  20, C_BLUE)
img_ball  = Image.new( 20,  20).circle_fill(10, 10, 10, C_RED)

bar   = Sprite.new(  0, 460, img_bar)
lwall = Sprite.new(  0,   0, img_hwall)
rwall = Sprite.new(620,   0, img_hwall)
twall = Sprite.new(  0,   0, img_vwall)

walls = [bar, lwall, rwall, twall]

ball  =  Sprite.new(300, 400, img_ball)
dx =  2
dy = -2

def move(sprite, speed_x, speed_y)
  sprite.x += speed_x
  sprite.y += speed_y
end


Window.loop do
  bar.x = Input.mouse_pos_x
  Sprite.draw(walls)

  move(ball, 0, 0)      #縦方向だけ動かす
  if ball === walls
    ball.x -= dx
    dx = -dx
  end

  move(ball, 0, dy)      #縦方向だけ動かす
  if ball === walls
    ball. y -= dy
    dy = -dy
  end

  ball.draw
end
2-14. ボールが跳ね返る(縦横方向)(block14.rb)
縦横ともに動かして、衝突したら跳ね返らせます。ちょっと「ブロック崩し」の雰囲気が出てきましたね。
ここでは、まずx方向に動かして、ぶつかったらx方向だけ跳ね返って、次にy方向に動かして、ぶつかったらy方向だけ跳ね返る書き方をしています。
なぜ、x方向、y方向同時に動かして、ぶつかったら跳ね返る書き方にしていないのでしょうか?自分で試して考えてみてください。
require 'dxruby'

img_bar   = Image.new(100,  20, C_WHITE)
img_hwall = Image.new( 20, 480, C_BLUE)
img_vwall = Image.new(640,  20, C_BLUE)
img_ball  = Image.new( 20,  20).circle_fill(10, 10, 10, C_RED)

bar   = Sprite.new(  0, 460, img_bar)
lwall = Sprite.new(  0,   0, img_hwall)
rwall = Sprite.new(620,   0, img_hwall)
twall = Sprite.new(  0,   0, img_vwall)

walls = [bar, lwall, rwall, twall]

ball  =  Sprite.new(300, 400, img_ball)
dx =  2
dy = -2

def move(sprite, speed_x, speed_y)
  sprite.x += speed_x
  sprite.y += speed_y
end


Window.loop do
  bar.x = Input.mouse_pos_x
  Sprite.draw(walls)

  move(ball, dx, 0)
  if ball === walls
    ball.x -= dx
    dx = -dx
  end

  move(ball, 0, dy)
  if ball === walls
    ball. y -= dy
    dy = -dy
  end

  ball.draw
end

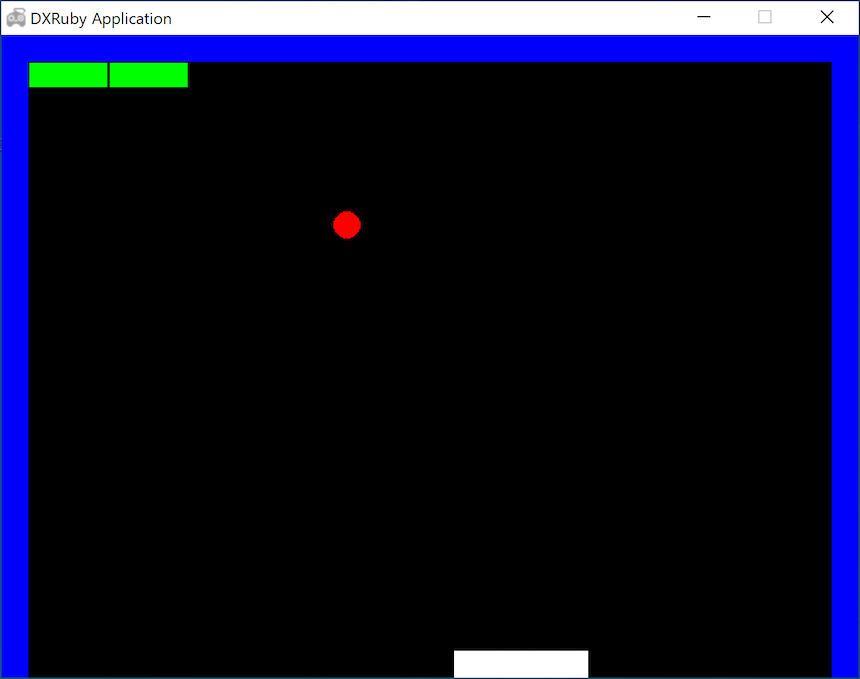
2-15. ブロックを出す(1個)(block15.rb)
ブロックを作っていきます。まずは1個。
ブロックは横58、縦18の大きさの緑の長方形のイメージimg_blockを作ります。さらに、ボールとの衝突判定をするためにスプライト化します(block_00)。
横の大きさは、横に10個置くことにして、(ウィンドウ横幅640 - 左右の壁の厚み 20 * 2) / 10 = 60 に、隣同士の隙間を左右 1ずつとって 58にしています。
位置は、左上の壁の内側(x = 20, y = 20)から横、縦とも 1だけ隙間を空けて、x = 21、y = 21に配置します。
require 'dxruby'

img_bar   = Image.new(100,  20, C_WHITE)
img_hwall = Image.new( 20, 480, C_BLUE)
img_vwall = Image.new(640,  20, C_BLUE)
img_ball  = Image.new( 20,  20).circle_fill(10, 10, 10, C_RED)
img_block = Image.new( 58,  18, C_GREEN)

bar   = Sprite.new(  0, 460, img_bar)
lwall = Sprite.new(  0,   0, img_hwall)
rwall = Sprite.new(620,   0, img_hwall)
twall = Sprite.new(  0,   0, img_vwall)

walls = [bar, lwall, rwall, twall]

ball  =  Sprite.new(300, 400, img_ball)
dx =  2
dy = -2

def move(sprite, speed_x, speed_y)
  sprite.x += speed_x
  sprite.y += speed_y
end

block_00 = Sprite.new(21, 21, img_block)


Window.loop do
  bar.x = Input.mouse_pos_x
  Sprite.draw(walls)

  move(ball, dx, 0)
  if ball === walls
    ball.x -= dx
    dx = -dx
  end

  move(ball, 0, dy)
  if ball === walls
    ball. y -= dy
    dy = -dy
  end

  ball.draw

  block_00.draw
end

2-16. ブロックを出す(2個)(block16.rb)
2個目のブロックは、同じ大きさのブロックをxを60だけ右にずらした位置に置きます。(ブロックの横幅は58なので少し隙間が空きます。)
require 'dxruby'

img_bar   = Image.new(100,  20, C_WHITE)
img_hwall = Image.new( 20, 480, C_BLUE)
img_vwall = Image.new(640,  20, C_BLUE)
img_ball  = Image.new( 20,  20).circle_fill(10, 10, 10, C_RED)
img_block = Image.new( 58,  18, C_GREEN)

bar   = Sprite.new(  0, 460, img_bar)
lwall = Sprite.new(  0,   0, img_hwall)
rwall = Sprite.new(620,   0, img_hwall)
twall = Sprite.new(  0,   0, img_vwall)

walls = [bar, lwall, rwall, twall]

ball  =  Sprite.new(300, 400, img_ball)
dx =  2
dy = -2

def move(sprite, speed_x, speed_y)
  sprite.x += speed_x
  sprite.y += speed_y
end

block_00 = Sprite.new(21     , 21, img_block)
block_01 = Sprite.new(21 + 60, 21, img_block)


Window.loop do
  bar.x = Input.mouse_pos_x
  Sprite.draw(walls)

  move(ball, dx, 0)
  if ball === walls
    ball.x -= dx
    dx = -dx
  end

  move(ball, 0, dy)
  if ball === walls
    ball. y -= dy
    dy = -dy
  end

  ball.draw

  block_00.draw
  block_01.draw
end
2-17. ブロックを出す(3個)(block17.rb)
同じく3個目のブロックを置きます。x位置は、ブロックの横幅58と隙間を見込んで60ずつずらしていきます。
require 'dxruby'

img_bar   = Image.new(100,  20, C_WHITE)
img_hwall = Image.new( 20, 480, C_BLUE)
img_vwall = Image.new(640,  20, C_BLUE)
img_ball  = Image.new( 20,  20).circle_fill(10, 10, 10, C_RED)
img_block = Image.new( 58,  18, C_GREEN)

bar   = Sprite.new(  0, 460, img_bar)
lwall = Sprite.new(  0,   0, img_hwall)
rwall = Sprite.new(620,   0, img_hwall)
twall = Sprite.new(  0,   0, img_vwall)

walls = [bar, lwall, rwall, twall]

ball  =  Sprite.new(300, 400, img_ball)
dx =  2
dy = -2

def move(sprite, speed_x, speed_y)
  sprite.x += speed_x
  sprite.y += speed_y
end

block_00 = Sprite.new(21         , 21, img_block)
block_01 = Sprite.new(21 + 60    , 21, img_block)
block_02 = Sprite.new(21 + 60 * 2, 21, img_block)


Window.loop do
  bar.x = Input.mouse_pos_x
  Sprite.draw(walls)

  move(ball, dx, 0)
  if ball === walls
    ball.x -= dx
    dx = -dx
  end

  move(ball, 0, dy)
  if ball === walls
    ball. y -= dy
    dy = -dy
  end

  ball.draw

  block_00.draw
  block_01.draw
  block_02.draw
end

2-18. ブロックを出す(5個)(block18.rb)
5個まで同様にブロックを置きます。
require 'dxruby'

img_bar   = Image.new(100,  20, C_WHITE)
img_hwall = Image.new( 20, 480, C_BLUE)
img_vwall = Image.new(640,  20, C_BLUE)
img_ball  = Image.new( 20,  20).circle_fill(10, 10, 10, C_RED)
img_block = Image.new( 58,  18, C_GREEN)

bar   = Sprite.new(  0, 460, img_bar)
lwall = Sprite.new(  0,   0, img_hwall)
rwall = Sprite.new(620,   0, img_hwall)
twall = Sprite.new(  0,   0, img_vwall)

walls = [bar, lwall, rwall, twall]

ball  =  Sprite.new(300, 400, img_ball)
dx =  2
dy = -2

def move(sprite, speed_x, speed_y)
  sprite.x += speed_x
  sprite.y += speed_y
end

block_00 = Sprite.new(21         , 21, img_block)
block_01 = Sprite.new(21 + 60    , 21, img_block)
block_02 = Sprite.new(21 + 60 * 2, 21, img_block)
block_03 = Sprite.new(21 + 60 * 3, 21, img_block)
block_04 = Sprite.new(21 + 60 * 4, 21, img_block)


Window.loop do
  bar.x = Input.mouse_pos_x
  Sprite.draw(walls)

  move(ball, dx, 0)
  if ball === walls
    ball.x -= dx
    dx = -dx
  end

  move(ball, 0, dy)
  if ball === walls
    ball. y -= dy
    dy = -dy
  end

  ball.draw

  block_00.draw
  block_01.draw
  block_02.draw
  block_03.draw
  block_04.draw
end

2-19. ブロックを出す(10個)(block19.rb)
横に10個置くとちょうどぴったりの幅です。
require 'dxruby'

img_bar   = Image.new(100,  20, C_WHITE)
img_hwall = Image.new( 20, 480, C_BLUE)
img_vwall = Image.new(640,  20, C_BLUE)
img_ball  = Image.new( 20,  20).circle_fill(10, 10, 10, C_RED)
img_block = Image.new( 58,  18, C_GREEN)

bar   = Sprite.new(  0, 460, img_bar)
lwall = Sprite.new(  0,   0, img_hwall)
rwall = Sprite.new(620,   0, img_hwall)
twall = Sprite.new(  0,   0, img_vwall)

walls = [bar, lwall, rwall, twall]

ball  =  Sprite.new(300, 400, img_ball)
dx =  2
dy = -2

def move(sprite, speed_x, speed_y)
  sprite.x += speed_x
  sprite.y += speed_y
end

block_00 = Sprite.new(21         , 21, img_block)
block_01 = Sprite.new(21 + 60    , 21, img_block)
block_02 = Sprite.new(21 + 60 * 2, 21, img_block)
block_03 = Sprite.new(21 + 60 * 3, 21, img_block)
block_04 = Sprite.new(21 + 60 * 4, 21, img_block)
block_05 = Sprite.new(21 + 60 * 5, 21, img_block)
block_06 = Sprite.new(21 + 60 * 6, 21, img_block)
block_07 = Sprite.new(21 + 60 * 7, 21, img_block)
block_08 = Sprite.new(21 + 60 * 8, 21, img_block)
block_09 = Sprite.new(21 + 60 * 9, 21, img_block)


Window.loop do
  bar.x = Input.mouse_pos_x
  Sprite.draw(walls)

  move(ball, dx, 0)
  if ball === walls
    ball.x -= dx
    dx = -dx
  end

  move(ball, 0, dy)
  if ball === walls
    ball. y -= dy
    dy = -dy
  end

  ball.draw

  block_00.draw
  block_01.draw
  block_02.draw
  block_03.draw
  block_04.draw
  block_05.draw
  block_06.draw
  block_07.draw
  block_08.draw
  block_09.draw
end

2-20. ブロックを出す(まとめて表示する)(block20.rb)
ブロックを表示させるdrawが10行にもなったので、まとめて描くようにします。
バーと壁を配列wallsにまとめたように、10個のブロックを配列blocksにします。そして、Sprite.drawで一気に表示させます。
require 'dxruby'

img_bar   = Image.new(100,  20, C_WHITE)
img_hwall = Image.new( 20, 480, C_BLUE)
img_vwall = Image.new(640,  20, C_BLUE)
img_ball  = Image.new( 20,  20).circle_fill(10, 10, 10, C_RED)
img_block = Image.new( 58,  18, C_GREEN)

bar   = Sprite.new(  0, 460, img_bar)
lwall = Sprite.new(  0,   0, img_hwall)
rwall = Sprite.new(620,   0, img_hwall)
twall = Sprite.new(  0,   0, img_vwall)

walls = [bar, lwall, rwall, twall]

ball  =  Sprite.new(300, 400, img_ball)
dx =  2
dy = -2

def move(sprite, speed_x, speed_y)
  sprite.x += speed_x
  sprite.y += speed_y
end

block_00 = Sprite.new(21         , 21, img_block)
block_01 = Sprite.new(21 + 60    , 21, img_block)
block_02 = Sprite.new(21 + 60 * 2, 21, img_block)
block_03 = Sprite.new(21 + 60 * 3, 21, img_block)
block_04 = Sprite.new(21 + 60 * 4, 21, img_block)
block_05 = Sprite.new(21 + 60 * 5, 21, img_block)
block_06 = Sprite.new(21 + 60 * 6, 21, img_block)
block_07 = Sprite.new(21 + 60 * 7, 21, img_block)
block_08 = Sprite.new(21 + 60 * 8, 21, img_block)
block_09 = Sprite.new(21 + 60 * 9, 21, img_block)

blocks = [block_00, block_01, block_02, block_03, block_04,
          block_05, block_06, block_07, block_08, block_09]


Window.loop do
  bar.x = Input.mouse_pos_x
  Sprite.draw(walls)

  move(ball, dx, 0)
  if ball === walls
    ball.x -= dx
    dx = -dx
  end

  move(ball, 0, dy)
  if ball === walls
    ball. y -= dy
    dy = -dy
  end

  ball.draw

  Sprite.draw(blocks)
end

2-21. ブロックを出す(まとめて作る)(block21.rb)
ブロックを作る方もまとめて一気に作るようにします。
まず、空の配列blocksを作ります。配列に追加していく<<メソッドを使って、ブロックを1つ作っては配列blocksに追加していきます。
10回繰り返すので、10.times do 〜 endを使って、1回毎にxを増やすことで横位置をずらしたブロックを作ります。(xは 0, 1, 2, ... , 9 と変わっていく)
require 'dxruby'

img_bar   = Image.new(100,  20, C_WHITE)
img_hwall = Image.new( 20, 480, C_BLUE)
img_vwall = Image.new(640,  20, C_BLUE)
img_ball  = Image.new( 20,  20).circle_fill(10, 10, 10, C_RED)
img_block = Image.new( 58,  18, C_GREEN)

bar   = Sprite.new(  0, 460, img_bar)
lwall = Sprite.new(  0,   0, img_hwall)
rwall = Sprite.new(620,   0, img_hwall)
twall = Sprite.new(  0,   0, img_vwall)

walls = [bar, lwall, rwall, twall]

ball  =  Sprite.new(300, 400, img_ball)
dx =  2
dy = -2

def move(sprite, speed_x, speed_y)
  sprite.x += speed_x
  sprite.y += speed_y
end

blocks = []
10.times do |x|
  blocks << Sprite.new(21 + 60 * x, 21, img_block)
end


Window.loop do
  bar.x = Input.mouse_pos_x
  Sprite.draw(walls)

  move(ball, dx, 0)
  if ball === walls
    ball.x -= dx
    dx = -dx
  end

  move(ball, 0, dy)
  if ball === walls
    ball. y -= dy
    dy = -dy
  end

  ball.draw

  Sprite.draw(blocks)
end

2-22. ブロックを出す(2段目も作る)(block22.rb)
2段目のブロックも作っていきます。2段目はyの位置を20大きくします。するとブロックの縦幅は18なので、少し隙間が空きます。
require 'dxruby'

img_bar   = Image.new(100,  20, C_WHITE)
img_hwall = Image.new( 20, 480, C_BLUE)
img_vwall = Image.new(640,  20, C_BLUE)
img_ball  = Image.new( 20,  20).circle_fill(10, 10, 10, C_RED)
img_block = Image.new( 58,  18, C_GREEN)

bar   = Sprite.new(  0, 460, img_bar)
lwall = Sprite.new(  0,   0, img_hwall)
rwall = Sprite.new(620,   0, img_hwall)
twall = Sprite.new(  0,   0, img_vwall)

walls = [bar, lwall, rwall, twall]

ball  =  Sprite.new(300, 400, img_ball)
dx =  2
dy = -2

def move(sprite, speed_x, speed_y)
  sprite.x += speed_x
  sprite.y += speed_y
end

blocks = []
10.times do |x|
  blocks << Sprite.new(21 + 60 * x, 21, img_block)
end

blocks << Sprite.new(21         , 21 + 20, img_block)
blocks << Sprite.new(21 + 60 * 1, 21 + 20, img_block)
blocks << Sprite.new(21 + 60 * 2, 21 + 20, img_block)


Window.loop do
  bar.x = Input.mouse_pos_x
  Sprite.draw(walls)

  move(ball, dx, 0)
  if ball === walls
    ball.x -= dx
    dx = -dx
  end

  move(ball, 0, dy)
  if ball === walls
    ball. y -= dy
    dy = -dy
  end

  ball.draw

  Sprite.draw(blocks)
end

2-23. ブロックを出す(2段目もまとめて作る)(block23.rb)
2段目の作り方も、1段目と同じく10.times do 〜 endを使って書きます。
require 'dxruby'

img_bar   = Image.new(100,  20, C_WHITE)
img_hwall = Image.new( 20, 480, C_BLUE)
img_vwall = Image.new(640,  20, C_BLUE)
img_ball  = Image.new( 20,  20).circle_fill(10, 10, 10, C_RED)
img_block = Image.new( 58,  18, C_GREEN)

bar   = Sprite.new(  0, 460, img_bar)
lwall = Sprite.new(  0,   0, img_hwall)
rwall = Sprite.new(620,   0, img_hwall)
twall = Sprite.new(  0,   0, img_vwall)

walls = [bar, lwall, rwall, twall]

ball  =  Sprite.new(300, 400, img_ball)
dx =  2
dy = -2

def move(sprite, speed_x, speed_y)
  sprite.x += speed_x
  sprite.y += speed_y
end

blocks = []
10.times do |x|
  blocks << Sprite.new(21 + 60 * x, 21, img_block)
end

10.times do |x|
  blocks << Sprite.new(21 + 60 * x, 21 + 20, img_block)
end


Window.loop do
  bar.x = Input.mouse_pos_x
  Sprite.draw(walls)

  move(ball, dx, 0)
  if ball === walls
    ball.x -= dx
    dx = -dx
  end

  move(ball, 0, dy)
  if ball === walls
    ball. y -= dy
    dy = -dy
  end

  ball.draw

  Sprite.draw(blocks)
end

2-24. ブロックを出す(5段目まで作る)(block24.rb)
5段目まで作りました。
require 'dxruby'

img_bar   = Image.new(100,  20, C_WHITE)
img_hwall = Image.new( 20, 480, C_BLUE)
img_vwall = Image.new(640,  20, C_BLUE)
img_ball  = Image.new( 20,  20).circle_fill(10, 10, 10, C_RED)
img_block = Image.new( 58,  18, C_GREEN)

bar   = Sprite.new(  0, 460, img_bar)
lwall = Sprite.new(  0,   0, img_hwall)
rwall = Sprite.new(620,   0, img_hwall)
twall = Sprite.new(  0,   0, img_vwall)

walls = [bar, lwall, rwall, twall]

ball  =  Sprite.new(300, 400, img_ball)
dx =  2
dy = -2

def move(sprite, speed_x, speed_y)
  sprite.x += speed_x
  sprite.y += speed_y
end

blocks = []
10.times do |x|
  blocks << Sprite.new(21 + 60 * x, 21, img_block)
end

10.times do |x|
  blocks << Sprite.new(21 + 60 * x, 21 + 20, img_block)
end

10.times do |x|
  blocks << Sprite.new(21 + 60 * x, 21 + 20 * 2, img_block)
end

10.times do |x|
  blocks << Sprite.new(21 + 60 * x, 21 + 20 * 3, img_block)
end

10.times do |x|
  blocks << Sprite.new(21 + 60 * x, 21 + 20 * 4, img_block)
end


Window.loop do
  bar.x = Input.mouse_pos_x
  Sprite.draw(walls)

  move(ball, dx, 0)
  if ball === walls
    ball.x -= dx
    dx = -dx
  end

  move(ball, 0, dy)
  if ball === walls
    ball. y -= dy
    dy = -dy
  end

  ball.draw

  Sprite.draw(blocks)
end

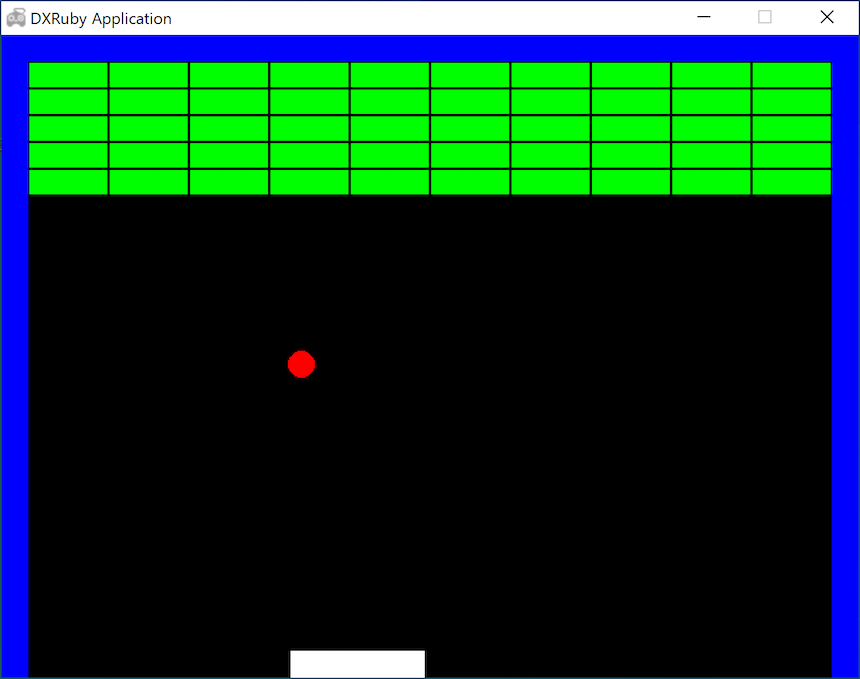
2-25. ブロックを出す(5段目までまとめて作る)(block25.rb)
10.times do 〜 endが5回出てきたので、これをまとめてみます。
10.times do 〜 endの中に、5.times do 〜 endを入れて、2重の形にします。
require 'dxruby'

img_bar   = Image.new(100,  20, C_WHITE)
img_hwall = Image.new( 20, 480, C_BLUE)
img_vwall = Image.new(640,  20, C_BLUE)
img_ball  = Image.new( 20,  20).circle_fill(10, 10, 10, C_RED)
img_block = Image.new( 58,  18, C_GREEN)

bar   = Sprite.new(  0, 460, img_bar)
lwall = Sprite.new(  0,   0, img_hwall)
rwall = Sprite.new(620,   0, img_hwall)
twall = Sprite.new(  0,   0, img_vwall)

walls = [bar, lwall, rwall, twall]

ball  =  Sprite.new(300, 400, img_ball)
dx =  2
dy = -2

def move(sprite, speed_x, speed_y)
  sprite.x += speed_x
  sprite.y += speed_y
end

blocks = []
10.times do |x|
  5.times do |y|
    blocks << Sprite.new(21 + 60 * x, 21 + 20 * y, img_block)
  end
end


Window.loop do
  bar.x = Input.mouse_pos_x
  Sprite.draw(walls)

  move(ball, dx, 0)
  if ball === walls
    ball.x -= dx
    dx = -dx
  end

  move(ball, 0, dy)
  if ball === walls
    ball. y -= dy
    dy = -dy
  end

  ball.draw

  Sprite.draw(blocks)
end
2-26. ブロックとの衝突判定(当たったらブロックは色が変わる)(block26.rb)
ボールとブロックの衝突判定をします。壁やバーと違って、ぶつかったブロックは消す必要があるので、どのブロックにぶつかったか知る必要があります。そこで、===ではなくcheckを使います。
checkは、衝突判定するだけでなく、衝突したものを配列で返します。それを配列coll_xやcoll_yに代入すると、配列に1つでも要素が入っていたら衝突したと判定できます。(同時に複数衝突していたらその数だけ配列に入ります。)
つまり、coll_x[0]やcoll_y[0]に何か入っていたら、ブロックとぶつかっているし、それがぶつかった(0番目の)ブロックです。ここでは、ぶつかったブロックを黄色いブロックに変えることで分かりやすくしています。
require 'dxruby'

img_bar   = Image.new(100,  20, C_WHITE)
img_hwall = Image.new( 20, 480, C_BLUE)
img_vwall = Image.new(640,  20, C_BLUE)
img_ball  = Image.new( 20,  20).circle_fill(10, 10, 10, C_RED)
img_block = Image.new( 58,  18, C_GREEN)
img_block_y = Image.new( 58,  18, C_YELLOW)

bar   = Sprite.new(  0, 460, img_bar)
lwall = Sprite.new(  0,   0, img_hwall)
rwall = Sprite.new(620,   0, img_hwall)
twall = Sprite.new(  0,   0, img_vwall)

walls = [bar, lwall, rwall, twall]

ball  =  Sprite.new(300, 400, img_ball)
dx =  2
dy = -2

def move(sprite, speed_x, speed_y)
  sprite.x += speed_x
  sprite.y += speed_y
end

blocks = []
10.times do |x|
  5.times do |y|
    blocks << Sprite.new(21 + 60 * x, 21 + 20 * y, img_block)
  end
end


Window.loop do
  bar.x = Input.mouse_pos_x
  Sprite.draw(walls)

  move(ball, dx, 0)
  if ball === walls
    ball.x -= dx
    dx = -dx
  end
  coll_x = ball.check(blocks)
  if coll_x[0]
    coll_x[0].image = img_block_y
  end

  move(ball, 0, dy)
  if ball === walls
    ball. y -= dy
    dy = -dy
  end
  coll_y = ball.check(blocks)
  if coll_y[0]
    coll_y[0].image = img_block_y
  end

  ball.draw

  Sprite.draw(blocks)
end

2-27. ブロックとの衝突判定(当たったブロックの色が変わり、跳ね返る)(block27.rb)
ブロックとぶつかったらボールが跳ね返るようにします。
require 'dxruby'

img_bar   = Image.new(100,  20, C_WHITE)
img_hwall = Image.new( 20, 480, C_BLUE)
img_vwall = Image.new(640,  20, C_BLUE)
img_ball  = Image.new( 20,  20).circle_fill(10, 10, 10, C_RED)
img_block = Image.new( 58,  18, C_GREEN)
img_block_y = Image.new( 58,  18, C_YELLOW)

bar   = Sprite.new(  0, 460, img_bar)
lwall = Sprite.new(  0,   0, img_hwall)
rwall = Sprite.new(620,   0, img_hwall)
twall = Sprite.new(  0,   0, img_vwall)

walls = [bar, lwall, rwall, twall]

ball  =  Sprite.new(300, 400, img_ball)
dx =  2
dy = -2

def move(sprite, speed_x, speed_y)
  sprite.x += speed_x
  sprite.y += speed_y
end

blocks = []
10.times do |x|
  5.times do |y|
    blocks << Sprite.new(21 + 60 * x, 21 + 20 * y, img_block)
  end
end


Window.loop do
  bar.x = Input.mouse_pos_x
  Sprite.draw(walls)

  move(ball, dx, 0)
  if ball === walls
    ball.x -= dx
    dx = -dx
  end
  coll_x = ball.check(blocks)
  if coll_x[0]
    coll_x[0].image = img_block_y
    ball.x -= dx
    dx = -dx
  end

  move(ball, 0, dy)
  if ball === walls
    ball. y -= dy
    dy = -dy
  end
  coll_y = ball.check(blocks)
  if coll_y[0]
    coll_y[0].image = img_block_y
    ball. y -= dy
    dy = -dy
  end

  ball.draw

  Sprite.draw(blocks)
end

2-28. 当たったブロックは消える(一瞬色が変わる);一応完成(block28.rb)
ぶつかったブロックを消します。そのためにはvanishを使います。
これで「ブロック崩し」は一応完成です!
require 'dxruby'

img_bar   = Image.new(100,  20, C_WHITE)
img_hwall = Image.new( 20, 480, C_BLUE)
img_vwall = Image.new(640,  20, C_BLUE)
img_ball  = Image.new( 20,  20).circle_fill(10, 10, 10, C_RED)
img_block = Image.new( 58,  18, C_GREEN)
img_block_y = Image.new( 58,  18, C_YELLOW)

bar   = Sprite.new(  0, 460, img_bar)
lwall = Sprite.new(  0,   0, img_hwall)
rwall = Sprite.new(620,   0, img_hwall)
twall = Sprite.new(  0,   0, img_vwall)

walls = [bar, lwall, rwall, twall]

ball  =  Sprite.new(300, 400, img_ball)
dx =  2
dy = -2

def move(sprite, speed_x, speed_y)
  sprite.x += speed_x
  sprite.y += speed_y
end

blocks = []
10.times do |x|
  5.times do |y|
    blocks << Sprite.new(21 + 60 * x, 21 + 20 * y, img_block)
  end
end


Window.loop do
  bar.x = Input.mouse_pos_x
  Sprite.draw(walls)

  move(ball, dx, 0)
  if ball === walls
    ball.x -= dx
    dx = -dx
  end
  coll_x = ball.check(blocks)
  if coll_x[0]
    coll_x[0].image = img_block_y
    coll_x[0].draw     #一瞬色が変わって表示
    coll_x[0].vanish   #消える
    ball.x -= dx
    dx = -dx
  end

  move(ball, 0, dy)
  if ball === walls
    ball. y -= dy
    dy = -dy
  end
  coll_y = ball.check(blocks)
  if coll_y[0]
    coll_y[0].image = img_block_y
    coll_y[0].draw     #一瞬色が変わって表示
    coll_y[0].vanish   #消える
    ball. y -= dy
    dy = -dy
  end

  ball.draw

  Sprite.draw(blocks)
end

応用問題
追加の課題として、いくつか考えてみました。気になったものをやってみましょう。
- A. 「ブロック崩し」を改良・発展させてみよう
- B. クラス・オブジェクト指向を使ってみよう
- C. DXRubyの衝突判定を自作してみよう
- D. なるべく基本命令だけでブロック崩しを作ってみよう
→「ブロック崩し」の追加課題 - noanoa 日々の日記
http://blog.livedoor.jp/noanoa07/archives/2046181.html
A. 「ブロック崩し」を改良・発展させてみよう
「ブロック崩し」を改良・発展させてみましょう。
以下はほんの一例です。各自、自由に発展させてみてください。
A-1. 動作を改善する
作った「ブロック崩し」を動かしてみて、動きが気になるところを直してみましょう。
A-2. タイトルを表示する(block29.rb)
ウィンドウの左上にタイトルを表示してみます。Window.caption =を使います。
require 'dxruby'

GAME = "ブロック崩し" #定数 文字列
ver = 0.1           #変数 数
name = "作者名"      #変数 文字列

Window.caption = GAME + "ゲーム #{ver} by" + name

img_bar   = Image.new(100,  20, C_WHITE)
img_hwall = Image.new( 20, 480, C_BLUE)
img_vwall = Image.new(640,  20, C_BLUE)
img_ball  = Image.new( 20,  20).circle_fill(10, 10, 10, C_RED)
img_block = Image.new( 58,  18, C_GREEN)
img_block_y = Image.new( 58,  18, C_YELLOW)

bar   = Sprite.new(  0, 460, img_bar)
lwall = Sprite.new(  0,   0, img_hwall)
rwall = Sprite.new(620,   0, img_hwall)
twall = Sprite.new(  0,   0, img_vwall)

walls = [bar, lwall, rwall, twall]

ball  =  Sprite.new(300, 400, img_ball)
dx =  2
dy = -2

def move(sprite, speed_x, speed_y)
  sprite.x += speed_x
  sprite.y += speed_y
end

blocks = []
10.times do |x|
  5.times do |y|
    blocks << Sprite.new(21 + 60 * x, 21 + 20 * y, img_block)
  end
end


Window.loop do
  bar.x = Input.mouse_pos_x
  Sprite.draw(walls)

  move(ball, dx, 0)
  if ball === walls
    ball.x -= dx
    dx = -dx
  end
  coll_x = ball.check(blocks)
  if coll_x[0]
    coll_x[0].image = img_block_y
    coll_x[0].draw     #一瞬色が変わって表示
    coll_x[0].vanish   #消える
    ball.x -= dx
    dx = -dx
  end

  move(ball, 0, dy)
  if ball === walls
    ball. y -= dy
    dy = -dy
  end
  coll_y = ball.check(blocks)
  if coll_y[0]
    coll_y[0].image = img_block_y
    coll_y[0].draw     #一瞬色が変わって表示
    coll_y[0].vanish   #消える
    ball. y -= dy
    dy = -dy
  end

  ball.draw

  Sprite.draw(blocks)
end

A-3. 画面に文字を表示する(block30.rb)
画面に文字を表示してみましょう。
Window.draw_font(x位置, y位置, 文字列, font, {:color => 文字色)のように指定します。
残りブロック数を知るには、ブロックの配列blocksに.sizeします。ただし、blocks.sizeの前に、衝突して無効化されたブロックをSprite.cleanで削除しておかなくてはいけません。
require 'dxruby'

GAME = "ブロック崩し" #定数 文字列
ver = 0.1           #変数 数
name = "作者名"      #変数 文字列

Window.caption = GAME + "ゲーム #{ver} by" + name

img_bar   = Image.new(100,  20, C_WHITE)
img_hwall = Image.new( 20, 480, C_BLUE)
img_vwall = Image.new(640,  20, C_BLUE)
img_ball  = Image.new( 20,  20).circle_fill(10, 10, 10, C_RED)
img_block = Image.new( 58,  18, C_GREEN)
img_block_y = Image.new( 58,  18, C_YELLOW)

bar   = Sprite.new(  0, 460, img_bar)
lwall = Sprite.new(  0,   0, img_hwall)
rwall = Sprite.new(620,   0, img_hwall)
twall = Sprite.new(  0,   0, img_vwall)

walls = [bar, lwall, rwall, twall]

ball  =  Sprite.new(300, 400, img_ball)
dx =  2
dy = -2

def move(sprite, speed_x, speed_y)
  sprite.x += speed_x
  sprite.y += speed_y
end

blocks = []
10.times do |x|
  5.times do |y|
    blocks << Sprite.new(21 + 60 * x, 21 + 20 * y, img_block)
  end
end

font = Font.new(24)

Window.loop do
  bar.x = Input.mouse_pos_x
  Sprite.draw(walls)

  move(ball, dx, 0)
  if ball === walls
    ball.x -= dx
    dx = -dx
  end
  coll_x = ball.check(blocks)
  if coll_x[0]
    coll_x[0].image = img_block_y
    coll_x[0].draw     #一瞬色が変わって表示
    coll_x[0].vanish   #消える
    ball.x -= dx
    dx = -dx
  end

  move(ball, 0, dy)
  if ball === walls
    ball. y -= dy
    dy = -dy
  end
  coll_y = ball.check(blocks)
  if coll_y[0]
    coll_y[0].image = img_block_y
    coll_y[0].draw     #一瞬色が変わって表示
    coll_y[0].vanish   #消える
    ball. y -= dy
    dy = -dy
  end

  ball.draw

  Sprite.draw(blocks)

  Sprite.clean(blocks)
  string = "残りブロックは #{blocks.size}個です。"
  puts string
  Window.draw_font(20, 200, string, font, {:color => C_YELLOW})
end
A-4. ゲームオーバー画面を追加する,ESCキーで終了(block31.rb)
ゲームオーバー画面を追加してみます。
ボールのy位置ball_yが画面より下に行ってしまったら(ウィンドウの縦幅480より大きくなったら)、breakでWindow.loop do 〜 endから抜けます。そして、次のWindow.loop do 〜 endが始まり、ここでゲームオーバー画面を表示します。
また、ESCキーが押されたらInput.key_down?(K_ESCAPE)で検出して、やはりbreakでWindow.loop do 〜 endを抜けることでプログラムを終了させるようにします。
require 'dxruby'

GAME = "ブロック崩し" #定数 文字列
ver = 0.1           #変数 数
name = "作者名"      #変数 文字列

Window.caption = GAME + "ゲーム #{ver} by" + name

img_bar   = Image.new(100,  20, C_WHITE)
img_hwall = Image.new( 20, 480, C_BLUE)
img_vwall = Image.new(640,  20, C_BLUE)
img_ball  = Image.new( 20,  20).circle_fill(10, 10, 10, C_RED)
img_block = Image.new( 58,  18, C_GREEN)
img_block_y = Image.new( 58,  18, C_YELLOW)

bar   = Sprite.new(  0, 460, img_bar)
lwall = Sprite.new(  0,   0, img_hwall)
rwall = Sprite.new(620,   0, img_hwall)
twall = Sprite.new(  0,   0, img_vwall)

walls = [bar, lwall, rwall, twall]

ball  =  Sprite.new(300, 400, img_ball)
dx =  2
dy = -2

def move(sprite, speed_x, speed_y)
  sprite.x += speed_x
  sprite.y += speed_y
end

blocks = []
10.times do |x|
  5.times do |y|
    blocks << Sprite.new(21 + 60 * x, 21 + 20 * y, img_block)
  end
end

font = Font.new(24)

Window.loop do
  bar.x = Input.mouse_pos_x
  Sprite.draw(walls)

  move(ball, dx, 0)
  if ball === walls
    ball.x -= dx
    dx = -dx
  end
  coll_x = ball.check(blocks)
  if coll_x[0]
    coll_x[0].image = img_block_y
    coll_x[0].draw     #一瞬色が変わって表示
    coll_x[0].vanish   #消える
    ball.x -= dx
    dx = -dx
  end

  move(ball, 0, dy)
  if ball === walls
    ball. y -= dy
    dy = -dy
  end
  coll_y = ball.check(blocks)
  if coll_y[0]
    coll_y[0].image = img_block_y
    coll_y[0].draw     #一瞬色が変わって表示
    coll_y[0].vanish   #消える
    ball. y -= dy
    dy = -dy
  end

  ball.draw

  Sprite.draw(blocks)

  Sprite.clean(blocks)
  string = "残りブロックは #{blocks.size}個です。"
  Window.draw_font(20, 200, string, font, {:color => C_YELLOW})

  puts ball.y
  if ball.y >= 480
    break                # breakで loopを抜ける
  end
end

Window.loop do
  Window.bgcolor= C_WHITE
  Window.draw_font(200, 200, "ゲームオーバー", font, {:color => C_BLACK})
  Window.draw_font(2000, 230, "(ESCキーで終了)", font, {:color => C_BLACK})
  if Input.key_down?(K_ESCAPE)
    exit                 # exit でプログラムを終了する
  end
end

B. クラス・オブジェクト指向を使ってみよう(block_class_oo.rb)
クラスにまとめたり、オブジェクト指向を使った書き方に変えてみましょう。
クラスやオブジェクト指向については、ここでは説明をしませんが、プログラミングの重要な考え方なので、ぜひ勉強してみてください。
以下に、一例を示します。
→「ブロック崩し」追加課題3;クラス・オブジェクト指向を使ってみよう - noanoa 日々の日記
http://blog.livedoor.jp/noanoa07/archives/2051658.html
# ブロッック崩し
# --------------------------------------------------------------
# Sprite + Class版
# --------------------------------------------------------------
require 'dxruby'

# 棒
class Bar < Sprite
  def initialize(x = 0, y = 460)
    self.x = x
    self.y = y
    self.image = Image.new(100,  20, C_WHITE)
  end
  def update
    self.x = Input.mouse_pos_x
  end
end


# 壁
class Walls < Array
  def initialize
    self << Wall.new(  0, 0,  20, 480)   # 左側
    self << Wall.new(  0, 0, 640,  20)   # 上側
    self << Wall.new(620, 0,  20, 480)   # 右側
  end
  def draw
    Sprite.draw(self)
  end
end

class Wall < Sprite
  def initialize(x, y, dx, dy)
    self.x = x
    self.y = y
    self.image = Image.new(dx, dy, C_WHITE)
  end
end


# ブロック
class Blocks < Array
  def initialize
    colors = [C_BLUE, C_YELLOW, C_WHITE, C_RED, C_GREEN]
    5.times do |y|
      10.times do |x|
        self << Block.new(21 + 60 * x , 21 + 20 * y, colors[y])
      end
    end
  end
  def draw
    self.each do |b|
      b.draw
    end
  end
end

class Block < Sprite
  def initialize(x, y, c)
    self.x = x
    self.y = y
    self.image = Image.new(58, 18, c)
  end
end


# ボール
class Ball < Sprite
  def initialize(x = 300, y = 400)
    self.x = x
    self.y = y
    self.image = Image.new(20, 20).circle_fill(10, 10, 10, C_WHITE)
    @dx =  4
    @dy = -4
  end

  def update(walls, bar, blocks)

    # 横方向への移動
    self.x += @dx

    # 壁または棒に衝突
    if self === walls or self === bar
      self.x -= @dx
      @dx    *= -1
    end

    # ブロックに衝突
    hit = self.check(blocks).first
    if hit != nil
      hit.vanish
      self.x -= @dx
      @dx    *= -1
    end

    # 縦方向への移動
    self.y += @dy

    # 壁または棒に衝突
    if self === walls or self === bar
      self.y -= @dy
      @dy    *= -1
    end

    # ブロックに衝突
    hit = self.check(blocks).first
    if hit != nil
      hit.vanish
      self.y -= @dy
      @dy    *= -1
    end

  end
end


# ブロック崩しゲーム
class Game
  def initialize
    @walls  = Walls.new    # 壁
    @bar    = Bar.new      # 棒
    @ball   = Ball.new     # ボール
    @blocks = Blocks.new   # ブロック
  end

  def play
    Window.loop do
      @walls.draw
      @bar.update
      @bar.draw
      @ball.update(@walls, @bar, @blocks)
      @ball.draw
      @blocks.draw

      break if Input.key_push?(K_ESCAPE)
    end
  end
end


#
# メイン
#
game = Game.new   # ゲーム初期化
game.play         # ゲーム開始

C. DXRubyの衝突判定を自作してみよう
今回作った「ブロック崩し」では、衝突判定に DXRuby の === や check を使いました。
とても便利な機能ですが、自分で作るとしたらどうしたらよいでしょうか?
判定方法を考えてみましょう。
いろいろなやり方が考えられるでしょうが、すぐ思いつくのは以下の3通りです。
a)四角の四隅の座標で判定する
b)円の中心からの距離で判定する
c)色で判定する
これについては、長くなるので別の課題とします。
・DXRuby:「当たり判定」を自分で作ってみよう - Qiita
→ 「ブロック崩し」追加課題1;衝突判定を自作してみよう - noanoa 日々の日記
http://blog.livedoor.jp/noanoa07/archives/2046177.html
D. なるべく基本命令だけでブロック崩しを作ってみよう
RubyやDXRubyは、衝突判定だけでなく、プログラミングに便利な数々の機能を持っています。そのため、わずか100行足らずで「ブロック崩し」ができてしまいました。
もし、それらの便利な機能をなるべく使わず、基本的な機能だけを使って「ブロック崩し」を作ってみるとどうなるでしょうか?
プログラミングの本当の力が試されることになります。
例えば、以下のような基本機能だけを使うとします。
・プログラミングの基礎力をつける:なるべく基本命令だけで作る「ブロック崩し」 on DXRuby - Qiita
- Rubyは、プログラミング言語として最低限の機能
- DXRubyは、ウィンドウの生成、座標(x,y)に点を描く、座標(x,y)の色を取得する、文字の表示、マウス/キー/カーソルキーの状態の取得
これについても、別の課題とします。
→ 「ブロック崩し」追加課題に向けて;コンピュータの世界の下側を見てみよう - noanoa 日々の日記
http://blog.livedoor.jp/noanoa07/archives/2048469.html
→ 「ブロック崩し」追加課題2;なるべく基本命令だけで「ブロック崩し」を作ってみよう - noanoa 日々の日記
http://blog.livedoor.jp/noanoa07/archives/2050752.html