概要
この記事は中学高校生向けプログラミング教室の教材として作ったものを一部改変したものです。
今回の記事は、
・DXRuby:「当たり判定」を自分で作ってみよう - Qiita
● 当たり(衝突)判定の方法
A. 四角形の四隅の座標で判定する
B. 円の中心からの距離で判定する
C. 色で判定する
の内の
C. 色で判定する
になります。

前の記事
・DXRuby:「当たり判定」を自分で作ってみよう B. 円の中心からの距離で判定する - Qiita
次の記事
・プログラミングの基礎力をつける:なるべく基本命令だけで作る「ブロック崩し」 on DXRuby - Qiita
技術解説
- 使用ライブラリ
- 参考サイト
については、上記記事を参照してください。
ソースコード
ライセンス
ソースコード、本解説ともにパブリックドメイン
プログラム解説
C. 色で判定する
→ 「ブロック崩し」追加課題 1c);衝突判定の自作(色) - noanoa 日々の日記
http://blog.livedoor.jp/noanoa07/archives/2052899.html
C-1a. ===を使った準備:判定相手が単独(atari_iro1.rb)
DXRubyのスプライトでは、===を使うと、衝突の有/無でtrue/fasleを返します。
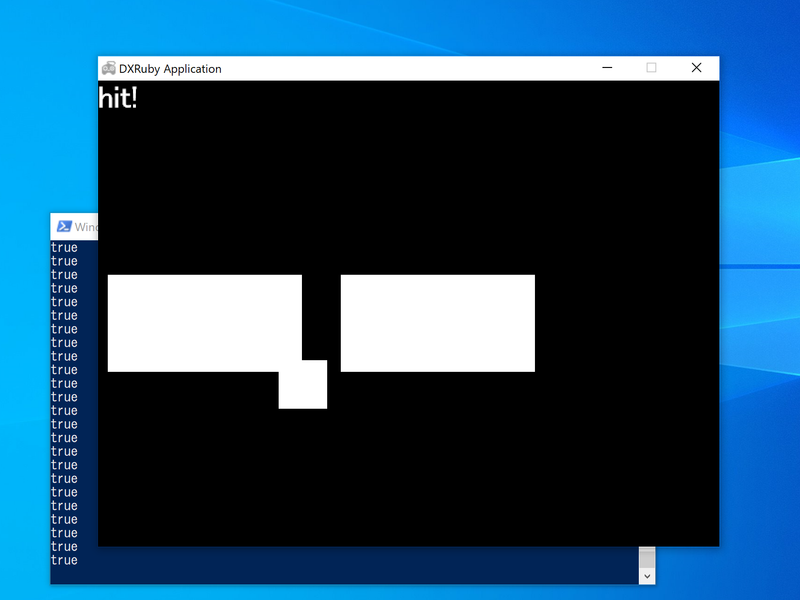
ball(小さい正方形)が、block(大きい長方形)と衝突しているかを===で判定します。
衝突/非衝突 の結果をターミナル(コマンドプロンプト)にtrue/falseで出力しつつ、blockの色も赤/白にします。
また、ウィンドウに衝突時はhit!の文字列を表示します。
require 'dxruby'

image0 = Image.new( 50,  50, C_WHITE)
image1 = Image.new(200, 100, C_WHITE)
image2 = Image.new(200, 100, C_RED)

ball  = Sprite.new(300, 400, image0)
block = Sprite.new(200, 200, image1)

font = Font.new(32)

Window.loop do
  ball.x = Input.mouse_pos_x
  ball.y = Input.mouse_pos_y

  ball.draw

  result = (ball === block)
  p result

  if result
    Window.draw_font(0, 0, "hit!", font)
    block.image = image2
  else
    block.image = image1
  end

  block.draw
end


C-1b. atari_sprite?を自作:判定相手が単独(atari_iro2.rb)
atari_sprite?(jibun, aite)を作って、 衝突の有/無でtrue/fasleを返すようにします。
DXRubyでは、座標(x, y)の色を取得する方法は、イメージ[x, y]しかありませんので、これを使うことにします。これを使えば、
イメージ[x, y] == C_DEFAULT で座標(x,y)が透明かどうかを比較できます。
手順としては、まず、表示するウィンドウと同じサイズの透明な衝突判定用のイメージ$screenを用意します。($でグローバル変数にしています。)$screen[x, y]で座標(x,y)の色を取得して、色がある/透明を衝突している/していないの判定に使います。
この部分をatari?(x,y)として作ってみます。
$screen = Image.new(640, 480)

def atari?(x, y)
  if $screen[x,y] == C_DEFAULT   # 位置(x,y)が透明かどうかで衝突判定
    return false
  end
  true
end
これだけだと、点(x, y)しか判定できないので、スプライト画像を判定できるようにatari_sprite?(jibun, aite)を作ります。
これにはDXRubyのイメージ.draw(x, y, コピーしたいイメージ画像)を使います。これで、あるイメージの上に別のイメージ画像をコピーできます。
def atari_sprite?(jibun, aite)
  x0  = jibun.x
  xx0 = x0 + jibun.image.width

  y0  = jibun.y
  yy0 = y0 + jibun.image.height

  $screen.clear                            # $screenは毎回 clearする
  $screen.draw(aite.x, aite.y, aite.image) # $screenに描画して衝突判定

  atari?(x0,  y0) || atari?(xx0,  y0) ||
  atari?(x0, yy0) || atari?(xx0, yy0)
end
ここで、$screen.clearは、毎回$screenを透明に戻しています。
また、衝突判定は四角形jibunの四隅が透明かどうかで判定しています。
atari?(x0,  y0) || atari?(xx0,  y0) ||
atari?(x0, yy0) || atari?(xx0, yy0)
そして、実際の画面の描画では、この$screenは使わず、普通にウィンドウにスプライト.draw、Window.draw_fontを使います。
それでは、自作したatari_sprite?を使って、===を使ったコードを書き換えてみます。
→ DXRubyリファレンス:API INDEX;class Image :[],draw,clear
http://mirichi.github.io/dxruby-doc/api/Image.html
→ DXRubyリファレンス:API INDEX;class Sprite :image,draw
http://mirichi.github.io/dxruby-doc/api/Sprite.html
→ Re: 描画処理の改善法 - DXRuby 掲示板 322 mirichi(2015/05/31 11:49)
http://dxruby.osdn.jp/bbs_/
require 'dxruby'

$screen = Image.new(640, 480)

def atari?(x, y)
  if $screen[x,y] == C_DEFAULT   # 位置(x,y)が透明かどうかで衝突判定
    return false
  end
  true
end

def atari_sprite?(jibun, aite)
  x0  = jibun.x
  xx0 = x0 + jibun.image.width

  y0  = jibun.y
  yy0 = y0 + jibun.image.height

  $screen.clear                            # $screenは毎回 clearする
  $screen.draw(aite.x, aite.y, aite.image) # $screenに描画して衝突判定

  atari?(x0,  y0) || atari?(xx0,  y0) ||
  atari?(x0, yy0) || atari?(xx0, yy0)
end

image0 = Image.new( 50,  50, C_WHITE)
image1 = Image.new(200, 100, C_WHITE)
image2 = Image.new(200, 100, C_RED)

ball  = Sprite.new(300, 400, image0)
block = Sprite.new(200, 200, image1)

font = Font.new(32)

Window.loop do
  ball.x = Input.mouse_pos_x
  ball.y = Input.mouse_pos_y

  ball.draw

  result = atari_sprite?(ball, block)
  p result

  if result
    Window.draw_font(0, 0, "hit!", font)
    block.image = image2
  else
    block.image = image1
  end

  block.draw
end


C-2a. ===を使った準備:判定相手が配列(atari_iro3.rb)
DXRubyのスプライトでは、===は、相手がスプライトの配列でも、衝突の有/無でtrue/fasleを返します。
ballが、スプライトの配列blocksと衝突しているかを===で判定します。
blocksのいずれかと衝突していたら、ターミナル(コマンドプロンプト)にtrueで出力し、それ以外はfalseを出力します。
また、ウィンドウに衝突時はhit!の文字列を表示します。
require 'dxruby'

image0 = Image.new( 50,  50, C_WHITE)
image1 = Image.new(200, 100, C_WHITE)
image2 = Image.new(200, 100, C_RED)

ball   = Sprite.new(300, 400, image0)

block1 = Sprite.new( 10, 200, image1)
block2 = Sprite.new(250, 200, image1)

blocks = [block1, block2]

font = Font.new(32)

Window.loop do
  ball.x = Input.mouse_pos_x
  ball.y = Input.mouse_pos_y

  ball.draw

  result = (ball === blocks)
  p result

  if result
    Window.draw_font(0, 0, "hit!", font)
  end

  Sprite.draw(blocks)
end


C-2b. atari_array?を自作:判定相手が配列(atari_iro4.rb)
===の代わりに、atari_array?(jibun, array)を自作します。
判定相手の配列の要素を一つずつatari_sprite?で判定していきます。
自作したatari_array?を使って、コードを書き換えます。
require 'dxruby'

$screen = Image.new(640, 480)

def atari?(x, y)
  if $screen[x,y] == C_DEFAULT
    return false
  end
  true
end

def atari_sprite?(jibun, aite)
  x0  = jibun.x
  xx0 = x0 + jibun.image.width

  y0  = jibun.y
  yy0 = y0 + jibun.image.height

  $screen.clear
  $screen.draw(aite.x, aite.y, aite.image)

  atari?(x0,  y0) || atari?(xx0,  y0) ||
  atari?(x0, yy0) || atari?(xx0, yy0)
end

def atari_array?(jibun, array)
  array.each do |aite|
    return true if atari_sprite?(jibun, aite)
  end
  false
end

image0 = Image.new( 50,  50, C_WHITE)
image1 = Image.new(200, 100, C_WHITE)
image2 = Image.new(200, 100, C_RED)

ball   = Sprite.new(300, 400, image0)

block1 = Sprite.new( 10, 200, image1)
block2 = Sprite.new(250, 200, image1)

blocks = [block1, block2]

font = Font.new(32)

Window.loop do
  ball.x = Input.mouse_pos_x
  ball.y = Input.mouse_pos_y

  ball.draw

  result = atari_array?(ball, blocks)
  p result

  if result
    Window.draw_font(0, 0, "hit!", font)
  end

  Sprite.draw(blocks)
end


C-3a. checkを使った準備(atari_iro5.rb)
DXRubyの===や、自作したatari_array?では、どの相手に衝突したかは分かりませんでした。
一方、DXRubyのスプライトではcheckを使うと、衝突している相手すべてを配列に入れて返します。(衝突していない時は、何も入ってない配列を返す)
この配列をarrayとすると、0番目のarray.first(array[0]でも同じ)が最初に衝突した相手です。また、array.firstに何か入っていれば衝突している、空(nil)ならば衝突していないという、当たり判定にも使えます。
→ DXRubyリファレンス:Spriteを使うためのチュートリアル;衝突したオブジェクトを取得する
http://mirichi.github.io/dxruby-doc/tutorial/sprite.html
→ DXRubyリファレンス:API INDEX;Sprite;check
http://mirichi.github.io/dxruby-doc/api/Sprite_23check.html
プログラムでは、ballがblocksのどれに最初に衝突しているかを check.firstで判定します。
最初に衝突しているブロックをターミナル(コマンドプロンプト)に出力し、そのブロックを赤色にします。それ以外はnilを出力します。
また、ウィンドウに衝突時はhit!の文字列を表示します。
require 'dxruby'

image0 = Image.new( 50,  50, C_WHITE)
image1 = Image.new(200, 100, C_WHITE)
image2 = Image.new(200, 100, C_RED)

ball   = Sprite.new(300, 400, image0)

block1 = Sprite.new( 10, 200, image1)
block2 = Sprite.new(250, 200, image1)

blocks = [block1, block2]

font = Font.new(32)

Window.loop do
  ball.x = Input.mouse_pos_x
  ball.y = Input.mouse_pos_y

  ball.draw

  col = ball.check(blocks).first
  p col

  if col
    Window.draw_font(0, 0, "hit!", font)
    col.image = image2
    Sprite.draw(blocks)
    col.image = image1
  else
    Sprite.draw(blocks)
  end
end


C-3b. atari_arrayを自作(atari_iro6.rb)
ぶつかった相手は最初のものだけ分かればよいので、DXRubyのcheck.first相当のatari_arrayを自作します。
つまり、atari_arrayは、衝突していないとnilを返し、衝突すると "ぶつかった最初のもの" を返します。
方法は、判定相手の配列の要素を一つずつatari?で判定していき、最初に衝突している要素を返します。
自作したatari_arrayを使って、コードを書き換えます。
require 'dxruby'

$screen = Image.new(640, 480)

def atari?(x, y)
  if $screen[x,y] == C_DEFAULT
    return false
  end
  true
end

def atari_sprite?(jibun, aite)
  x0  = jibun.x
  xx0 = x0 + jibun.image.width

  y0  = jibun.y
  yy0 = y0 + jibun.image.height

  $screen.clear
  $screen.draw(aite.x, aite.y, aite.image)

  atari?(x0,  y0) || atari?(xx0,  y0) ||
  atari?(x0, yy0) || atari?(xx0, yy0)
end

def atari_array(jibun, array)
  array.each do |aite|
    return aite if atari_sprite?(jibun, aite)
  end
  nil
end

image0 = Image.new( 50,  50, C_WHITE)
image1 = Image.new(200, 100, C_WHITE)
image2 = Image.new(200, 100, C_RED)

ball   = Sprite.new(300, 400, image0)

block1 = Sprite.new( 10, 200, image1)
block2 = Sprite.new(250, 200, image1)

blocks = [block1, block2]

font = Font.new(32)

Window.loop do
  ball.x = Input.mouse_pos_x
  ball.y = Input.mouse_pos_y

  ball.draw

  col = atari_array(ball, blocks)
  p col

  if col
    Window.draw_font(0, 0, "hit!", font)
    col.image = image2
    Sprite.draw(blocks)
    col.image = image1
  else
    Sprite.draw(blocks)
  end
end


C-4. 自作の当たり判定(色)をSpriteクラスのメソッドにする(atari_iro7.rb)
元の===とcheckは、Spriteクラスのメソッド(命令)なので、書き方としては、ball.check(blocks)のようになります。
自作のatari_arrayも同じような書き方になるように、Spriteクラスのメソッドにしてみます。
クラスやメソッドについての説明はここでは説明を省きますので、詳しくはRubyのテキストを見てください。
クラスメソッドを追加する方法は簡単で、以下のようにします。
class Sprite
  def 追加したいメソッド
    #追加したいメソッドの内容
  end
end
Spriteクラスにatari?とatari_array追加します。
ちなみに、jibun(自分)に相当するものは、selfと書きます。
class Sprite
  def atari?(x, y)
    if $screen[x,y] == C_DEFAULT
      return false
    end
    true
  end

  def atari_sprite?(aite)
    x0  = self.x
    xx0 = x0 + self.image.width

    y0  = self.y
    yy0 = y0 + self.image.height

    $screen.clear
    $screen.draw(aite.x, aite.y, aite.image)

    atari?(x0,  y0) || atari?(xx0,  y0) ||
    atari?(x0, yy0) || atari?(xx0, yy0)
  end

  def atari_array(array)
    array.each do |aite|
      return aite if atari_sprite?(aite)
    end
    nil
  end
end
これで、クラスメソッドになったので、今までのatari_array(ball, blocks)という書き方ではなく、ball.atari_array(blocks)というように書くことができるようになりました。
require 'dxruby'

$screen = Image.new(640, 480)

class Sprite
    def atari?(x, y)
      if $screen[x,y] == C_DEFAULT
        return false
      end
      true
    end

    def atari_sprite?(aite)
      x0  = self.x
      xx0 = x0 + self.image.width

      y0  = self.y
      yy0 = y0 + self.image.height

      $screen.clear
      $screen.draw(aite.x, aite.y, aite.image)

      atari?(x0,  y0) || atari?(xx0,  y0) ||
      atari?(x0, yy0) || atari?(xx0, yy0)
    end

    def atari_array(array)
      array.each do |aite|
        return aite if atari_sprite?(aite)
      end
      nil
    end
end

image0 = Image.new( 50,  50, C_WHITE)
image1 = Image.new(200, 100, C_WHITE)
image2 = Image.new(200, 100, C_RED)

ball   = Sprite.new(300, 400, image0)

block1 = Sprite.new( 10, 200, image1)
block2 = Sprite.new(250, 200, image1)

blocks = [block1, block2]

font = Font.new(32)

Window.loop do
  ball.x = Input.mouse_pos_x
  ball.y = Input.mouse_pos_y

  ball.draw

  col = ball.atari_array(blocks)
  p col

  if col
    Window.draw_font(0, 0, "hit!", font)
    col.image = image2
    Sprite.draw(blocks)
    col.image = image1
  else
    Sprite.draw(blocks)
  end
end


C-5. 自作の当たり判定(色)を使ったブロック崩し(atari_iro8.rb)
「ブロック崩し」のプログラムblock28.rbを、自作のatari_arrayに書き換えてみましょう。
元の===とcheck.firstを同じ動きをしているのがわかると思います。
require 'dxruby'

$screen = Image.new(640, 480)

class Sprite
    def atari?(x, y)
      if $screen[x,y] == C_DEFAULT
        return false
      end
      true
    end

    def atari_sprite?(aite)
      x0  = self.x
      xx0 = x0 + self.image.width

      y0  = self.y
      yy0 = y0 + self.image.height

      $screen.clear
      $screen.draw(aite.x, aite.y, aite.image)

      atari?(x0,  y0) || atari?(xx0,  y0) ||
      atari?(x0, yy0) || atari?(xx0, yy0)
    end

    def atari_array(array)
      array.each do |aite|
        return aite if atari_sprite?(aite)
      end
      nil
    end
end

img_bar   = Image.new(100,  20, C_WHITE)
img_hwall = Image.new( 20, 480, C_BLUE)
img_vwall = Image.new(640,  20, C_BLUE)
img_ball  = Image.new( 20,  20).circle_fill(10, 10, 10, C_RED)
img_block = Image.new( 58,  18, C_GREEN)
img_block_y = Image.new( 58,  18, C_YELLOW)

bar   = Sprite.new(  0, 460, img_bar)
lwall = Sprite.new(  0,   0, img_hwall)
rwall = Sprite.new(620,   0, img_hwall)
twall = Sprite.new(  0,   0, img_vwall)

walls = [bar, lwall, rwall, twall]

ball  =  Sprite.new(300, 400, img_ball)
dx =  2
dy = -2

def move(sprite, speed_x, speed_y)
  sprite.x += speed_x
  sprite.y += speed_y
end

blocks = []
10.times do |x|
  5.times do |y|
    blocks << Sprite.new(21 + 60 * x, 21 + 20 * y, img_block)
  end
end


Window.loop do
  bar.x = Input.mouse_pos_x
  Sprite.draw(walls)

  move(ball, dx, 0)
  if ball.atari_array(walls)
    ball.x -= dx
    dx = -dx
  end
  coll_x = ball.atari_array(blocks)
  if coll_x
    coll_x.image = img_block_y
    coll_x.draw     #一瞬色が変わって表示
    coll_x.vanish   #消える
    ball.x -= dx
    dx = -dx
  end

  move(ball, 0, dy)
  if ball.atari_array(walls)
    ball. y -= dy
    dy = -dy
  end
  coll_y = ball.atari_array(blocks)
  if coll_y
    coll_y.image = img_block_y
    coll_y.draw     #一瞬色が変わって表示
    coll_y.vanish   #消える
    ball. y -= dy
    dy = -dy
  end

  ball.draw

  Sprite.draw(blocks)
end

参考
プログラミング初心者向け:DXRubyで 1ステップずつ作っていく「ブロック崩し」 - Qiita
で作った「ブロック崩し」のプログラムです。
require 'dxruby'

img_bar   = Image.new(100,  20, C_WHITE)
img_hwall = Image.new( 20, 480, C_BLUE)
img_vwall = Image.new(640,  20, C_BLUE)
img_ball  = Image.new( 20,  20).circle_fill(10, 10, 10, C_RED)
img_block = Image.new( 58,  18, C_GREEN)
img_block_y = Image.new( 58,  18, C_YELLOW)

bar   = Sprite.new(  0, 460, img_bar)
lwall = Sprite.new(  0,   0, img_hwall)
rwall = Sprite.new(620,   0, img_hwall)
twall = Sprite.new(  0,   0, img_vwall)

walls = [bar, lwall, rwall, twall]

ball  =  Sprite.new(300, 400, img_ball)
dx =  2
dy = -2

def move(sprite, speed_x, speed_y)
  sprite.x += speed_x
  sprite.y += speed_y
end

blocks = []
10.times do |x|
  5.times do |y|
    blocks << Sprite.new(21 + 60 * x, 21 + 20 * y, img_block)
  end
end


Window.loop do
  bar.x = Input.mouse_pos_x
  Sprite.draw(walls)

  move(ball, dx, 0)
  if ball === walls
    ball.x -= dx
    dx = -dx
  end
  coll_x = ball.check(blocks)
  if coll_x[0]
    coll_x[0].image = img_block_y
    coll_x[0].draw     #一瞬色が変わって表示
    coll_x[0].vanish   #消える
    ball.x -= dx
    dx = -dx
  end

  move(ball, 0, dy)
  if ball === walls
    ball. y -= dy
    dy = -dy
  end
  coll_y = ball.check(blocks)
  if coll_y[0]
    coll_y[0].image = img_block_y
    coll_y[0].draw     #一瞬色が変わって表示
    coll_y[0].vanish   #消える
    ball. y -= dy
    dy = -dy
  end

  ball.draw

  Sprite.draw(blocks)
end
