はじめに
Apache2.4で自己署名証明書(※いわゆるオレオレ証明書)を使って、SSL(TLS)を有効化する方法をまとめてみました。
本番環境では当然使えない方法となりますが、自宅サーバーで学習する時や開発環境では使える方法なのではないかと思います。
テストに使用した環境
ハードウェアについては今回の手順とは直接関係ありませんが、念のため記載しておきました。
- CPU
- Kabylake: Pentium G4560
- マザーボード:ASRock H110M-STX
- メモリ:8GB(4GB×2枚)
- ストレージ:256GB SSD(NVMe)
- OS
- CentOS 7.8(2003)
- Apache
- Apache-2.4.6
前提となる設定
- Apacheがインストールされていること。
- Apacheが起動できる状態であること。
- 事前に設定ファイル(httpd.confなど)を編集した場合は要注意。
- SELinuxが停止かつ無効化(disabled)されていること。
- 今回は自宅用、あるいは開発用ということで、SELinuxを停止させておきます。
SSL(TLS)を有効化するための手順
1. HTTPS通信に必要なソフトウェアのインストール
- OpenSSLは、SSLおよびTLSを実装したライブラリで、SSL(TLS)を有効化するのに必須のモジュールとなります。
- mod_sslは、ApacheでSSLおよびTLSをサポートするために提供されているモジュールです。
[root@akagi ~]# yum install openssl
[root@akagi ~]# yum install mod_ssl
2. 作業用のフォルダに移動
-
/rootなどではサーバー証明書を正常に作成できないため、/etc/pki/tls/certsに移動します。 -
/usr/local/ssl以下を使っている記事も見られますが、Apache2.4をRPMでインストールした場合にはこのフォルダが存在しませんでした。
[root@akagi ~]# cd /etc/pki/tls/certs/
3. 秘密鍵の作成
- opensslコマンドで秘密鍵を作成します。
[root@akagi certs]# openssl genrsa > server.key
Generating RSA private key, 2048 bit long modulus
................................................+++
....+++
e is 65537 (0x10001)
4. 公開鍵の作成
- 再びopensslコマンドを使って、今度は公開鍵を作成します。
- 国名、都道府県名、市町村名、組織名(会社名)、部署名、メールアドレスなど様々な情報を要求されますが、今回は「オレオレ証明書」なので適当な値を入力します。
[root@akagi certs]# openssl req -new -key server.key > server.csr
You are about to be asked to enter information that will be incorporated
into your certificate request.
What you are about to enter is what is called a Distinguished Name or a DN.
There are quite a few fields but you can leave some blank
For some fields there will be a default value,
If you enter '.', the field will be left blank.
-----
Country Name (2 letter code) [XX]:JP
State or Province Name (full name) []:Tokyo
Locality Name (eg, city) [Default City]:Chiyoda
Organization Name (eg, company) [Default Company Ltd]:XYZ Company
Organizational Unit Name (eg, section) []:Development Dept.
Common Name (eg, your name or your server's hostname) []:192.168.10.240
Email Address []:nkojima@xyz.co.jp

Please enter the following 'extra' attributes
to be sent with your certificate request
A challenge password []:
An optional company name []:
5. サーバー証明書(自己署名証明書)の作成
- opensslコマンドを使って、さらにサーバー証明書を作成します。
[root@akagi certs]# openssl x509 -req -signkey server.key < server.csr > server.crt
Signature ok
subject=/C=JP/ST=Tokyo/L=Chiyoda/O=XYZ Company/OU=Development Dept./CN=192.168.10.240/emailAddress=nkojima@xyz.co.jp
Getting Private key
6. 秘密鍵のコピー
- 公開鍵をサーバー証明書を作成した後、秘密鍵を
/etc/pki/tls/privateにコピーしました。 - 秘密鍵の置き場所によっては、Apacheが秘密鍵を見つけられずに起動に失敗しました。
[root@akagi certs]# cp -a server.key ../private/
7. ssl.confの修正
- 編集前に
ssl.confをコピーしてオリジナルのssl.confを保存した後、以下の4ヶ所を修正しました。 - セキュリティ上、TLS1.2以下はNGというケースが増えてきているので、TLS1.2以上に対応するようにしています。
- オレオレ証明書を使っている人が言うことではありませんが...
★サーバー名の変更
ServerName www.example.com:443
↓
ServerName 192.168.10.240:443

★TLS1.2以上に対応
SSLProtocol all -SSLv2 -SSLv3
↓
SSLProtocol +TLSv1.2

★証明書のパス
SSLCertificateFile /etc/pki/tls/certs/localhost.crt
↓
SSLCertificateFile /etc/pki/tls/certs/server.crt

★秘密鍵のパス
SSLCertificateKeyFile /etc/pki/tls/private/localhost.key
↓
SSLCertificateKeyFile /etc/pki/tls/certs/server.key
8. Apacheの再起動
- Apacheが正常に再起動できれば、SSL(TLS)が有効化されているはずです。
[root@akagi certs]# systemctl restart httpd
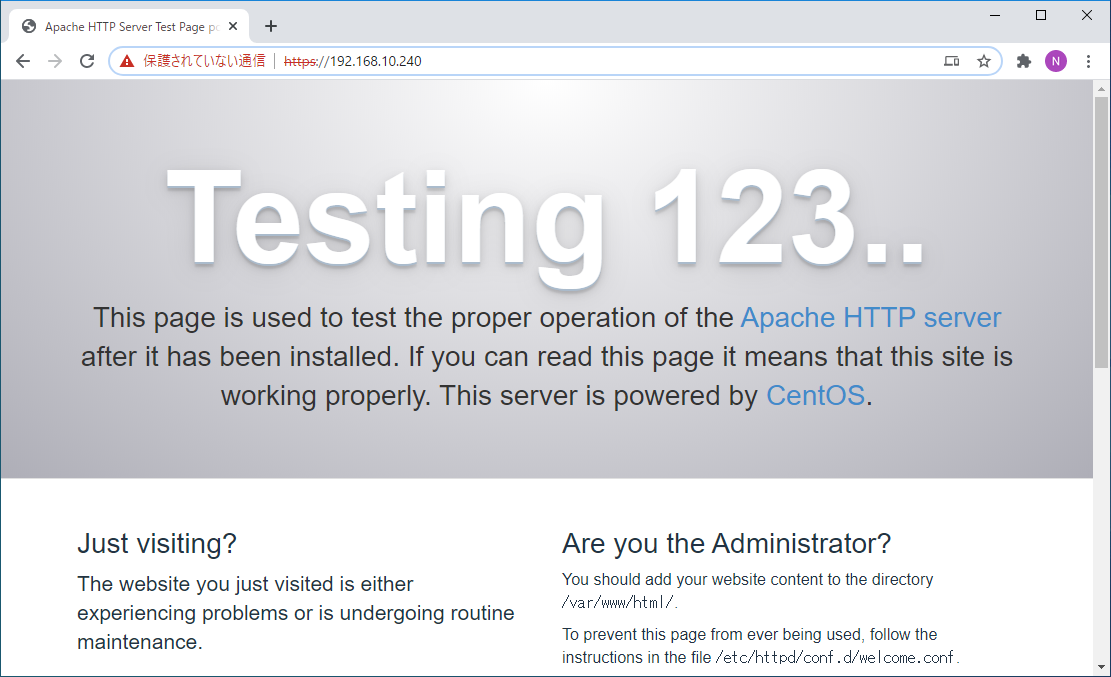
作業後の状態
- 以下のスクリーンショットのように、当該サーバーにHTTPSで接続できますが、ブラウザのアドレスバーに「保護されていない通信」と警告が表示されます。
