はじめに
サーバに配置したAsset BundleをAddressableに読み込む方法についてです。
Addressable Assets System(AAS)はUnity2018.2以降でpreview機能として提供されており、現時点での最新バージョンは1.1.4 previewです。
あくまで導入と実装が目的なので、ここではAddressableの詳しい仕様については書きません。
気になる方や内部構造を深く知りたい方はこちらの方々の記事をご覧ください。
- Addressable Assets Systemを完全に理解する
- 【Unite Tokyo 2018】そろそろ楽がしたい!新アセットバンドルワークフロー&リソースマネージャー詳細解説 (Unite Tokyo 2018 YouTube動画)
実行環境
Windows10 64bit, Unity2018.3.3f1, Addressable Assets System 1.1.4-preview, VirtualBox CentOS7, PuTTY
おおまかな流れ
- Unityでビルドして.bundleファイルを作成
- サーバに配置
- Unityからサーバ上のAssetBundleにリモートアクセス、読み込む
Unity側の操作
Addressable Assets Systemの導入
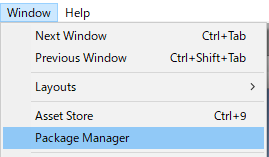
① UnityEditorメニューのWindow->Package Managerを開く
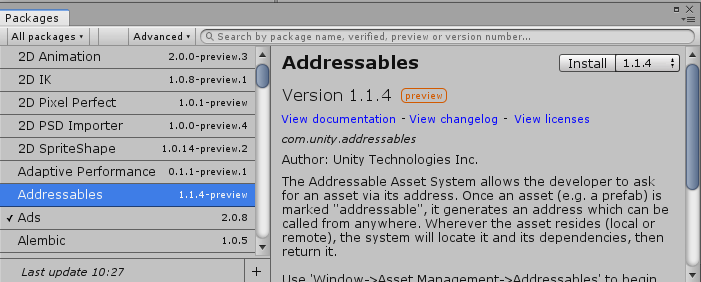
② Advanced->Show Preview Packageを押してメニューを開く

③ Addressableという項目を開き、バージョン最新(1.1.4)でInstallボタンを押す
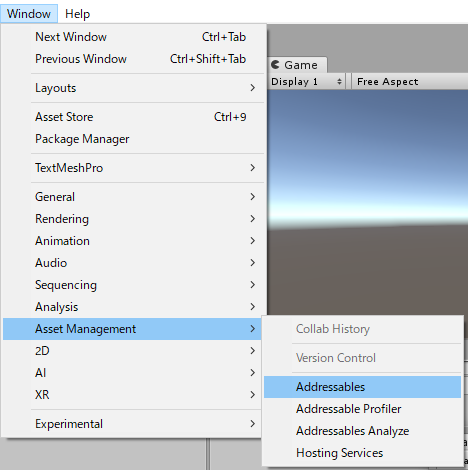
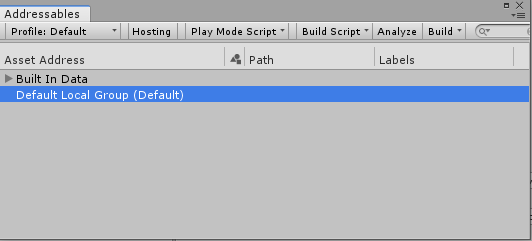
④ インストールが完了したら、Window->Asset Management->Addressablesが追加されるので開く
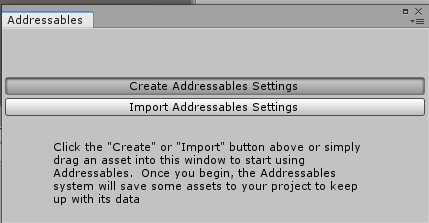
⑤ Create Addressables Settingを押す
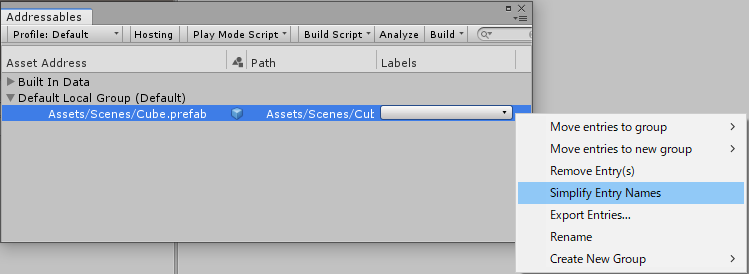
⑥ Default Local Groupを右クリックする
⑦ Simplify Entry Nameをクリックしてパスを省略形にする(お好みで)
スクリプトの作成
① 適当にPrefabを作る
② 適当にスクリプトを作成し、オブジェクトにアタッチする
(こちらではAddressableInstantiateというスクリプトを生成しました)
③ 先ほど作ったPrefabをInspectorの「None(AddressableAsset)」にアタッチする

② 先ほどのスクリプトに以下のコードを書く
using UnityEngine;
using UnityEngine.AddressableAssets;
using UnityEngine.ResourceManagement.AsyncOperations;

public class AddressableInstantiate : MonoBehaviour
{
    public AssetReference m_Ref;
    GameObject m_Result = null;

    private void Start() {
        Addressables.LoadAssetAsync<GameObject>(m_Ref).Completed += OnLoadDone;
    }

    void OnLoadDone(AsyncOperationHandle<GameObject> handle) {
        if (handle.Status == AsyncOperationStatus.Succeeded) {
            m_Result = handle.Result;
            m_Result = Instantiate(m_Result, Vector3.zero, Quaternion.identity);
        }
    }
}
AddressableAssetsSystemの設定
① Assets/AddressableAssetsData/AssetGroups/Default Loacal Groupを開く
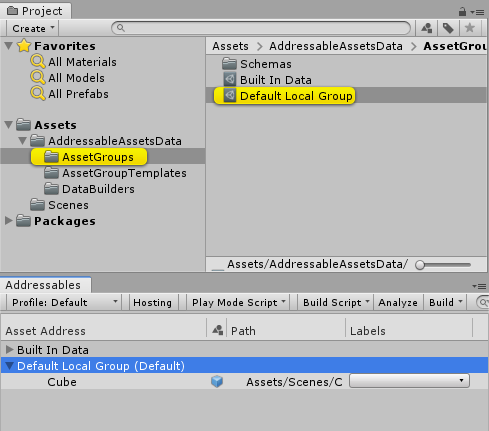
② 「Build Path」と「Load Path」のプルダウンメニューから、それぞれ「RemoteBuildPath」「RemoteLoadPath」に変更
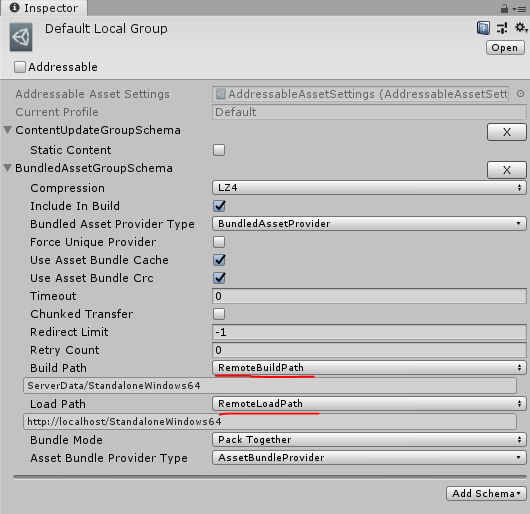
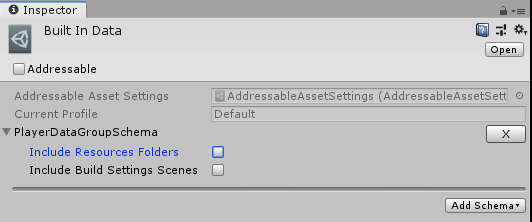
③ Assets/AddressableAssetsData/AssetGroups/Built In Dataを開く
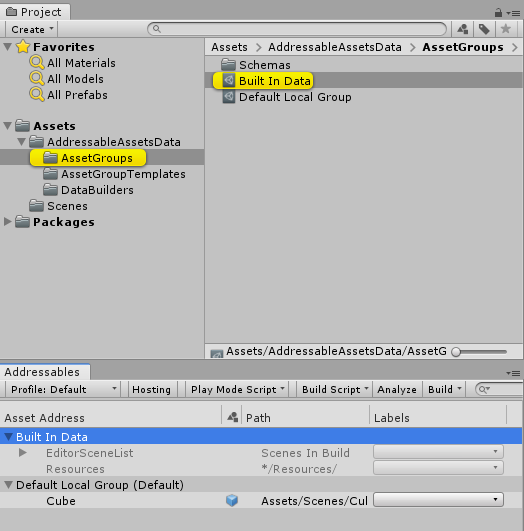
④ 「Include Resources Folders」と「Include Build Setting Scenes」のチェックを外す
※こちらの環境では④の手順を行わないでビルドすると以下のようなエラーが発生しました
参考:https://forum.unity.com/threads/nullreferenceexception-photon-bolt-create-errors-when-building.703850/

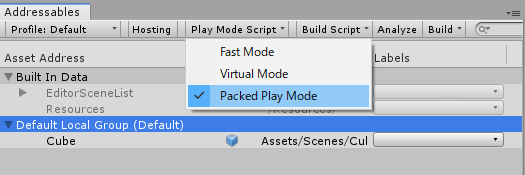
⑤ Play Mode Script->Packed Play Modeを選択する
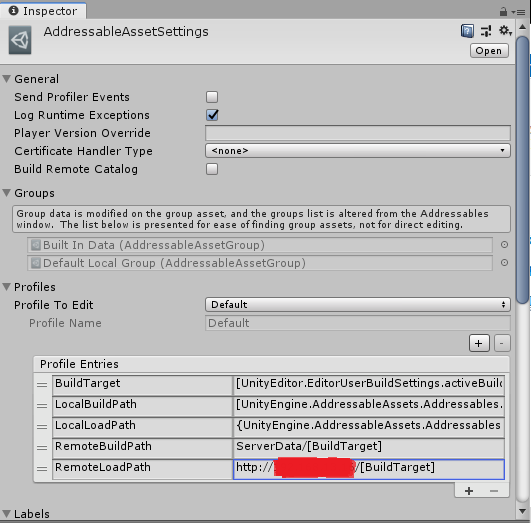
⑥ Assets/AddressableAssetsData/AddressableAssetSettingsを開き、「RemoteLoadPath」の値をローカルサーバのアドレスに変更する
⑦ Build->Build Player Contentを押してビルドをする

⑧ 「Unityのプロジェクトパス/ServerData」の中にビルド後に出力された.bandleデータがあることを確認する
サーバ側の操作
.bundleデータを配置する
こちらではVirtualBoxでCentOS7を動かしてローカルサーバに配置しました。
環境ごとに微妙に操作が違う箇所もあると思いますが、おおまなか流れは共通だと思います。
① サーバを起動し公開ディレクトリに移動
② 公開ディレクトリに「StandaloneWindows64」ディレクトリを作成
> mkdir /var/www/html/StandaloneWindows64
③ 作成したディレクトリにビルド後のファイル類を移動
④ 実行権限の変更を行う
> sudo chmod 777 /var/www/html/StandaloneWindows64/*
※補足:StandaloneWindows64は[UnityEditor.EditorUserBuildSettings.activeBuildTarget]と等しく、
下画像の黄色で囲った部分がそれと対応しています。
今回はPCでテストを行ったためStandaloneWindows64となっています。

公開ディレクトリにファイルを配置していざUnityで実行すると、パスが解決できなかったり、アクセス権がないために取得できないなど、ここが一番ひっかかるポイントが多いと思います。
最後に
いかがだったでしょうか。
実装が成功するとリモートからPrefab Bundleを読み込み、InstantiateしてSceneに表示される様子が確認できると思います。