tl; dr
- RADIUS を用意しましょう
- google-authenticator-libpam を認証に利用しましょう
- Directory Service のセキュリティグループを確認しよう
概要
久しぶりの投稿です。
ご時世的にリモートワークに対応できるようにしておかないとダメになってきましたね。
弊社も「リモートワークをするんだ!(ドンッ!!!!!!」って言い始めたんですよ。
で、「AWS を使っているなら VDI サービスの WorkSpaces を利用しようじゃないか」みたいな話で進めて、利用できるようにしました。
弊社では、WorkSpaces の認証に MFA(Multi-Factor Authentication) を必須にしたい。という要望を受けましたので、用意しました。
その手順を公開しますので、どこかで役立てば幸いです。
導入手順
RADIUS サーバの用意
Azure MFA みたいな SaaS 型の認証サーバが利用できるならそっちが楽ですよ。
弊社はケチお金がないので、FreeRADIUS サーバを用意しました。
適用な Amazon Linux 2 を用意して、以下のようにインストールします。
以降、すべての手順は root ユーザで実行しています。
amazon-linux-extras enable epel
yum -y install freeradius freeradius-utils git gcc pam-devel qrencode qrencode-libs qrencode-devel autoconf automake libtool
google-authenticator-libpam の用意
MFA が必須ということで、前職の時に使ってた google-authenticator-libpam を利用することにしました。
以下の手順を実行します。
git clone https://github.com/google/google-authenticator-libpam.git

cd google-authenticator-libpam/
./bootstrap.sh
./configure
make && make install
cp /usr/local/lib/security/pam_google_authenticator.so /usr/lib64/security
FreeRADIUS 設定
まずは、専用グループを作成します。
groupadd radius-enabled
次に各種設定ファイルに手を入れます。
# 438-439行目あたり
user = radiusd
group = radiusd

↓

user = root
group = root
# ファイル末尾へ追記。中身は環境に合わせて書き換えて
client hogegroup {
    ipaddr     = xxx.xxx.xxx.xxx
    netmask    = yy
    secret     = hogeraccho
    short-name = hogegroup
}
# 513行目あたり
# pam

↓

pam
# コメントアウトして新しい設定を追記してる
%PAM-1.0
auth       include     password-auth
account    required    pam_nologin.so
account    include     password-auth
password   include     password-auth
session    include     password-auth

↓

# %PAM-1.0
# auth       include     password-auth
# account    required    pam_nologin.so
# account    include     password-auth
# password   include     password-auth
# session    include     password-auth
auth requisite /usr/local/lib/security/pam_google_authenticator.so
account required pam_permit.so
session required pam_permit.so
DEFAULT        Group == "disabled", Auth-Type := Reject
               Reply-Message = "Your account has been disabled."
↓

# DEFAULT        Group == "disabled", Auth-Type := Reject
#               Reply-Message = "Your account has been disabled."
DEFAUTL        Group != "radius-enabled", Auth-Type := Reject
               Reply-Message = "Your account has been disabled."
DEFAULT        Auth-Type := PAM
ln -s /etc/raddb/mods-available/pam /etc/raddb/mods-enabled/pam
ここまで終わったら、RADIUS サーバを起動します。
systemctl enabled radiusd
systemctl start radiusd
AWS Directory Service の用意
弊社は既存の AD を利用するので、AD Connector を用意しました。
DS を作成後、「ネットワークとセキュリティ」設定から多要素認証を有効化します。
すると、下図のような画面になりますので、必要項目を埋めてください。
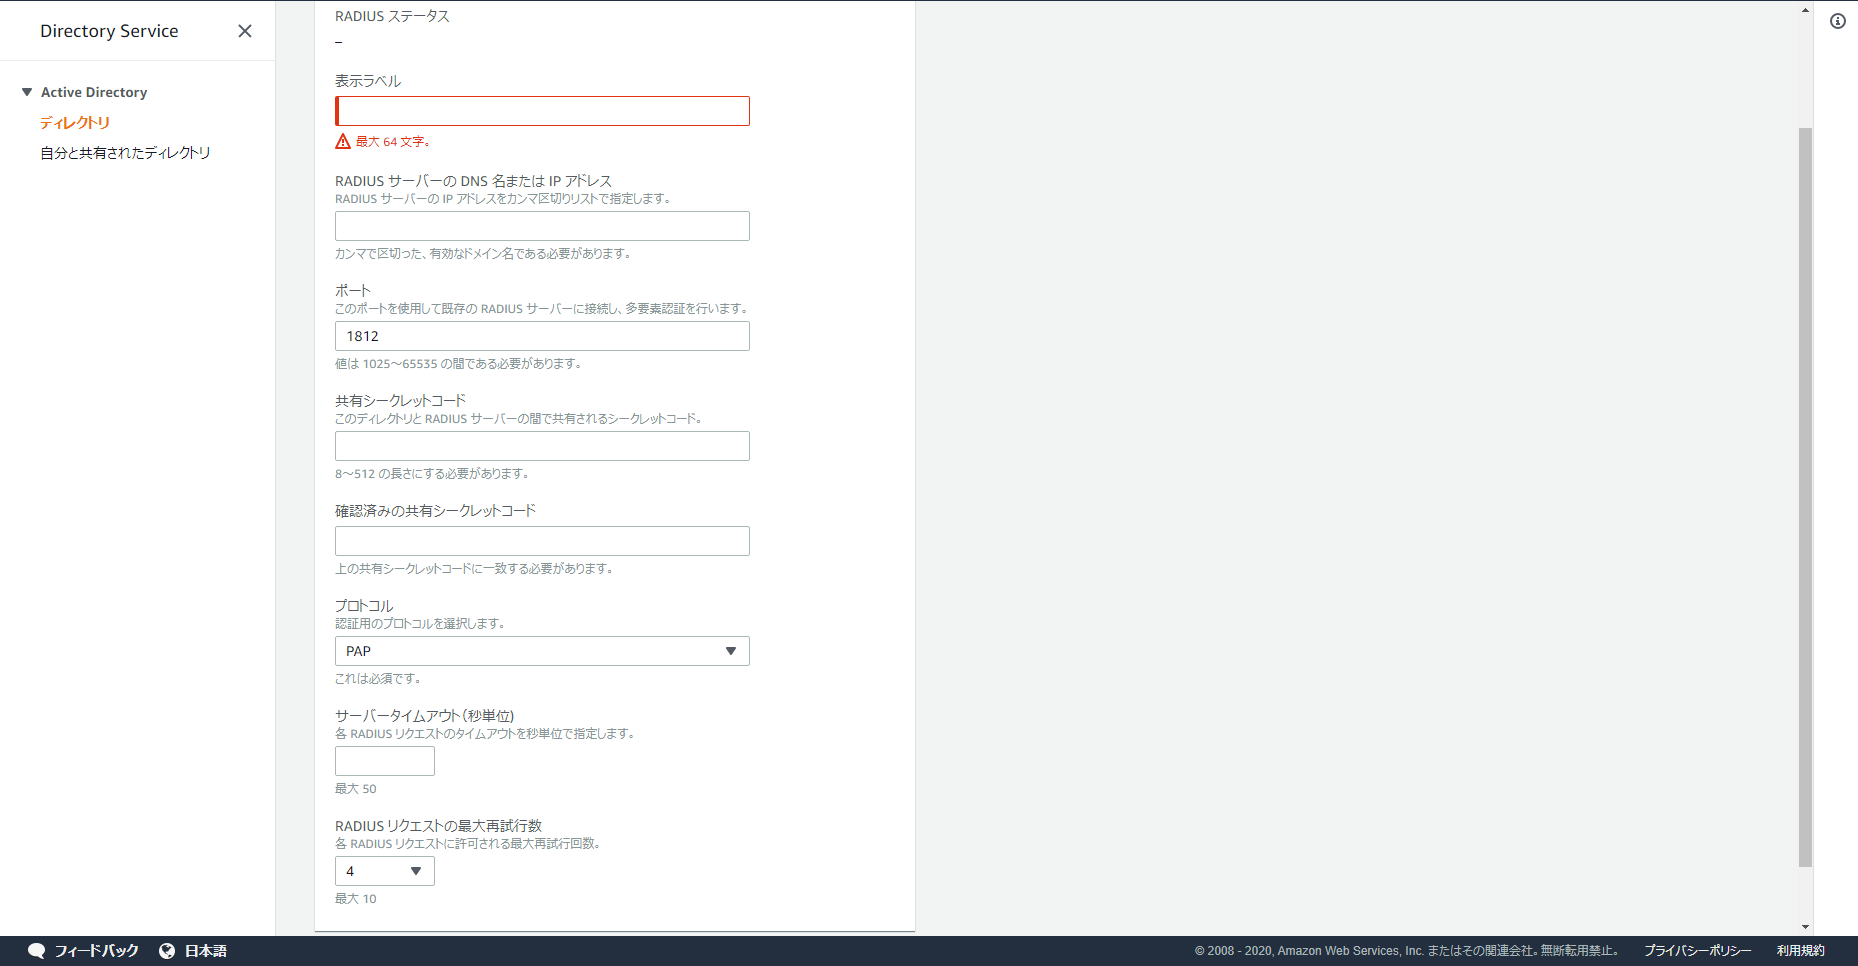
- RADIUS サーバーの IP アドレス:RADIUS サーバーの IP アドレスを入力
- ポート:設定を変えてなければ「1812」
- 共有シークレットコード:clients.conf で設定した secret
- プロトコル:PAP
- サーバタイムアウト:適当な数値
- 最大試行回数:適当な数値
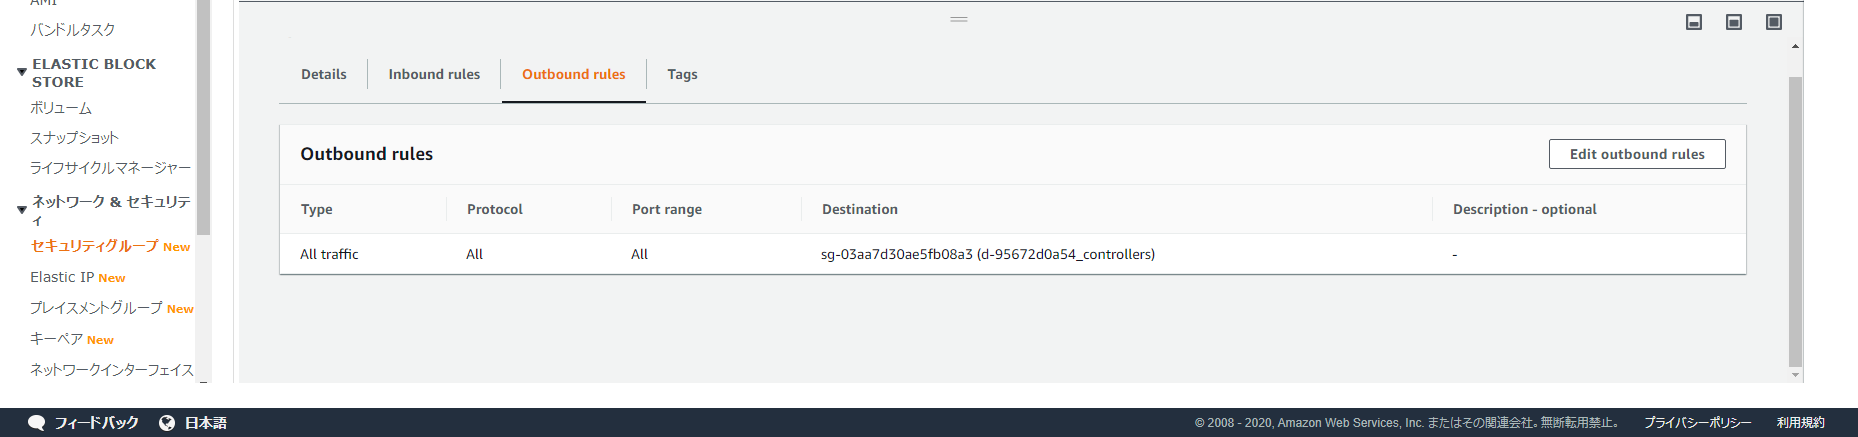
これで有効化できない場合、DS 側のセキュリティグループで Outbound 側を閉塞している(正確には、同じセキュリティグループを付与しているサーバにしかアクセスできないようにしている初期設定)可能性が高いので、そこを確認してください。
WorkSpaces の用意
ネットで調べろください。
自分が説明するより遥かに詳しい情報があるはずです。
RADIUS ユーザの追加
ここまで準備出来たら、AD と同じユーザ名で RADIUS サーバにユーザを作成しましょう。
useradd -g radius-enabled -s /sbin/nologin 'AD と同じユーザ名'
上記ユーザを作成後、下記コマンドを実行します。
sudo -u 'AD と同じユーザ名' /usr/local/bin/google-authenticator
実行すると、全部で4つの質問が表示され、y / nにて回答をします。
Do you want authentication tokens to be time-based (y/n)
すべて、「y」で進めてください。
すると、 QR コードが表示されます。
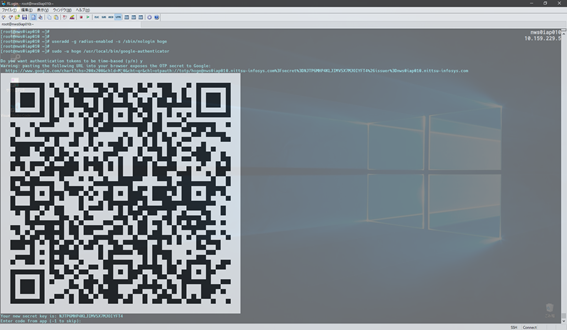
このQRコードは、スマートフォンのワンタイムパスワードアプリに登録する際に利用するQRコードですので、保管してください。
以降、操作を進めるには、以下のような手順になります。
# 表示されているコードを入力するか、「-1」を入力し先に進む
Enter code from app (-1 to skip):
以下の質問はすべて「y」と答えればおkです。
Do you want me to update your "/home/hoge/.google_authenticator" file? (y/n)

Do you want to disallow multiple uses of the same authentication
token? This restricts you to one login about every 30s, but it increases
your chances to notice or even prevent man-in-the-middle attacks (y/n)

By default, a new token is generated every 30 seconds by the mobile app.
In order to compensate for possible time-skew between the client and the server,
we allow an extra token before and after the current time. This allows for a
time skew of up to 30 seconds between authentication server and client. If you
experience problems with poor time synchronization, you can increase the window
from its default size of 3 permitted codes (one previous code, the current
code, the next code) to 17 permitted codes (the 8 previous codes, the current
code, and the 8 next codes). This will permit for a time skew of up to 4 minutes
between client and server.
Do you want to do so? (y/n)

If the computer that you are logging into isn't hardened against brute-force
login attempts, you can enable rate-limiting for the authentication module.
By default, this limits attackers to no more than 3 login attempts every 30s.
Do you want to enable rate-limiting? (y/n)
ここまで終われば完了です。
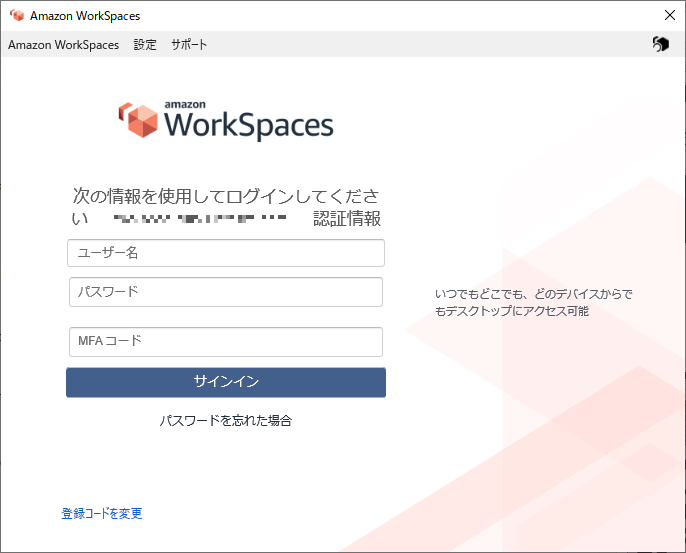
WorkSpaces のログイン画面で MFA が有効となっているはずですので、認証ができるか確認してください。
では、良きリモートワークライフを。
仲間募集中
弊社ではエンジニアを募集中です。インフラからアプリ、ユーザサポートまで幅広く業務を行ってます。
https://www.nittsu-infosys.com/recruit/