ニフクラ mobile backend (NCMB) エバンジェリストの小山(koyhoge)です。
前回の「準備編」を受けて、実際に NCMB と連携して Google 認証を行うアプリを作っていきます。
今回の内容は、基本的に以下のガイドにしたがって進めていきます。
SDKガイド (Android): SNS連携(Google連携)
Android Studio でプロジェクトを作成
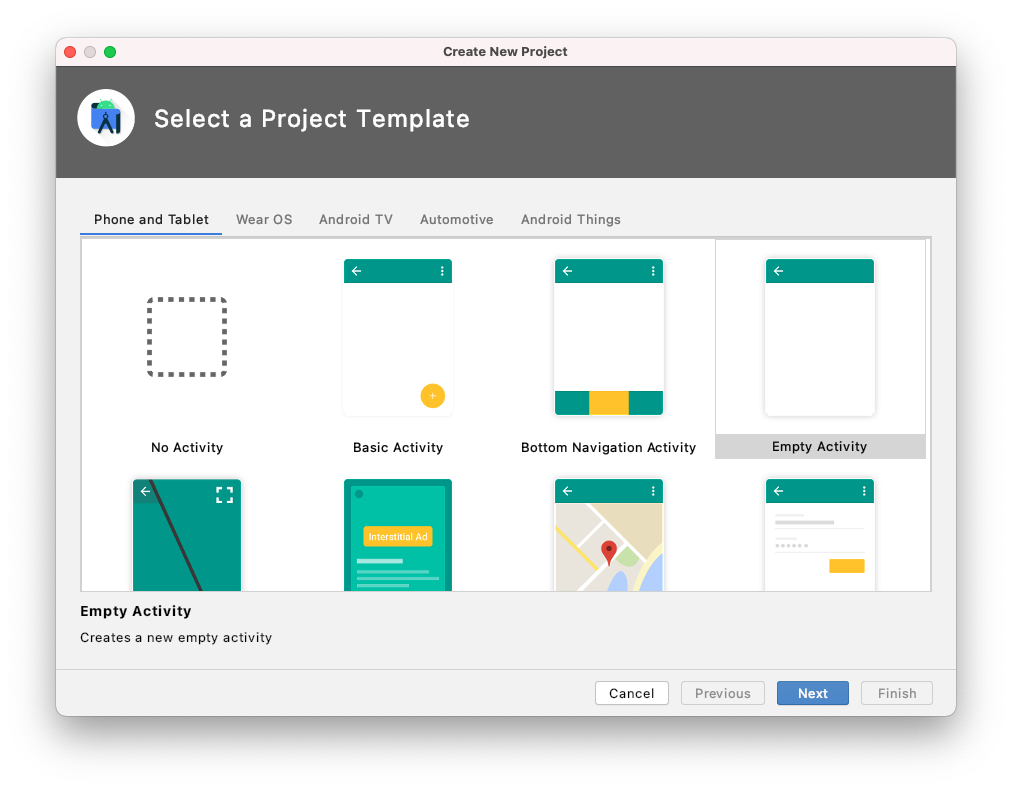
Android Studio で新しくプロジェクトを作ります。
準備編
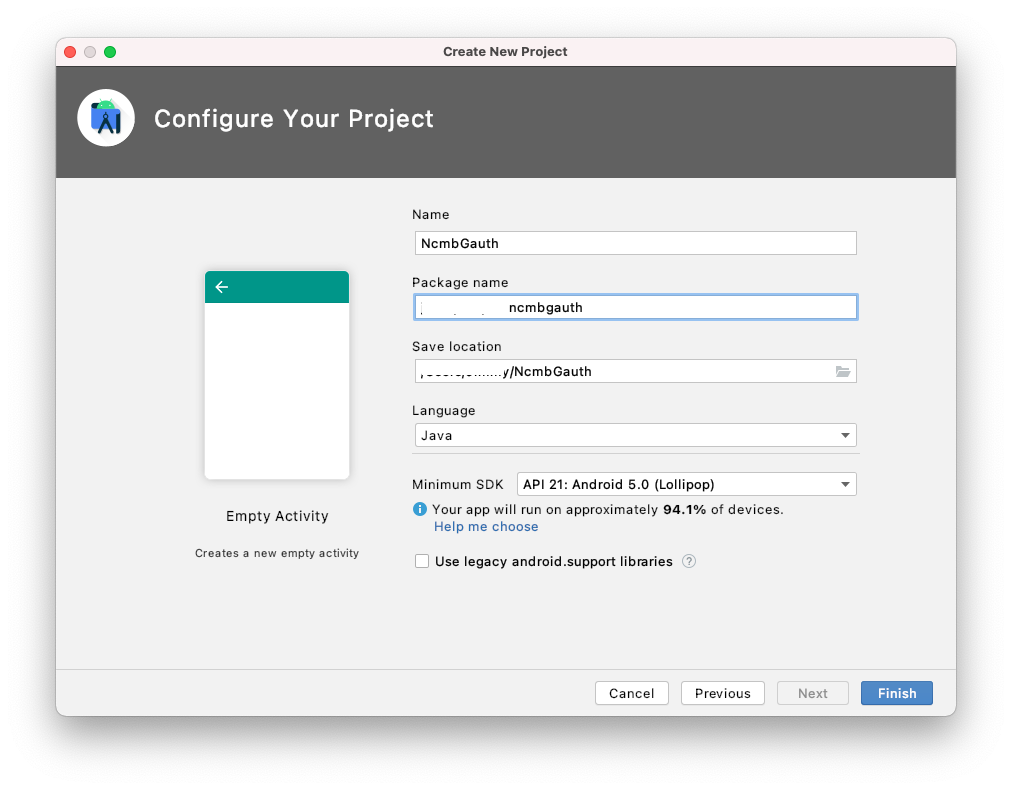
テンプレートプロジェクト画面でEmpty Activity を選んだらNextを押します。
プロジェクト名を「NcmbGauth」にして Finishで完了します。
プロジェクトの設定
NCMB Android SDK のインストール
まず NCMB Android SDK である NCMB.jar を取得します。NCMB のクイックスタートのページの中ごろにある「Android SDKダウンロードはこちら」というボタンから、NCMB_latest.zip をダウンロードして下さい。
NCMB_latest.zip を展開すると NCMB.jar ファイルが現れますので、それを Android Studio で作成したプロジェクトディレクトリの app/libs にコピーします。
Google Play Service をアプリに追加
以下の説明に従い、Google Play Service 用のライブラリをプロジェクトに追加します。
Setting Up Google Play Services
プロジェクトの build.gradle の dependencies セクションに以下を加えます。
dependencies {
// (略)
    implementation 'com.google.android.gms:play-services-base:17.3.0'
    implementation 'com.google.android.gms:play-services-auth:19.0.0'
// (略)
}
アプリのネットワークアクセスを許可
プロジェクトの AndroidManifest.xml の の直前に以下を追加して、アプリにネットへのアクセスを許可します。
<uses-permission android:name="android.permission.INTERNET" />
<uses-permission android:name="android.permission.ACCESS_NETWORK_STATE" />
<uses-permission android:name="android.permission.GET_ACCOUNTS" />
<uses-permission android:name="android.permission.USE_CREDENTIALS" />
ボタンとメッセージ表示枠を配置
次にUI部品を配置します。認証を開始する Button と結果を表示するTextView を1つずつ配置しましょう。
activity_main.xml を RelativeLayout から LinearLayout に変更して、その中に Button と TextView を作ります。最終的には以下のようにになります。
<?xml version="1.0" encoding="utf-8"?>
<androidx.constraintlayout.widget.ConstraintLayout xmlns:android="http://schemas.android.com/apk/res/android"
    xmlns:app="http://schemas.android.com/apk/res-auto"
    xmlns:tools="http://schemas.android.com/tools"
    android:layout_width="match_parent"
    android:layout_height="match_parent"
    tools:context=".MainActivity">

    <com.google.android.gms.common.SignInButton
        android:id="@+id/sign_in_button"
        android:layout_width="wrap_content"
        android:layout_height="wrap_content"
        app:layout_constraintBottom_toBottomOf="parent"
        app:layout_constraintLeft_toLeftOf="parent"
        app:layout_constraintRight_toRightOf="parent"
        app:layout_constraintTop_toTopOf="parent"/>

</androidx.constraintlayout.widget.ConstraintLayout>
NCMB SDKの初期化。
ここから先は MainActivity.java にある MainActivity クラスを編集していきます。まずは onCreate() メソッドの中で、SDK の初期化をしましょう。NCMB.initialize() メソッドで SDK 初期化します。第2,3 引数の文字列は NCMB のアプリに紐付いたアプリケーションキーとクライアントキーです。
またそのあとで NCMBGoogleUtils.initialize(this) で Google 認証関係のライブラリの初期化を行います。
        NCMB.initialize(this.getApplicationContext(), "xxxxxxxxxxxxxxxxxxxxxxxxxxxxxxxxxxxxxxxxxxxxxxxxxxxxxxxxxxxxxxx",
                "xxxxxxxxxxxxxxxxxxxxxxxxxxxxxxxxxxxxxxxxxxxxxxxxxxxxxxxxxxxxxxx");
イベントハンドラをオーバーライド
以下の2つのイベントハンドラをオーバーライドします。
Google 認証ダイアログから復帰した処理を記述します。
    @Override
    protected void onActivityResult(int requestCode, int resultCode, @Nullable Intent data) {
        super.onActivityResult(requestCode, resultCode, data);
        if (requestCode == REQUEST_SIGN_IN && resultCode == RESULT_OK) {
            getGoogleToken();
        }
    }
Google認証の処理本体を記述
Button が押されたら Google 認証を実行して、その結果得られたユーザ名を TextView に表示してみましょう。該当部分は以下のようになります。
        SignInButton signInButton = findViewById(R.id.sign_in_button);
        signInButton.setSize(SignInButton.SIZE_STANDARD);
        findViewById(R.id.sign_in_button).setOnClickListener(new View.OnClickListener() {
            @RequiresApi(api = Build.VERSION_CODES.M)
            @Override
            public void onClick(View v) {
                if (ContextCompat.checkSelfPermission(getApplicationContext(),
                        Manifest.permission.GET_ACCOUNTS)
                        == PackageManager.PERMISSION_GRANTED) {
                    Intent intent = AccountManager.newChooseAccountIntent(null
                            , null
                            , new String[] {"com.google"}
                            , null
                            , null
                            , null
                            , null);
                    startActivityForResult(intent, REQUEST_SIGN_IN);
                }
            }
        });
最終的な MainActivity.java は以下となります。
package org.koyhoge.ncmbgauth;

import androidx.annotation.NonNull;
import androidx.annotation.Nullable;
import androidx.annotation.RequiresApi;
import androidx.appcompat.app.AlertDialog;
import androidx.appcompat.app.AppCompatActivity;
import androidx.core.app.ActivityCompat;
import androidx.core.content.ContextCompat;

import android.Manifest;
import android.accounts.Account;
import android.accounts.AccountManager;
import android.content.Intent;
import android.content.pm.PackageManager;
import android.os.AsyncTask;
import android.os.Build;
import android.os.Bundle;
import android.util.Log;
import android.view.View;

import com.google.android.gms.auth.GoogleAuthException;
import com.google.android.gms.auth.GoogleAuthUtil;
import com.google.android.gms.auth.UserRecoverableAuthException;
import com.google.android.gms.common.SignInButton;
import com.nifcloud.mbaas.core.NCMB;
import com.nifcloud.mbaas.core.NCMBException;
import com.nifcloud.mbaas.core.NCMBGoogleParameters;
import com.nifcloud.mbaas.core.NCMBUser;

import java.io.IOException;

public class MainActivity extends AppCompatActivity {
    private static final String ACCOUNT_TYPE_GOOGLE = "com.google";
    private static final String AUTH_SCOPE = "oauth2:profile email";
    private static final int REQUEST_SIGN_IN = 10000;
    private static final String TAG = "NCMBLOG";

    @Override
    protected void onCreate(Bundle savedInstanceState) {
        super.onCreate(savedInstanceState);
        setContentView(R.layout.activity_main);

        //**************** APIキーの設定とSDKの初期化 **********************
        NCMB.initialize(this.getApplicationContext(), "xxxxxxxxxxxxxxxxxxxxxxxxxxxxxxxxxxxxxxxxxxxxxxxxxxxxxxxxxxxxxxx",
                "xxxxxxxxxxxxxxxxxxxxxxxxxxxxxxxxxxxxxxxxxxxxxxxxxxxxxxxxxxxxxxx");

        if (ContextCompat.checkSelfPermission(this,
                Manifest.permission.GET_ACCOUNTS)
                != PackageManager.PERMISSION_GRANTED) {

            if (ActivityCompat.shouldShowRequestPermissionRationale(this,
                    android.Manifest.permission.GET_ACCOUNTS)) {

            } else {
                ActivityCompat.requestPermissions(this,
                        new String[]{android.Manifest.permission.GET_ACCOUNTS},
                        1);
            }
        }

        SignInButton signInButton = findViewById(R.id.sign_in_button);
        signInButton.setSize(SignInButton.SIZE_STANDARD);
        findViewById(R.id.sign_in_button).setOnClickListener(new View.OnClickListener() {
            @RequiresApi(api = Build.VERSION_CODES.M)
            @Override
            public void onClick(View v) {
                if (ContextCompat.checkSelfPermission(getApplicationContext(),
                        Manifest.permission.GET_ACCOUNTS)
                        == PackageManager.PERMISSION_GRANTED) {
                    Intent intent = AccountManager.newChooseAccountIntent(null
                            , null
                            , new String[] {"com.google"}
                            , null
                            , null
                            , null
                            , null);
                    startActivityForResult(intent, REQUEST_SIGN_IN);
                }
            }
        });
    }

    @Override
    public void onRequestPermissionsResult(int requestCode, @NonNull String[] permissions, @NonNull int[] grantResults) {
//        super.onRequestPermissionsResult(requestCode, permissions, grantResults);
        switch (requestCode) {
            case 1: {
                // If request is cancelled, the result arrays are empty.
                if (grantResults.length > 0
                        && grantResults[0] == PackageManager.PERMISSION_GRANTED) {
                    Log.d(TAG, "ACCESS_GET_ACCOUNTS is granted!");
                } else {
                    Log.d(TAG, "ACCESS_GET_ACCOUNTS is denied!");
                }
            }
        }
    }

    private void getGoogleToken() {

        AsyncTask<String, Void, String> task = new AsyncTask<String, Void, String> () {
            @Override
            protected String doInBackground(String... accounts) {

                String scopes = AUTH_SCOPE;
                String token = null;
                String id = null;
                try {
                    // Get google account
                    AccountManager accountManager = (AccountManager) getSystemService(ACCOUNT_SERVICE);
                    Account[] getAccounts = accountManager.getAccountsByType(ACCOUNT_TYPE_GOOGLE);
                    if (getAccounts.length>0) {
                        String accountName = getAccounts[0].name;

                        id = GoogleAuthUtil.getAccountId(getApplicationContext(), accountName);
                        token = GoogleAuthUtil.getToken(getApplicationContext(), accountName, scopes);
                        Log.d(TAG, "id: " + id);
                        Log.d(TAG, "token: " + token);

                        NCMBGoogleParameters parameters = new NCMBGoogleParameters(
                                id,
                                token
                        );

                        NCMBUser.loginWith(parameters);

                        Log.d(TAG, "Login success!");
                    }


                } catch (UserRecoverableAuthException e) {
                    startActivityForResult(e.getIntent(), REQUEST_SIGN_IN);
                } catch (IOException | GoogleAuthException | ArrayIndexOutOfBoundsException e) {
                    Log.e(TAG, e.getMessage());
                } catch (NCMBException e) {
                    e.printStackTrace();
                    Log.e(TAG, e.getMessage());
                }
                return token;
            }

            @Override
            protected void onPostExecute(String s) {
                super.onPostExecute(s);
            }
        };

        task.execute();
    }

    @Override
    protected void onActivityResult(int requestCode, int resultCode, @Nullable Intent data) {
        super.onActivityResult(requestCode, resultCode, data);
        if (requestCode == REQUEST_SIGN_IN && resultCode == RESULT_OK) {
            getGoogleToken();
        }
    }
}
実際に実行してみる
それでは早速、実際にビルドして実行してみましょう。アプリを実行すると以下の画面になります。
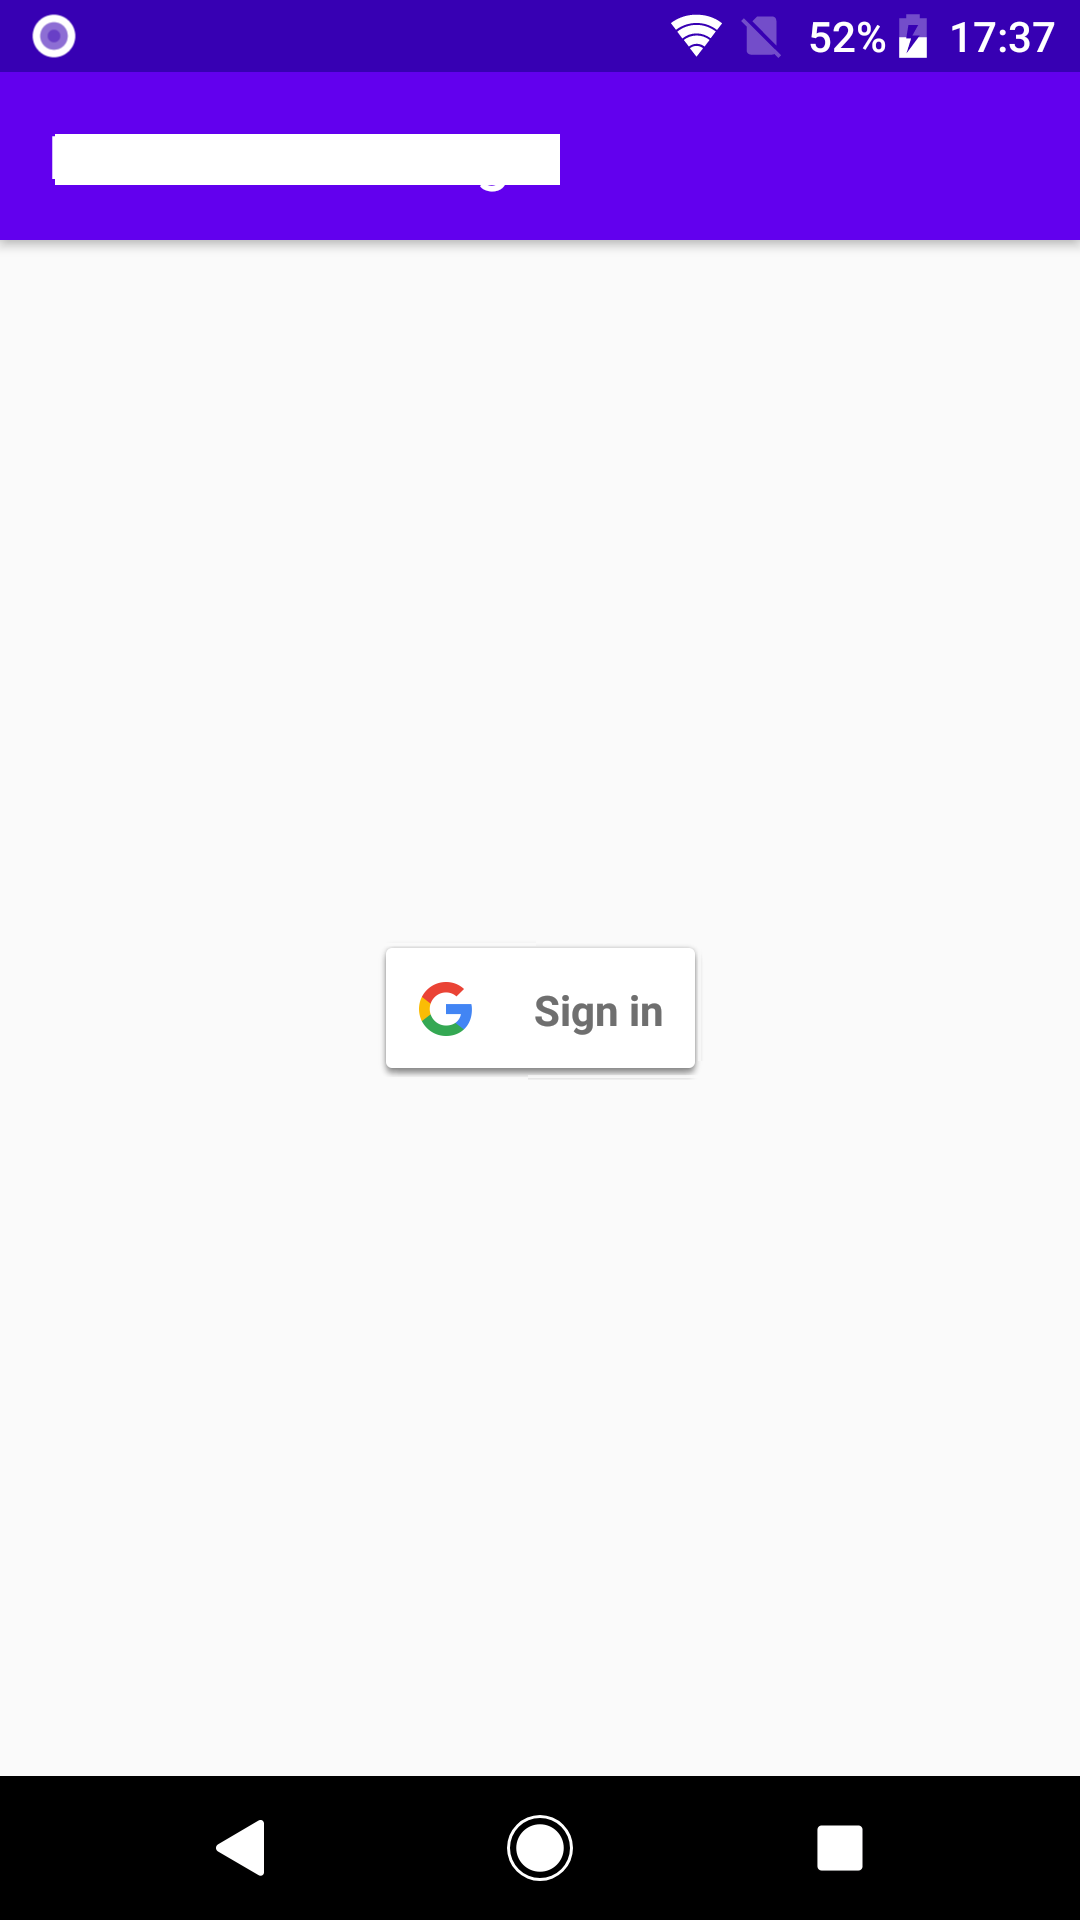
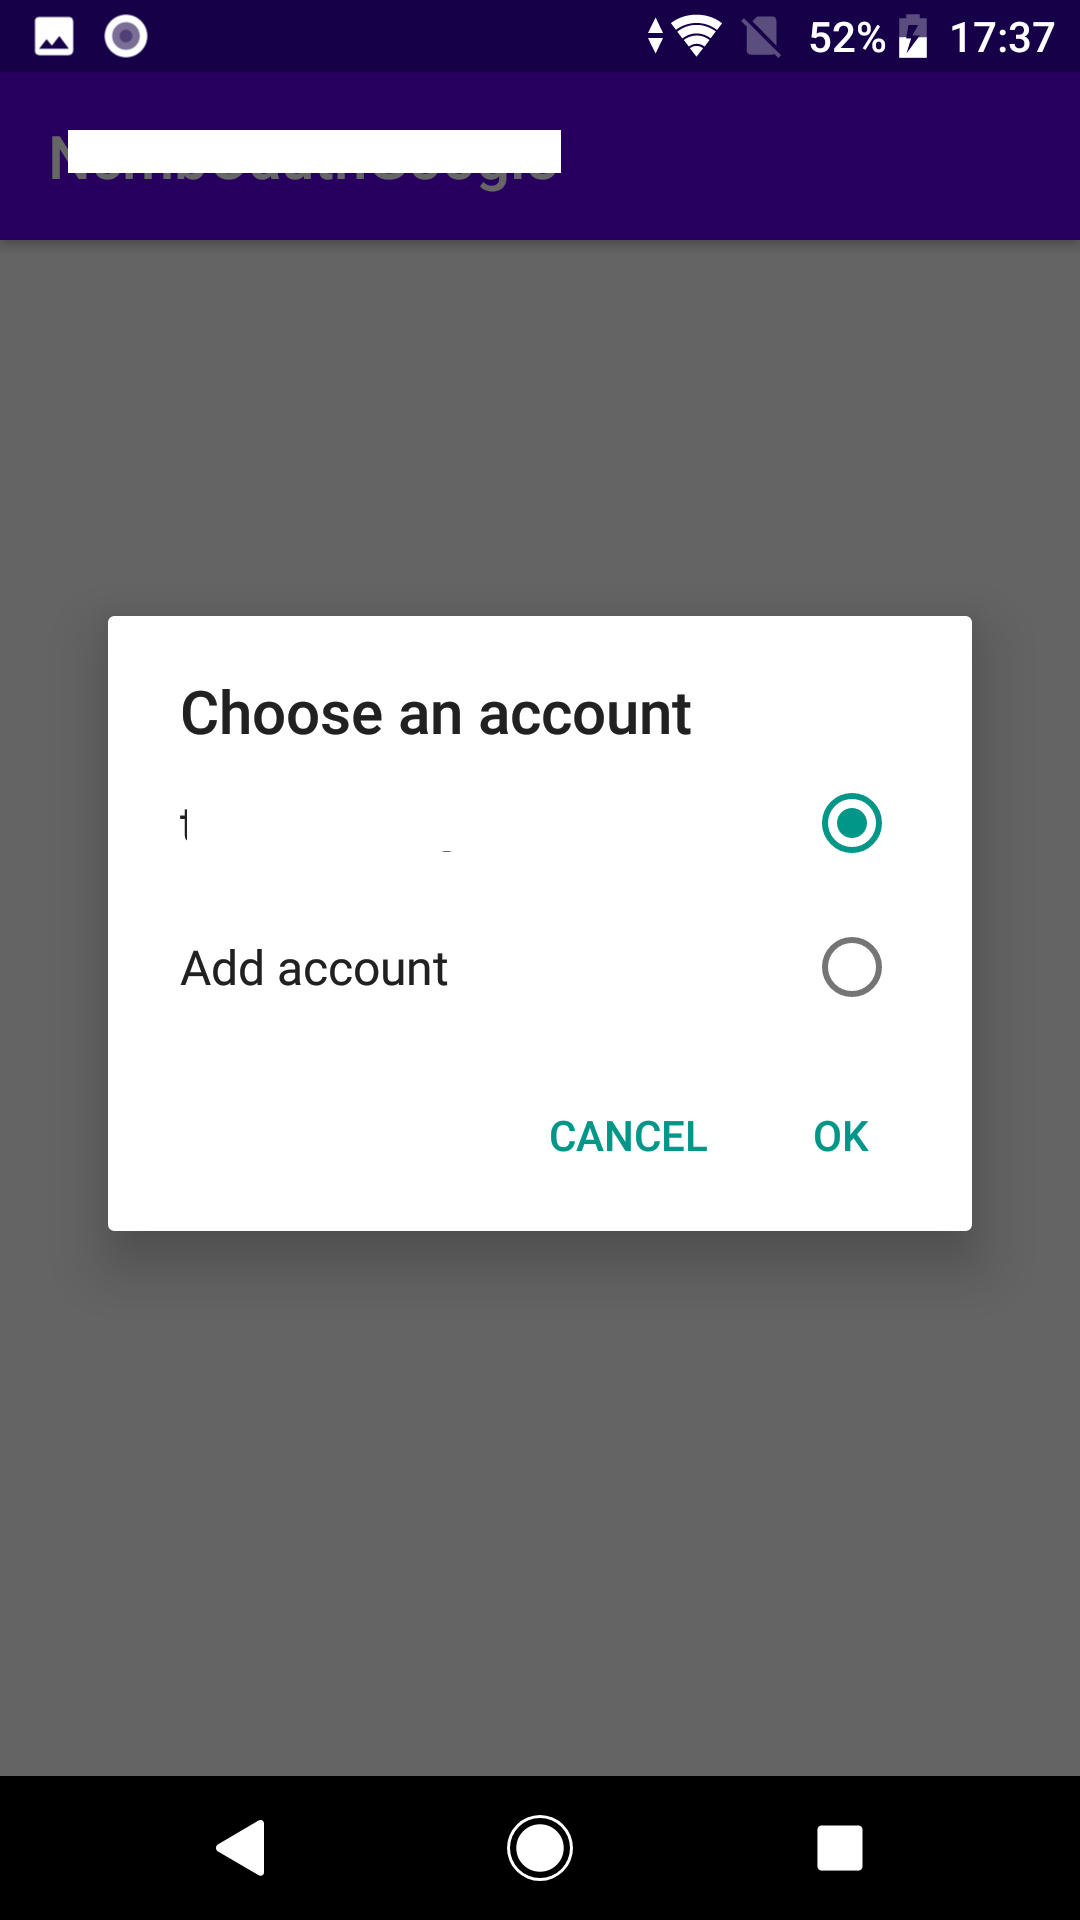
「LOGIN WITH GOOGLE」ボタンを押すと、初回はGoogleアカウントに連携したNCMBのユーザアカウントが存在しないので、どの Google アカウントを使用するかというダイアログが表示されます。
最後に
いかがでしたでしょうか。特に前準備の部分がちょっと面倒だったかもしれません。Google 認証に限らず、Twitter や Facebook を用いた SNS 認証は、うまく使うことでユーザ登録の精神的な負担を減らしてくれます。コードの記述自体は、今回の例で見たようにかなり簡単に機能を使うことができますので、NCMB をすでにお使いの方や使用を検討している方は、SNS 認証機能をアプリに追加することもご検討いただいく参考になれば幸いです。