はじめに
S3の静的Webサイトホスティングシリーズ第3弾。
S3の静的Webサイトホスティングで遊んでいると、色々な人から「CloudFrontオススメだよ!」と言われるので触ってみた。
CloudFrontって何?というよりは、基本の設定をTerraformで書きながら確認していく感じだ。
前提条件
- AWS Black Belt Online SeminarのCloudFront編をさらっと見ていること。全部理解していなくても問題ないが、これを見て、マネコンでディストリビューションを軽く触ってみたことがないと難しいと思う
- 手前味噌ではあるが、過去のS3の静的Webサイトホスティングの記事を読んでおいてもらえると入りが早いと思う
事前準備(S3バケットの作成)
以下のような感じで、静的WebサイトホスティングしているS3と、そこにコンテンツを突っ込んでおこう。
なお、バケットに格納するオブジェクトのコンテンツはテキトーに準備して、Terraformのディレクトリとは別の場所に突っ込んである。パス構成等はお好みで変えてもらえれば。
################################################################################
# S3 Bucket                                                                    #
################################################################################
resource "aws_s3_bucket" "my" {
  bucket = local.bucket_name
  acl    = "public-read"

  website {
    index_document = "index.html"
    error_document = "error.html"
  }
}

################################################################################
# S3 Object                                                                    #
################################################################################
resource "aws_s3_bucket_object" "contents" {
  bucket       = aws_s3_bucket.my.id
  source       = "../contents/test-contents.png"
  key          = "test-contents.png"
  acl          = "public-read"
  content_type = "image/png"
  etag         = filemd5("../contents/test-contents.png")
}

resource "aws_s3_bucket_object" "index" {
  bucket       = aws_s3_bucket.my.id
  source       = "../contents/index.html"
  key          = "index.html"
  acl          = "public-read"
  content_type = "text/html"
  etag         = filemd5("../contents/index.html")
}

resource "aws_s3_bucket_object" "error" {
  bucket       = aws_s3_bucket.my.id
  source       = "../contents/error.html"
  key          = "error.html"
  acl          = "public-read"
  content_type = "text/html"
  etag         = filemd5("../contents/error.html")
}
ディストリビューションを作ってみる
CloudFrontのディストリビューションは、aws_cloudfront_distributionのリソースで作成する。
他のリソースと違い、必須項目が多くて面倒だったりする。
origin_idはテキトーなユニーク名を付けておく。
その他、default_cache_behaviorでは色々なキャッシュの設定ができるが、今回はとりあえず動けばいいや的な設定にしておく。viewer_certificateもデフォルト設定でとりあえず動くような感じに。restrictionsも、何も書かなければ「制限なし」として扱ってくれればいいのに、必須項目なので書くだけ書いて無効化しておく。
################################################################################
# CloudFront                                                                   #
################################################################################
resource "aws_cloudfront_distribution" "s3" {
  origin {
    domain_name = aws_s3_bucket.my.bucket_regional_domain_name
    origin_id   = local.origin_id
  }

  enabled             = true
  comment             = "CloudFrontお試し"
  default_root_object = "index.html"

  default_cache_behavior {
    allowed_methods  = ["DELETE", "GET", "HEAD", "OPTIONS", "PATCH", "POST", "PUT"]
    cached_methods   = ["GET", "HEAD"]
    target_origin_id = local.origin_id

    forwarded_values {
      query_string = false

      cookies {
        forward = "none"
      }
    }

    viewer_protocol_policy = "allow-all"
  }

  restrictions {
    geo_restriction {
      restriction_type = "none"
    }
  }

  viewer_certificate {
    cloudfront_default_certificate = true
  }
}
さて、これでterraform applyすると、CloudFrontのコンソールで以下のように表示されるようになる。
ここで、払い出されたドメインに対してアクセスすると、
$ curl -i http://xxxxxxxxxxxxxx.cloudfront.net/
HTTP/1.1 200 OK
Content-Type: text/html
Content-Length: 213
Connection: keep-alive
Date: Sat, 29 Aug 2020 12:13:34 GMT
Last-Modified: Sat, 29 Aug 2020 02:10:22 GMT
ETag: "1dde2af6633cb7a90946986afff7b0ca"
Accept-Ranges: bytes
Server: AmazonS3
X-Cache: Hit from cloudfront
Via: 1.1 xxxxxxxxxxxxxxxxxxxxxxxxxxxxxxxx.cloudfront.net (CloudFront)
X-Amz-Cf-Pop: NRTXX-XX
X-Amz-Cf-Id: xxxxxxxxxxxxxxxxxxxxxxxxxxxxxxxxxxxxxxxxxxxxxxxxxxxxxxxx
Age: 2938

<html xmlns="http://www.w3.org/1999/xhtml" >
<head>
<title>Test Contents</title>
</head>
  <body>
    <p>test contents</p>
  </body>
</html>
やった!CloudFront経由でコンテンツを取得できたぞ!
S3への直接アクセスを防ぐ
さて、せっかくCloudFrontを作ったにもかかわらず、S3に直接アクセスされてしまっては負荷軽減の意味がなくなってしまう。こういうときは、オリジンアクセスアイデンティティの機能を使えば良い。詳しくは、CloudFrontの開発者ガイドを参照してもらいたい。
実際に設定する場合は以下のようにする。
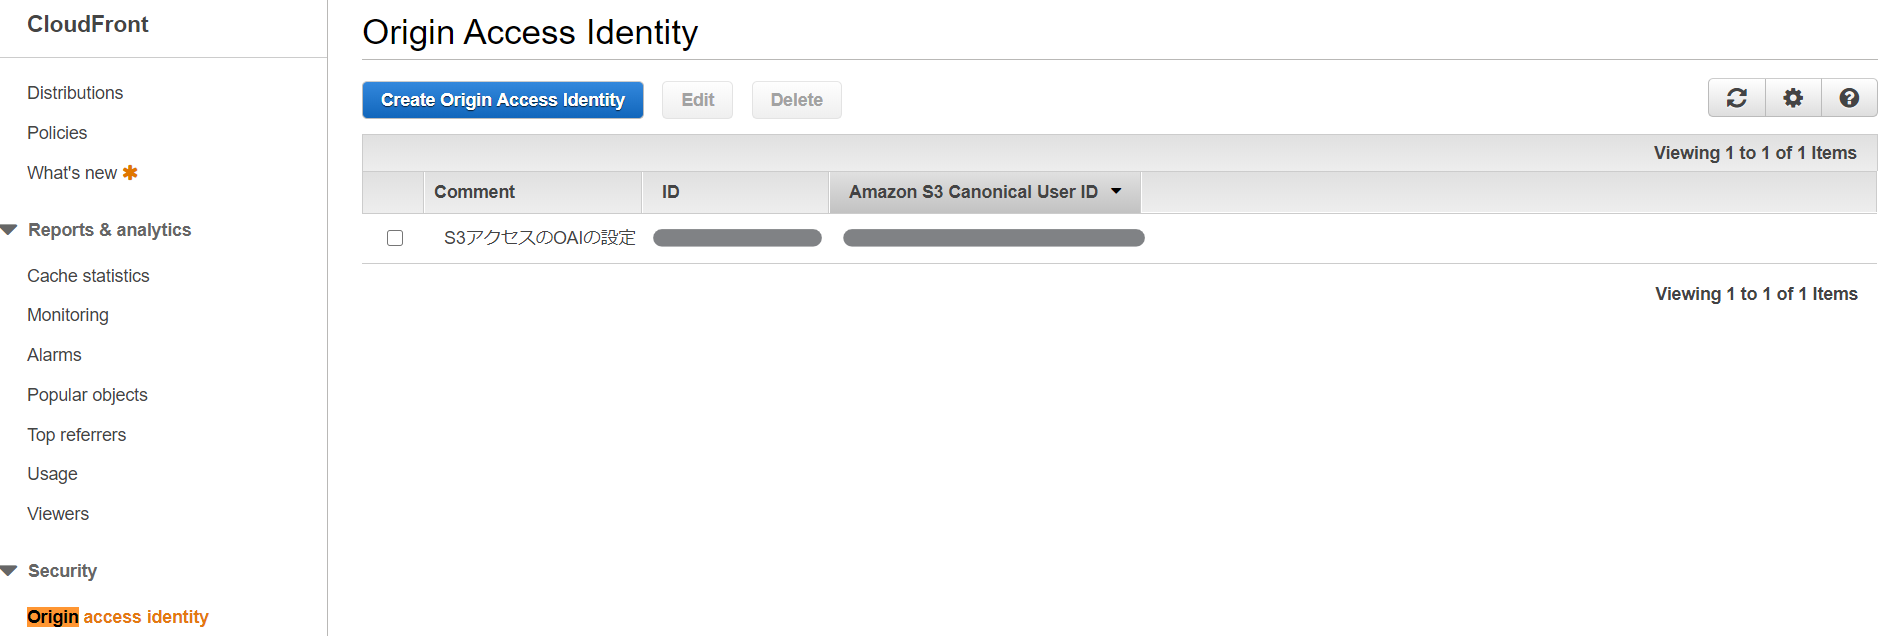
aws_cloudfront_origin_access_identityのリソースを作り、aws_cloudfront_distributionから参照させる。また、バケットポリシーにもPrincipalsで作ったOAIをAllowする。
  origin {
    domain_name = aws_s3_bucket.my.bucket_regional_domain_name
    origin_id   = local.origin_id

    s3_origin_config {
      origin_access_identity = aws_cloudfront_origin_access_identity.s3.cloudfront_access_identity_path
    }
  }
resource "aws_cloudfront_origin_access_identity" "s3" {
  comment = "S3アクセスのOAIの設定"
}

resource "aws_s3_bucket_policy" "my" {
  bucket = aws_s3_bucket.my.id
  policy = data.aws_iam_policy_document.my_s3.json
}

data "aws_iam_policy_document" "my_s3" {
  statement {
    actions   = ["s3:GetObject"]
    resources = ["${aws_s3_bucket.my.arn}/*"]

    principals {
      type        = "AWS"
      identifiers = [aws_cloudfront_origin_access_identity.s3.iam_arn]
    }
  }
}
これだけだと、S3に直接アクセスできてしまうので、ACLの設定を
acl = "private"
に変更しておこう。
これでterraform applyすると、CloudFrontコンソールには
のように反映され、curlでアクセスしてみると
$ curl -i http://xxxxxxxxxxxxxxxxxxxx-cloudfront-test-bucket.s3-website-ap-northeast-1.amazonaws.com | head -1
HTTP/1.1 403 Forbidden
$ curl -i http://xxxxxxxxxxxxxx.cloudfront.net/ | head -1
HTTP/1.1 200 OK
な感じで、オリジンでは拒否され、CloudFront側ではコンテンツを取得できるようになった!
エラー応答をカスタマイズする
デフォルトの設定では、エラー応答が味気ない感じになってしまうので、aws_cloudfront_distributionのリソースに以下のブロックを追加することで設定を変更できる。
  custom_error_response {
    error_code         = "404"
    response_code      = "404"
    response_page_path = "/error.html"
  }

  custom_error_response {
    error_code         = "403"
    response_code      = "403"
    response_page_path = "/error.html"
  }
terraform applyするとCloudFrontコンソール上では
のように反映され、存在しないコンテンツにcurlすると
$ curl -i http://xxxxxxxxxxxxxx.cloudfront.net/hoge.html
HTTP/1.1 403 Forbidden
Content-Type: text/html
Content-Length: 52
Connection: keep-alive
Date: Sat, 29 Aug 2020 12:12:53 GMT
Last-Modified: Sat, 29 Aug 2020 02:10:22 GMT
ETag: "427e8f7bac6989431936b55912fd830c"
Accept-Ranges: bytes
Server: AmazonS3
X-Cache: Error from cloudfront
Via: 1.1 xxxxxxxxxxxxxxxxxxxxxxxxxxxxxxxx.cloudfront.net (CloudFront)
X-Amz-Cf-Pop: NRTXX-XX
X-Amz-Cf-Id: xxxxxxxxxxxxxxxxxxxxxxxxxxxxxxxxxxxxxxxxxxxxxxxxxxxxxxxx
Age: 4311

<html>
  <body>
    error contents
  </body>
</html>
と、自前のエラーコンテンツを取得できるようになった!
アクセスログを取る
CloudFrontはWebサーバのアクセスログも取得可能。aws_cloudfront_distributionのリソースに以下のブロックを追加することで設定できる。
  logging_config {
    include_cookies = false
    bucket          = aws_s3_bucket.log.bucket_domain_name
    prefix          = "CFLog"
  }
もちろん、出力先のバケットも準備しておこう。
resource "aws_s3_bucket" "log" {
  bucket = local.log_bucket_name
  acl    = "private"
}
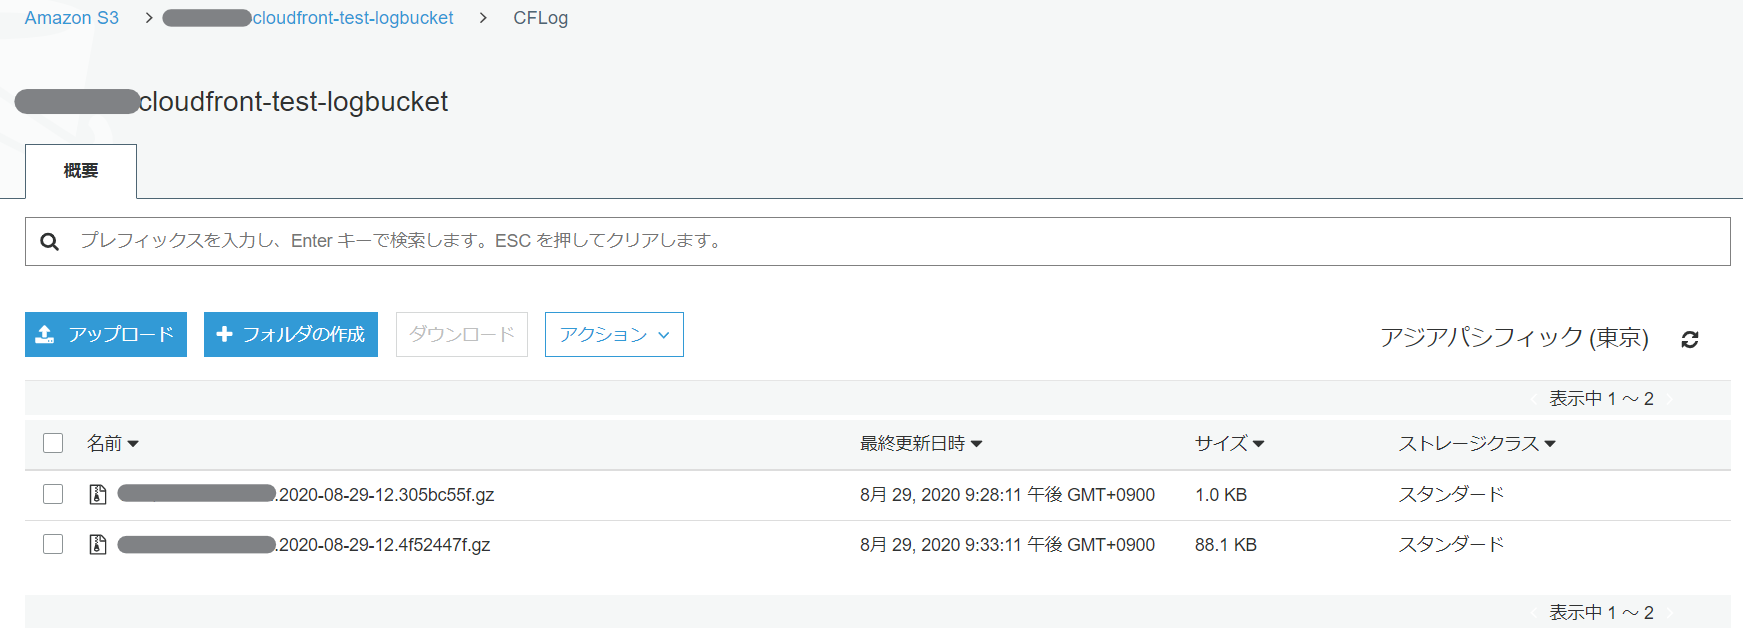
terraform applyした後にアクセスしてからバケットを見に行くと、
gzipされたログが吐かれるようになった!
これはBlack Beltでも言われているけど、定型のログだから、S3 Selectで好きなように分析することもできるぞ!
CloudFrontって結局速いの?
さて、最後に、せっかくだからCloudFrontのキャッシュがどれだけ強力か見てみよう。
と言っても、本気でAWSのインフラにトラフィックを叩き込むと破産するので、静的Webサイトホスティングと比較をしてみよう。
CloudFrontにLocustで放り込んでみると以下のようなグラフになった。
速い!55KBくらいのコンテンツを使用しているが、95%タイルのレスポンスタイムが10ms程度で、しかも安定している。
同条件での静的Webサイトホスティングの結果が40~50ms(これも充分すごいと思うけど)と考えるとかなり速いぞ!


