概要
Three.jsのReact用ライブラリ react-three-fibar を使用して、Blenderで作成した3Dモデルをブラウザ上で表示する方法をまとめました。
商品購入サイトでのプレビューとかに使えそうです。
- 本記事は、以下の記事をより丁寧に解説したものです。
- react-three-fibarの基本的な使い方は、以下を参照してください。
環境
- react - 17.0.2
- typescript - 4.4.3
- three - 0.132.2
- react-three/fiber - 7.0.7
- react-three/drei - 7.8.2
- Blender - 2.93
以下のパッケージは、コントローラーを追加するために導入しています。(本題とはあまり関係ないです)
- material-ui/core - 4.12.3
- react-colorful - 5.4.0
- csx - 10.0.2
- valtio - 1.2.2
インストール
プロジェクトの作成
任意のプロジェクトフォルダを作成して、以下を実行します。
npx create-react-app . --template typescript --use-npm
パッケージのインストール
npm i three @react-three/fiber @react-three/drei
npm i -D @types/three
Materialコントローラー用のパッケージのインストール(任意)
npm i @material-ui/core react-colorful csx valtio
Blenderモデルのコンバーター
Blenderモデルファイル(.glb)を、react-three-fiberで読み込むためのコンポーネントファイル(.tsx)を自動生成するツールです。
npm i -g gltfjsx
Blenderモデル
作成
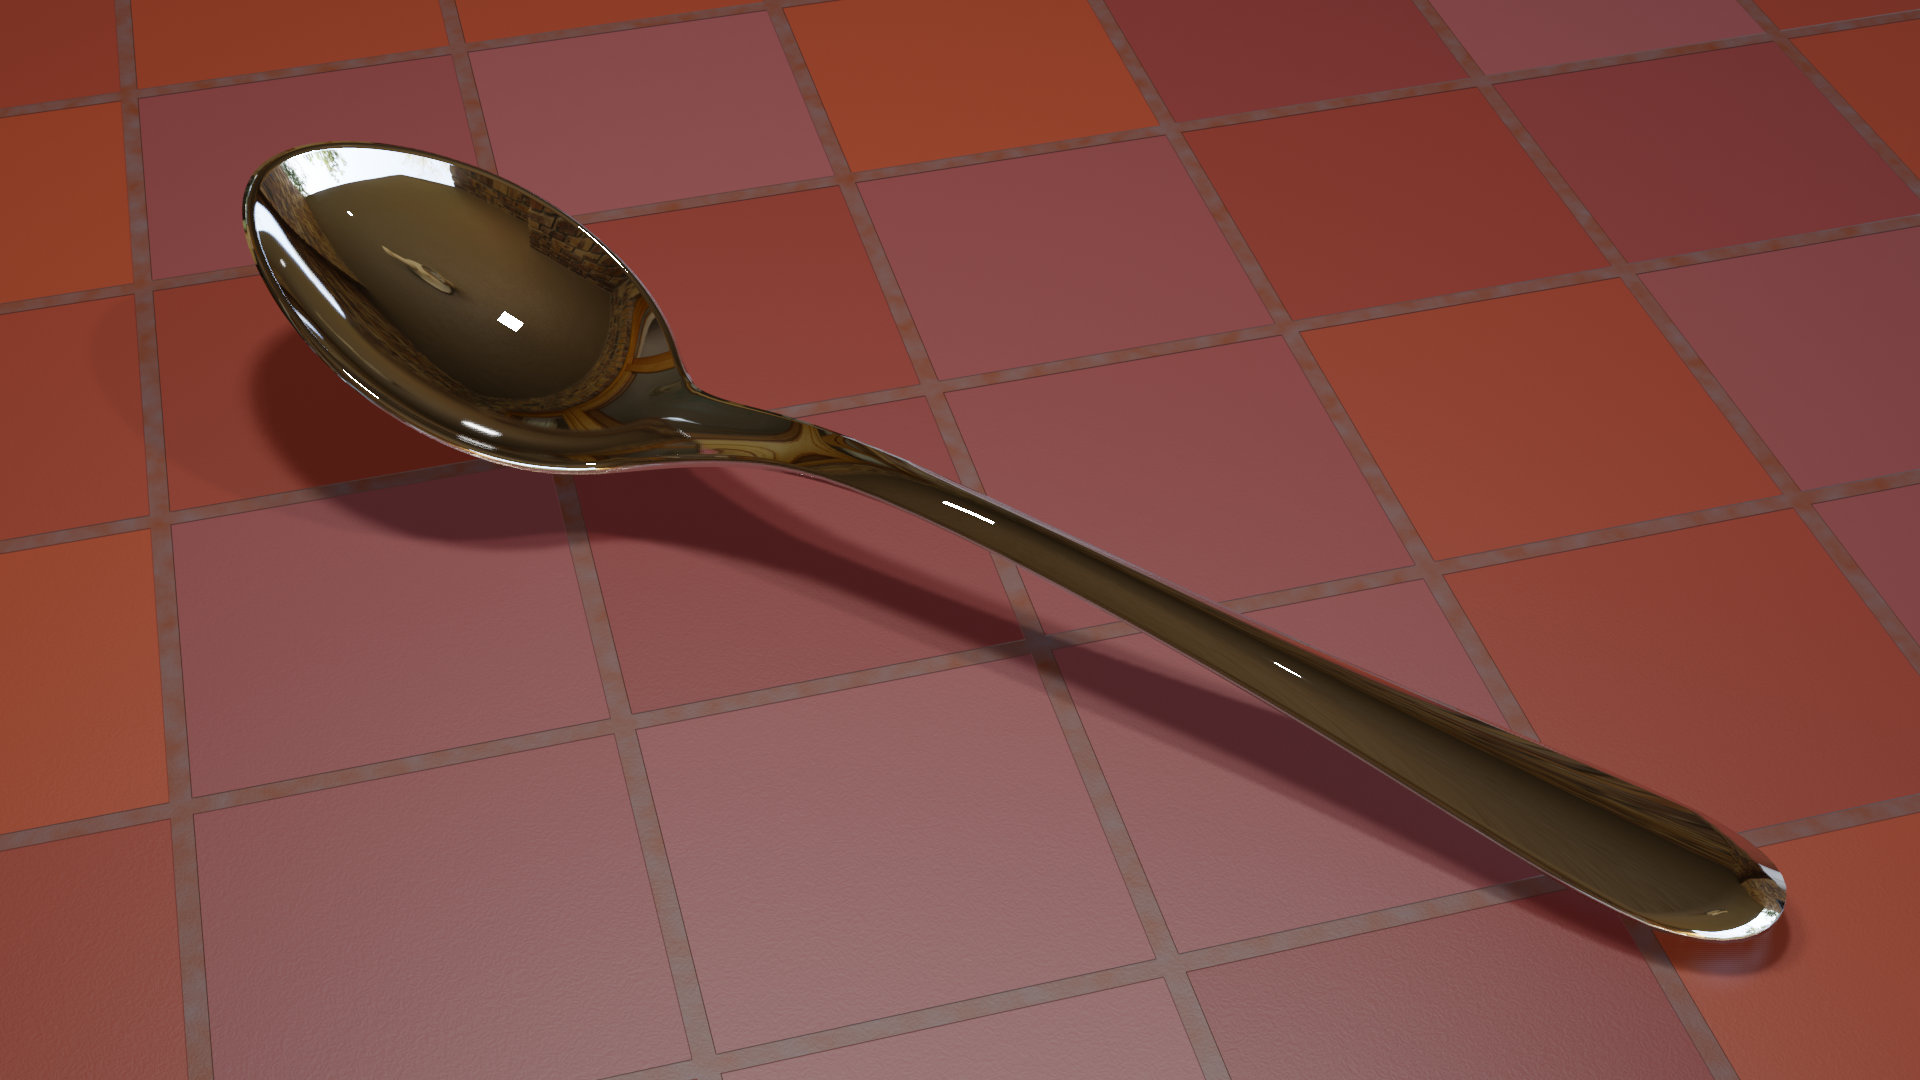
今回はスプーンの3Dモデルを作成しました。

こちらの動画を元に作成しました。
モデルファイル(.glb)のエクスポート
エクスポートをする前に、
動画では、カメラやライト、床パネルなどスプーン以外の要素もあるので、コレクションを分けてスプーン以外を非表示にします。

Blenderモデルの読み込みコンポーネントの作成
gltfjsxを使って、Blenderモデルファイル(.glb)を読み込むためのコンポーネントファイルを生成します。
Blenderモデルファイル(model.glb)を保存したフォルダで、以下を実行します。
npx gltfjsx model.glb --types --shadows
--types:TypeScript対応にする(.tsx)
--shadows:読み込むモデルに影を適応する
実行すると、Model.tsxが作成されます。
このファイルは、あくまでBlenderモデルファイルを読み込むためのものです。
プロジェクトにはBlenderモデルファイル(.glb)も含める必要があります。
実装
ファイルが揃ったので実装していきます。
まず、Blenderモデルファイル(model.glb)をpublicフォルダ以下に置きます。
public/assets/model.glb
Spoon.tsx
Spoon.tsxでは、Threeのキャンバスを作成してモデルを読み込んでいます。
import React, { Suspense, VFC } from 'react';
import { Environment, OrbitControls } from '@react-three/drei';
import { TCanvas } from '../TCanvas';
import { Model } from './Model';

export const Spoon: VFC = () => {
	return (
		<TCanvas>
			<OrbitControls enablePan={false} />

			<Suspense fallback={null}>
				<Model />
				<Environment preset="sunset" background />
			</Suspense>
		</TCanvas>
	)
}
-
TCanvasは、Canvasをラップしたものです。実装についてはこちらを参照してください。
-
OrbitControlsを追加すると、カメラの視点操作ができるようになります。
enablePan={false}とすることで、平行移動はできないように制限しています。 -
Modelコンポーネントの読み込みは、Suspenseタグ内で行います。
-
Environmentを追加すると、背景を追加することができます。
Model.tsx
gltfjsxで作成したコンポーネントを配置します。
/*
Auto-generated by: https://github.com/pmndrs/gltfjsx
*/

import React, { useRef, VFC } from 'react';
import * as THREE from 'three';
import { GLTF } from 'three/examples/jsm/loaders/GLTFLoader';
import { useGLTF } from '@react-three/drei';

const ModelPath = '/assets/model.glb'

type GLTFResult = GLTF & {
	nodes: {
		Sphere: THREE.Mesh
	}
	materials: {
		['Material.001']: THREE.MeshStandardMaterial
	}
}

export const Model: VFC<JSX.IntrinsicElements['group']> = props => {
	const group = useRef<THREE.Group>()
	const { nodes, materials } = useGLTF(ModelPath) as GLTFResult

	return (
		<group ref={group} {...props} dispose={null}>
			<mesh
				castShadow
				receiveShadow
				geometry={nodes.Sphere.geometry}
				material={materials['Material.001']}
				position={[-2, 2, 0]}
				rotation={[0, 0, -0.38]}
				scale={[1.39, 1, 1]}
			/>
		</group>
	)
}

useGLTF.preload(ModelPath)
-
ModelPathは、Blenderモデルファイル(model.glb)のパスに直します。
-
position、rotation、scaleは都度調整しましょう。
gltfjsxでコンポーネントを作成したときに影の設定を有効にしたので、castShadow、receiveShadowが追加されています。
コントローラーの実装
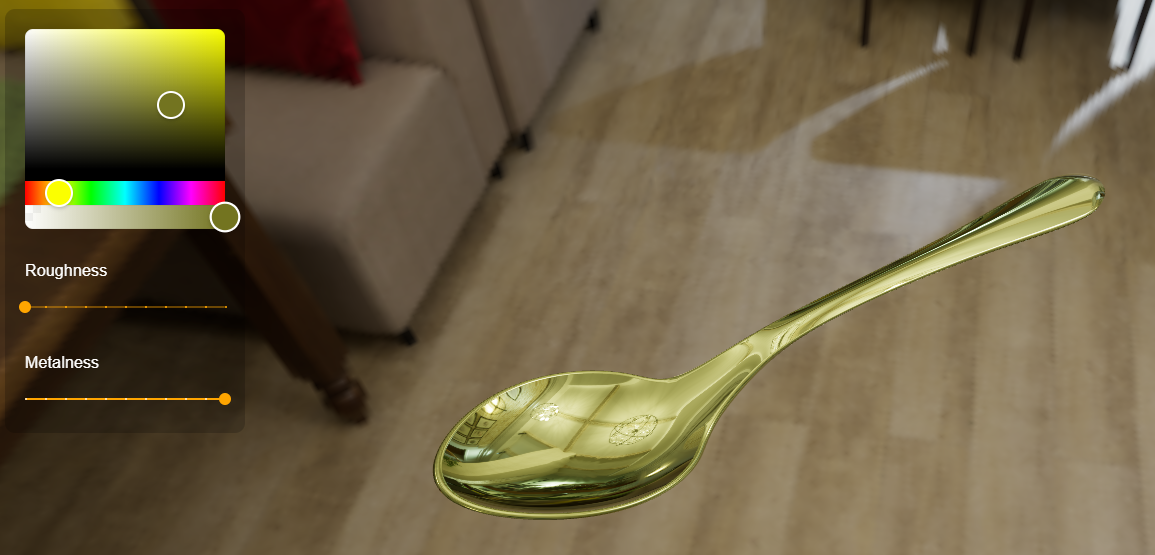
このままだと、作成した3Dモデルをただ表示するだけで味気ないので、色や質感を自由に変更できるようにします。
変更するのは、スプーンのMaterial(色、透明度、粗さ、光沢)とします。
使用するパッケージ
- 色と透明度の選択には、React Colorfulを使用します。
- 粗さ、光沢の選択には、Material UIのスライダーを使用します。
- 状態管理には、Valtioを使用します。
- 色の変換ユーティリティとして、csxを使用します。
状態管理
まず、スプーンのMaterialを保持するために、store.tsを作成します。
import { color } from 'csx';
import { proxy } from 'valtio';
import { derive } from 'valtio/utils';

type MaterialState = {
	hexColor: string
	alpha: number
	roughness: number
	metalness: number
}

export const materialState = proxy<MaterialState>({
	hexColor: '#fff',
	alpha: 1,
	roughness: 0,
	metalness: 1
})

export const derivedMaterialState = derive({
	rgba: get => {
		const convertedColor = color(get(materialState).hexColor).fade(get(materialState).alpha)
		return {
			r: convertedColor.red(),
			g: convertedColor.green(),
			b: convertedColor.blue(),
			a: convertedColor.alpha()
		}
	}
})
- 初期値は、以下のように設定しています。
| 名前 | 値 | 説明 |
|---|---|---|
| hexColor | #fff | 白 |
| alpha | 1 | 不透明 |
| roughness | 0 | 粗さ無し |
| metalness | 1 | 光沢最大 |
-
derivedMaterialStateでは、
hexColorとalphaを使ってrgbaオブジェクトを生成します。これは、React Colorfulに対応した値にするためです。
コントローラー
コントローラー部分を実装します。
import { rgb } from 'csx';
import React, { VFC } from 'react';
import { RgbaColor, RgbaColorPicker } from 'react-colorful';
import { useSnapshot } from 'valtio/';
import { css } from '@emotion/css';
import { makeStyles, Slider, Typography } from '@material-ui/core';
import { derivedMaterialState, materialState } from './store';

export const Controller: VFC = () => {
	return (
		<div className={styles.container}>
			<ColorPicker />

			<div className={styles.sliderContainer}>
				<Typography className={styles.text}>Roughness</Typography>
				<CustomSlider name="roughness" />
			</div>

			<div className={styles.sliderContainer}>
				<Typography className={styles.text}>Metalness</Typography>
				<CustomSlider name="metalness" />
			</div>
		</div>
	)
}

// ==============================================
const ColorPicker: VFC = () => {
	const derivedMaterialSnap = useSnapshot(derivedMaterialState)

	const changeHandler = (newColor: RgbaColor) => {
		materialState.hexColor = rgb(newColor.r, newColor.g, newColor.b).toHexString()
		materialState.alpha = newColor.a
	}

	return <RgbaColorPicker color={derivedMaterialSnap.rgba} onChange={changeHandler} />
}

// ==============================================
type CustomSliderProps = {
	name: 'roughness' | 'metalness'
}

const CustomSlider: VFC<CustomSliderProps> = ({ name }) => {
	const classes = useStyles()
	const materialSnap = useSnapshot(materialState)

	const valueChangeHandler = (e: React.ChangeEvent<{}>, value: number | number[]) => {
		if (name === 'roughness') {
			materialState.roughness = value as number
		} else if (name === 'metalness') {
			materialState.metalness = value as number
		}
	}

	return (
		<Slider
			className={classes.slider}
			aria-label={name}
			defaultValue={name === 'roughness' ? materialSnap.roughness : materialSnap.metalness}
			valueLabelDisplay="auto"
			step={0.1}
			marks
			min={0}
			max={1}
			onChange={valueChangeHandler}
		/>
	)
}

// ==============================================
const styles = {
	container: css`
		position: absolute;
		top: 20px;
		left: 20px;
		padding: 20px;
		background-color: rgba(0, 0, 0, 0.2);
		border-radius: 10px;
		display: flex;
		flex-direction: column;
	`,
	sliderContainer: css`
		margin-top: 30px;
		display: grid;
		grid-template-rows: auto auto;
		row-gap: 10px;
	`,
	text: css`
		color: white;
	`
}

const useStyles = makeStyles({
	slider: {
		color: 'orange'
	}
})
- ColorPickerでは、RgbaColorPickerを使用して透明度も設定できるようにします。値の受け渡しはrgbaのオブジェクト(RgbaColor)なので、適宜変換します。
モデルへ反映
設定した値をモデルへ反映させます。
/*
Auto-generated by: https://github.com/pmndrs/gltfjsx
*/

import React, { useRef, VFC } from 'react';
import * as THREE from 'three';
import { GLTF } from 'three/examples/jsm/loaders/GLTFLoader';
import { useSnapshot } from 'valtio';
import { useGLTF } from '@react-three/drei';
import { materialState } from './store';

const ModelPath = '/assets/model.glb'

type GLTFResult = GLTF & {
	nodes: {
		Sphere: THREE.Mesh
	}
	materials: {
		['Material.001']: THREE.MeshStandardMaterial
	}
}

export const Model: VFC<JSX.IntrinsicElements['group']> = props => {
	const materialSnap = useSnapshot(materialState)

	const group = useRef<THREE.Group>()
	const { nodes, materials } = useGLTF(ModelPath) as GLTFResult

	const material = new THREE.MeshStandardMaterial({
		color: materialSnap.hexColor,
		roughness: materialSnap.roughness,
		metalness: materialSnap.metalness,
		opacity: materialSnap.alpha,
		transparent: true
	})

	return (
		<group ref={group} {...props} dispose={null}>
			<mesh
				castShadow
				receiveShadow
				geometry={nodes.Sphere.geometry}
				// material={materials['Material.001']}
				material={material}
				position={[-2, 2, 0]}
				rotation={[0, 0, -0.38]}
				scale={[1.39, 1, 1]}
			/>
		</group>
	)
}

useGLTF.preload(ModelPath)
- importしたmaterialは使用せずに、状態管理している値からmaterialを生成してそれをmeshに割り当てています。
コントローラーの有効化
コンポーネントを追加してコントローラーを使えるようにします。
import React, { Suspense, VFC } from 'react';
import { css } from '@emotion/css';
import { Environment, OrbitControls } from '@react-three/drei';
import { TCanvas } from '../TCanvas';
import { Controller } from './Controller';
import { Model } from './Model';

export const Spoon: VFC = () => {
	return (
		<div className={styles.container}>
			<TCanvas>
				<OrbitControls enablePan={false} />

				<Suspense fallback={null}>
					<Model />
					<Environment preset="sunset" background />
				</Suspense>
			</TCanvas>

			<Controller /> {/* コントローラーを追加 */}
		</div>
	)
}

const styles = {
	container: css`
		position: relative;
		width: 100%;
		height: 100%;
	`
}
まとめ
基本形状(立方体とか球体など)を動かすだけじゃやっぱり単調なので、Blenderで作成したモデルで色々表現できると楽しいです。
おまけ
環境ファイルの設定
Spoon.tsxに追加したEnvironmentタグでは、プリセットの他に自分で用意したファイルを使うこともできます。
export const Spoon: VFC = () => {
	return (
		<div className={styles.container}>
			<TCanvas>
				<OrbitControls enablePan={false} />

				<Suspense fallback={null}>
					<Model />
					{/* <Environment preset="sunset" background /> */}
					<Environment files="/assets/comfy_cafe_2k.hdr" background />
				</Suspense>
			</TCanvas>

			<Controller />
		</div>
	)
}
環境ファイル(.hdr)は、以下からダウンロードできます。


