はじめに
生のCanvasAPIには便利なアニメーションメソッドは無く、ただの直線でも動かそうとすると結構手間です。意外と使う気もするので、記事としてパターンをまとめてみました。何かのお役に立てば幸いです。
CanvasAPIのアニメーションについての基本イメージは以下にまとめています。
Canvasアニメーションの要点
[目次]
- はじめに
- 縦線・横線を引く
- 普通に引く
- アニメーションさせる
- 応用: イージングを付ける
- 応用: グラフっぽいものを描く
- 斜め線を引く
- 普通に引く
- アニメーションさせる
- 応用: イージングを付ける
- 応用: グラフっぽいものを描く
- 終わりに
- おまけだ...っ!
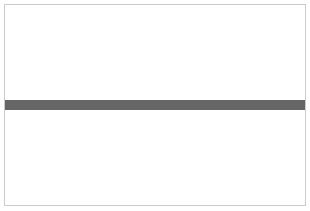
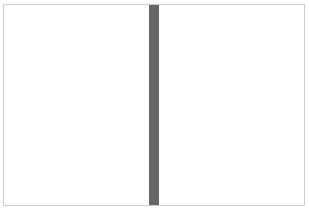
縦線・横線を引く
普通に引く
メソッドが用意されており難しいことはありません。
気をつけるポイントがあるとすれば「1pxの線を引くと太く見えることがある」ということぐらいでしょうか。
参考ページ
https://plus.google.com/102594170131511973965/posts/aiV2SqosCfR
[動作イメージ]
<canvas id="myCanvas" width="300" height="200"></canvas>
// 変数定義
var cs       = document.getElementById('myCanvas'),
    ctx      = cs.getContext('2d'),
    csWidth  = cs.width,
    csHeight = cs.height,
    center   = {
      x: csWidth / 2,
      y: csHeight / 2
    };

// 線の基本スタイル
ctx.strokeStyle = '#666';
ctx.lineWidth = 10;

// 横線を引く
var drawHorizontalLine = function() {
  ctx.beginPath();
  ctx.moveTo(0, center.y);
  ctx.lineTo(csWidth, center.y);
  ctx.closePath();
  ctx.stroke();
};

// 縦線を引く
var drawVerticalLine = function() {
  ctx.beginPath();
  ctx.moveTo(center.x, 0);
  ctx.lineTo(center.x, csHeight);
  ctx.closePath();
  ctx.stroke();
};

drawHorizontalLine();
drawVerticalLine();
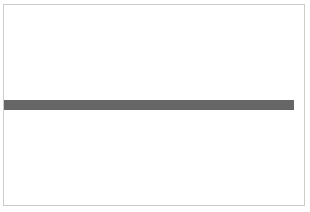
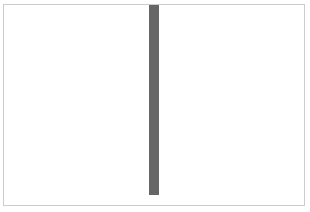
アニメーションさせる
直線として引く座標位置をそのつど算出して描画を繰り返します。
縦・横は伸ばす座標のx, yが違うだけです。反対方向にするには、「開始終了位置」「終了条件」「加算する値」などを変更します。
[動作イメージ]

// 変数定義や基本スタイルは省略(前述)
// ...

var drawHorizontalLineAnim = function() {
  var beginPos = 0,  // スタート位置
      movePos  = beginPos,  // 移動位置(現在位置)
      addVal   = 10,  // 加算量
      endPos   = csWidth - 10,  // 終了位置
      isAnim   = function() {  // アニメーションを終了する条件
        return (movePos < endPos);
      };

  var render = function() {
    ctx.beginPath();
    ctx.moveTo(beginPos, center.y);
    ctx.lineTo(movePos, center.y);
    ctx.closePath();
    ctx.stroke();

    if (isAnim() === true) {
      movePos += addVal;
      // ↑のaddで終了点を超えることがあるため上限を決める
      movePos = (isAnim() === false) ? endPos : movePos;
      requestAnimationFrame(render)
    }
  };
  render();
};
drawHorizontalLineAnim();
// 変数定義や基本スタイルは省略(前述)
// ...

var drawVerticalLineAnim = function() {
  var beginPos = 0,
      movePos  = beginPos,
      addVal   = 10,
      endPos   = csHeight - 10,
      isAnim   = function() {
        return (movePos < endPos);
      };

  var render = function() {
    ctx.beginPath();
    ctx.moveTo(center.x, beginPos);
    ctx.lineTo(center.x, movePos);
    ctx.closePath();
    ctx.stroke();

    // 描画を繰り返す条件
    if (isAnim() === true) {
      movePos += addVal;
      // ↑のaddで終了点を超えることがあるため上限を決める
      movePos = (isAnim() === false) ? endPos : movePos;
      requestAnimationFrame(render)
    }
  };
  render();
};
drawVerticalLineAnim();
// 変数定義や基本スタイルは省略(前述)
// ...

var drawVerticalLineAnimReverse = function() {
  var beginPos = csHeight,
      movePos  = beginPos;
      addVal   = -10,
      endPos   = 10,
      isAnim   = function() {
        return (endPos < movePos);
      };

  var render = function() {
    ctx.beginPath();
    ctx.moveTo(center.x, beginPos);
    ctx.lineTo(center.x, movePos);
    ctx.closePath();
    ctx.stroke();

    // 描画を繰り返す条件
    if (isAnim() === true) {
      movePos += addVal;
      movePos = (isAnim() === false) ? endPos : movePos;
      requestAnimationFrame(render)
    }
  };
  render();
};
drawVerticalLineAnimReverse();
応用: イージングを付ける
イージングをつけてアニメーションに動きをつけてみます。
今までのように伸ばす値を決めて加算していくのではなく、アニメーションさせるトータルの時間と経過時間を元に現在の変化量を計算していきます。
なおイージングの計算式は以下のものを利用させていただきました。
http://gizma.com/easing/
[動作イメージ]

ちょっとGifだと分かりにくいかもしれません
http://jsbin.com/yepike/
// 変数定義や基本スタイルは省略(前述)
// ...

var drawHorizontalLineAnimEase = function() {
  /**
   * イージング関数
   * http://gizma.com/easing/
   * @param  {[type]} t [経過時間(ミリ秒)]
   * @param  {[type]} b [初期値]
   * @param  {[type]} c [値の変化量、10->50なら40となる]
   * @param  {[type]} d [アニメーション時間(ミリ秒)]
   */
  var easeInQuad = function (t, b, c, d) {
    t /= d;
    return c*t*t + b;
  };

  var beginPos  = 0,
      movePos   = beginPos,
      endPos    = csWidth - 10,  //
      changeVal = endPos - beginPos, // 値の変化量
      duration  = 1000,  // アニメーション時間。最小でも300程度は取る
      beginTime = new Date().getTime(),
      // 経過時間
      getTime = function() {
        return (new Date().getTime() - beginTime);
      },
      isAnim = function() {
        return (movePos < endPos);
      };

  var render = function() {
    ctx.beginPath();
    ctx.moveTo(beginPos, center.y);
    ctx.lineTo(movePos, center.y);
    ctx.closePath();
    ctx.stroke();

    if (isAnim() === true) {
      movePos = easeInQuad(getTime(), beginPos, changeVal, duration);
      // ↑で終了点を超えることがあるため上限を決める
      movePos = (isAnim() === false) ? endPos : movePos;
      requestAnimationFrame(render)
    }
  };
  render();
};
drawHorizontalLineAnimEase();
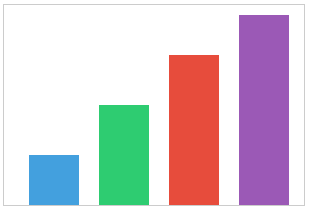
応用: グラフっぽいものを描く
直線の数を増やしてグラフのようなものを描いてみます。
考え方は上で書いたものと同じですが、ここではConstructorを使ってカスタマイズしやすくなることを目指しました。
[動作イメージ]
// 変数定義や基本スタイルは省略(前述)
// ...

var Graph = function(arg) {
  this.initialize(arg);
  /* 静的プロパティ */
  this.addVal = -10;
  this.isAnim = function() {
    return (this.endPos.y < this.movePos.y);
  };
};

(function (p) {
  p.initialize = function(arg) {
    // 左右に線が引かれるので位置に注意
    this.strokeStyle = arg.strokeStyle;
    this.beginPos = {
      x: arg.beginPos.x,
      y: arg.beginPos.y
    };
    this.movePos = {
      x: arg.beginPos.x,
      y: arg.beginPos.y
    };
    this.endPos = {
      x: arg.endPos.x,
      y: arg.endPos.y
    };
  };
  p.draw = function() {
    ctx.strokeStyle = this.strokeStyle;
    ctx.beginPath();
    ctx.moveTo(this.beginPos.x, this.beginPos.y);
    ctx.lineTo(this.movePos.x, this.movePos.y);
    ctx.closePath();
    ctx.stroke();
  };
  p.update = function() {
    this.movePos.y += this.addVal;
  };
  p.render = function() {
    this.draw();
    if (this.isAnim() === true) {
      this.update();
      this.movePos.y = (this.isAnim() === false) ? this.endPos.y : this.movePos.y;
      requestAnimationFrame(this.render.bind(this));
    }
  };
})(Graph.prototype);

var graphData = [
  {
    strokeStyle: '#43a0de',
    beginPos: { x: 50, y: 200},
    endPos: { x: 50, y: 150}
  },
  {
    strokeStyle: '#2ecc71',
    beginPos: { x: 120, y: csHeight},
    endPos: { x: 120, y: 100}
  },
  {
    strokeStyle: '#e74c3c',
    beginPos: { x: 190, y: csHeight},
    endPos: { x: 190, y: 50}
  },
  {
    strokeStyle: '#9b59b6',
    beginPos: { x: 260, y: csHeight},
    endPos: { x: 260, y: 10}
  }
];

// 以降、グラフインスタンスの生成とレンダリング
var graphObj = {},
    i = 0,
    j = 0,
    l = graphData.length;
for (; i < l; i++) {
  graphObj[i] = new Graph(graphData[i]);
}
for (; j < l; j++) {
  graphObj[j].render();
}
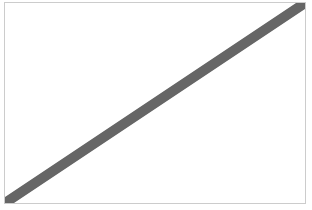
斜め線を引く
普通に引く
縦横と同じです。
[動作イメージ]
// 変数定義や基本スタイルは省略(前述)
// ...

var drawSlantLine = function() {
  ctx.beginPath();
  ctx.moveTo(0, csHeight);
  ctx.lineTo(csWidth, 0);
  ctx.closePath();
  ctx.stroke();
};
drawSlantLine();
アニメーションさせる
縦横とは違いx, y座標の両方を変動させます。
斜辺の線上から位置がずれると直線にならないので、進むべき角度とそれに沿った値の計算が必要です。
[動作イメージ]
// 変数定義や基本スタイルは省略(前述)
// ...

var drawSlantLineAnim = function() {
  var beginPos = {  // 開始座標
        x: 0,
        y: 0
      },
      movePos = {  // 移動座標(現在のxy座標)
        x: beginPos.x,
        y: beginPos.y
      },
      endPos = {  // 終了座標
        x: csWidth,
        y: csHeight
      },
      moveLength = 0, // 移動距離(現在の移動距離)
      addLength = 10, // 移動する距離
      side = { // 移動する範囲の辺の長さ
        x: endPos.x - beginPos.x,
        y: endPos.y - beginPos.y
      },
      // beginPos -> endPosに伸びていく斜辺の角度を算出
      // ラジアン = Math.atan2(終y座標 - 始y座標, 終x座標 - 始x座標);
      // 角度 = ラジアン * 180 / Math.PI;
      hypotenuse = Math.sqrt(Math.pow(side.x, 2) + Math.pow(side.y, 2)),
      radian = Math.atan2(side.y, side.x),
      isAnim = function() {
        // 移動した距離が斜辺の長さを超えていないかどうか
        return moveLength < hypotenuse;
      };

  var render = function() {
    ctx.beginPath();
    ctx.moveTo(beginPos.x, beginPos.y);
    ctx.lineTo(movePos.x, movePos.y);
    ctx.closePath();
    ctx.stroke();

    if (isAnim() === true) {
      moveLength += addLength;
      movePos.x += Math.cos(radian) * addLength;
      movePos.y += Math.sin(radian) * addLength;
      // ↑のaddで終了点を超えることがあるため上限を決める
      movePos.x = (isAnim() === false) ? endPos.x : movePos.x;
      movePos.y = (isAnim() === false) ? endPos.y : movePos.y;
      requestAnimationFrame(render);
    }
  };
  render();
};
drawSlantLineAnim();
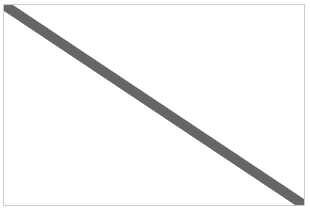
応用: イージングを付ける
イージングを付けてみます。
変化中の値を計算する必要がなく、単純なものであればこちらの方が簡単かもしれません。
ちょっとGifだと分かりにくいかもしれません
http://jsbin.com/lipaqa
[動作イメージ]

// 変数定義や基本スタイルは省略(前述)
// ...

var drawSlantLineAnimEase = function() {
  /**
   * イージング関数
   * http://gizma.com/easing/
   * @param  {[type]} t [経過時間(ミリ秒)]
   * @param  {[type]} b [初期値]
   * @param  {[type]} c [値の変化量、10->50なら40となる]
   * @param  {[type]} d [アニメーション時間(ミリ秒)]
   */
  var easeInQuad = function (t, b, c, d) {
    t /= d;
    return c*t*t + b;
  };

  var beginPos = {  // 開始座標
        x: 0,
        y: 0
      },
      movePos = {  // 移動座標(現在のxy座標)
        x: beginPos.x,
        y: beginPos.y
      },
      endPos = {  // 終了座標
        x: csWidth,
        y: csHeight
      },
      side = { // 移動する範囲の辺の長さ
        x: endPos.x - beginPos.x,
        y: endPos.y - beginPos.y
      },
      duration = 1000,  // アニメーション時間。最小でも300程度は取る
      beginTime = new Date().getTime(),
      // 経過時間
      getTime = function() {
        return (new Date().getTime() - beginTime);
      },
      isAnim = function() {
        // アニメーション時間が超えていないかどうか
        return getTime() < duration;
      };

  var render = function() {
    var draw = function() {
      ctx.clearRect(0, 0, csWidth, csHeight);
      ctx.beginPath();
      ctx.moveTo(beginPos.x, beginPos.y);
      ctx.lineTo(movePos.x, movePos.y);
      ctx.closePath();
      ctx.stroke();
    };

    if (isAnim() === true) {
      movePos.x = easeInQuad(getTime(), beginPos.x, side.x, duration);
      movePos.y = easeInQuad(getTime(), beginPos.y, side.y, duration);
      draw();
      requestAnimationFrame(render);
    } else {
      // 経過時間で条件を判断しているため、requestAnimationFrameだと微妙にずれる可能性がある
      // 足りない分を1回再描画して補う
      movePos.x = (isAnim() === false) ? endPos.x : movePos.x;
      movePos.y = (isAnim() === false) ? endPos.y : movePos.y;
      draw();
    }
  };
  render();
};
drawSlantLineAnimEase();
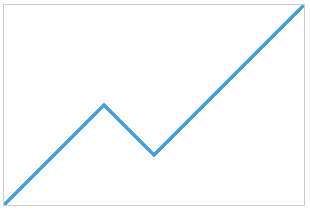
応用: グラフっぽいものを描く
斜め線でグラフのようなものを描いてみます。
縦線グラフの時と考え方は同じですが、更にDeferredを使って順番にアニメーションできるようにしてみました。
[動作イメージ]
var cs       = document.getElementById('myCanvas'),
    ctx      = cs.getContext('2d'),
    csWidth  = cs.width,
    csHeight = cs.height,
    center   = {
      x: csWidth / 2,
      y: csHeight / 2
    };

// 線の共通スタイル
ctx.strokeStyle = '#43a0de';
ctx.lineWidth   = 3;
ctx.lineJoin    = 'round';

var Graph = function(arg) {
  this.initialize(arg);
  /* 共通の静的プロパティ */
  this.moveLength = 0;
  this.addLength  = 5;
  this.isAnim     = function() {
    return (this.moveLength < this.hypotenuse);
  };
};

(function (p) {
  /**
   * インスタンスごとの初期設定
   * @param  {array.obj} arg [beginPos.x, beginPos.y, endPos.x, endPos.y]
   */
  p.initialize = function(arg) {
    this.dfd = $.Deferred();
    this.beginPos = {
      x: arg.beginPos.x,
      y: arg.beginPos.y
    };
    this.movePos = {
      x: arg.beginPos.x,
      y: arg.beginPos.y
    };
    this.endPos = {
      x: arg.endPos.x,
      y: arg.endPos.y
    };
    this.side = {
      x: this.endPos.x - this.beginPos.x,
      y: this.endPos.y - this.beginPos.y
    };
    this.hypotenuse = Math.sqrt(Math.pow(this.side.x, 2) + Math.pow(this.side.y, 2));
    this.radian = Math.atan2(this.side.y, this.side.x);
  };
  p.draw = function() {
    ctx.beginPath();
    ctx.moveTo(this.beginPos.x, this.beginPos.y);
    ctx.lineTo(this.movePos.x, this.movePos.y);
    ctx.closePath();
    ctx.stroke();
  };
  p.update = function() {
    this.moveLength += this.addLength;
    this.movePos.x += Math.cos(this.radian) * this.addLength;
    this.movePos.y += Math.sin(this.radian) * this.addLength;
  };
  p.render = function() {
    this.draw();
    if (this.isAnim() === true) {
      this.update();
      this.movePos.x = (this.isAnim() === false) ? this.endPos.x : this.movePos.x;
      this.movePos.y = (this.isAnim() === false) ? this.endPos.y : this.movePos.y;
      requestAnimationFrame(this.render.bind(this));
    } else {
      // アニメーションが完了したら通知する
      this.dfd.resolve();
    }
    return this.dfd.promise();
  };
})(Graph.prototype);

var graphData = [
  {
    beginPos: { x: 0, y: csHeight},
    endPos: { x: 100, y: 100}
  },
  {
    beginPos: { x: 100, y: 100},
    endPos: { x: 150, y: 150}
  },
  {
    beginPos: { x: 150, y: 150},
    endPos: { x: csWidth, y: 0}
  }
];

// 以降、グラフインスタンスの生成とレンダリング
var graphObj = {},
    i = 0,
    j = 0,
    l = graphData.length;
for (; i < l; i++) {
  graphObj[i] = new Graph(graphData[i]);
}

$(function() {
  var d = (new $.Deferred()).resolve();
  $.each(graphObj, function(i, obj){
    d = d.then(function() {
      return obj.render();
    });
  });
})
終わりに
思いのほかボリュームが出てしまったので、今回は直線のみを取り上げました。
作り方は自分で考えてみたので、書き方が微妙だったり非効率な可能性があります。もっと良い方法があればご教授くださいませ。
おまけだ...っ!

ククク...!
なんて無意味で非効率...っ!
(途中で飽きた)