経緯
pythonを独学で勉強しはじめているけど、
機械学習をやろうと思っても正直理解が進まないんですよ。。
一番のネックは数学的な知識が要求されるって事ですかね。
高校もろくに出ていないので数式を見せられても何も分からないんですよね。
ただやっぱりやらないと覚えられないと思って理解していなくても色々なサイトを参考(パクッて)にしてとりあえず形にしてみようと思います。
ターゲットを決める
実践的に試していきたいと思ったので、画像認証を使っていそうな掲示板を探した所、
FC2の掲示板を見つけたので特に理由は無く決めました。なので本当のCAPTCHAではないですね。
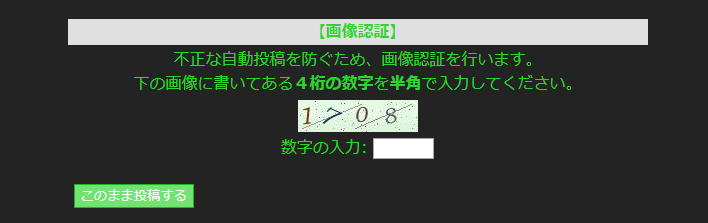
以下のような画像の数字を識別して自動で投稿出来るようにしたいと思います。
(最初に言っておきますが、不正目的ではなくあくまで技術勉強の為です。)
参考にしたサイト
機械学習を使ってCAPTCHAをわずか15分で突破するチャレンジが行われる
学習データ作り
数字認識で色々なサイトを探しても大半がMNISTデータセットを使って学習していたので、オリジナルの学習データの場合どうするのかよく分かりませんでした。
でも↑に書いた参考サイトと同じようにとりあえずやってみる事にしました。
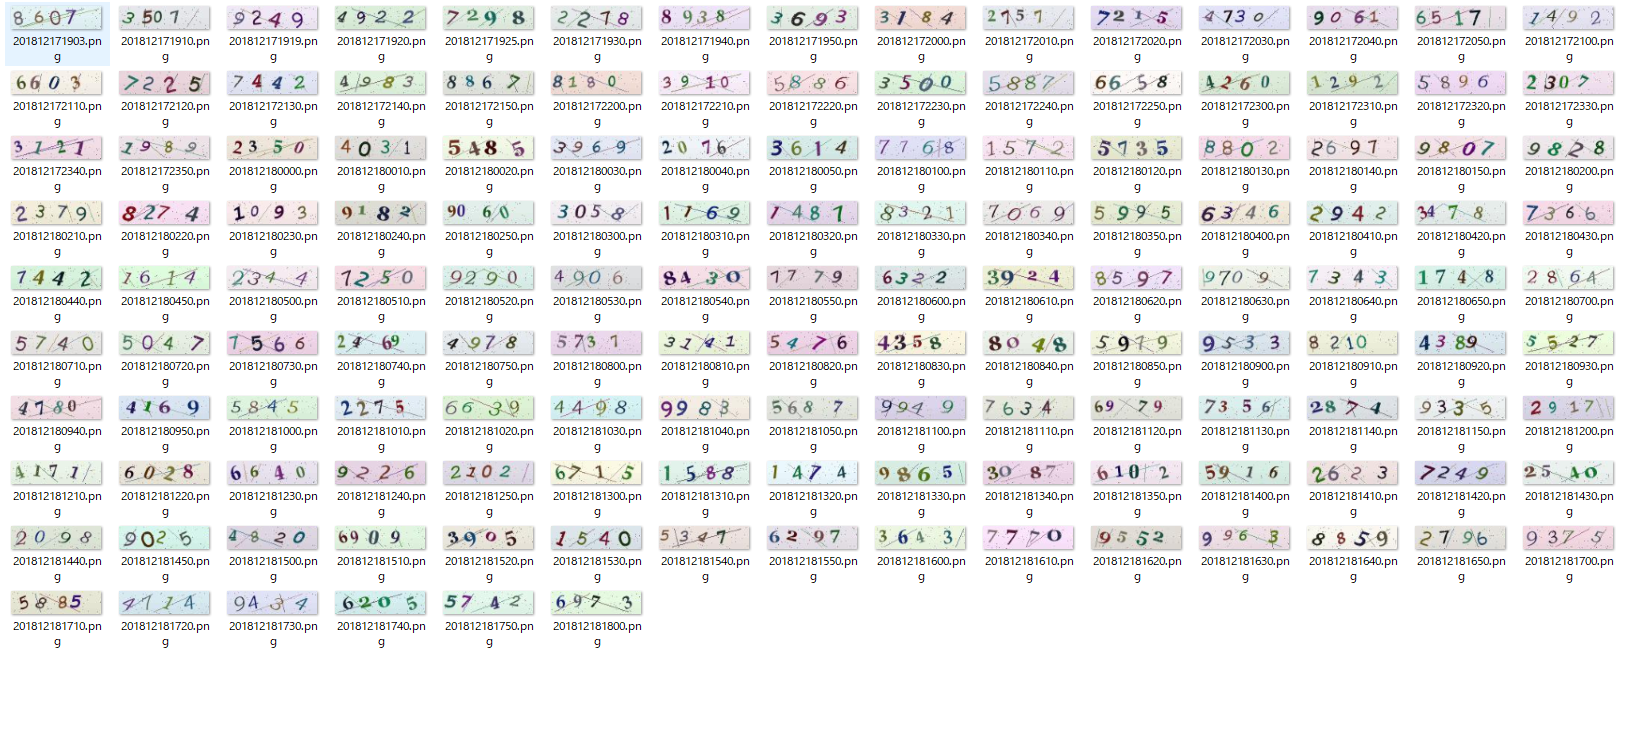
画像取得
適当なFC2の掲示板をSeleniumを使って画像認証の画面まで進めて、スクリーンショットを取り
OpenCV2でトリミングをして学習データとなる数字の画像を集める所から行いました。
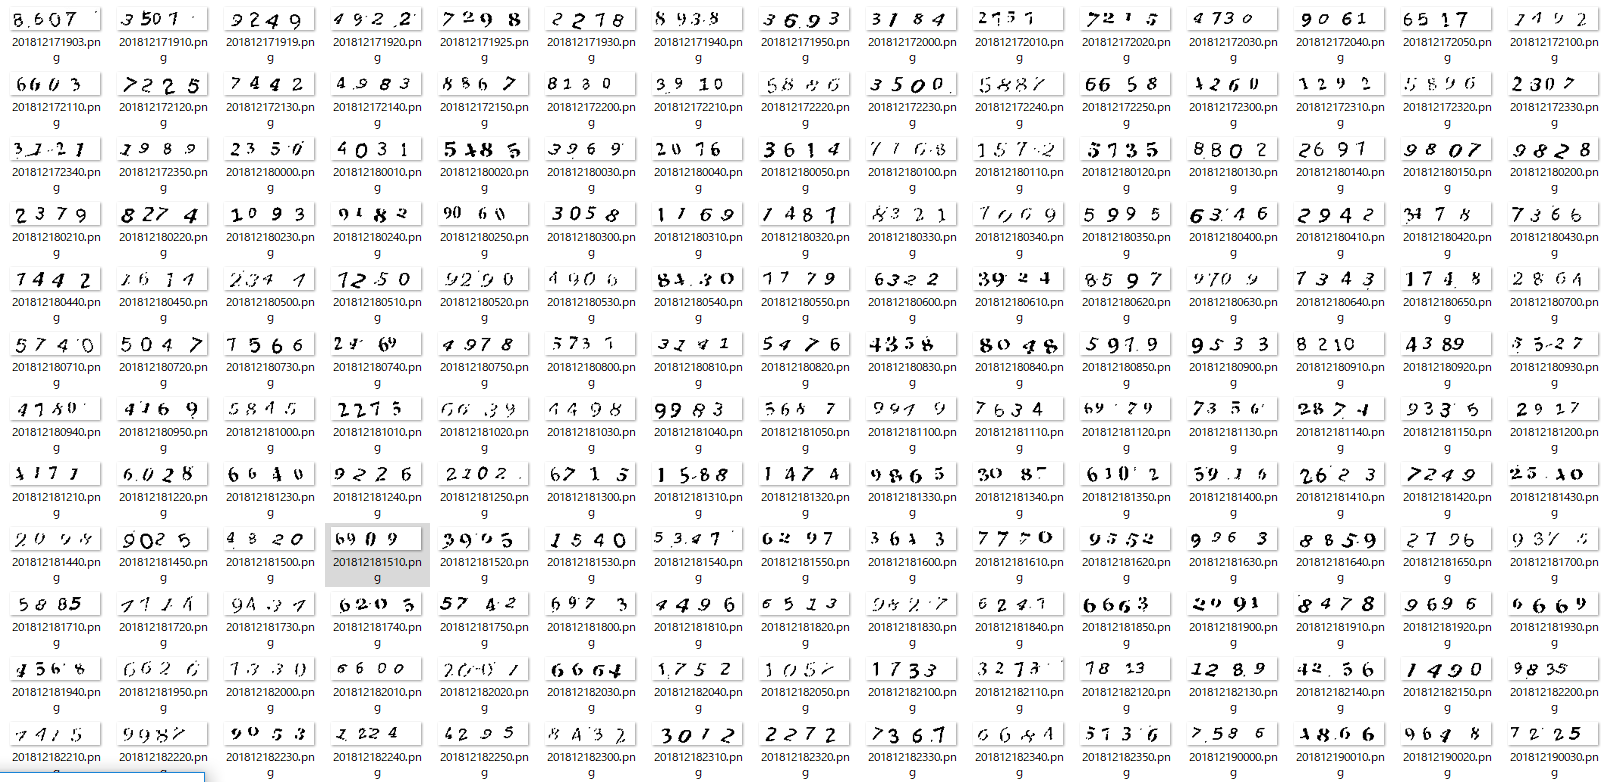
画像加工
次に集めた画像を輪郭抽出して1文字づつに区切る為に加工を施します。
やっている加工処理は以下です。
def gazosyori(inputfile,output):
    image = cv2.imread(inputfile)
    # グレースケール
    gray = cv2.cvtColor(image,cv2.COLOR_BGR2GRAY)
    # 閾値処理
    gray = cv2.adaptiveThreshold(gray,255,cv2.ADAPTIVE_THRESH_GAUSSIAN_C , cv2.THRESH_BINARY,21,35)
    # 平均化
    gray = cv2.equalizeHist(gray)
    # 二値化
    ret, dst = cv2.threshold(gray, 127,255, cv2.THRESH_TOZERO)
    ret, dst = cv2.threshold(dst, 0, 255, cv2.THRESH_BINARY | cv2.THRESH_OTSU)
    # モーフィング
    kernel = cv2.getStructuringElement(cv2.MORPH_ELLIPSE,(2,2))
    dst = cv2.morphologyEx(dst, cv2.MORPH_CLOSE, kernel)
    cv2.imwrite(output, dst)
切り取り
加工した画像から1文字づつ切り取ります。
加工処理が良くないのか元画像が悪いのか分からないけど、結構試行錯誤しました。
def kiritori(inputfile,text):
    fullfilename = os.path.basename(inputfile)
    filename = os.path.splitext(fullfilename)[0]
    image = cv2.imread(inputfile)
    image = cv2.cvtColor(image,cv2.COLOR_BGR2GRAY)
    image2 = cv2.threshold(image, 0, 255, cv2.THRESH_BINARY_INV | cv2.THRESH_OTSU)[1]
    contours = cv2.findContours(image2.copy(), cv2.RETR_EXTERNAL, cv2.CHAIN_APPROX_SIMPLE)
    contours = contours[0] if imutils.is_cv2() else contours[1]
    letter_image_regions = []
    for contour in contours:
        (x, y, w, h) = cv2.boundingRect(contour)
        if w + h >= 21:
            if w + h <= 30:
                w = 16
                h = 16
            letter_image_regions.append((x, y, w, h))
        else:
            continue
            # This is a normal letter by itself
            #letter_image_regions.append((x, y, w, h))
    if len(letter_image_regions) != 4:
        ret = 1
        text = '0000'
        return ret
    letter_image_regions = sorted(letter_image_regions, key=lambda x: x[0])

    output = cv2.merge([image] * 3)
    predictions = []
    i = 0
    textlist = list(text)
    for letter_bounding_box in letter_image_regions:
        label = textlist[i]
        i = i + 1

        x, y, w, h = letter_bounding_box

        letter_image = image[y - 2:y + h + 2, x - 2:x + w + 2]

        letter_image = resize_to_fit(letter_image, 20, 20)
        cv2.imwrite('/home/ubuntu/tensorflow/train/'+ str(label) + '/' + str(filename) + '_' + str(i)  + '.png',letter_image)
手動で区分け
数字のフォルダを作り、切り取った画像を数字別に分けました。
また、その際に自分の目でも判別できない画像は削除しました。
大体、各フォルダに40~50枚で450枚程の画像になりました。

学習
正直ここのニューラルネットワークの部分は全然分かってないです。
サイトを参考にまるっとコピーしてエラーが出た時に対処したくらいです。
import cv2
import pickle
import os.path
import numpy as np
from imutils import paths
import pprint
from sklearn.preprocessing import LabelBinarizer
from sklearn.model_selection import train_test_split
from keras.models import Sequential
from keras.layers.convolutional import Conv2D, MaxPooling2D
from keras.layers.core import Flatten, Dense
from helpers import resize_to_fit


IMAGESDIR = 'train'
MODEL_FILENAME = "model.hdf5"
MODEL_LABELS_FILENAME = "model_labels.dat"

data = []
labels = []

# 学習データ読み込み
for image_file in paths.list_images(IMAGESDIR):
    image = cv2.imread(image_file)
    image = cv2.cvtColor(image, cv2.COLOR_BGR2GRAY)
    image = resize_to_fit(image, 20, 20)
    image = np.expand_dims(image, axis=2)

    # label(画像に書かれている数字)をディレクトリ名から付与
    label = image_file.split(os.path.sep)[-2]
    #print(image)
    #print(label)
    data.append(image)
    labels.append(label)

data = np.array(data, dtype="float") / 255.0
labels = np.array(labels)

(X_train, X_test, Y_train, Y_test) = train_test_split(data, labels, test_size=0.25, random_state=0)

lb = LabelBinarizer().fit(Y_train)
Y_train = lb.transform(Y_train)
Y_test = lb.transform(Y_test)


with open(MODEL_LABELS_FILENAME, "wb") as f:
    pickle.dump(lb, f)

# Build the neural network!
model = Sequential()

# First convolutional layer with max pooling
model.add(Conv2D(20, (5, 5), padding="same", input_shape=(20, 20, 1), activation="relu"))
model.add(MaxPooling2D(pool_size=(2, 2), strides=(2, 2)))

# Second convolutional layer with max pooling
model.add(Conv2D(50, (5, 5), padding="same", activation="relu"))
model.add(MaxPooling2D(pool_size=(2, 2), strides=(2, 2)))

# Hidden layer with 500 nodes
model.add(Flatten())
model.add(Dense(500, activation="relu"))

# Output layer with 32 nodes (one for each possible letter/number we predict)
model.add(Dense(10, activation="softmax"))

# Ask Keras to build the TensorFlow model behind the scenes
model.compile(loss="categorical_crossentropy", optimizer="adam", metrics=["accuracy"])

# Train the neural network
model.fit(X_train, Y_train, validation_data=(X_test, Y_test), batch_size=10, epochs=10, verbose=1)

# Save the trained model to disk
model.save(MODEL_FILENAME)
上記のコードを画像フォルダ(名前はtrainにしてます)がある場所で実行するだけ。
# python learn.py
Using TensorFlow backend.
Train on 795 samples, validate on 266 samples
Epoch 1/10
2018-12-26 15:46:44.579331: I tensorflow/core/platform/cpu_feature_guard.cc:141] Your CPU supports instructions that this TensorFlow binary was not compiled to use: AVX2 FMA
795/795 [==============================] - 2s 3ms/step - loss: 1.5208 - acc: 0.5220 - val_loss: 0.8452 - val_acc: 0.7481
Epoch 2/10
795/795 [==============================] - 2s 2ms/step - loss: 0.3774 - acc: 0.9006 - val_loss: 0.4554 - val_acc: 0.8910
Epoch 3/10
795/795 [==============================] - 2s 2ms/step - loss: 0.2044 - acc: 0.9472 - val_loss: 0.3750 - val_acc: 0.9173
Epoch 4/10
795/795 [==============================] - 2s 2ms/step - loss: 0.1321 - acc: 0.9585 - val_loss: 0.3266 - val_acc: 0.9323
Epoch 5/10
795/795 [==============================] - 2s 2ms/step - loss: 0.0927 - acc: 0.9748 - val_loss: 0.3173 - val_acc: 0.9286
Epoch 6/10
795/795 [==============================] - 2s 2ms/step - loss: 0.0684 - acc: 0.9811 - val_loss: 0.3334 - val_acc: 0.9248
Epoch 7/10
795/795 [==============================] - 2s 2ms/step - loss: 0.0390 - acc: 0.9912 - val_loss: 0.3873 - val_acc: 0.9211
Epoch 8/10
795/795 [==============================] - 2s 2ms/step - loss: 0.0349 - acc: 0.9937 - val_loss: 0.3499 - val_acc: 0.9248
Epoch 9/10
795/795 [==============================] - 2s 2ms/step - loss: 0.0257 - acc: 0.9925 - val_loss: 0.3800 - val_acc: 0.9361
Epoch 10/10
795/795 [==============================] - 2s 2ms/step - loss: 0.0387 - acc: 0.9899 - val_loss: 0.3318 - val_acc: 0.9398
結果もよく分かりませんが、モデルが出来上がったのでこれを利用します。
数字判別(実際に投稿できるか)
処理の流れ的には今までやってきた事をなぞる感じになります。
・投稿する手前(画像認証のページ)まで行ってスクリーンショット取得
・スクリーンショットから画像加工
・1文字づつ切り出して
New ・判別
New ・判別した数字を入力して投稿
def hantei(inputfile):
    MODEL_FILENAME = "/home/ubuntu/tensorflow/model.hdf5"
    MODEL_LABELS_FILENAME = "/home/ubuntu/tensorflow/model_labels.dat"
    CAPTCHA_IMAGE_FOLDER = "/home/ubuntu/crowler/test/number/2/"

    print(inputfile)
    with open(MODEL_LABELS_FILENAME, "rb") as f:
        lb = pickle.load(f)

    # Load the trained neural network
    model = load_model(MODEL_FILENAME)


    # loop over the image paths
    image = cv2.imread(inputfile)
    image = cv2.cvtColor(image, cv2.COLOR_BGR2GRAY)

    # Add some extra padding around the image
    image = cv2.copyMakeBorder(image, 20, 20, 20, 20, cv2.BORDER_REPLICATE)

    # threshold the image (convert it to pure black and white)
    thresh = cv2.threshold(image, 0, 255, cv2.THRESH_BINARY_INV | cv2.THRESH_OTSU)[1]

    # find the contours (continuous blobs of pixels) the image
    contours = cv2.findContours(thresh.copy(), cv2.RETR_EXTERNAL, cv2.CHAIN_APPROX_SIMPLE)

    # Hack for compatibility with different OpenCV versions
    contours = contours[0] if imutils.is_cv2() else contours[1]

    letter_image_regions = []

    # Now we can loop through each of the four contours and extract the letter
    # inside of each one
    for contour in contours:
        # Get the rectangle that contains the contour
        (x, y, w, h) = cv2.boundingRect(contour)
        print(x,y,w,h)
        # Compare the width and height of the contour to detect letters that
        # are conjoined into one chunk
        if w + h >= 19:
            if w + h <= 30:
                if h >= 17:
                    w = 15

                else:
                    w = 16
                    h = 16
            letter_image_regions.append((x, y, w, h))
        else:
            continue
            # This is a normal letter by itself
            #letter_image_regions.append((x, y, w, h))

    # If we found more or less than 4 letters in the captcha, our letter extraction
    # didn't work correcly. Skip the image instead of saving bad training data!
    if len(letter_image_regions) != 4:
        ret = 1
        text = '0000'
        return ret,text

    # Sort the detected letter images based on the x coordinate to make sure
    # we are processing them from left-to-right so we match the right image
    # with the right letter
    letter_image_regions = sorted(letter_image_regions, key=lambda x: x[0])

    # Create an output image and a list to hold our predicted letters
    output = cv2.merge([image] * 3)
    predictions = []

    # loop over the lektters
    for letter_bounding_box in letter_image_regions:
        # Grab the coordinates of the letter in the image
        x, y, w, h = letter_bounding_box

        # Extract the letter from the original image with a 2-pixel margin around the edge
        letter_image = image[y - 2:y + h + 2, x - 2:x + w + 2]

        # Re-size the letter image to 20x20 pixels to match training data
        letter_image = resize_to_fit(letter_image, 20, 20)

        # Turn the single image into a 4d list of images to make Keras happy
        letter_image = np.expand_dims(letter_image, axis=2)
        letter_image = np.expand_dims(letter_image, axis=0)

        # Ask the neural network to make a prediction
        prediction = model.predict(letter_image)

        # Convert the one-hot-encoded prediction back to a normal letter
        letter = lb.inverse_transform(prediction)[0]
        predictions.append(letter)

        # draw the prediction on the output image
        cv2.rectangle(output, (x - 2, y - 2), (x + w + 4, y + h + 4), (0, 255, 0), 1)
        cv2.putText(output, letter, (x - 5, y - 5), cv2.FONT_HERSHEY_SIMPLEX, 0.55, (0, 255, 0), 2)

    # Print the captcha's text
    text = "".join(predictions)
    print("CAPTCHA text is: {}".format(text))
    ret = 0
    return ret,text
追加学習?
どの程度の精度で判別するのか分からないので、コードの中で投稿が成功してたら
その画像を1文字づつ切り取って、学習データの数字フォルダに保存するようにしました。
これで成功する度に学習データが増えるので、ある程度溜まった段階でモデル再作成すれば精度が高まる?のかな?
感想
何回か試してみましたが、投稿が成功する事もあれば失敗もある感じですね。体感7割くらいの成功率。
まあこれが目的ではなく、あくまで機械学習に触れるという目的だったのでそういう意味では成果はあった気がします。
ただ、やっぱりこれ以上理解しようとするのは敷居は高いと感じます。。
まあ本業はインフラエンジニアなのでまあいっかー