Amazonで3万弱のミニPCを買ってみたので、Ubuntu Server 20.04.1 LTS をインストールしてみました。
概要
beelink ミニPCにUbuntu server 20.04をインストール。
SSHでメインPCからリモートアクセス。

(参考)Ubuntu Server 20.04に行きつくまで参考これまでのいきさつ。
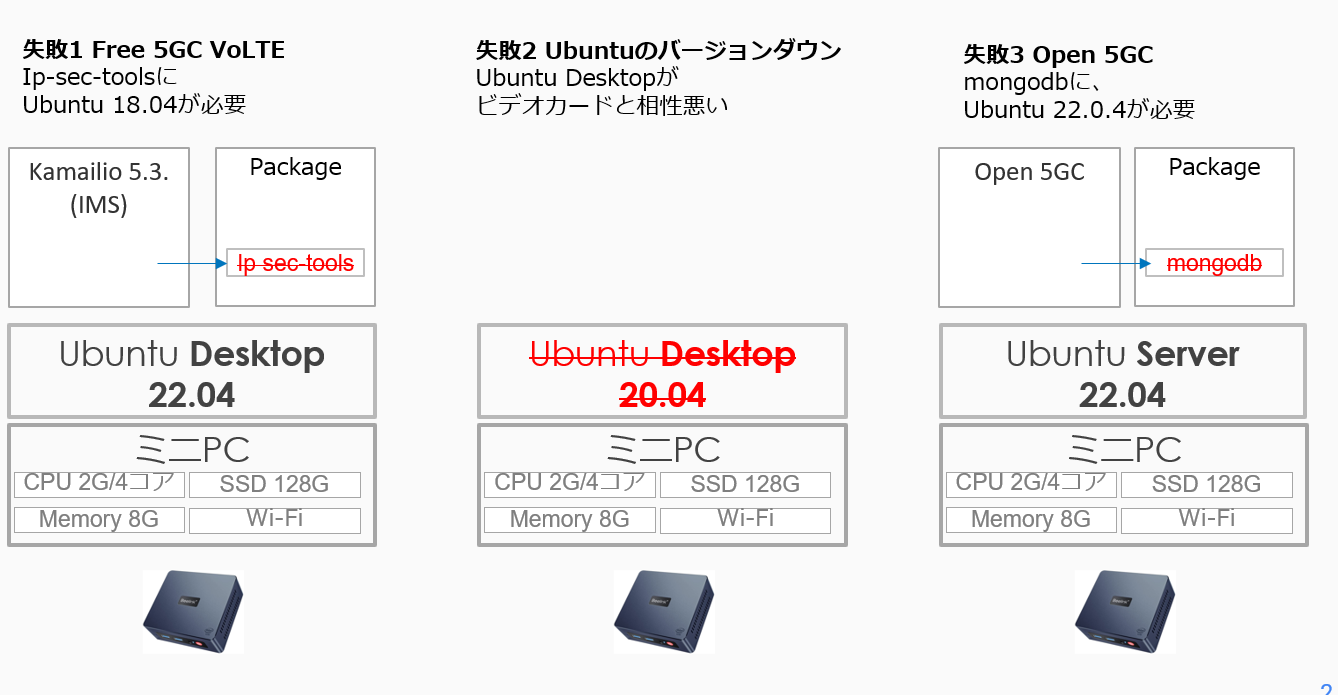
最初は22.04 Desktopをインストールしたのですが、使いたいPackageが一部
未対応でした。

Ubuntu Server のインストール 参考文献
Ubuntu server guide
https://ubuntu.com/server/docs#system-requirements
(22.04と共通 まだ22.04用のガイドは用意されてない様子)
材料
ミニPC Beelink Minis : 2万ちょい こちらにUbuntuをインストール
・Win11, 8GB DDR, 128G SSD, Intel N5095
1. Basic installation
1.1. システム要件
amd64 (Intel/AMD 64-bit) :Intel 64 niy OK
CPU: 1 gigahertz:OK 2.00 GHz 4 Core
RAM: 1 gigabyte :OK 8GByte
Disk: 2.5 gigabytes: OK 128GByte
1.2. Desktop版とServer版の違い
repositoryは一緒。Serverはグラフィカルではない=コマンドライン
1.3. Preparing install media
・isoイメージをダウンロード
https://releases.ubuntu.com/20.04/?_ga=2.16476596.366750257.1662323541-361458439.1662067984
・balenaEtcherでUSBメモリisoを焼く
1.4. Booting the installer
・USBをミニPCに刺して、電源ON、起動画面でF7を押しっぱなし。
・USBを選択してUbuntu Serverをインストール
1.5. インストーラー詳細
・言語選択:日本語がないので、泣く泣く"English"を選択して Done
・キーボード:日本語キーボードがない"English(US)"を選択して Done
・Network connection:Wifiも選べた
wlpis0でスペース,Edit WiFi
SSID選ぶ:Choose avisible network
・Proxy? arhchive mirror? わからないので、そのまま Done
・Mirror address デフォルトのまま jp.archive.ubuntu.com
・名前、サーバ名、ユーザ名、パスワード 設定
・OpenSSHのインストール チェック"x" Done
//多分後でメインのWindowsマシンから リモート接続したくなるだろう
1.6. Snap(おすすめソフト?)
とりあえず何も選ばずにDone。
1.7. インストール終わり
Reboot Nowと出たら再起動
Please remove boot media と出たらUSBを抜いてエンター
2. Attaching your subscription to Ubuntu
Ubuntu.comへの登録がおすすめされているので、とりあえずしておく。
2.1. Installing the UA client
$ sudo apt update
$ sudo apt install ubuntu-advantage-tools
2.2. Ubuntu one Accountを作る
メインPC(Windows)のブラウザから、アカウントを作成
https://login.ubuntu.com/
ダッシュボード https://ubuntu.com/advantage
にアクセスしてみる。
Free personalで3マシンまでは無料っぽい。tokenを使えばよいっぽい。
tokenを目で見て手打ちするのは無理。SSHで接続しよう。SSH接続は3章へ。
sudo ua attach C1xxxx ←これがトークン
livepatchがenableになって、少しセキュアになりました。
3. OpenSSH Server のインストールとSSHでリモート接続
sudo apt install openssh-client
sudo apt install openssh-server
上記を参考にミニPCのipアドレス確認
ip addr
192.168.68.xxx
Win PCに Teratermをインストール
Teratermを使って、ubuntu serverセットアップ時のIDとパスでSSHアクセス。
接続できました!
終わり。