実施環境
- OS: macOS Sierra (10.12.6)
- Vagrant: 2.0.0
- Virtualbox: 5.1.28 r117968
- Ansible: 2.4.0.0
今回のゴール
vagrant upだけでNFSサーバを作成する
今回の成果物
こちらに置いてあります
negibouze/vagrant-nfs
1. 各ツールの準備(インストール済みの場合不要)
step1. Homebrewをインストールする
ターミナルで下記を実行
$ ruby -e "$(curl -fsSL https://raw.githubusercontent.com/Homebrew/install/master/install)"
step2. Homebrew Caskをインストールする
$ brew install caskroom/cask/brew-cask
step3. VirtualBoxをインストールする
$ brew cask install virtualbox
step4. Vagrantをインストールする
$ brew cask install vagrant
step5. Vagrant-vbguest pluginをインストールする
$ vagrant plugin install vagrant-vbguest
step6. Vagrant-hostmanager pluginをインストールする
$ vagrant plugin install vagrant-hostmanager
step7. Ansibleをインストールする
$ brew install ansible
2. Vagrantfileの作成
step1. 対象ディレクトリ配下で下記を実行
$ vagrant init
step2. vm.boxを設定
今回はpuppetlabsのCentOS 6.6(64-bit)を使用
!Puppetは使わないので「nocm」
config.vm.box = "puppetlabs/centos-6.6-64-nocm"
# boxがない場合、インストール
config.vm.box_url = "https://vagrantcloud.com/puppetlabs/boxes/centos-6.6-64-nocm/versions/1.0.2/providers/virtualbox.box"
step3. hostmanagerを追記
config.hostmanager.enabled = true
config.hostmanager.manage_host = true
step4. provisionを追記
host.vm.provision "ansible" do |ansible|
  ansible.playbook = "provisioning/servers.yml"
  ansible.inventory_path = "provisioning/hosts"
  ansible.limit = 'all'
end
3. Ansibleのファイルを作成
step1. hosts
[servers]
192.168.34.212
step2. Playbook
servers.yml
---
- hosts: servers
  become: true
  roles:
    - common
    - nfslayer
nfslayer/tasks/main.yaml
---
# install nfs-utils
- name: install nfs-utils
  yum: name=nfs-utils state=present
# copy configurations
- name: copy idmapd.conf
  copy: src=../files/idmapd.conf dest=/etc/idmapd.conf
- name: copy exports
  copy: src=../files/exports dest=/etc/exports
# create nfs directory
- stat: path=/data/nfs
  register: dir
- name: create target directory
  file: path=/data/nfs state=directory mode=0777
  when: not dir.stat.exists
# reload exports
- name: reload NFS exports
  command: exportfs -ra
# start servieces
- name: start rpcbind
  service:
    name: rpcbind
    state: started
- name: start nfs-server
  service:
    name: nfs
    state: started
- name: enable rpcbind
  service:
    name: rpcbind
    enabled: yes
- name: enable nfs-server
  service:
    name: nfs
    enabled: yes
4. 動作確認
step1. 仮想マシンを作成する
$ vagrant up
step2. 接続確認
FileZilla等で接続してみる
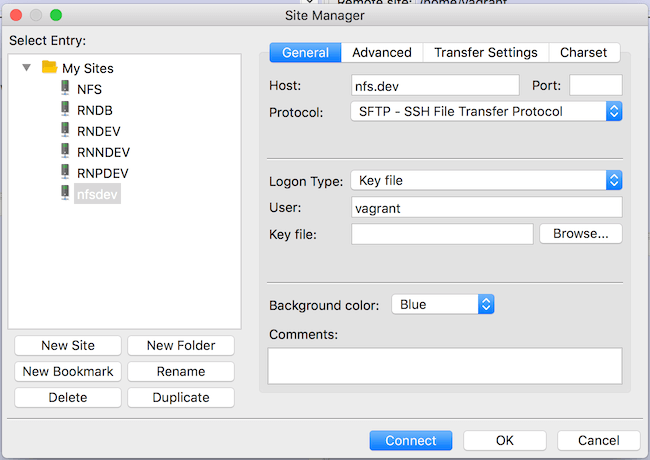
Host: Vagrantfileの「hostname」
Protocol: SFTP
Logon Type: Key file
User: vagrant
Key file: [WORK_DIR]/.vagrant/machines/[VM_NAME]/virtualbox/private_key
5. 参考にしたサイト