久々にXAMPPをいじったら構築に手間取ったのでメモ.
やりたいこと
デフォルトでは,XAMPPのバーチャルホスト(localhost)のパスは,Cドライブ直下にインストールした場合C:\xampp\htdocsとなっているが,
C:\Users\Documents\testなどの任意のパスもバーチャルホストにしたい.
環境
Windows 8
XAMPP 5.6.14
手順
手順1. フォルダパスとドメイン名の設定
まず,C:\xampp\apache\conf\extra\httpd-vhosts.confの20行目あたりにある
## NameVirtualHost *:80
のコメントアウト(##)を消す.
次に,以下のように追記して参照したいフォルダを指定.
<VirtualHost *:80>
    DocumentRoot "C:\Users\Documents\test"
    ServerName localhost2
</VirtualHost>
DocumentRootにはフォルダパスを,ServerNameには任意のドメイン名を設定する.
ここではドメイン名はlocalhost2とする.
手順2. アクセス権付与
注意点として,C:\xampp\htdocs以外をバーチャルホストとするとき,別途アクセス権を与えなければならない.そうしないと403エラーになる.
引き続きC:\xampp\apache\conf\extra\httpd-vhosts.confに,以下のように追記すればOK.
<Directory "C:\Users\Documents\test">
    Options Indexes
    AllowOverride All
    Require all granted
</Directory>
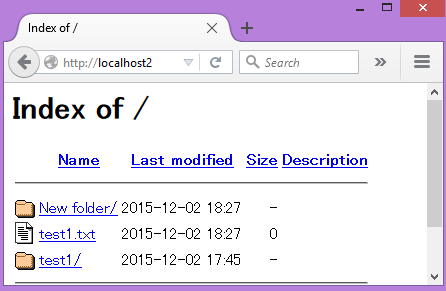
Options Indexesとは,以下のようにブラウザ上でフォルダのインデックスGUIを見れるようにするオプション.書かなくてもOK.
手順3. hostsファイル編集
C:\Windows\System32\Drivers\etcにある,hostsを開き,以下のように先ほど設定したドメイン名を追記.
127.0.0.1 localhost2
これでOK.
XAMPPからApacheを起動し,http://localhost2 を叩けば上記の画像のように任意のフォルダをバーチャルホストにできる.
参考
以下のサイトを参考にさせていただきました.
http://web77.info/xampp/set/virtual.html
