はじめに
AWSド初心者のわたなゔぇです。
流れでSlackBotを作ることになって、流れでサーバーレスにしてみようって話になって、
流れで試作してできたのがShuzoBotです(雑)
機能として
・あらかじめ設定したマイナスな言葉を打つと対応したShuzoのアツい言葉が届く
以上です。
また、今回はこちらの記事を参考にしました。
AWS Lambda を使って Slack ボット (命名: Lambot [ランボー]) を低予算で作ろうじゃないか
AWSコンソールの画面配置が変わっておりちょっと混乱したので
覚え書きも兼ねて。
AWS側の設定
Lambda
- Lambda関数の作成

- 設計図選択
「microservice-http-endpoint」を選択。

- トリガー設定
API名:ShuzoBot
デプロイされるステージ:prod
セキュリティ:オープン
にそれぞれ指定します。なんか警告出るけど無視で今回はおk。

- 命名
次の画面で名前をつけます。説明の欄は多分ちゃんと書いておいた方がいいけどめんどくさかったので今回はこのままやっちゃいました。

- Lambda関数のコード設定
「コードをインラインで編集」モードにしてから、

exports.handler = function(event, context) {
    var text = '';

    switch(event.text) {
        case '帰りたい':
            text = '富士山のように、日本一になるって言っただろ! お前、昔を思い出せよ!! 今日からお前は富士山だ!!!';
            break;
        case 'もう無理':
            text = 'もっと熱くなれよ…!!熱い血燃やしてけよ…!!人間熱くなったときがホントの自分に出会えるんだ!';
    }

    if(text !== '') {
        context.done(null, {text: text});
    }
};
これを貼っつけます。
- ハンドラとロールの設定
ハンドラ:index.handler
ロール:既存のロールを選択
既存のロール:lambda_basic_execution

- 詳細設定
画面したのタブを開いて、
メモリ:128
タイムアウト:3秒 に設定。

API Gatewayの設定
- API Gateway設定画面へ
https:~~~~/ShuzoBotのURLは、どこかに控えておいてください。
あとで使います。
画像の「ANY」をクリック。

- POSTメソッドの追加
/ShuzoBotを選択した状態で アクションをクリック。

続いて、「メソッドの作成」をクリック。

こんなやつが出てくるので、POSTを選択してチェックマークをポチ。

- ANYの削除
ANYを選択した状態で、アクションからメソッド削除。

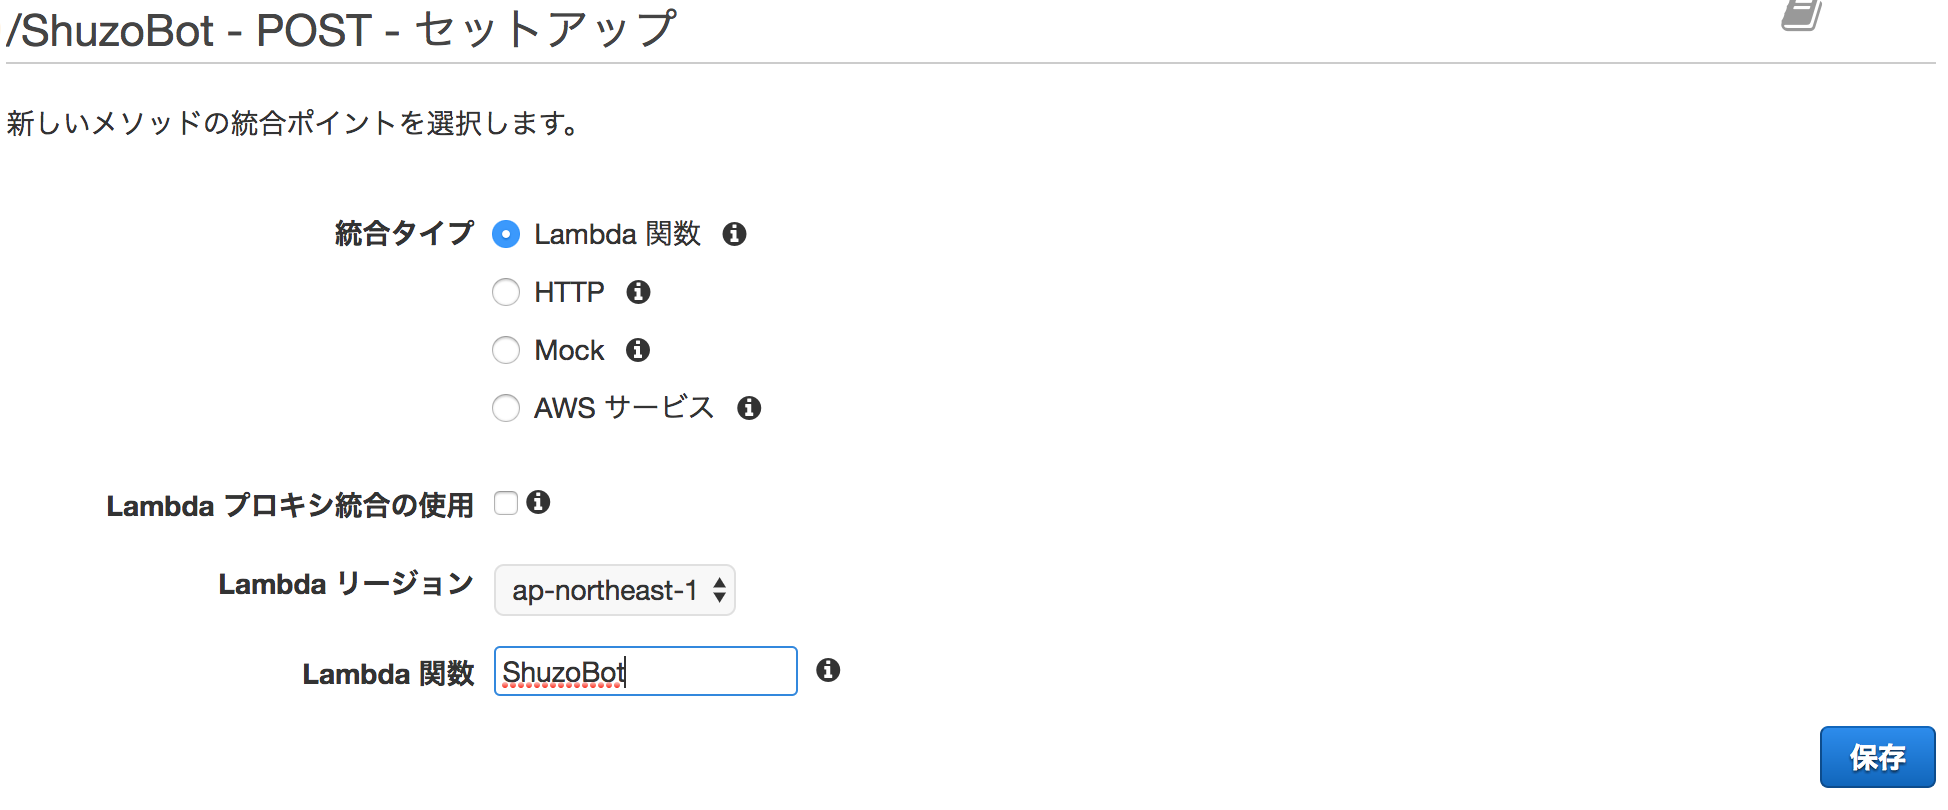
- POSTメソッドのセットアップ
POSTを選択して、
関数名を「ShuzoBot」に設定、保存。
- マッピングテンプレートの設定
するとこんな画面になるので、
「統合リクエスト」をクリック。

画面下の方のタブを開いて、

Content-Typeに
「application/x-www-form-urlencoded」を入力して横のチェックマークをぽち。
「マッピングテンプレートの追加」をクリック。

出てきたやつに入力。
(これについての解説は参考にしたページをご覧ください)

## convert HTML POST data or HTTP GET query string to JSON

## get the raw post data from the AWS built-in variable and give it a nicer name
# if ($context.httpMethod == "POST")
 #set($rawAPIData = $input.path('$'))
# elseif ($context.httpMethod == "GET")
 #set($rawAPIData = $input.params().querystring)
 #set($rawAPIData = $rawAPIData.toString())
 #set($rawAPIDataLength = $rawAPIData.length() - 1)
 #set($rawAPIData = $rawAPIData.substring(1, $rawAPIDataLength))
 #set($rawAPIData = $rawAPIData.replace(", ", "&"))
# else
 #set($rawAPIData = "")
# end

## first we get the number of "&" in the string, this tells us if there is more than one key value pair
# set($countAmpersands = $rawAPIData.length() - $rawAPIData.replace("&", "").length())

## if there are no "&" at all then we have only one key value pair.
## we append an ampersand to the string so that we can tokenise it the same way as multiple kv pairs.
## the "empty" kv pair to the right of the ampersand will be ignored anyway.
# if ($countAmpersands == 0)
 #set($rawPostData = $rawAPIData + "&")
# end

## now we tokenise using the ampersand(s)
# set($tokenisedAmpersand = $rawAPIData.split("&"))

## we set up a variable to hold the valid key value pairs
# set($tokenisedEquals = [])

## now we set up a loop to find the valid key value pairs, which must contain only one "="
# foreach( $kvPair in $tokenisedAmpersand )
 #set($countEquals = $kvPair.length() - $kvPair.replace("=", "").length())
 #if ($countEquals == 1)
  #set($kvTokenised = $kvPair.split("="))
  #if ($kvTokenised[0].length() > 0)
   ## we found a valid key value pair. add it to the list.
   #set($devNull = $tokenisedEquals.add($kvPair))
  #end
 #end
# end

## next we set up our loop inside the output structure "{" and "}"
{
# foreach( $kvPair in $tokenisedEquals )
  ## finally we output the JSON for this pair and append a comma if this isn't the last pair
  #set($kvTokenised = $kvPair.split("="))
 "$util.urlDecode($kvTokenised[0])" : #if($kvTokenised[1].length() > 0)"$util.urlDecode($kvTokenised[1])"#{else}""#end#if( $foreach.hasNext ),#end
# end
}
- デプロイ
保存したら、
アクション>APIのデプロイをクリック。

デプロイされるステージを「prod」に設定して、デプロイ。

これでAWS側は完成です!
Slack側の設定
- Outgoing WebHooksのintegrationを追加

- URLを設定
修造を呼びたいチャンネルと、トリガーワード(任意)、
URLには先ほど控えておいたものをペースト。

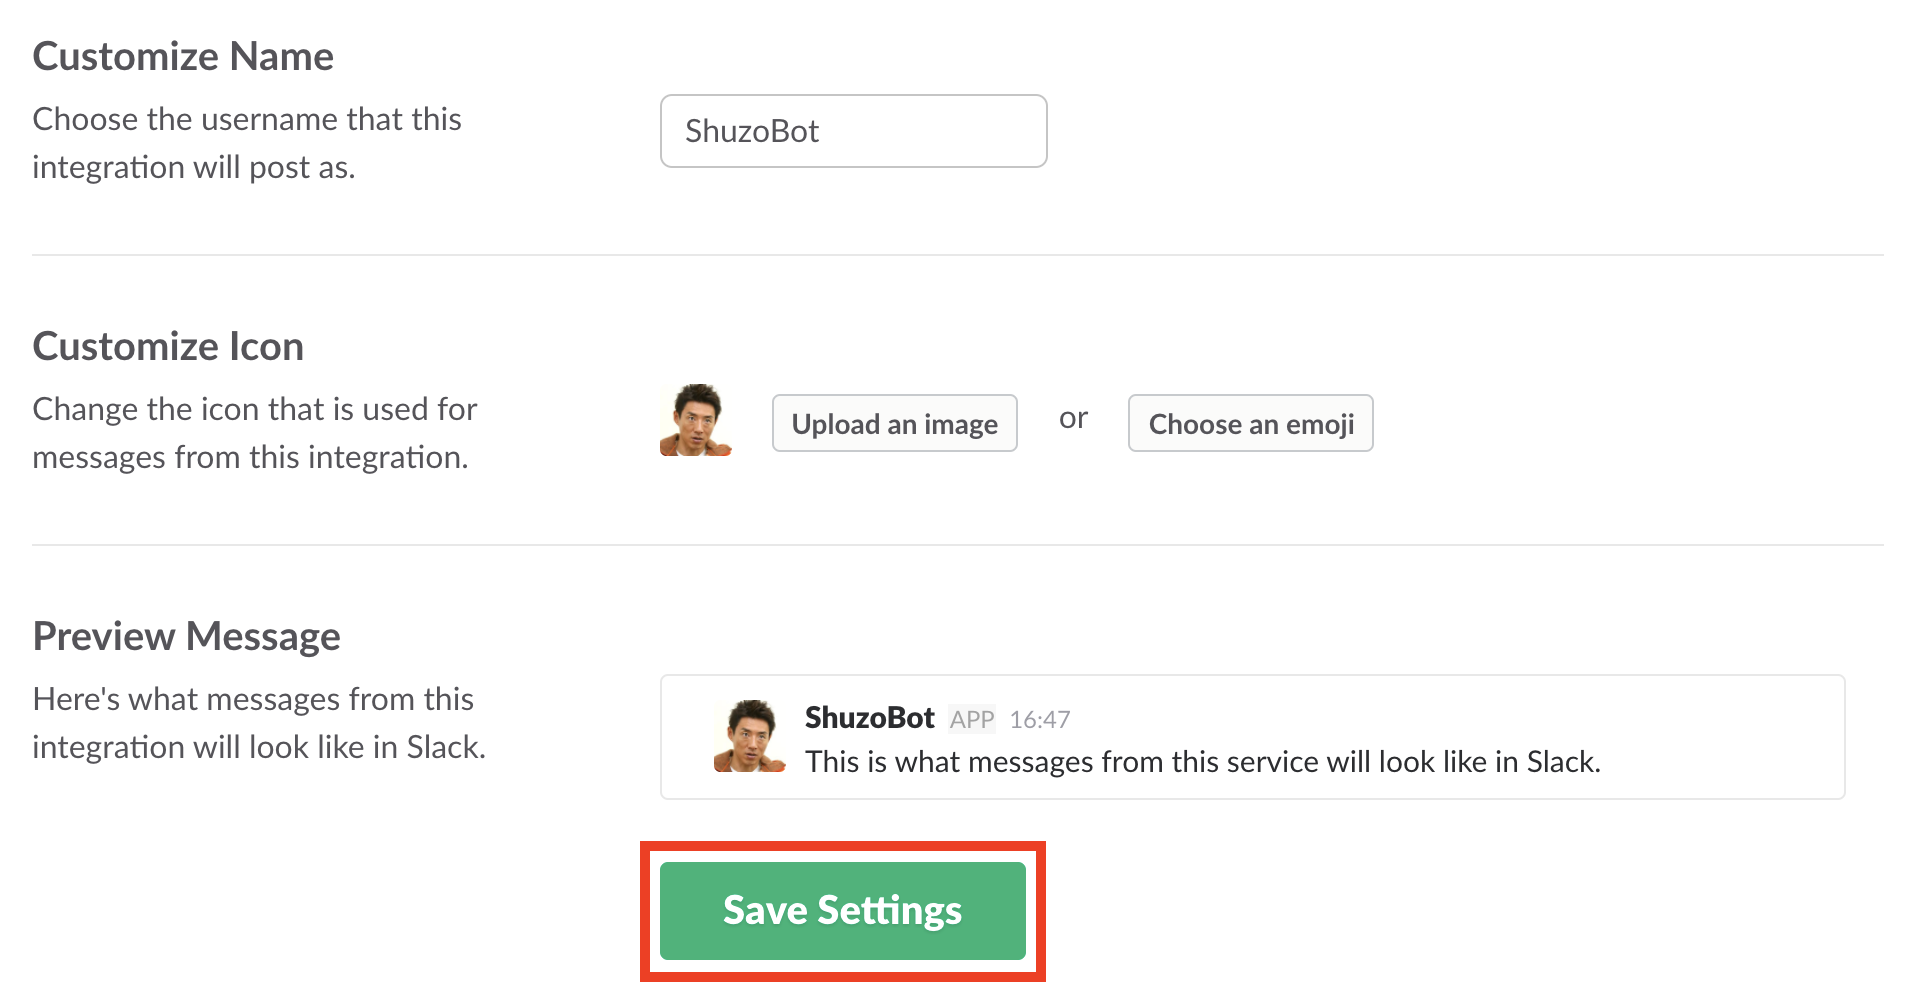
- Bot名設定
お好みでカスタム。
できたらsave settingsをクリック。
完成!
