目標:人を判定してカウントしたい
環境
環境構築は以下の記事で書いているので置いておきます。
https://qiita.com/nataly510/items/034f946362e7a8ecb6a8
やりたいこと
・3つのチャンネルを別々に出力する
・出力した3つのチャンネルを保存
・IR画像で人間だけを温度分布から判定してRGB画像に出力する(それ以外をブラックアウトさせる)
3つのチャンネルを別々に出力
# License: Apache 2.0. See LICENSE file in root directory.
## Copyright(c) 2015-2017 Intel Corporation. All Rights Reserved.

###############################################
##      Open CV and Numpy integration        ##
###############################################

import pyrealsense2 as rs
import numpy as np
import cv2

# Configure depth and color streams
pipeline = rs.pipeline()
config = rs.config()
config.enable_stream(rs.stream.infrared, 1, 1280, 720, rs.format.y8, 30)
config.enable_stream(rs.stream.depth, 640, 480, rs.format.z16, 30)
config.enable_stream(rs.stream.color, 640, 480, rs.format.bgr8, 30)
# Start streaming
pipeline.start(config)

try:
    while True:

        # Wait for a coherent pair of frames: depth and color
        frames = pipeline.wait_for_frames()
        ir_frame = frames.get_infrared_frame()
        depth_frame = frames.get_depth_frame()
        color_frame = frames.get_color_frame()
        if not depth_frame or not color_frame or not ir_frame  :
            continue

        # Convert images to numpy arrays
        ir_image = np.asanyarray(ir_frame .get_data())
        depth_image = np.asanyarray(depth_frame.get_data())
        color_image = np.asanyarray(color_frame.get_data())
        change_color = 0
        change_temp = 150
        ir_image2 = np.where(ir_image < change_temp,change_color ,ir_image)


        # Show images
        cv2.namedWindow('ir_image', cv2.WINDOW_AUTOSIZE)
        cv2.imshow('ir_image', ir_image2)
        cv2.namedWindow('color_image', cv2.WINDOW_AUTOSIZE)
        cv2.imshow('color_image', color_image)
        cv2.namedWindow('depth_image', cv2.WINDOW_AUTOSIZE)
        cv2.imshow('depth_image', depth_image)
        cv2.waitKey(1)

finally:

    # Stop streaming
    pipeline.stop()
上記コードで3つチャンネル表示はできた。
左から深度、RGB、IR画面です。
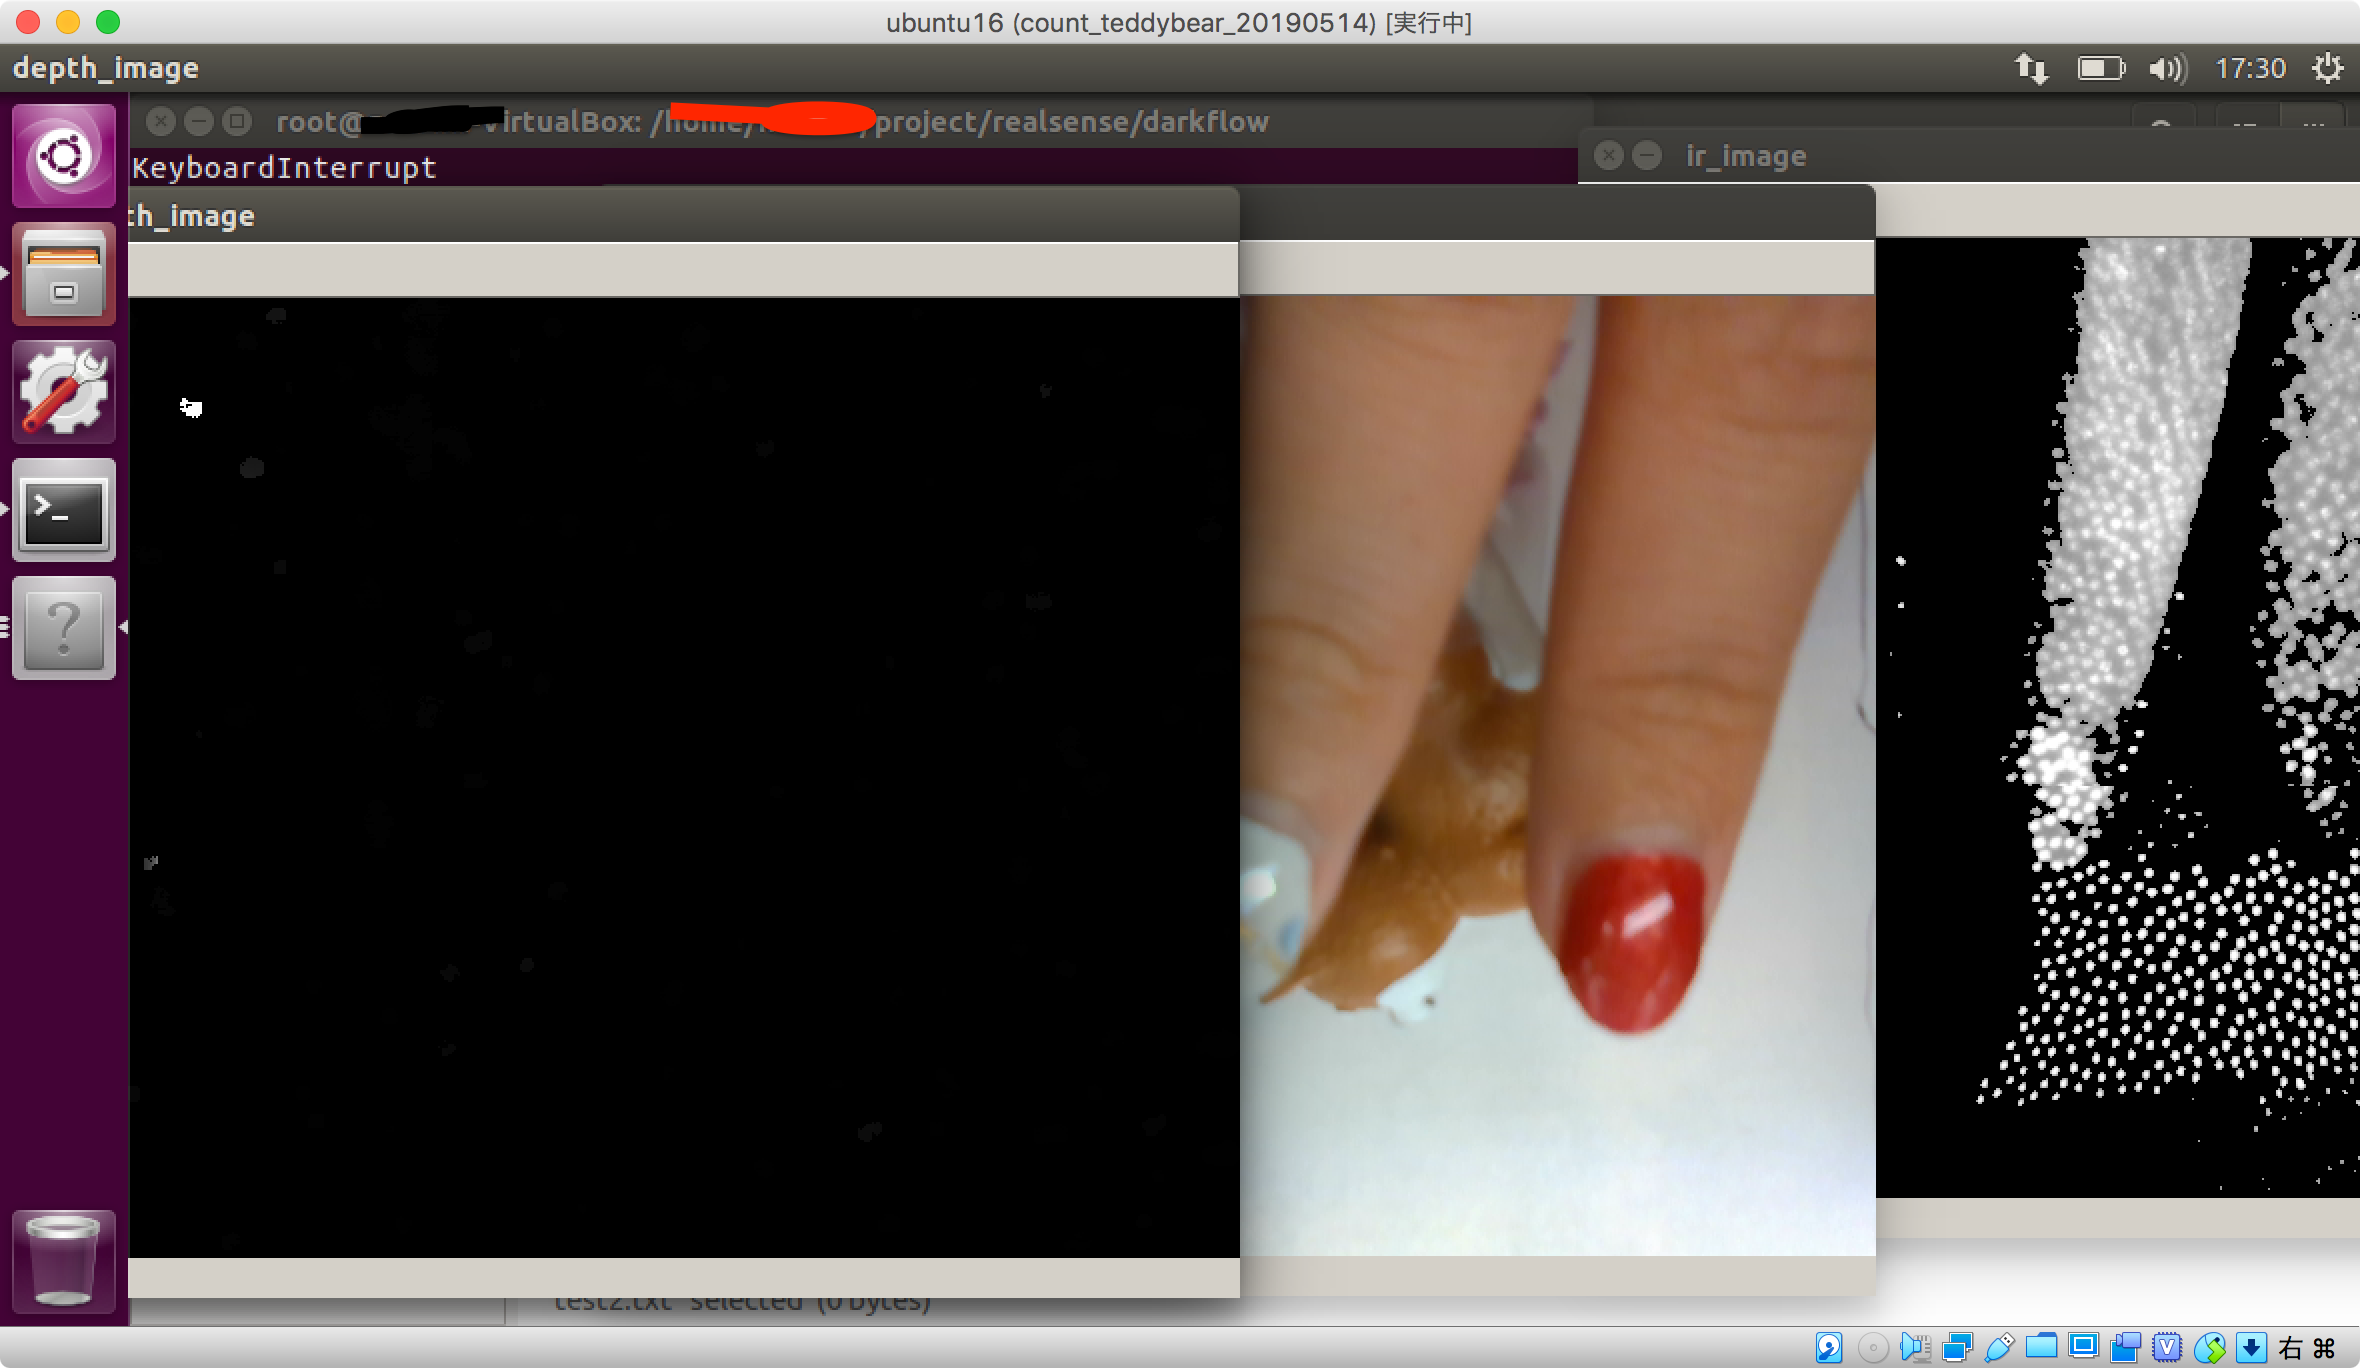
ここからRGB、IRの情報をマージさせていきたいのですがここでただマージさせると位置が少しRGBとIRでずれていることが発覚した。
あ、気づいてなかったのですがカメラの位置が違うんですね。
それはずれますね…。
10cmレベルの至近距離で調整しても今回の要件では意味がないので遠いところで調整して誤差が少ないことを確認していきたいと思います。
方法としてはPLIを使ってresizeして地道に調整する方向で考えてます。
より良い方法があったら誰かご教授願います。
保存方法
IRとRGBはaviでdepthはply形式で保存した。
fourccというところで出力形式を指定できる。
追記:上記方法はfpsがかなり低いのでbagファイル形式で保存がおすすめである
bagファイルでの保存コードはこちらにIntelのRealsense D435で録画と出力
# License: Apache 2.0. See LICENSE file in root directory.
## Copyright(c) 2015-2017 Intel Corporation. All Rights Reserved.

###############################################
##      Open CV and Numpy integration        ##
###############################################

import pyrealsense2 as rs
import numpy as np
import cv2
import time

# Declare pointcloud object, for calculating pointclouds and texture mappings
pc = rs.pointcloud()
# We want the points object to be persistent so we can display the last cloud when a frame drops
points = rs.points()

# Configure depth and color streams
pipeline = rs.pipeline()
config = rs.config()
config.enable_stream(rs.stream.infrared, 1, 640, 480, rs.format.y8, 30)
config.enable_stream(rs.stream.depth, 640, 480, rs.format.z16, 30)
config.enable_stream(rs.stream.color, 640, 480, rs.format.bgr8, 30)
# Start streaming
pipeline.start(config)
start = time.time()


# VideoWriter を作成する。
fourcc = cv2.VideoWriter_fourcc(*'DIVX')
writer = cv2.VideoWriter('output_ir.avi', fourcc, 30, (640, 480))
writer2 = cv2.VideoWriter('output_color.avi', fourcc, 30, (640, 480))
frame_no = 1
try:
    while True:

        # Wait for a coherent pair of frames: depth and color
        frames = pipeline.wait_for_frames()
        ir_frame = frames.get_infrared_frame()
        depth_frame = frames.get_depth_frame()
        color_frame = frames.get_color_frame()
        if not depth_frame or not color_frame or not ir_frame  :
            continue

        # Convert images to numpy arrays
        ir_image = np.asanyarray(ir_frame .get_data())
        depth_image = np.asanyarray(depth_frame.get_data())
        color_image = np.asanyarray(color_frame.get_data())
        # Tell pointcloud object to map to this color frame
        pc.map_to(color_frame)

        # Generate the pointcloud and texture mappings
        points = pc.calculate(depth_frame)
        fps  = frame_no / (time.time() - start)
        print(fps)
        frame_no = frame_no+1
        points.export_to_ply('frame_{:04d}.ply'.format(frame_no), color_frame )


        #export
        writer.write(ir_image)
        writer2.write(color_image)


        # Show images
        cv2.namedWindow('ir_image', cv2.WINDOW_AUTOSIZE)
        cv2.imshow('ir_image', ir_image)
        cv2.namedWindow('color_image', cv2.WINDOW_AUTOSIZE)
        cv2.imshow('color_image', color_image)
        cv2.namedWindow('depth_image', cv2.WINDOW_AUTOSIZE)
        cv2.imshow('depth_image', depth_image)
        cv2.waitKey(1)

finally:

    # Stop streaming
    writer.release()
    pipeline.stop()