この記事を書くきっかけ
最近railsへの理解を深めるためにtetatailで質問の回答を始めました。
そこで質問を見ていると何人かCRUDの実装をする際に基礎的な知識が抜けているなと感じることがあり、まるで約一年前の自分をみているようだったので何か役に立てたらいいなと思いこの記事を書きました。
CRUDとは
またこの一つのCRUDについて理解することで2個3個とモデルが増えた時もこの基礎的な知識を元に応用していく感じなのでまず1つのモデルのCRUDについてしっかり学ぶのもいいと思います。
対象読者
- ルーティングについて学習したい方
-
params[:id]が何を指すのかわからない方 - 約一年前の自分
概要
1つのモデル(モデル名: Post, カラム: title, content)のCRUD機能をできるだけ詳しく説明しています。
モデルについての説明はこの記事ではほとんど触れません。
ルーティングとコントローラーがメインになります。
ちなみにしつこいぐらいルーティングは登場します。
またコードも普段ならまとめる箇所もあえてそのままの記述にしているのでその点はご容赦ください。
この記事の流れ
1.新規プロジェクト作成
2.Postモデルの作成
3.ルーティング設定
4.PostsController作成
5.indexアクション定義(中身の記述なし)
6.newアクション定義、新規登録フォーム作成
7.createアクション定義
6.indexアクション中身記述
7.showアクション定義、詳細ページ作成
8.editアクション定義、編集フォーム作成
9.updateアクション定義
10.destroyアクション定義
の順に説明していきます。
環境
% ruby -v
ruby 2.7.1p83 (2020-03-31 revision a0c7c23c9c) [x86_64-darwin19]

% rails -v
Rails 6.0.3.2

% postgres --version
postgres (PostgreSQL) 9.6.18
1.新規プロジェクト作成
rails new コマンドでアプリを作成します。今回アプリ名はone_model_crudにします。
rails new [アプリ名](one_model_crud) -d postgresql
database.ymlを編集します
default: &default
  adapter: postgresql
  encoding: unicode
  username: <%= ENV['PG_USERNAME'] %> # postgresqlで設定したusername
  password: <%= ENV['PG_PASSWORD'] %> # postgresqlで設定したpassword
  # For details on connection pooling, see Rails configuration guide
  # https://guides.rubyonrails.org/configuring.html#database-pooling
  pool: <%= ENV.fetch("RAILS_MAX_THREADS") { 5 } %>
% rails db:create
Created database 'one_model_crud_development'
Created database 'one_model_crud_test'

% rails s
http://localhost:3000/ にアクセスします。

本題とはずれるのですが今回viewはslim、スタイルを整えるためにbootstrap、デバックツールとしてpry-railsを使用しています。
これで準備は整いました。
2.Postモデルの作成
rails g model モデル名(単数形)でモデルを作成します。
% rails g model post
titleカラムとcontentカラムを追加します。
class CreatePosts < ActiveRecord::Migration[6.0]
  def change
    create_table :posts do |t|
      t.string :title
      t.text   :content

      t.timestamps
    end
  end
end
作成したデータベース情報を反映させます。
% rails db:migrate
== 20200815005104 CreatePosts: migrating ======================================
-- create_table(:posts)
   -> 0.0271s
== 20200815005104 CreatePosts: migrated (0.0272s) =============================
コンソールで確認してみます。
% rails c
irb(main):001:0> Post.new
=> #<Post id: nil, title: nil, content: nil, created_at: nil, updated_at: nil>
irb(main):002:0> Post.new(title: 'タイトル1', content: 'コンテンツ1').save
   (0.3ms)  BEGIN
  Post Create (7.9ms)  INSERT INTO "posts" ("title", "content", "created_at", "updated_at") VALUES ($1, $2, $3, $4) RETURNING "id"  [["title", "タイトル1"], ["content", "コンテンツ1"], ["created_at", "2020-08-15 01:03:24.246072"], ["updated_at", "2020-08-15 01:03:24.246072"]]
   (6.8ms)  COMMIT
=> true
Postモデルを作成できました。
次はこれをブラウザでできるようにします。
3.ルーティング設定
http://localhost:3000/ にアクセスした時にposts#indexにアクセスするようにルーティングを設定します。
Rails.application.routes.draw do
  # For details on the DSL available within this file, see https://guides.rubyonrails.org/routing.html
  root to: "posts#index"
  resources :posts
end
resources :モデル(複数形)とすることでそのモデルの基本的な7つのアクション index, new, create, show, edit, update, destroyのルーティングが生成されます。
またresources :モデル(複数形), only: :indexやresources :モデル(複数形), only: %i[index] と記述することでアクションを限定することもできます。
では生成されたルーティングをコンソールで見てみます。
% rails routes
     Prefix Verb       URI Pattern               Controller#Action
       root  GET      /                           posts#index
       posts GET      /posts(.:format)            posts#index
             POST     /posts(.:format)            posts#create
    new_post GET      /posts/new(.:format)        posts#new
   edit_post GET      /posts/:id/edit(.:format)   posts#edit
        post GET      /posts/:id(.:format)        posts#show
             PATCH    /posts/:id(.:format)        posts#update
             PUT      /posts/:id(.:format)        posts#update
             DELETE   /posts/:id(.:format)        posts#destroy
上記のようなルーティングが作成されました。
-
Prefixは後で説明します。 -
VerbはHTTPメソッドになります。 -
URI Patternは http://localhost:3000 以降のURLを指しています。 -
Controller#Actionは URLにアクセスした時にどのコントローラのどのアクションを実行するかを指します。
それを踏まえた上で http://localhost:3000/ を見てみましょう。
-
prefixroot -
VerbGET -
URI Pattern/ -
Controller#Actionposts#index
これはhttp://localhost:3000/ にアクセスした時に postsコントローラーのindexアクションを実行するという意味になります。
4.PostsController作成
rails g controller モデル(複数形) でコントローラを作成します。
% rails g controller posts
Running via Spring preloader in process 31151
      create  app/controllers/posts_controller.rb
      invoke  erb
      create    app/views/posts
      invoke  test_unit
      create    test/controllers/posts_controller_test.rb
      invoke  helper
      create    app/helpers/posts_helper.rb
      invoke    test_unit
      invoke  assets
      invoke    scss
      create      app/assets/stylesheets/posts.scss
app/controllers/posts_controller.rbとapp/views/posts以外使用しないので削除しても大丈夫です
5.indexアクション定義(中身の記述なし)
class PostsController < ApplicationController
  def index
  end
end
中身の設定はPostを作成できるようになった後で設定します。
app/views/posts/にindex.slimを作成し以下を記述
h1 Posts#index
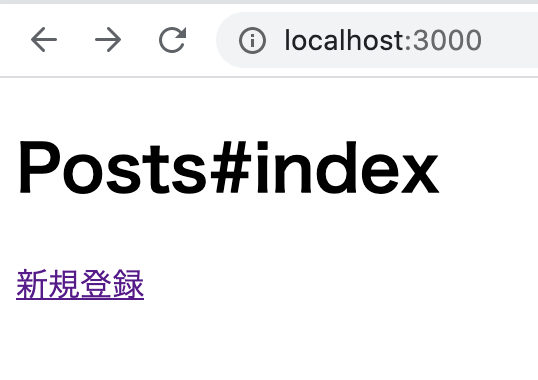
これで準備は整いました。では実際に http://localhost:3000/ にアクセスします
% rails s
アクセスした時の流れ
- PostsControllerのindexアクションを実行
- views/posts/index.slimを表示
となります。
実際にアクセスすると下記のような画面が表示されます。
6.newアクション定義、新規登録フォーム作成
実装の流れとしては
1.リンクの設置
2.PostsControllerのnewアクション
3.new.slimに遷移
4.PostsControllerのcreateアクション
のようになります。
1.リンクの設置
まず新規登録画面にアクセスできるリンクを作成します。ここで必要なのがPrefixです。
リンクは下記のような形を記述することで作成できます。
= link_to '表示する文字', Prefix_path
このように記述することでPrefix_pathのURI Patternにアクセスするリンクを生成することができます。
実際に記述します。
h1 Posts#index
= link_to '新規登録', new_post_path
このリンクはPrefixがnew_postの URI Pattertnに遷移するリンクになります。
newアクションのルーティングを見てみます。
Prefix Verb       URI Pattern               Controller#Action
new_post GET      /posts/new(.:format)        posts#new
新規登録のリンクをクリックするとURLが/posts/newに変更します。(*まだnewアクションを定義していないのでエラーが表示されます)
2.PostsControllerのnewアクション
def new
  @post = Post.new
end
Post.newでPostモデルのインスタンスを生成しそのインスタンスを@postに代入しています。
3.new.slimに遷移
.container
  h1.mt-4 新規登録
  = form_with url: posts_path, model: @post do |form|
    .form-group
      = form.label :title, 'タイトル'
      = form.text_field :title, class: 'form-control'
    .form-group
      = form.label :content, '内容'
      = form.text_area :content, class: 'form-control'
    = form.submit '登録', class: 'btn btn-primary'
form_withについてはこちら => form_with使い方
簡単に説明すると
= form_with posts_path で submitを押した時の遷移先を設定できます。
ここでcreateアクションのルーティングを見て欲しいのですが
Prefix Verb       URI Pattern               Controller#Action
posts GET      /posts(.:format)            posts#index
      POST     /posts(.:format)            posts#create
Prefixに何も記述されていない場合は上を辿っていき初めに存在するPrefixになります。
今回の場合だとPrefixはpostsにあたります。
なのでposts_pathはposts#indexとposts#createの2種類あるということになります。
この2つをどう判断しているのかというとVerb(HTTPメソッド)です。
form_withはデフォルトのHTTPメソッドはPOSTに設定されています。
ということはnew.slimに書いたposts_pathはPostsControllerのcreateアクションを実行するという意味になります。
4.PostsControllerのcreateアクション
まずどのようなパラメータが送られてくるのかを確認します。
def create
  binding.pry
end
と記述してどのような形でデータが送られてくるのかをコンソールで見てみます。
 9: def create
 => 10:   binding.pry
    11: end

[1] pry(#<PostsController>)> params
=> <ActionController::Parameters {"authenticity_token"=>"d9j/87bg84JqMg5cPr7HwMKi8PIbw8gmEhMj4EvgIblmRKqdmGAdmk1THcW9095M2cBdQxGigM/PZ+VYl9ZGYA==", "post"=>{"title"=>"タイトル2", "content"=>"コンテンツ2"}, "commit"=>"登録", "controller"=>"posts", "action"=>"create"} permitted: false>
[2] pry(#<PostsController>)> params[:post][:title]
=> "タイトル1"
[3] pry(#<PostsController>)> params[:post][:content]
=> "コンテンツ2"
このように記述することで中身を確認することができました。あとはこれを保存します。
def create
  @post = Post.new(title: params[:post][:title], content: params[:post][:content])
  @post.save
end
とすると一応保存はできます。
しかし今回は不正なパラメータを防ぐストロングパラメータという仕組みを使い保存します。
def create
  @post = Post.new
  @post.save(post_params)
  redirect_to posts_path
end

private

def post_params
  params.require(:post).permit(:title, :content)
end
修正後のコードはこのようになります。今回はtitleとcontentが空でも保存できるようになっているのでif文で条件分岐のコードは記述していません。
createアクションの最後の記述 redirect_to posts_path でurlが / に遷移すなわちPostsControllerのindexアクションを実行するようにしています。
6.indexアクション中身記述
createアクションにてデータの生成ができたので次はそのデータを取得して表示します。
def index
 @posts = Post.all
end
モデル.allでそのモデルのデータ全てを取得することができその取得したデータを@postsに代入しています。
@postsには複数のデータが入ることが想定されるので複数形になっています。ちなみにデータは以下のような形で入っています。
[#<Post:0x00007f94bc4d83b8 id: 1, title: "タイトル1", content: "コンテンツ1", created_at: Sat, 15 Aug 2020 05:19:09 UTC +00:00, updated_at: Sat, 15 Aug 2020 05:19:09 UTC +00:00>,
 #<Post:0x00007f94bc4ae838 id: 2, title: "タイトル2", content: "コンテンツ2", created_at: Sat, 15 Aug 2020 05:19:22 UTC +00:00, updated_at: Sat, 15 Aug 2020 05:19:22 UTC +00:00>]
ではこれらを表示してみます。
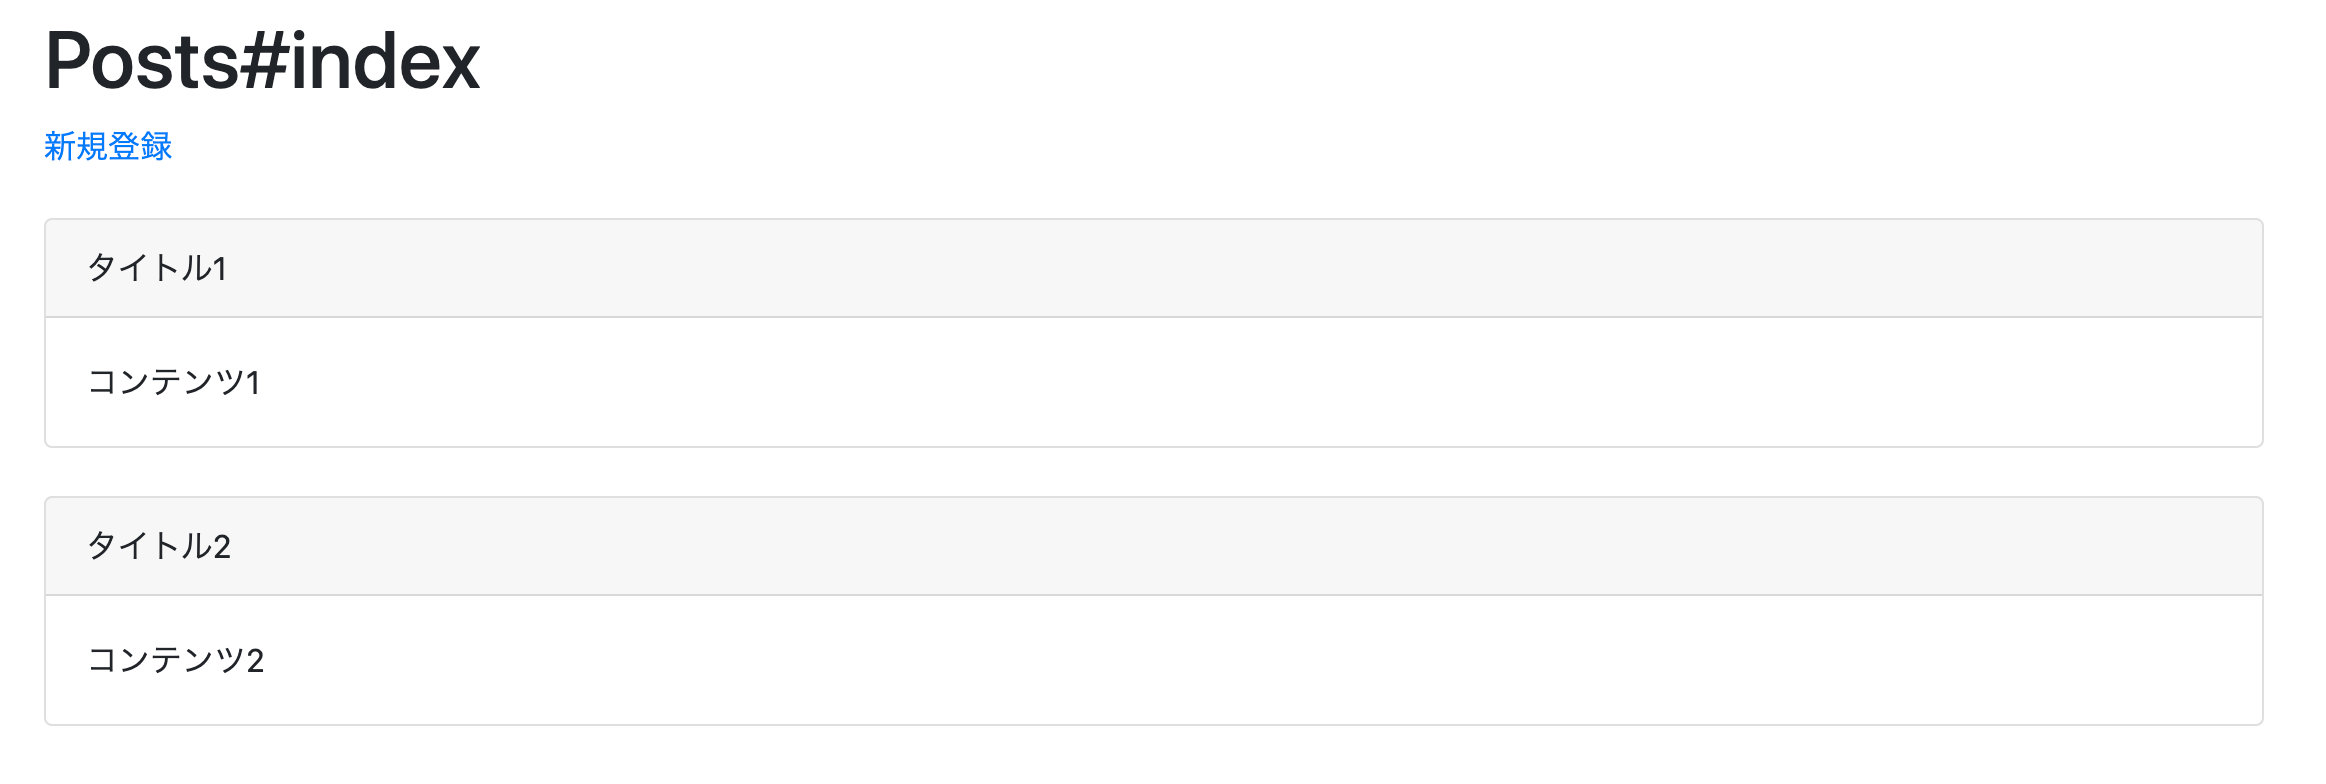
.container
  h1.mt-4 Posts#index
  = link_to '新規登録', new_post_path

  // 追記
  - @posts.each do |post|
    .card.my-4
      .card-header
        = post.title
      .card-body
        p.card-text
          = post.content
@postsはindexアクションで定義したものです。
それをeachメソッドで1つずつ取り出し、取り出した1つのデータがpostに入ります。
= post.title, = post.contentでpostデータのtitleカラム、contentカラムを参照しています。
画面は下記のようになります。

7.showアクション定義、詳細ページ作成
まず、それぞれのデータの下に詳細画面に遷移するボタンを設置します。
.container
  h1.mt-4 Posts#index
  = link_to '新規登録', new_post_path

  - @posts.each do |post|
    .card.my-4
      .card-header
        = post.title
      .card-body
        p.card-text
          = post.content
        // 追記
        = link_to '詳細', post_path(post), class: 'btn btn-success mr-2'
post_pathの引数にpostを取っている点に注目してください。
showアクションのルーティングを見てみます。
Prefix Verb       URI Pattern               Controller#Action
    post GET      /posts/:id(.:format)        posts#show
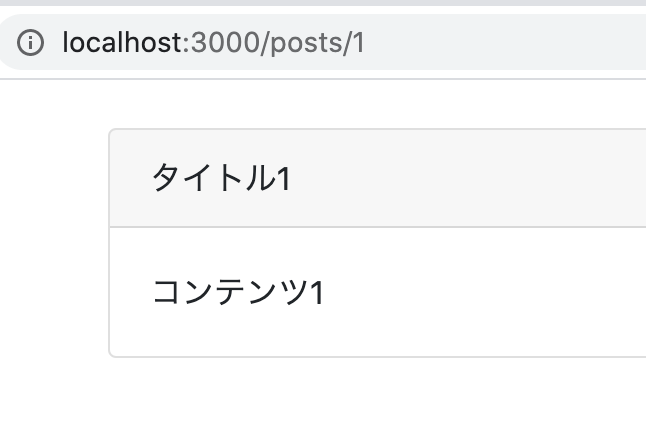
URI Patternに:idがありこの値は動的に変更されます。(例: /posts/1, /posts/7)
post_pathのみだとidが何かわからないため引数をとります。(今回はpost)
こうすることでpostのidを取得することができ/posts/:idに遷移することができます。
ではshowアクションにどのようなパラメータが送られるのかみてみます。
def show
  binding.pry
end
binding.pryで止めてコンソールを確認
pry(#<PostsController>)> params
=> <ActionController::Parameters {"controller"=>"posts", "action"=>"show", "id"=>"1"} permitted: false>
[2] pry(#<PostsController>)> params[:id]
=> "1"
このようにparams[:id]と記述することでidが取得できます。
このidを用いてPostモデルのデータの中からデータを一つ取得します。
def show
  @post = Post.find(params[:id])
end
モデル.find(id番号)とすることでモデルのidとid番号が一致するデータを一つ取得します。
続いてshow.slimです。
.container
  .card.my-4
    .card-header
      = @post.title
    .card-body
      p.card-text
        = @post.content
8.editアクション定義、編集フォーム作成
まず詳細ボタンと同じよう編集ボタンを設置します。
.container
  h1.mt-4 Posts#index
  = link_to '新規登録', new_post_path

  - @posts.each do |post|
    .card.my-4
      .card-header
        = post.title
      .card-body
        p.card-text
          = post.content
        = link_to '詳細', post_path(post), class: 'btn btn-success mr-2'
        // 追記
        = link_to '編集', edit_post_path(post), class: 'btn btn-primary mr-2'
editアクションのルーティングを見てみます。
Prefix Verb       URI Pattern               Controller#Action
edit_post GET      /posts/:id/edit(.:format)   posts#edit
続いてeditアクションを定義します。
def edit
  @post = Post.find(params[:id])
end
showアクションと同じ記述になります。
続いてedit.slimを記述します。
.container
  h1.mt-4 編集
  = form_with url: post_path(@post), model: @post do |form|
    .form-group
      = form.label :title, 'タイトル'
      = form.text_field :title, class: 'form-control'
    .form-group
      = form.label :content, '内容'
      = form.text_area :content, class: 'form-control'
    = form.submit '更新', class: 'btn btn-primary'
new.slimとほとんど同じ内容なので説明は省略します。post_path(@post)はnew.slimで定義した時と同様でこのHTTPメソッドはPATCHになります。一応ルーティングも見ておきます。
Prefix Verb       URI Pattern               Controller#Action
   post GET      /posts/:id(.:format)        posts#show
        PATCH    /posts/:id(.:format)        posts#update
        PUT      /posts/:id(.:format)        posts#update
HTTPメソッドがPATCHなので今回の更新ボタンが押された時に実行するアクションはPostsControllerのupdateアクションになります。
9.updateアクション定義
updateアクションを定義します。
def update
  @post = Post.find(params[:id])
  @post.update(post_params)
  redirect_to posts_path
end
こちらはcreateアクションとほとんど同じ内容になります。
createアクションとの違いはモデルをnewするかfindするかの違いです。
10.destroyアクション定義
最後にデータを削除します。
編集ボタン同様削除ボタンを設置します。destroyアクションのルーティングを見てみます。
Prefix Verb       URI Pattern               Controller#Action
 post GET      /posts/:id(.:format)        posts#show
       DELETE   /posts/:id(.:format)        posts#destroy
同じpost_pathなのでHTTPメソッドで区別します。 method: :HTTPメソッドとすることで指定したパスの指定したHTTPメソッドのアクションを実行する形になります。実際に記述します。
.container
  h1.mt-4 Posts#index
  = link_to '新規登録', new_post_path

  - @posts.each do |post|
    .card.my-4
      .card-header
        = post.title
      .card-body
        p.card-text
          = post.content
        = link_to '詳細', post_path(post), class: 'btn btn-success mr-2'
        = link_to '編集', edit_post_path(post), class: 'btn btn-primary mr-2'
        // 追記
        = link_to '削除', post_path(post), method: :delete, class: 'btn btn-danger'
続いてdestroyアクションを定義します。
def destroy
  @post = Post.find(params[:id])
  @post.destroy
  redirect_to posts_path
end
これで1つのモデルのCRUDが実装できました。
完成形のコード
一応完成形のコードを下記に記載しておきます。
class PostsController < ApplicationController
  def index
    @posts = Post.all
  end

  def new
    @post = Post.new
  end

  def create
    @post = Post.new(post_params)
    @post.save
    redirect_to posts_path
  end

  def show
    @post = Post.find(params[:id])
  end

  def edit
    @post = Post.find(params[:id])
  end

  def update
    @post = Post.find(params[:id])
    @post.update(post_params)
    redirect_to posts_path
  end

  def destroy
    @post = Post.find(params[:id])
    @post.destroy
    redirect_to posts_path
  end

  private

  def post_params
    params.require(:post).permit(:title, :content)
  end
end
おわりに
とりあえずこれで1年前の自分に見せたい内容は一通り書くことができました。


