はじめに
- 前回のバックエンドにWebフロントエンドつなげようと思って、Cognito周りを触れるJSのSDKを探していたのだが、メンテが終わっていてどうやらAmplifyに統合されようとしていることに気づく
Amazon Cognito Identity SDK for JavaScript
NOTE: We have discontinued developing this library as part of this GitHub repository. We will continue to develop it as part of the AWS Amplify GitHub repository. You can still reach us by creating an issue on the AWS Amplify GitHub repository or posting to the Amazon Cognito Identity forums. Versions 1.x will still be available via NPM. Future development will continue on the 2.x versions.
-
ならばAmplifyを触ってみようかと思うが、チュートリアルがGraphQLやAppSync推しになっていて、REST APIで始めようとすると意外とまとまった情報がなかったので、ブラウザからREST API つかえるようにするためにやってみた
-
なにが起こってるかを理解するために、フロントエンドはReactやVueなどのフレームワークを使わず、Pure JSでやってみた
-
フロント周りの確認なので、データベースには触れない。ブラウザからLambdaで折り返すところまで
概要
流れとしてはこんな感じ
- Amplifyのインストール
npm install -g @aws-amplify/cliして設定amplify configure - フロントエンドのプロジェクト(HTML, CSS, JS, webpack) などを準備
- 上記のプロジェクトの中でAmplifyを初期化
amplify init - フロントエンドをホスティングする先をつくる
amplify add hosting - REST APIをつくる
amplify add api(ここでLambdaも作成される) - クライアントのJSを書く
amplify publishでビルドして公開 - CORSを許可する
Amplifyのインストール
このページのとおり実行する。ただし、最後の amplify init はまだ実行しない
$ amplify configure
Initializing new Amplify CLI version...
Done initializing new version.
Scanning for plugins...
Plugin scan successful
Follow these steps to set up access to your AWS account:

Sign in to your AWS administrator account:
https://console.aws.amazon.com/
Press Enter to continue

Specify the AWS Region
? region:  us-east-2
Specify the username of the new IAM user:
? user name:  amplify-user
Complete the user creation using the AWS console
https://console.aws.amazon.com/iam/home?region=us-east-2#/users$new?step=final&accessKey&userNames=amplify-user&permissionType=policies&policies=arn:aws:iam::aws:policy%2FAdministratorAccess
Press Enter to continue

Enter the access key of the newly created user:
? accessKeyId:  ********************
? secretAccessKey:  ****************************************
This would update/create the AWS Profile in your local machine
? Profile Name:  default
フロントエンドのプロジェクトを準備
このページのとおり実行する。npm start でWebページが表示されたら、お疲れさまです
上記のプロジェクトの中でAmplifyを初期化
プロジェクト内で amplify init する(実は、上のページの手順に含まれてしまっている)
$ amplify init
Note: It is recommended to run this command from the root of your app directory
? Enter a name for the project amplifyjsapp
? Enter a name for the environment dev
? Choose your default editor: Vim (via Terminal, Mac OS only)
? Choose the type of app that you're building javascript
Please tell us about your project
? What javascript framework are you using none
? Source Directory Path:  src
? Distribution Directory Path: dist
? Build Command:  npm run-script build
? Start Command: npm run-script start
Using default provider  awscloudformation

For more information on AWS Profiles, see:
https://docs.aws.amazon.com/cli/latest/userguide/cli-configure-profiles.html

? Do you want to use an AWS profile? Yes
? Please choose the profile you want to use default
この時点でフォルダ構成はこんな感じ。amplify フォルダには機能毎にCloud Formationのファイルができている
$ tree -L 1
.
├── amplify
├── dist
├── index.html
├── node_modules
├── package-lock.json
├── package.json
├── src
└── webpack.config.js
フロントエンドをホスティングする先をつくる
このページのとおり実行する
$ amplify add hosting
? Select the plugin module to execute Hosting with Amplify Console (Managed hosting with custom domains, Continuous deployment)
? Choose a type Manual deployment

You can now publish your app using the following command:

Command: amplify publish
$ amplify status

Current Environment: dev

| Category | Resource name  | Operation | Provider plugin   |
| -------- | -------------- | --------- | ----------------- |
| Hosting  | amplifyhosting | Create    | awscloudformation |


No amplify console domain detected
$ amplify publish
✔ Successfully pulled backend environment dev from the cloud.

Current Environment: dev

| Category | Resource name  | Operation | Provider plugin   |
| -------- | -------------- | --------- | ----------------- |
| Hosting  | amplifyhosting | Create    | awscloudformation |
? Are you sure you want to continue? Yes
amplify publish をすることで、index.html とか src/app.js が webpack でビルドされる。webpackの設定に従い、dist にビルドされた main.bundle.js ができて、これが index.html から読み込まれるようになり、それがホストされる
REST APIをつくる
$ amplify add api
? Please select from one of the below mentioned services: REST
? Provide a friendly name for your resource to be used as a label for this category in the project: api51c78b80
? Provide a path (e.g., /book/{isbn}): /items
? Choose a Lambda source Create a new Lambda function
? Provide an AWS Lambda function name: (amplifyjsapp********)
d0303inouem1:amplify-js-app you$ amplify add api
? Please select from one of the below mentioned services: REST
? Provide a friendly name for your resource to be used as a label for this category in the project: apic1480740
? Provide a path (e.g., /book/{isbn}): /items
? Choose a Lambda source Create a new Lambda function
? Provide an AWS Lambda function name: amplifyjsapp********
? Choose the runtime that you want to use: NodeJS
? Choose the function template that you want to use: Hello World

Available advanced settings:
- Resource access permissions
- Scheduled recurring invocation
- Lambda layers configuration

? Do you want to configure advanced settings? No
? Do you want to edit the local lambda function now? No
確認してみると、APIとFunctionができている
$ amplify status

Current Environment: dev

| Category | Resource name        | Operation | Provider plugin   |
| -------- | -------------------- | --------- | ----------------- |
| Function | amplifyjsapp******** | Create    | awscloudformation |
| Api      | apic*******          | Create    | awscloudformation |
| Hosting  | amplifyhosting       | No Change | awscloudformation |

Amplify hosting urls:
┌──────────────┬──────────────────────────────────────────┐
│ FrontEnd Env │ Domain                                   │
├──────────────┼──────────────────────────────────────────┤
│ dev          │ https://dev.your-pj.amplifyapp.com       │
└──────────────┴──────────────────────────────────────────┘
これを push する
$ amplify push
✔ Successfully pulled backend environment dev from the cloud.

Current Environment: dev

| Category | Resource name        | Operation | Provider plugin   |
| -------- | -------------------- | --------- | ----------------- |
| Function | amplifyjsapp******** | Create    | awscloudformation |
| Api      | apic*******          | Create    | awscloudformation |
| Hosting  | amplifyhosting       | No Change | awscloudformation |
? Are you sure you want to continue? Yes
curl でAPIにアクセスしてみる。/items などのリソース名をつけるのを忘れがち(忘れるとなぜか Missing Authentication Token のエラーがでる)
$ curl -s https://your-end-point.execute-api.us-east-2.amazonaws.com/dev/items | jq
"Hello from Lambda!"
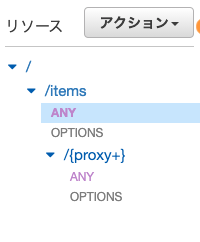
コンソールでAPI Gateway を覗きに行ってみると、メソッドのところが ANY になってる1 2
クライアントのJSを書く
AmplifyのSDKを使って、ブラウザからアクセスするためのJSを書く。とりあえずGETするやつ
import Amplify, { API } from 'aws-amplify';
import awsconfig from './aws-exports';

Amplify.configure(awsconfig);

const apiName = 'your-api-name';
const path = '/items';

API
  .get(apiName, path)
  .then(response => {
    document.getElementById("msg").innerHTML = response;
  })
  .catch(error => {
    console.log(error.response);
 });
aws-exports.js にAPIエンドポイントなどのコンフィグが入っているので、読み込んでおけばこれだけでGETにいきます。
再度 amplify publish して更新
CROSを許可する
Webページを見にいってみると、コンソールに以下のCORS関連のエラーが。ああ、確かにCORSを許可しないと
(index):1 Access to XMLHttpRequest at 'https://your-end-point.execute-api.us-east-2.amazonaws.com/dev/items?name=param' from origin 'https://dev.your-pj.amplifyapp.com' has been blocked by CORS policy: No 'Access-Control-Allow-Origin' header is present on the requested resource.
① このページの通りにAPI GatewayのコンソールでCROSを有効に。ただこれだけだと以下の記載のとおり、CORSは動きません
上記の手順をプロキシ統合の
ANYメソッドに適用すると、適切な CORS ヘッダーは設定されません。代わりに、バックエンドはAccess-Control-Allow-Originなどの適切な CORS ヘッダーを返す必要があります。
② なので、適切なCROSヘッダーをLambdaから返すようにします
exports.handler = async (event) => {
    const response = {
        statusCode: 200,
        headers: {
            "Access-Control-Allow-Headers" : "Content-Type",
            "Access-Control-Allow-Origin": "*",
            "Access-Control-Allow-Methods": "OPTIONS,POST,GET"
        },
        body: JSON.stringify('Hello from Lambda! CORS is enabled'),
    };
    return response;
};
クライアント側は XMLHttpRequest を使っているっぽいので何もしなくていいんだと思います
単純にXHRやFetch APIでのGETやPOSTを許可したい場合は、次のようにします。まず、クライアントサイドでは、XHRの場合は特段の工夫は必要なく、Fetch APIの場合はオプションによってCORSを使うことを宣言します。
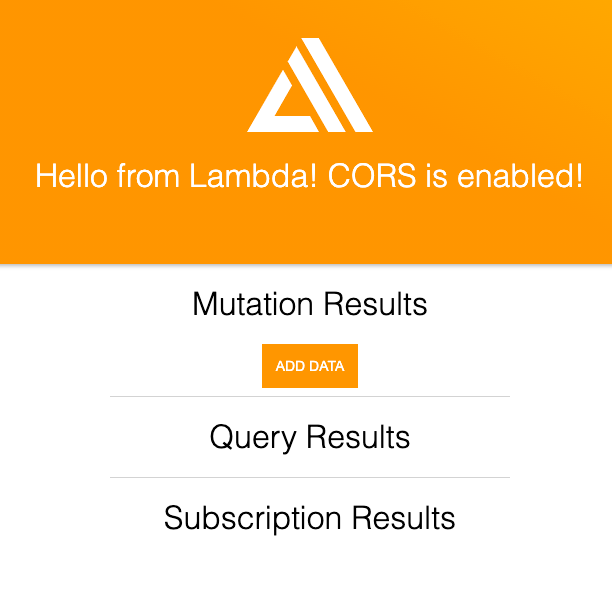
これで再度アクセスしてみると... 動いた! document.getElementById("msg").innerHTML = response; になっています
ちなみに、Chromeだとコンソールに以下のワーニングがいっぱいでてますがとりあえず置いておきます3
DevTools failed to load SourceMap: Could not load content for webpack:///node_modules/aws-amplify/lib-esm/index.js.map: HTTP error: status code 404, net::ERR_UNKNOWN_URL_SCHEME
ローカルでのテスト
amplify publish が遅いので、変更毎に publish せずにローカルで確認します。
package.json が 以下のようになっているので、npm start で webpack でビルドした後にローカルにサーバが立ち上がるので amplify publish の前に、ローカルで確認できる
  "scripts": {
    "start": "webpack && webpack-dev-server --mode development",
    "build": "webpack"
  }
なるほどね。とりあえず一通り動きました。Amplify が なにをやって何をやらないのか、だいぶわかってきた気がする
シリーズ
- Lambda ↔ DynamoDB
- API Gateway ↔ Lambda ↔ DynamoDB
- Cognito ↔ API Gateway ↔ Lambda ↔ Dynamo
- Amplify [Hosting] ↔ API Gateway [REST] ↔ Lambda
- API GatewayでCORSを有効にするためにやったこと
- AmplifyのJavascript SDKでCognito認証からデータ取得まで

