はじめに
こんにちは、普段は学生で裏でプログラムをこそこそと書いているなりかくんです。
今回は、エアコンの電源をONにする際にお金がかかるようにして節電するというものを作ってみようと思います。
お金がかかるとは?
まず、どうやってお金がかかるようにするのかを説明します。最近、SNSなどのネットのサービスに登録する際に電話番号認証というものがよくあるのはご存じでしょうか。
電話番号認証では、一人が複数アカウントを所持することを防ぐのに一番簡単な方法となります。
今回はその電話番号認証をVonage Verify APIを使って実装します。このサービスは、電話番号認証を簡単に実装できるのですがなんといっても認証成功課金モデルを採用されているので認証失敗時にはお金がかかりません。
そのため、最小限のお金で電話番号認証を実装することが出来ます。
このAPIでは、私の環境で1回認証するのに€0.05かかります。日本円で5円から10円程度ですね。
エアコンの制御
今回自動でエアコンをつけるのに、SwitchBotを利用します。SwitchBotのAPIを利用すると、家の中の家電をハブ経由で自由にリモコン操作することが出来ます。
SwitchBot APIを使った作品は最近別の記事で書いていますので、良ければこちらをお読みください。
エアコンの制御だけのコードは以下のようになります。このコードでは、暖房26度でエアコンをONにするコードです。
const request = require("request");
const crypto = require("crypto");

const token = "Token";
const secret = "Secret";
const t = Date.now();
const nonce = "vonageSwitchBot";
const data = token + t + nonce;
const signTerm = crypto.createHmac('sha256', secret)
    .update(Buffer.from(data, 'utf-8'))
    .digest();
const sign = signTerm.toString("base64");

const deviceId = "deviceId";

async function sendDeviceComamnd (parameter) {
    let sentCommand = await getRequest({
        url: `https://api.switch-bot.com/v1.1/devices/${deviceId}/commands`,
        json: {
            "command": "setAll",
            "parameter": parameter,
            "commandType": "command"
        },
        method: "POST",
        headers: {
            "Authorization": token,
            "sign": sign,
            "nonce": nonce,
            "t": t
        }
    });
    return sentCommand;
}

main();

async function main () {
    await sendDeviceComamnd("26,5,1,on"); // 暖房26° 自動でONにする
}

function getRequest(option) {
    return new Promise((resolve, reject) => {
        request(option, function (error, response, body) {
            if (error) {
                reject(error);
            } else {
                resolve(body);
            }
        });
    });
}
エアコンの操作パラメータは公式ドキュメントに以下のように書かれています。
| commandType | Command | Parameter |
|---|---|---|
| command | setAll | {温度},{モード},{ファン速度},{電源状態} |
モードは以下のように設定できます。
| 1 | 2 | 3 | 4 | 5 |
|---|---|---|---|---|
| 自動 | 冷却(冷房) | 乾燥(除湿) | ファン(送風) | 加熱(暖房) |
ファン速度は以下のように設定できます。
| 1 | 2 | 3 | 4 |
|---|---|---|---|
| 自動 | 低 | 中 | 高 |
Vonageを使ってみる
では、次に本題のVonageを使ってみます。まず、以下のURLから開発者登録をする必要があるみたいです。
https://developer.vonage.com/
登録は非常に簡単で、メールアドレスと電話番号の認証があるだけです。また、最初は初期クレジットとして2ユーロが与えられています。
今回はNode.jsで扱うのでNode.jsのVonage SDKを使いたいのですがSyntaxError: Unexpected token 'export'が出るので普通にrequestを使ってやります。
Webからエアコンを制御できるようにする
では、今回はウェブからエアコンを制御できるようにしたいと思います。
expressを使ってウェブサーバーを立ち上げます。今回はこのようなコードを書きました。
const vonageApiKey = "vonage Api Key";
const vonageApiSecret = "vonage Api Secret";

const phoneNumber = "電話番号";

const express = require('express');
const app = express();
const path = require('path');

const port = 8080;

app.listen(port, () => {
        console.log(`${port}でWebを立ち上げます。`);
});

app.use('/', express.static(path.join(__dirname, 'public')));

app.get('/send', async (req, res) => {
    let requestId = await getRequest({
        url: `https://api.nexmo.com/verify/json?&api_key=${vonageApiKey}&api_secret=${vonageApiSecret}&number=${phoneNumber}&brand=${encodeURIComponent("エアコン認証")}`,
        json: true
    });
    res.send(requestId.request_id);
});

app.get('/check', async (req, res) => {
    let result = await getRequest({
        url: `https://api.nexmo.com/verify/check/json?&api_key=${vonageApiKey}&api_secret=${vonageApiSecret}&request_id=${req.query.requestId}&code=${req.query.code}`,
        json: true
    });
    if (result.status == "0") {
        sendDeviceComamnd("26,5,1,on");
    }
    res.send(result.status);
});

app.use((req, res) => {
        res.sendStatus(404);
});
<!DOCTYPE html>
<html>
    <head>
            <title>エアコン電源ボタン</title>
    </head>
    <body>
            <h1>エアコン電源ボタン</h1>
            <button type="button" onclick="send()">認証番号を送信</button>
            <input type="text" id="code">
            <button type="button" id="verify" onclick="verify()">認証</button>
            <p id="status"></p>
            <script>
                let requestId;
                let status = document.getElementById("status");
                async function send() {
                    fetch("./send")
                        .then(async (res)=>{
                            requestId = await res.text();
                        });
                    status.innerText = "認証コードを送信しました。";
                }
                async function verify() {
                    let code = document.getElementById("code").value;
                    fetch(`./check?requestId=${requestId}&code=${code}`)
                        .then(async (res)=>{
                            let result = await res.text();
                            if (result == "0") {
                                status.innerText = "認証に成功しました。エアコンをONにします。";
                            } else {
                                status.innerText = "認証コードが違います。";
                            }
                        });
                }
            </script>
    </body>
</html>
完成したもの
今回作ったものを実際に動かしてみるとこのようになります。
まず、localhost:8080にアクセスして、認証番号を送信ボタンを押します。
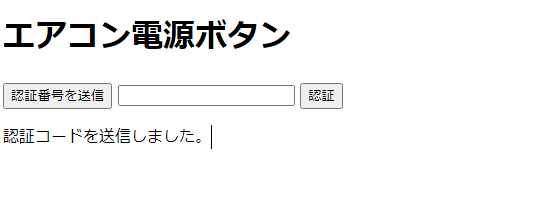
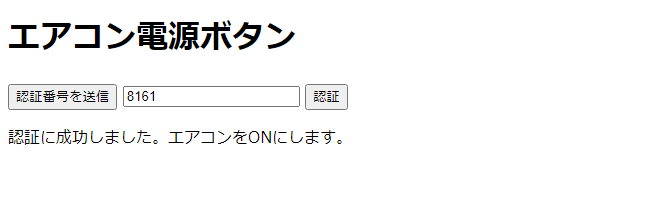
すると、スマホにSMSで認証番号が届きます。

この認証番号を先ほどのコードを入れて認証を押すとエアコンがONになります。
最後に全体コード
最後に全体コードをおいておきます。是非参考にしてみてください。
const request = require("request");
const crypto = require("crypto");

const token = "Token";
const secret = "Secret";
const t = Date.now();
const nonce = "vonageSwitchBot";
const data = token + t + nonce;
const signTerm = crypto.createHmac('sha256', secret)
    .update(Buffer.from(data, 'utf-8'))
    .digest();
const sign = signTerm.toString("base64");

const deviceId = "deviceId";

async function sendDeviceComamnd (parameter) {
    let sentCommand = await getRequest({
        url: `https://api.switch-bot.com/v1.1/devices/${deviceId}/commands`,
        json: {
            "command": "setAll",
            "parameter": parameter,
            "commandType": "command"
        },
        method: "POST",
        headers: {
            "Authorization": token,
            "sign": sign,
            "nonce": nonce,
            "t": t
        }
    });
    return sentCommand;
}

async function getDeviceId () {
    let getDevices = await getRequest({
        url: "https://api.switch-bot.com/v1.1/devices",
        json: true,
        headers: {
            "Authorization": token,
            "sign": sign,
            "nonce": nonce,
            "t": t
        }
    });
    return getDevices.body;
}

function getRequest(option) {
    return new Promise((resolve, reject) => {
        request(option, function (error, response, body) {
            if (error) {
                reject(error);
            } else {
                resolve(body);
            }
        });
    });
}

const vonageApiKey = "vonage Api Key";
const vonageApiSecret = "vonage Api Secret";

const phoneNumber = "電話番号";

const express = require('express');
const app = express();
const path = require('path');

const port = 8080;

app.listen(port, () => {
        console.log(`${port}でWebを立ち上げます。`);
});

app.use('/', express.static(path.join(__dirname, 'public')));

app.get('/send', async (req, res) => {
    let requestId = await getRequest({
        url: `https://api.nexmo.com/verify/json?&api_key=${vonageApiKey}&api_secret=${vonageApiSecret}&number=${phoneNumber}&brand=${encodeURIComponent("エアコン認証")}`,
        json: true
    });
    res.send(requestId.request_id);
});

app.get('/check', async (req, res) => {
    let result = await getRequest({
        url: `https://api.nexmo.com/verify/check/json?&api_key=${vonageApiKey}&api_secret=${vonageApiSecret}&request_id=${req.query.requestId}&code=${req.query.code}`,
        json: true
    });
    if (result.status == "0") {
        sendDeviceComamnd("26,5,1,on");
    }
    res.send(result.status);
});

app.use((req, res) => {
        res.sendStatus(404);
});
最後に
これで、1回ONするだけで5円程度かかるので少し抵抗が増えますね(汗)
これで地球温暖化の改善と節電が出来ますね。
まあこれだけではONにしてOFFにはできないので是非皆さんこれをアレンジして完全にリモコンみたいに操作できるようにしてみてください。
以上です、最後までお読みいただきありがとうございました。