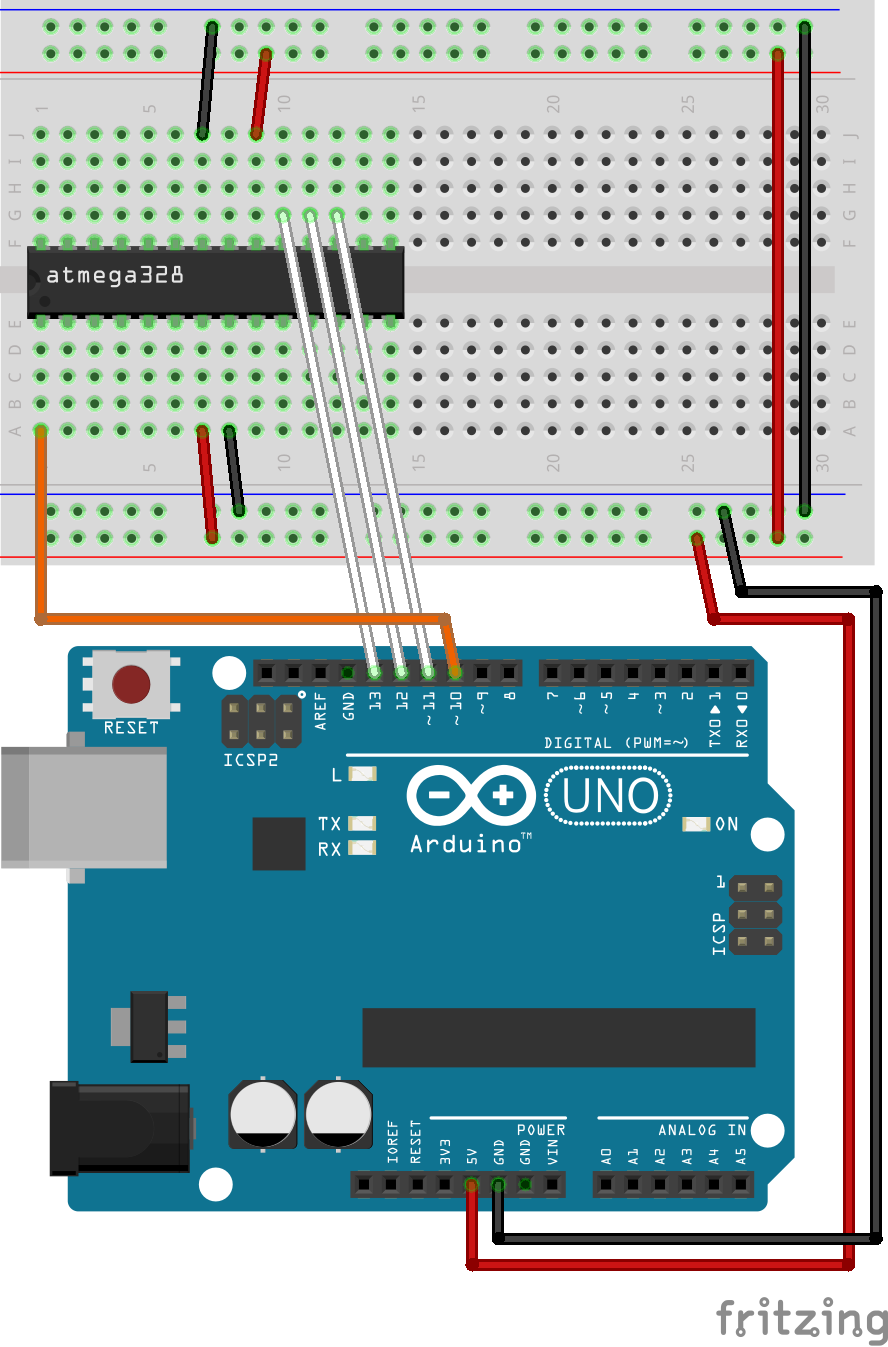
書き込み回路
Arduino IDEの設定
1.ファイル → 環境設定 を開き、
追加のボードマネージャのURLに以下を追記
https://raw.githubusercontent.com/carlosefr/atmega/master/package_carlosefr_atmega_index.json
2.ツール → ボード → ボードマネージャ を開き、
atmega328と検索し、Barebones ATmega Chips (no bootloader) のインストールをクリック
3.閉じるをクリック
これでボードのインストール完了です。
Arduino UnoにArduinoISPを書き込む
1.ファイル → スケッチ例 → ArduinoISP → ArduinoISPを選択
2.ツール → ボード → Arduino AVR Boads → Arduino Uno を選択
3.スケッチ → マイコンボードに書き込む をクリック
これでArduino UnoにArduinoISPの書き込みができました。
サンプルプログラム
Lチカのプログラム
void setup() {
  pinMode(13, OUTPUT);
}

void loop() {
  digitalWrite(13, HIGH);
  delay(1000);
  digitalWrite(13, LOW);
  delay(1000);
}
回路

書き込み
1.ツール → ボード → ATmega Microcontrollers → ATmega328p を選択
クロック周波数を内部8MHzにする場合は、
ツール → ボード → Clockを8 MHz (internal) を選択
2.ツール → 書込装置 → Arduino as ISP を選択
3.ツール → ブートローダを書き込む をクリック
4.スケッチ → マイコンボードに書き込む をクリックして、書き込みができます。
