Zoom は楽しいのですがもっといろんな機能と連動して活用していきたいですね。
Zoom API を使って可能性を調べていきます。
「Zoomのアプリケーションの作成 | 記録程度」
https://1507t.xyz/zoom-app-create
に詳しい資料がありますが、進化の速い Zoom なので現在の状況を確認してみました。
(2021/08/19 追記)
この記事の内容は2020年05月10日時点のものです。
また、同じ日に試した以下記事も参照ください。
「Zoom APIを試してみる OAuth編」
https://qiita.com/nanbuwks/items/a66439abe5230456d73a
アプリの登録とAPIキーの生成
まず、Zoom のアカウント及び Developer アカウントを取得してログオンしておきます。
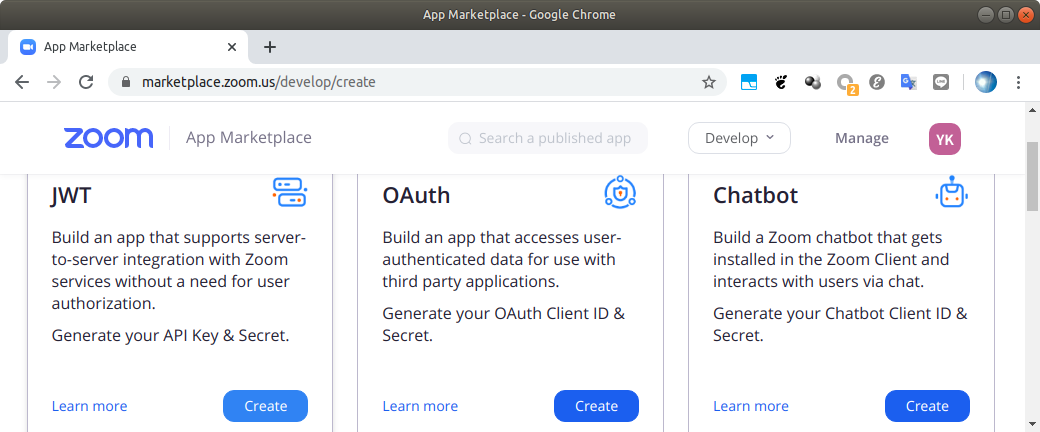
で以下のページを開きます。
「Develop」のボタンを押してメニュー中の「Build App」を押します。
ボタンは画面の横幅がないと出てこないので注意。
今回は、JWT を使って API にアクセスしてみます。
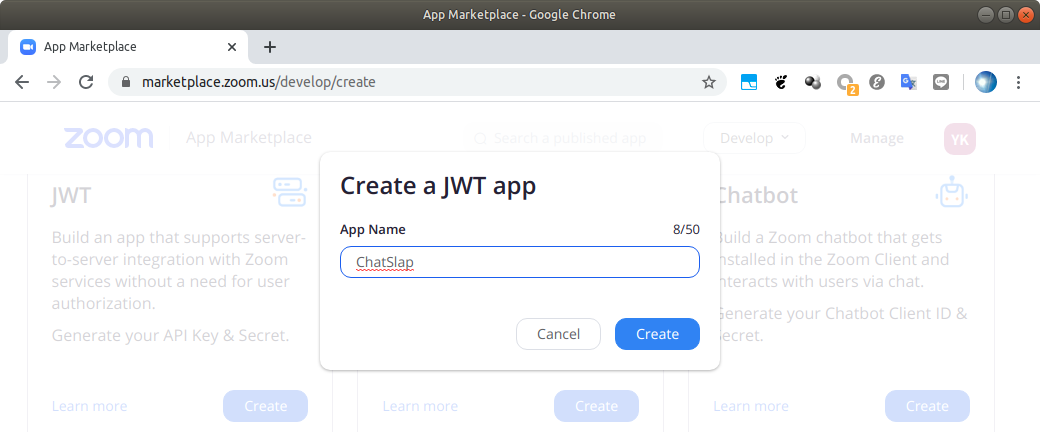
最初にアプリの名前を入れて
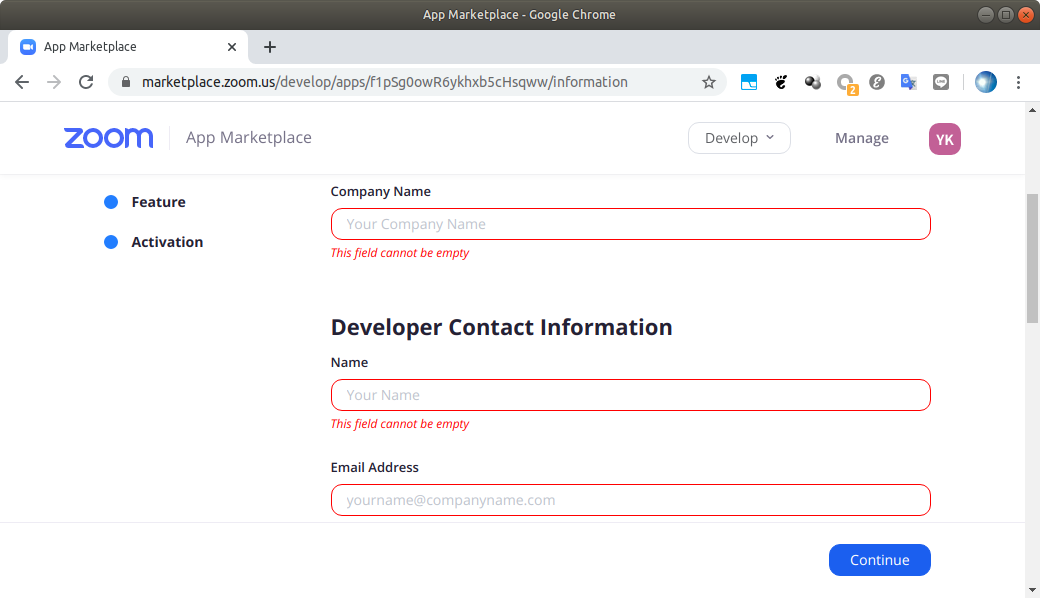
項目を埋めていきます
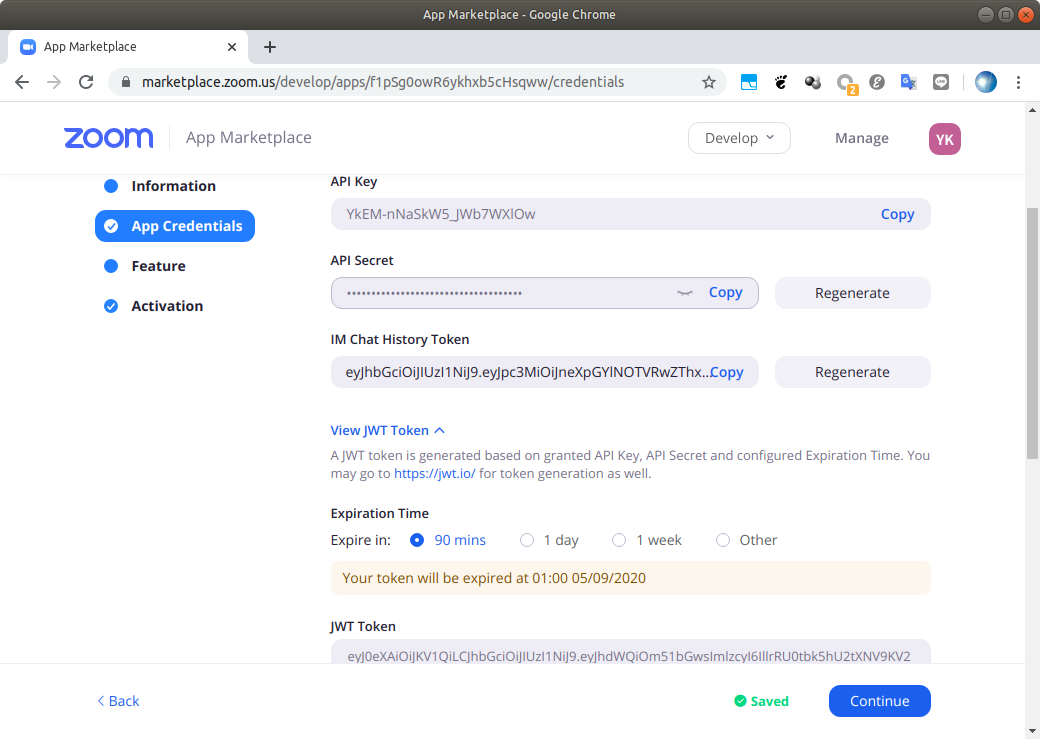
API key が得られます。この API Key はセキュリティのため期限付きの Token と併せて使います。
View JWT Token のところにある Token が、テスト用途に使うことができます。本番ではここにある Token ではなく使用にあたり都度 Token を生成する必要があります。
サンプルプログラムを実行する
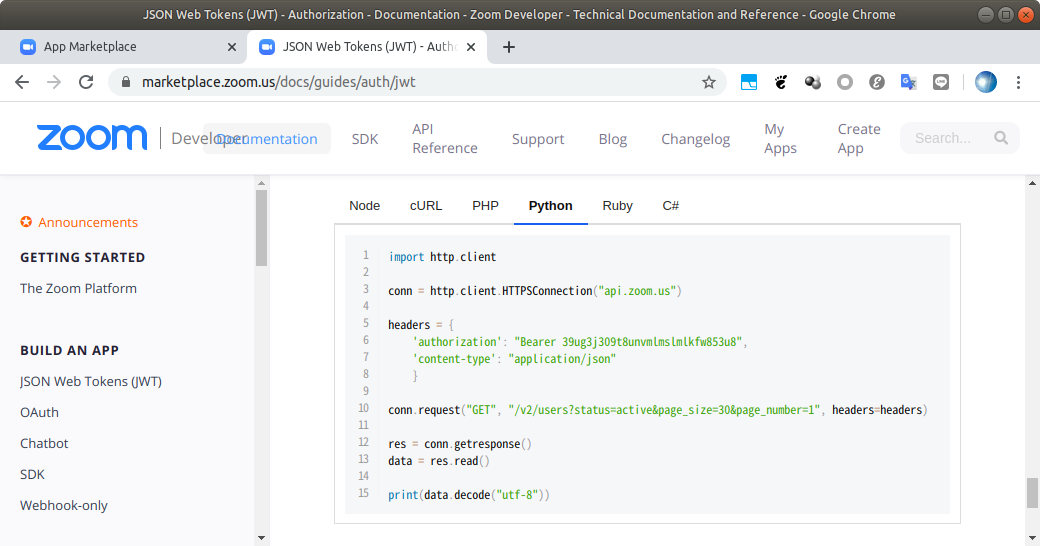
ドキュメントにサンプルプログラムが用意されています。
ここでは Python のサンプルプログラムをコピーして試してみました。
import http.client

conn = http.client.HTTPSConnection("api.zoom.us")

headers = {
    'authorization': "Bearer 39ug3j309t8unvmlmslmlkfw853u8",
    'content-type': "application/json"
    }

conn.request("GET", "/v2/users?status=active&page_size=30&page_number=1", headers=headers)

res = conn.getresponse()
data = res.read()

print(data.decode("utf-8"))
まずはこのまま実行してみます。
$ python3 chatslap.py{"code":124,"message":"Invalid access token."}
アクセストークンが不良ということです。
上記サンプルプログラムの
'authorization': "Bearer 39ug3j309t8unvmlmslmlkfw853u8",
のBearer より後ろの Token をテスト用の「JWT-Token」に入れ替えます。
'authorization': "Bearer eyJ0eXAiOiJKV1QiLCJhbGciOiJIUzI1NiJ9.eyJhdWQiOm51bGwsImlzcyI6IllrRU0tbk5hU2tXNV9KV2I3V1hsT3ciLCJleHAiOjE1ODg5NTQwNzcsImlhdCI6MTU4ODk0ODY3N30.gdkcMyienpafga0M3Zg2Y01oCAIKR3GST4NC2IRtMdo",
実行すると、以下の結果が得られます。
$ python3 chatslap.py{"page_count":1,"page_number":1,"page_size":30,"total_records":1,"users":[{"id":"gyzFbSNMTpe8qMQYlGI3sA","first_name":"Yoshimasa","last_name":"Kawano","email":"anybody@example.com","type":2,"pmi":2413037085,"timezone":"Asia/Tokyo","verified":1,"dept":"","created_at":"2020-02-21T01:27:09Z","last_login_time":"2020-05-08T06:32:33Z","last_client_version":"4.5.352596.0119(linux)","language":"jp-JP","phone_number":"","status":"active"}]}
これは、 GET /users APIを使用しています。
「List Users - Users - Zoom API - API Reference」
https://marketplace.zoom.us/docs/api-reference/zoom-api/users/users
アカウントのユーザー情報が表示されています。
その後、Explration Time が経過すると
{"code":124,"message":"Access token is expired."}
となります。
トークンを都度生成する
https://marketplace.zoom.us/docs/guides/auth/jwt
を見ながら作っていきます
Header
署名アルゴリズムとトークンタイプを指定します。
以下のJSONデータを "=" を除外する形式でurlsafe_b64でエンコードして作ります。
{
  "alg": "HS256",
  "typ": "JWT"
}
Payload
既に得られたAPIキーと、有効期限をエポック秒で指定します。
以下のJSONデータを "=" を除外する形式でurlsafe_b64でエンコードして作ります。
{
  "iss": "YkEM-nNaSkW5_JWb7WXlOw",
  "exp": 1496091964000
}
Signature
header + "." + payload をHMACSHA256でハッシュを作成し、"=" を除外する形式でurlsafe_b64でエンコードして作ります。
token
header+"."+payload+"."+signature をトークンとします。
import http.client
import base64
import time
import hmac
import hashlib

API_Key = 'YkEM-nNaSkW5_JWb7WXlOw'  # 取得したKeyに入れ替えてください
API_Secret = 'HjjHogenWjsHageqV8AgeCjjSage'   # 取得したSecretに入れ替えてください
expiration = int(time.time()) + 5 # 有効期間5秒

header    = base64.urlsafe_b64encode('{"alg":"HS256","typ":"JWT"}'.encode()).replace(b'=', b'') # ヘッダー
payload   = base64.urlsafe_b64encode(('{"iss":"'+API_Key+'","exp":"'+str(expiration)+'"}').encode()).replace(b'=', b'') # APIキーと>有効期限

hashdata  = hmac.new(API_Secret.encode(), header+".".encode()+payload, hashlib.sha256) # HMACSHA256でハッシュを作成
signature = base64.urlsafe_b64encode(hashdata.digest()).replace(b'=', b'') # ハッシュをURL-Save Base64でエンコード
token = (header+".".encode()+payload+".".encode()+signature).decode()  # トークンをstrで生成

conn = http.client.HTTPSConnection("api.zoom.us")

headers = {
    'authorization': "Bearer "+token,
    'content-type': "application/json"
    }

conn.request("GET", "/v2/users?status=active&page_size=30&page_number=1", headers=headers)

res = conn.getresponse()
data = res.read()

print(data.decode("utf-8"))
実行結果
$ python3 chatslap2.py
{"page_count":1,"page_number":1,"page_size":30,"total_records":1,"users":[{"id":"gyzFbSNMTpe8qMQYlGI3sA","first_name":"Yoshimasa","last_name":"Kawano","email":"anybody@example.com","type":2,"pmi":2413037085,"timezone":"Asia/Tokyo","verified":1,"dept":"","created_at":"2020-02-21T01:27:09Z","last_login_time":"2020-05-08T06:32:33Z","last_client_version":"4.5.352596.0119(linux)","pic_url":"https://us02web.zoom.us/p/gyzFbSNMTpe8qMQYlGI3sA/aefe7b2e-d173-4231-adbb-38a681034ecf-3770","language":"jp-JP","phone_number":"","status":"active"}]}
うまく取得できました。

