関連記事も併せてご覧ください
「LibreOffice を利用して Webアプリなどから PDF 文書生成 記事 INDEX」
https://qiita.com/nanbuwks/items/9cddc154f2d21c891ca5
概要
LibreOfficeを使い、データベース連動してPDF帳票を作るシステムを作ってみます。
(初出:2020/04/04)
(2021/03/29追記)
この記事を元に、Webサーバーで PDF 作成できるようにした記事を書きました
「WebアプリでPDF文書を自動生成 on Ubuntu20.04 LTS」
https://qiita.com/nanbuwks/items/f11e4e3aabac33f9a32b
環境
- LibreOffice バージョン: 6.4.6.2
- Ubuntu Linux 18.04LTS/20.04 LTS
- MariaDB mysql Ver 15.1 Distrib 10.3.25-MariaDB
- Python3
だけれども、基本的には OS はどれでも大丈夫なハズ。
他の OS の場合は、unzip などのコマンドを相当するものに読み替えてください。
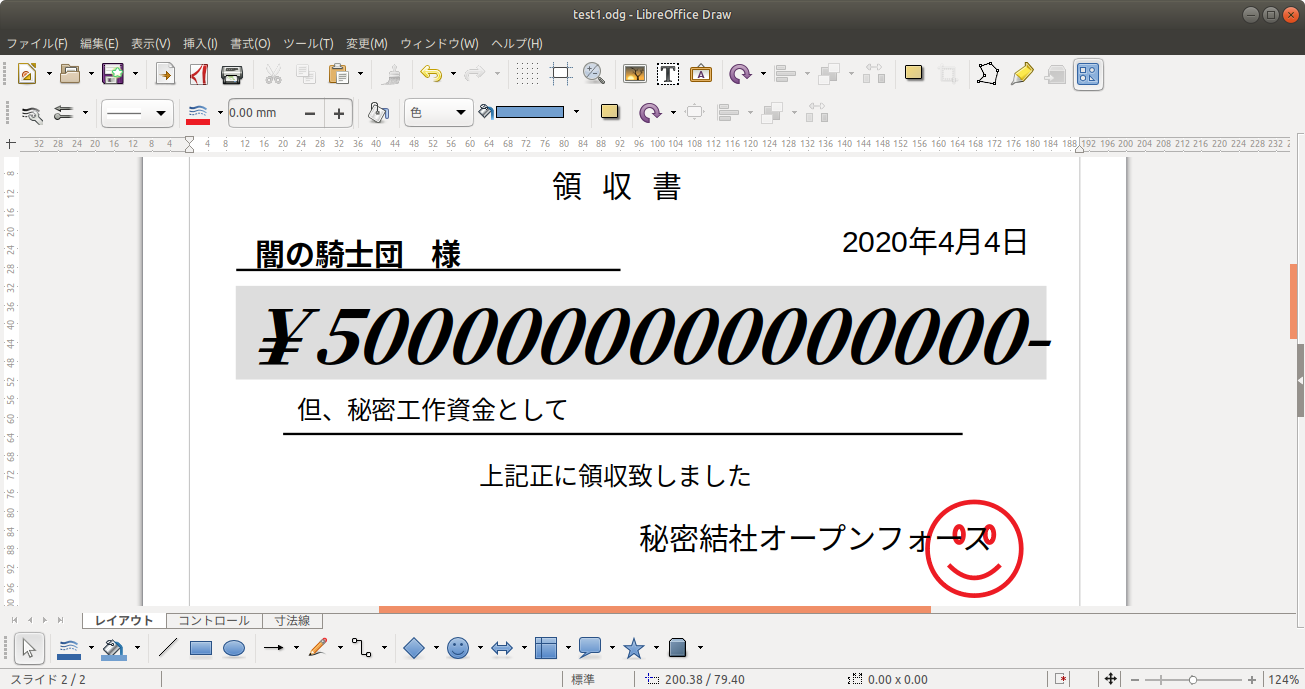
Draw で領収書を作る
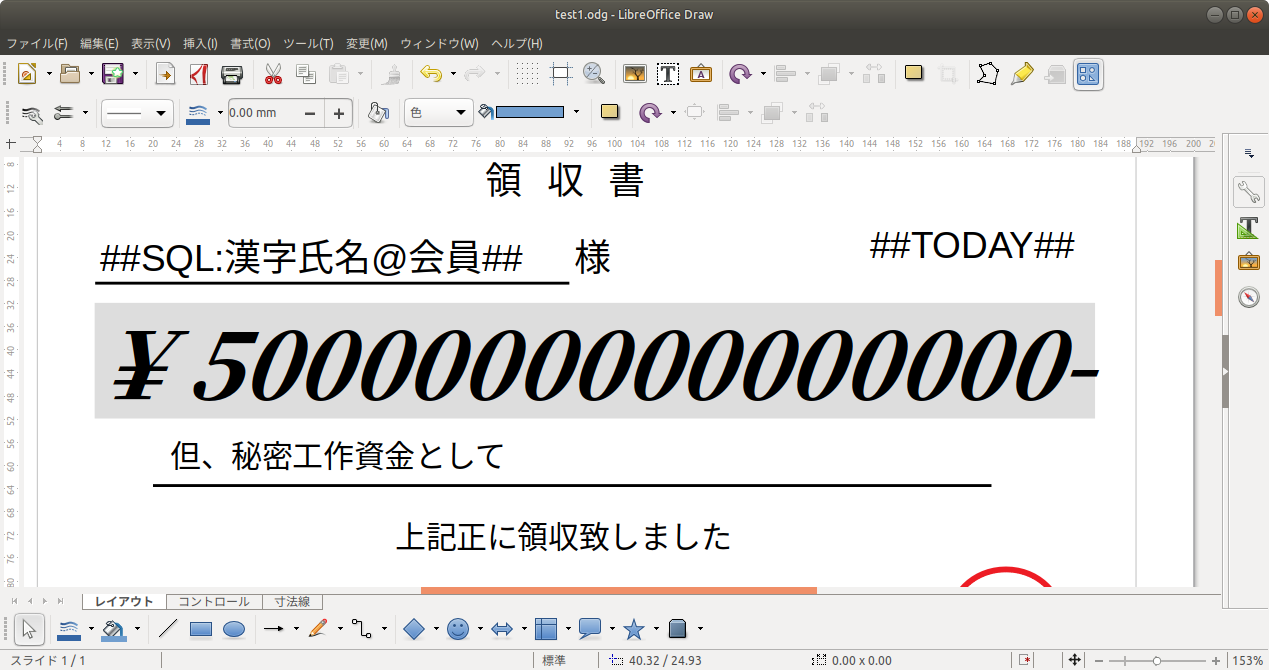
これを使います。
Drawだと好きな位置に好きな体裁で「領収書」と書ける。
ネ申エクセルよりもずっと直感的。
以下に述べる手法は、Writer でも Calc でもできる。けれども人類は Draw の可能性に気づくべき。
注意
センタリングや右揃えの必要な書式は、図形描画で透明&透明枠の四角を作り、その中にテキストを配置します。
自動で日付を入れる
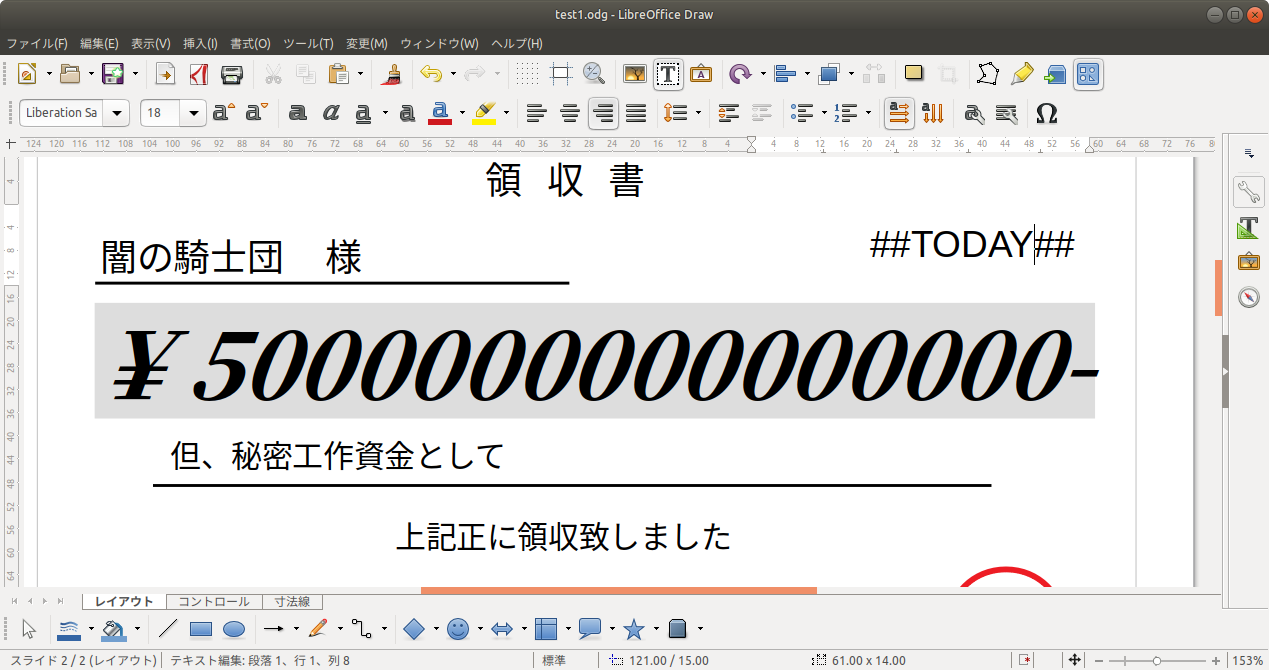
先のものの日付を ##TODAY## としておきます。
キーワードを ## に挟み込む形にしました。
## TODAY##
として、## で囲んだキーワードを置き換えることにします。
なぜ ## を使うのか
なぜ %% とかではなく、 ## を使うか? 20年ほど前から似たようなものを作ってましたが、その当時の SJIS や EUC などの文字コードでは %% だと誤動作することがあったからです。
今では UTF-8 が前提となり、## でなくても十分動作すると思いますが以前の流儀で ## としています。
操作
作業フォルダを決めて、odgファイルをそこに保存します。
そのフォルダ上で作業をします。
まずは、odgファイルから、content.xmlを抽出し、名前を original.xml と変更します。
$ unzip test1.odg content.xml
$ mv content.xml original.xml
加工しやすくするためにxmllint をかけ、sed でキーワードを変更します。
$ xmllint --format original.xml | sed s/##TODAY##/"`date +%Y年%-m月%-d日`"/g > content.xml
ちなみに、2020/04/04 みたいにするには以下の通り
$ xmllint --format original.xml | sed s/##TODAY##/"`date +%Y年\\\/%m\\\/%d`"/g > content.xml
できた content.xml を odgファイルに収容する。
$ zip test1.odg content.xml
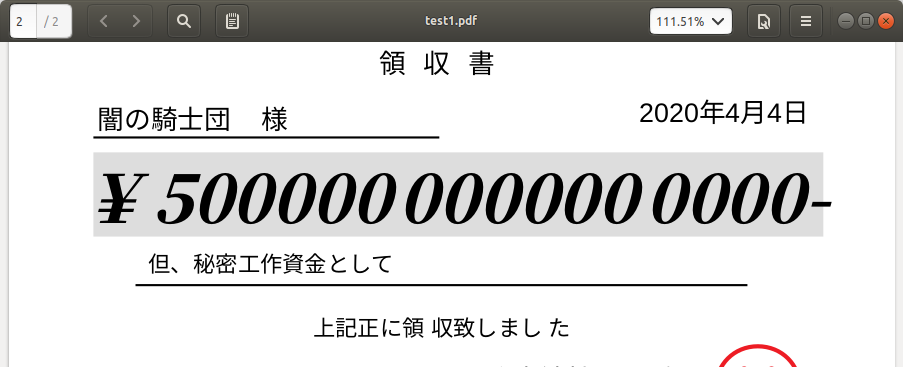
pdf変換
$ soffice --headless --convert-to pdf test1.odg
データベースと連動する
mysqlに入っているデータを引っ張ってくるようにしてみます。
(2021/03/25 追記: 以下のコマンドを実行する前に、pip3 がインストールされていない場合は python3-pip をインストールしておいてください)
$ sudo pip3 install mysql-connector-python3
(2021/03/25 追記:)
Ubuntu 20.04では以下のようにエラーが出ました。
$ sudo pip3 install mysql-connector-python3
ERROR: Could not find a version that satisfies the requirement mysql-connector-python3 (from versions: none)
ERROR: No matching distribution found for mysql-connector-python3
以下のようにするとインストールできました。
$ sudo pip3 install mysql-connector-python
もしかしたら、過去の記録が間違えていたかも知れません。
(:2021/03/25 追記終わり)
以下の db.py を作っておく。
import sys
import mysql.connector
import re
global キー
global キーフィールド

キー=sys.argv[2]
キーフィールド="会員番号"


def dbload(キー,テーブル,フィールド):
  db=mysql.connector.connect(host="127.0.0.1", user="webdb", password="password")
  cursor=db.cursor()

  cursor.execute("USE test")
  db.commit()
  sql=('SELECT '+フィールド+' FROM '+テーブル+' where 会員番号="'+キー+'"')
  cursor.execute(sql)
  i=(cursor.fetchone())
  cursor.close()
  db.close()
#  return(i[0])  # Ubuntu20.04でエラー
  return(i[0].decode())

def replaceline(source):
  p = re.search(r'##SQL:(.+)@(.+)##',source)
  if p != None:
    テーブル=(p.groups()[1])
    フィールド=(p.groups()[0])
#    print(テーブル)
#    print(フィールド)
    ret = dbload(キー,テーブル,フィールド)
    p = re.sub(r'##SQL:(.+)@(.+)##',ret,source)
    return(p)
  else:
    return(source)

# source = '  ##SQL:会員@フリガナ## 様'
# dist=replaceline(source)
# print(dist)

filename = sys.argv[1]
with open(filename, 'r') as f:
    fileText = f.read()
    replacedtext = replaceline(fileText)
    print(replacedtext)
(2021/03/26追記:Ubuntu20.04で TypeError: sequence item 1: expected str instance, bytes found というエラーが出たので該当箇所を以下のように修正しました。
#  return(i[0])  # Ubuntu20.04でエラー
  return(i[0].decode())
あとは、同じように
$ unzip test1.odg content.xml
$ xmllint --format content.xml > original_xmllint.xml
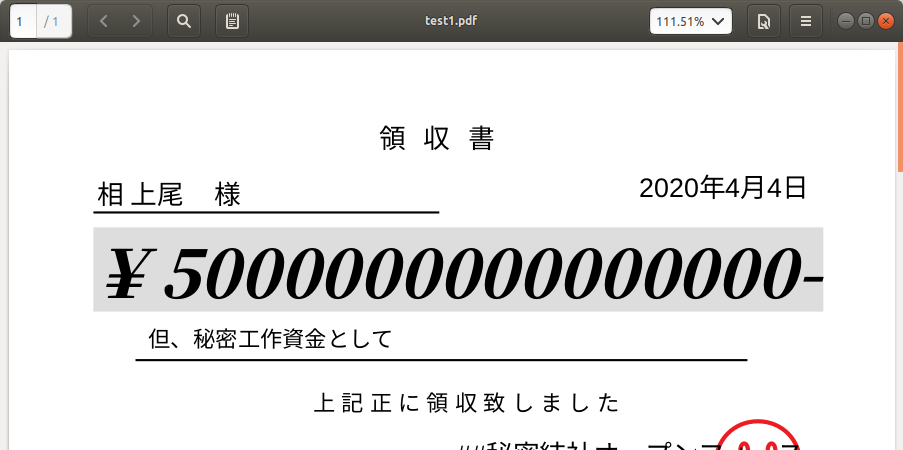
$ python3 db.py original_xmllint.xml 4 | sed s/##TODAY##/"`date +%Y年%-m月%-d日`"/g  > content.xml
$ zip test1.odg content.xml
updating: content.xml (deflated 85%)
$ soffice --headless --convert-to pdf test1.odg
(2021/03/25修正:操作中のファイル名に誤りがあったのを直しました)
とすると pdf ファイルができる。
