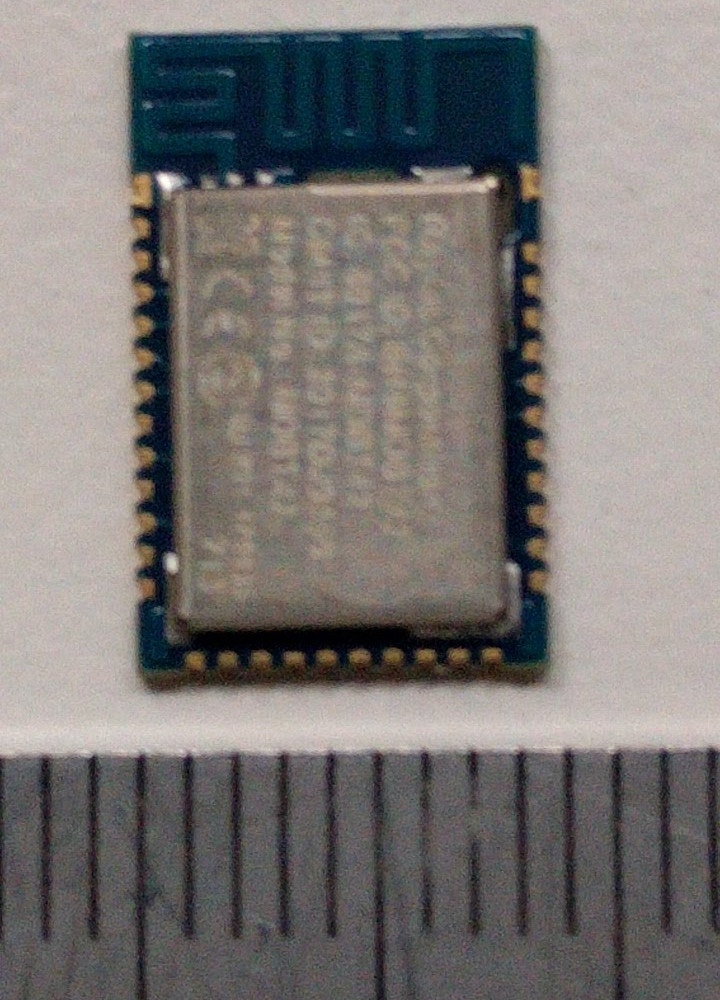
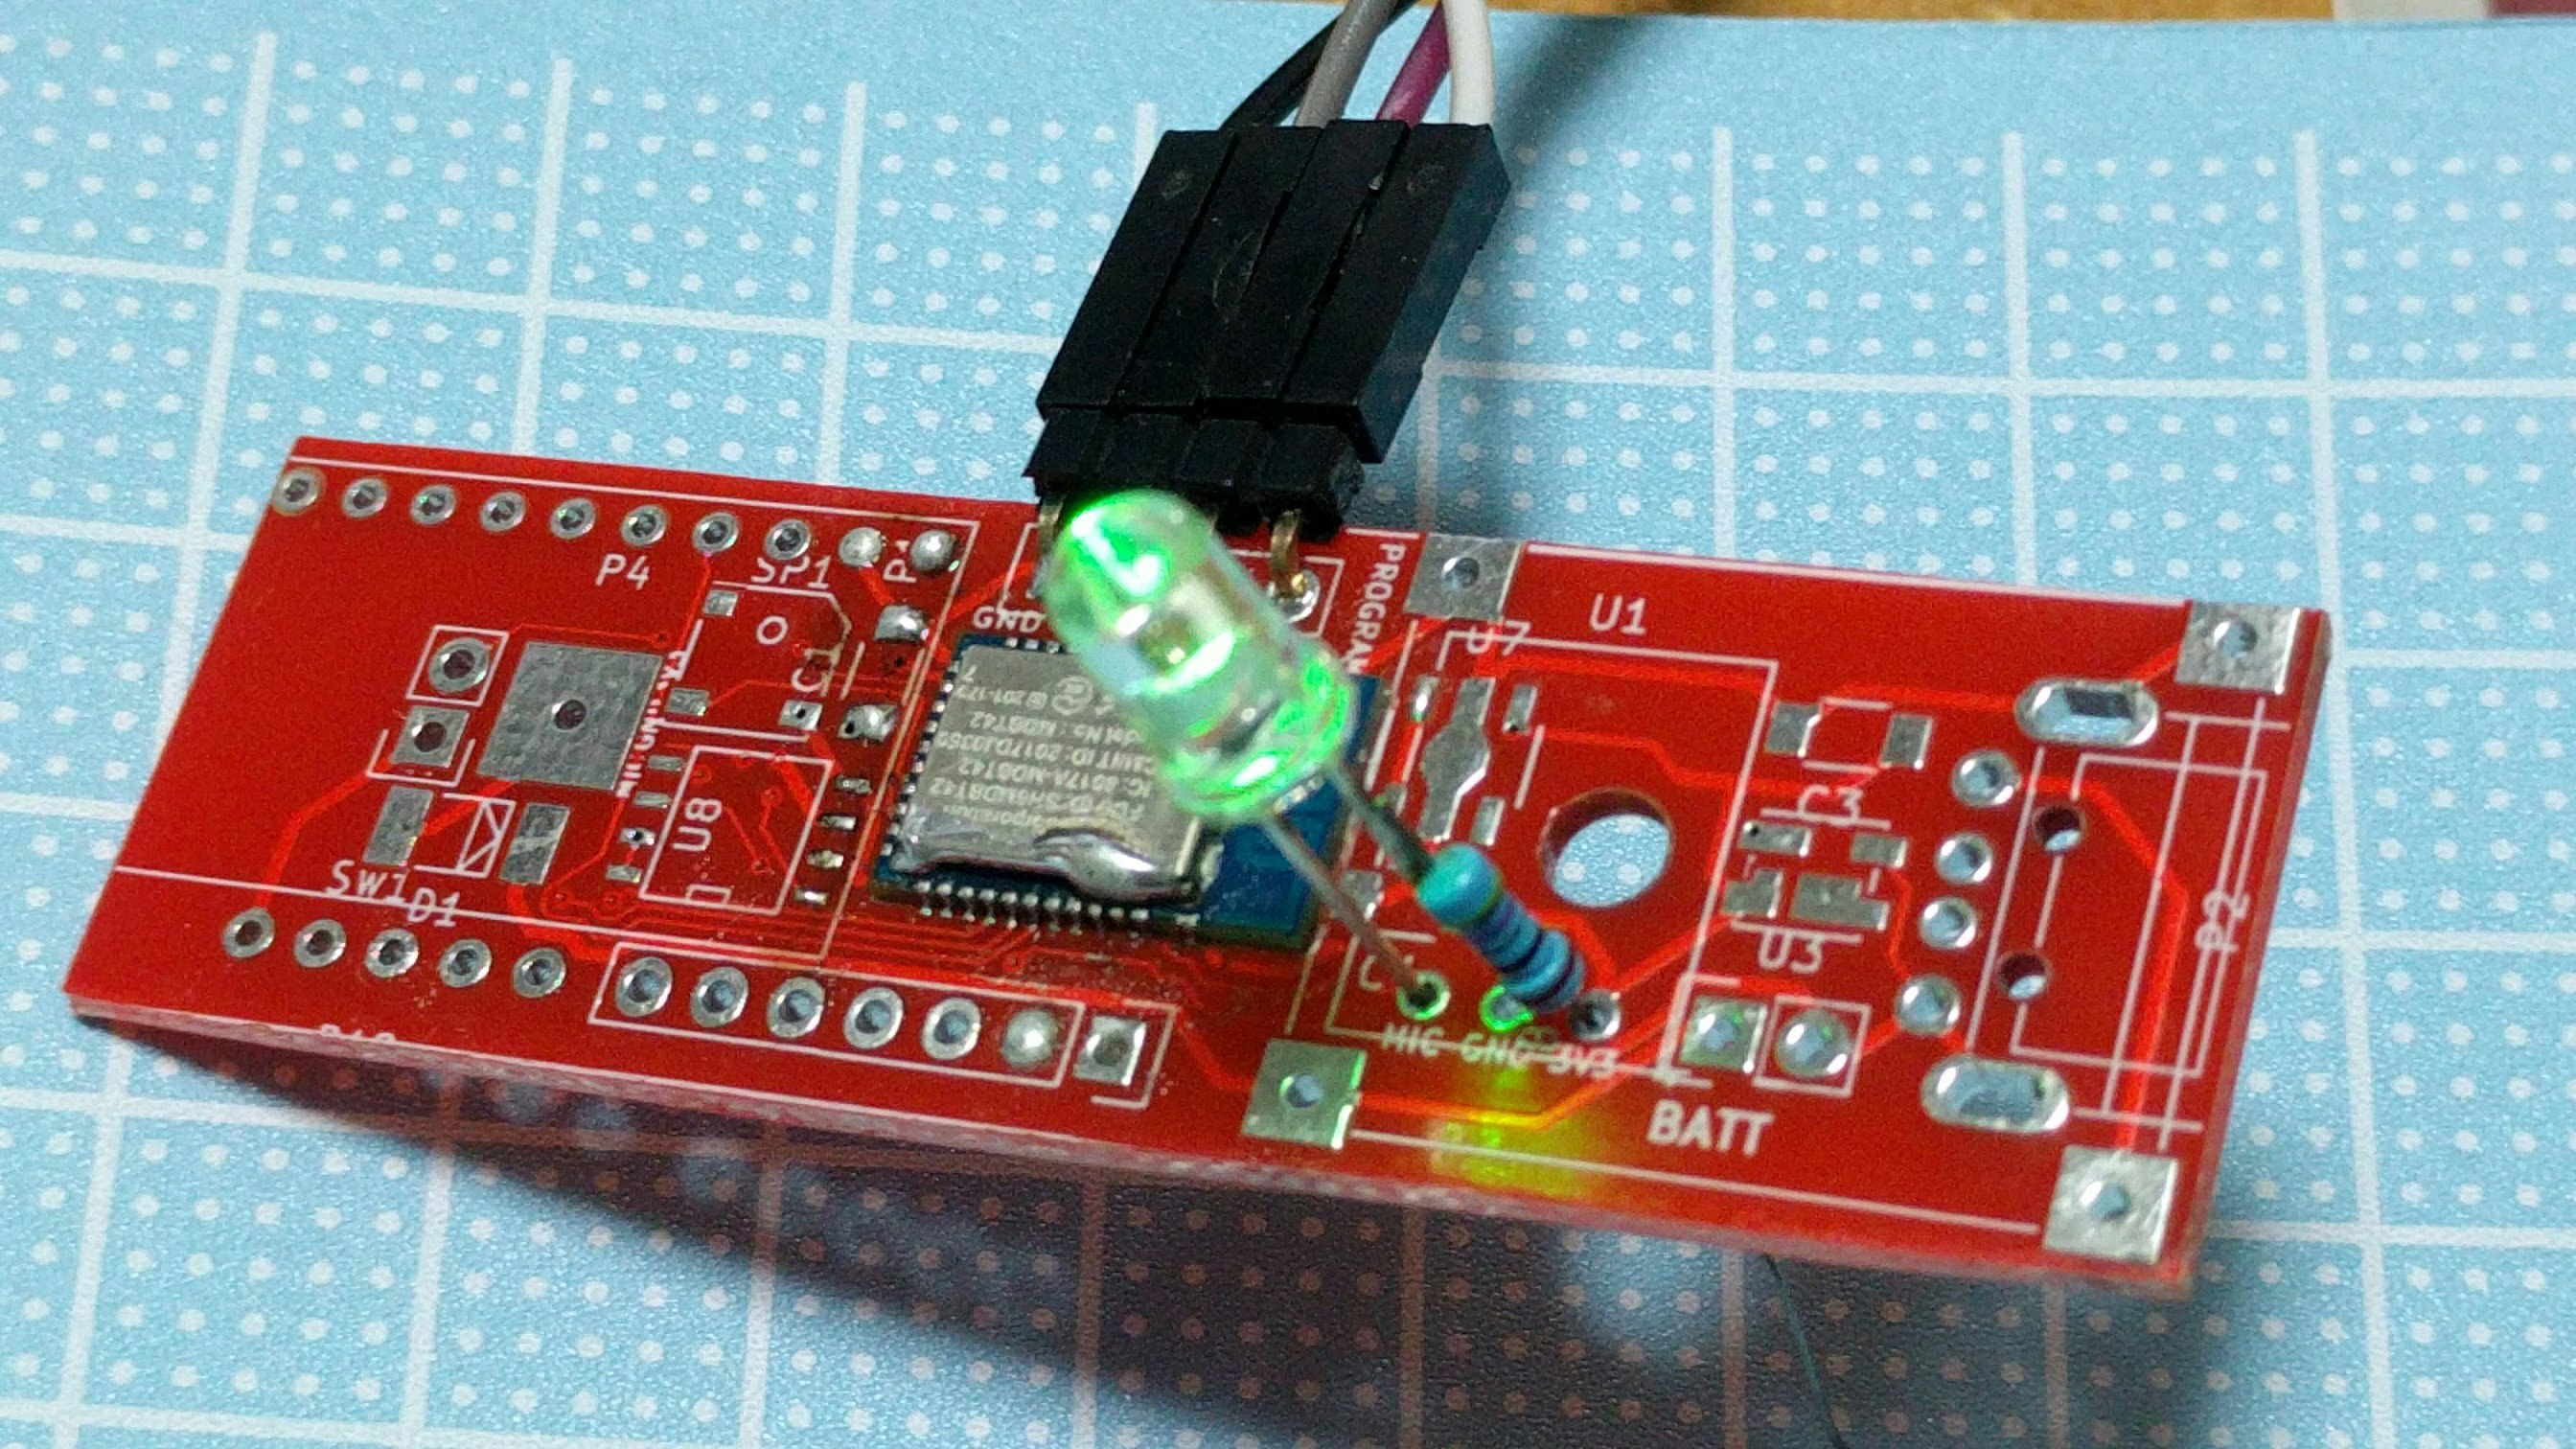
台湾Raytac社のBLEモジュールとして、nRF52832 を搭載した MDBT42 が技適通っていて使いやすそうなので使ってみた。
ラインアップ
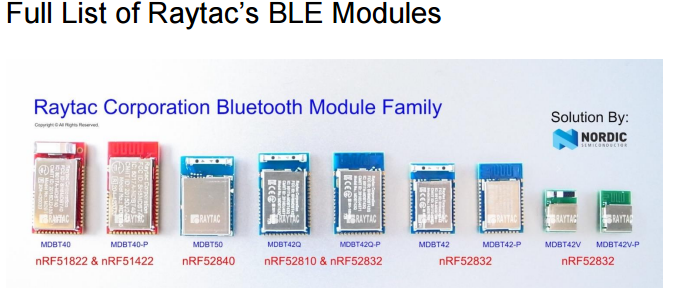
後述の仕様書(Approval Sheet Page 40)より
販売しているところ
株式会社フクミから取り寄せました。
一般のストアみたいなところとしては、 MDBT42 よりちょっと大きな MDBT42Q が Seeedstudio から購入できる
- MDBT42Q には nRF52810 を搭載したものと nRF52832 を搭載したものがある
- nRF52810 は nRF52832 の廉価版
- Seeedstudio のは nRF52832 版(廉価版じゃない方)のようだ
Spec.
- MDBT42-512K ( チップアンテナ版 )
- MDBT42-P512K ( パターンアンテナ版 )
nRF52
Nordic Semiconductor SoC “nRF52832 WLCSP” 搭載
- Bluetooth 4.2 & Bluetooth 5
- 32-bit ARM Cortex M4 搭載
- 512KB flash
- 64KB RAM
- 小さい! 13.8 x 8.8 x 1.9 mm.
仕様書
Footprint Design Guide
http://www.raytac.com/download/MDBT42/MDBT42_MDBT42-P%20Footprint_Design%20Guide-20170726.zip
開発方法
Arduino開発環境を使うやり方を試してみる。
ここを使った。
https://github.com/sandeepmistry/arduino-nRF5
他にも、Adafruitのファームウェア(Bluefruit52)もあるらしいです。https://github.com/adafruit/Adafruit_nRF52_Arduino
設定する
環境
- Arduino1.8.5
- Ubuntu 16.04 (AMD64)
- ポータブル環境化したIDEで試していますが、通常の場合でもあまり違わないはず。
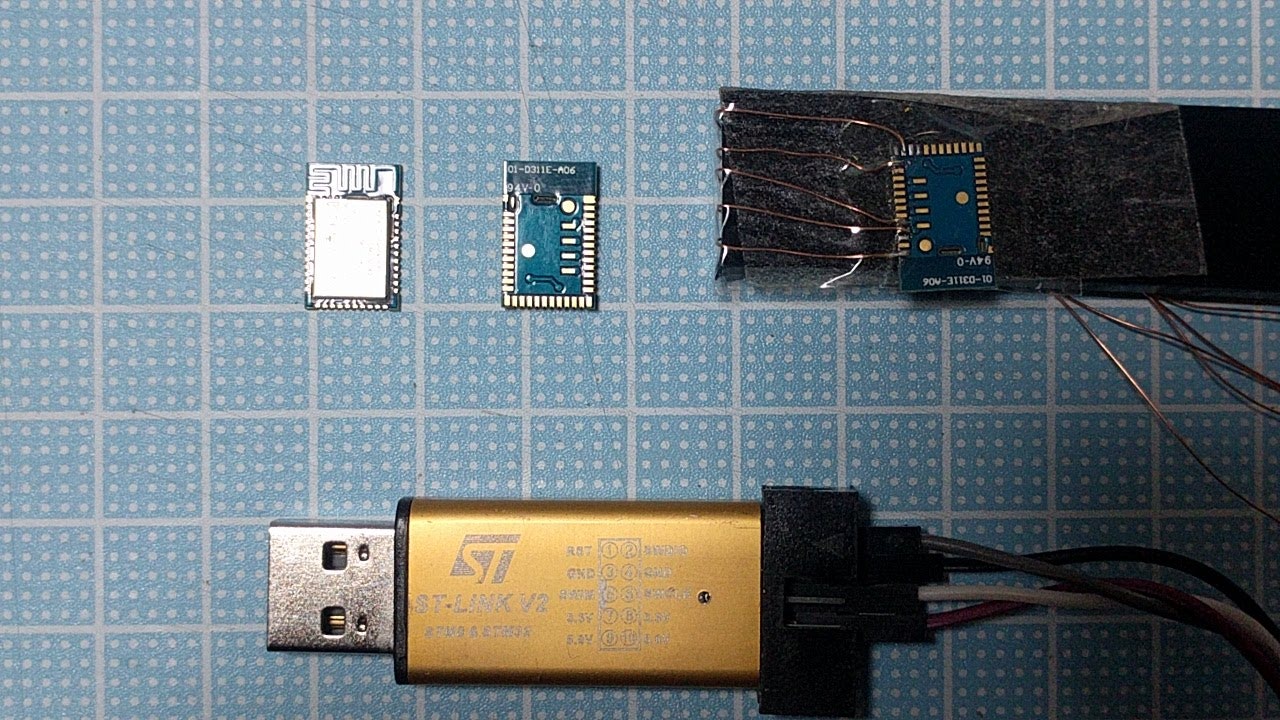
- 書込装置として、STM32マイコンの開発で慣れているST-Linkを使います。
Arduino開発環境の設定
Arduino開発環境は既にインストール終わっているとします。
「ファイル」- 「環境設定」 - 「追加のボードマネージャのURL:」に
https://sandeepmistry.github.io/arduino-nRF5/package_nRF5_boards_index.json
と入力してOK
「ツール」 - 「ボード:・・・」の一番上の「ボードマネージャ...」
で検索窓に「Nordic」と入力すると
「Nordic Semiconductor nRF5 Boards」と出るので選択して「インストール」
環境依存の設定
更にドキュメント https://github.com/sandeepmistry/arduino-nRF5 に沿って環境(Windows/Mac/Linux)に応じた設定をします。
私はLinux64なので、以下を追加作業。
sudo dpkg --add-architecture i386
sudo apt-get update
sudo apt-get install libc6:i386 libstdc++6:i386 libncurses5:i386 libudev1:i386
なお、 libc6:i386 が不足している場合、以下のエラーが発生する。
arm-none-eabi-g++: no such file or directory
また、
openocd: error while loading shared libraries: libudev.so.1: cannot open shared object file: No such file or directory
でエラーが発生する場合は、
sudo apt install --reinstall libudev1
で対処。
また、
Error: libusb_open() failed with LIBUSB_ERROR_ACCESS
Error: open failed
in procedure 'program'
in procedure 'init' called at file "embedded:startup.tcl", line 473
in procedure 'ocd_bouncer'
** OpenOCD init failed **
shutdown command invoked
が発生した場合、
(Arduinoフォルダ)/Arduino_STM32-master/tools/linux64/install.sh
を実行する。
また、以下も必要かも。(未検証)
$ sudo apt-get install libusb-1.0
なお、Windowsの場合は以下のようにST-Linkのドライバをインストールするだけでいいみたいです。
http://www.st.com/ja/development-tools/stsw-link009.html
このページから STSW-LINK009 をダウンロード、インストールしてください。
書込プログラムを配置(SoftDeviceを使う場合)
Arduinoスケッチフォルダにtools/nRF5FlashSoftDevice/tool/
を作り、nRF5FlashSoftDevice.jarを格納。
jarファイルはこちらから。
僕の場合はポータブル環境として arduino-1.8.5_nRF5というフォルダを作っているので、
その中に/tools/nRF5FlashSoftDevice/toolsフォルダを作りました。
ターゲットボードなどの選択
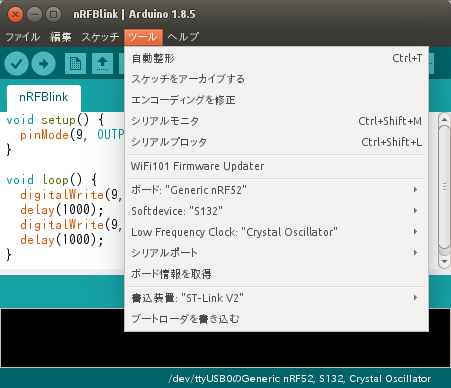
「ツール」 - 「ボード:」を
「Generic nRF52」 にする。
「ツール」 - 「書込装置:」を
「ST-Link V2」 にする。
「ツール」 - 「Softdevice:」を
「S132」 にする。
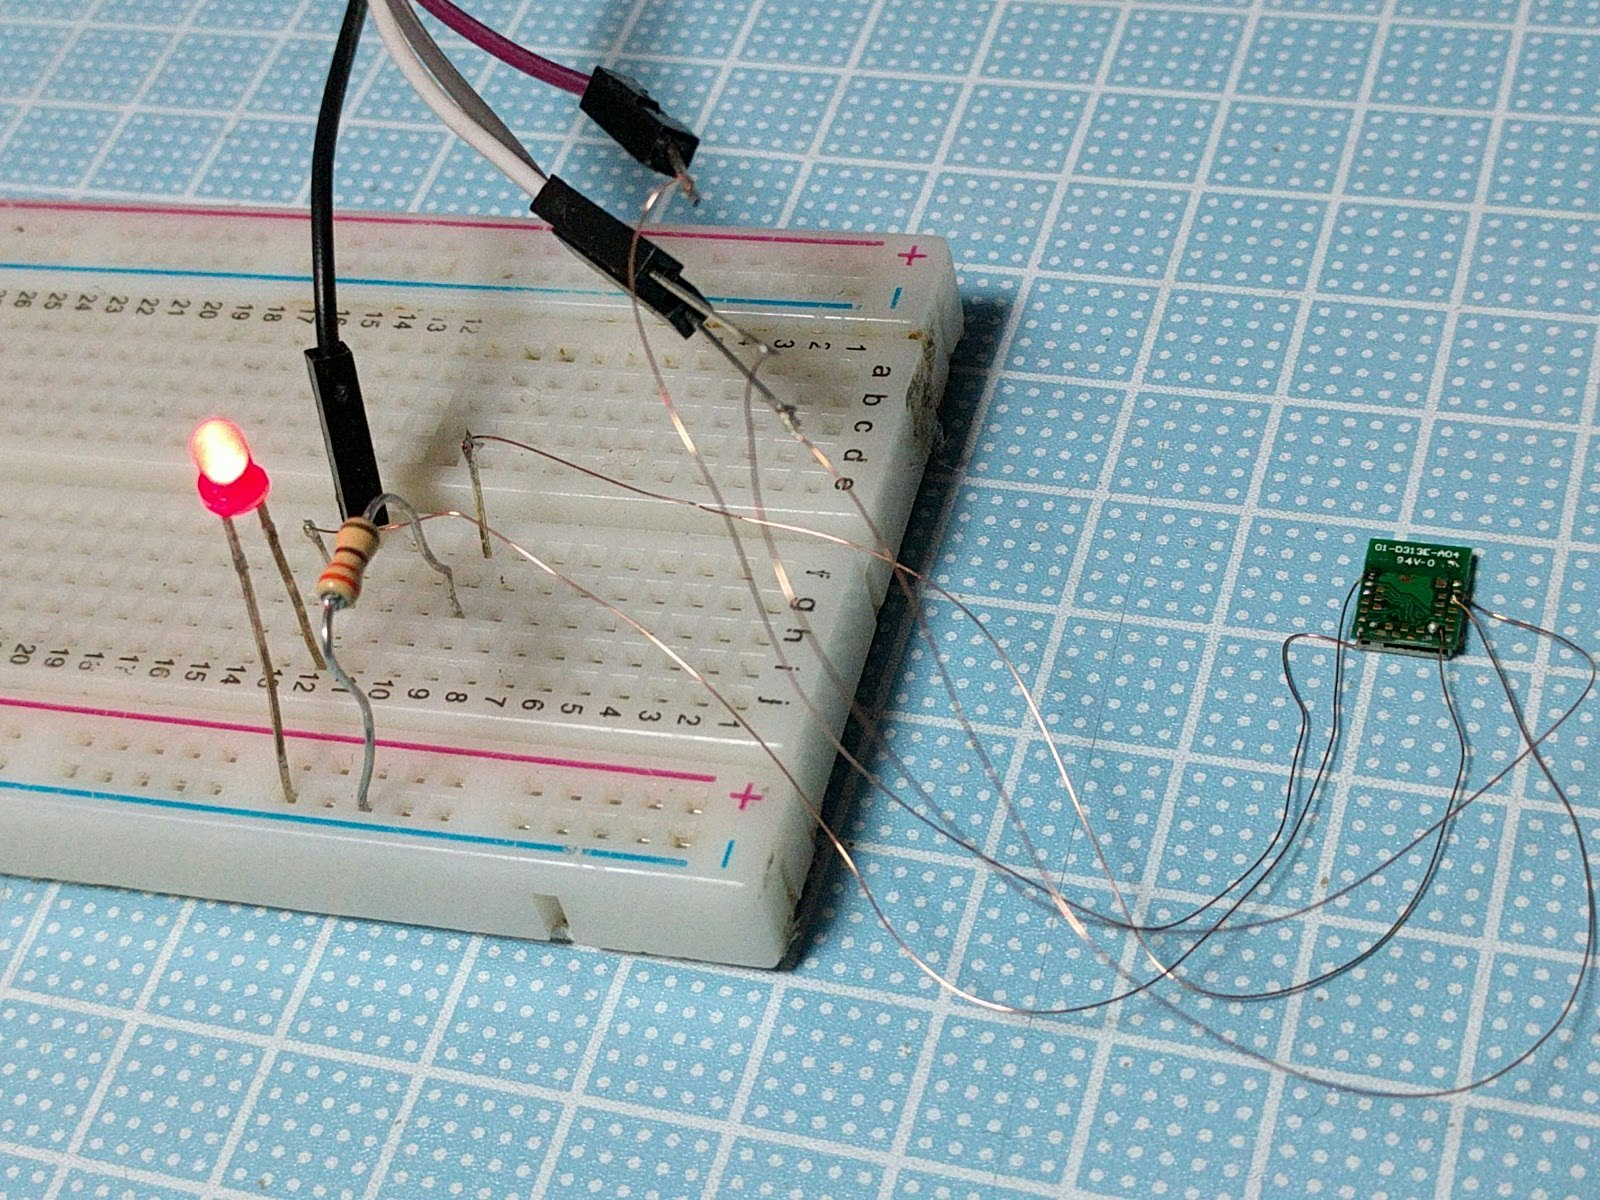
Lチカやってみる
配線
スケッチ
void setup() {
  pinMode(9, OUTPUT);
}

void loop() {
  digitalWrite(9, HIGH);
  delay(1000);
  digitalWrite(9, LOW);
  delay(1000);
}
で確認できた。
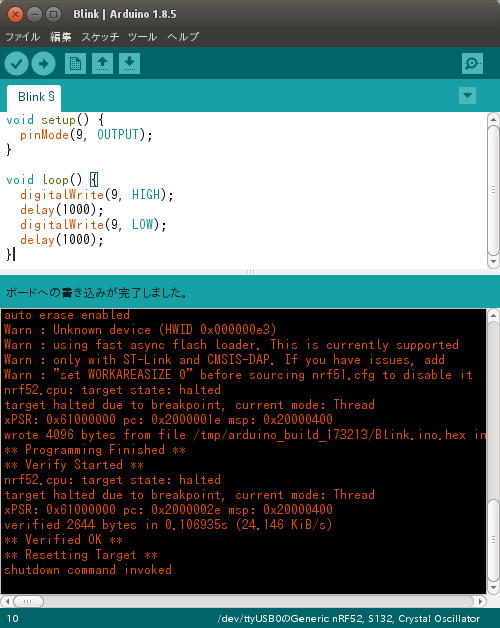
書き込み時のメッセージ(書き込み時の詳細情報を表示するに設定)
バリエーション
より小型のMDBT42Vというのもあります。同じように設定して、Lチカできました。
MDBT42V仕様書
http://www.raytac.com/download/MDBT42/MDBT42V%20&%20MDBT42V-P-Version%20B.PDF
Footprint Design Guide
http://www.raytac.com/download/MDBT42/MDBT42V_%20MDBT42V-P%20Footprint_Design%20Guide-20170726.zip
BLEライブラリの導入
https://ht-deko.com/arduino/microbit.html
こちらを参考に、BLEライブラリを導入します。
sandeepmistry/arduino-BLEPeripheral
https://github.com/sandeepmistry/arduino-BLEPeripheral
これに基づいて、
ArduinoIDEから「スケッチ」-「ライブラリをインクルード」-「ライブラリの管理...」
で「BLEPeripheral」を検索してインストール
MDBT42 IOT Module PCB future
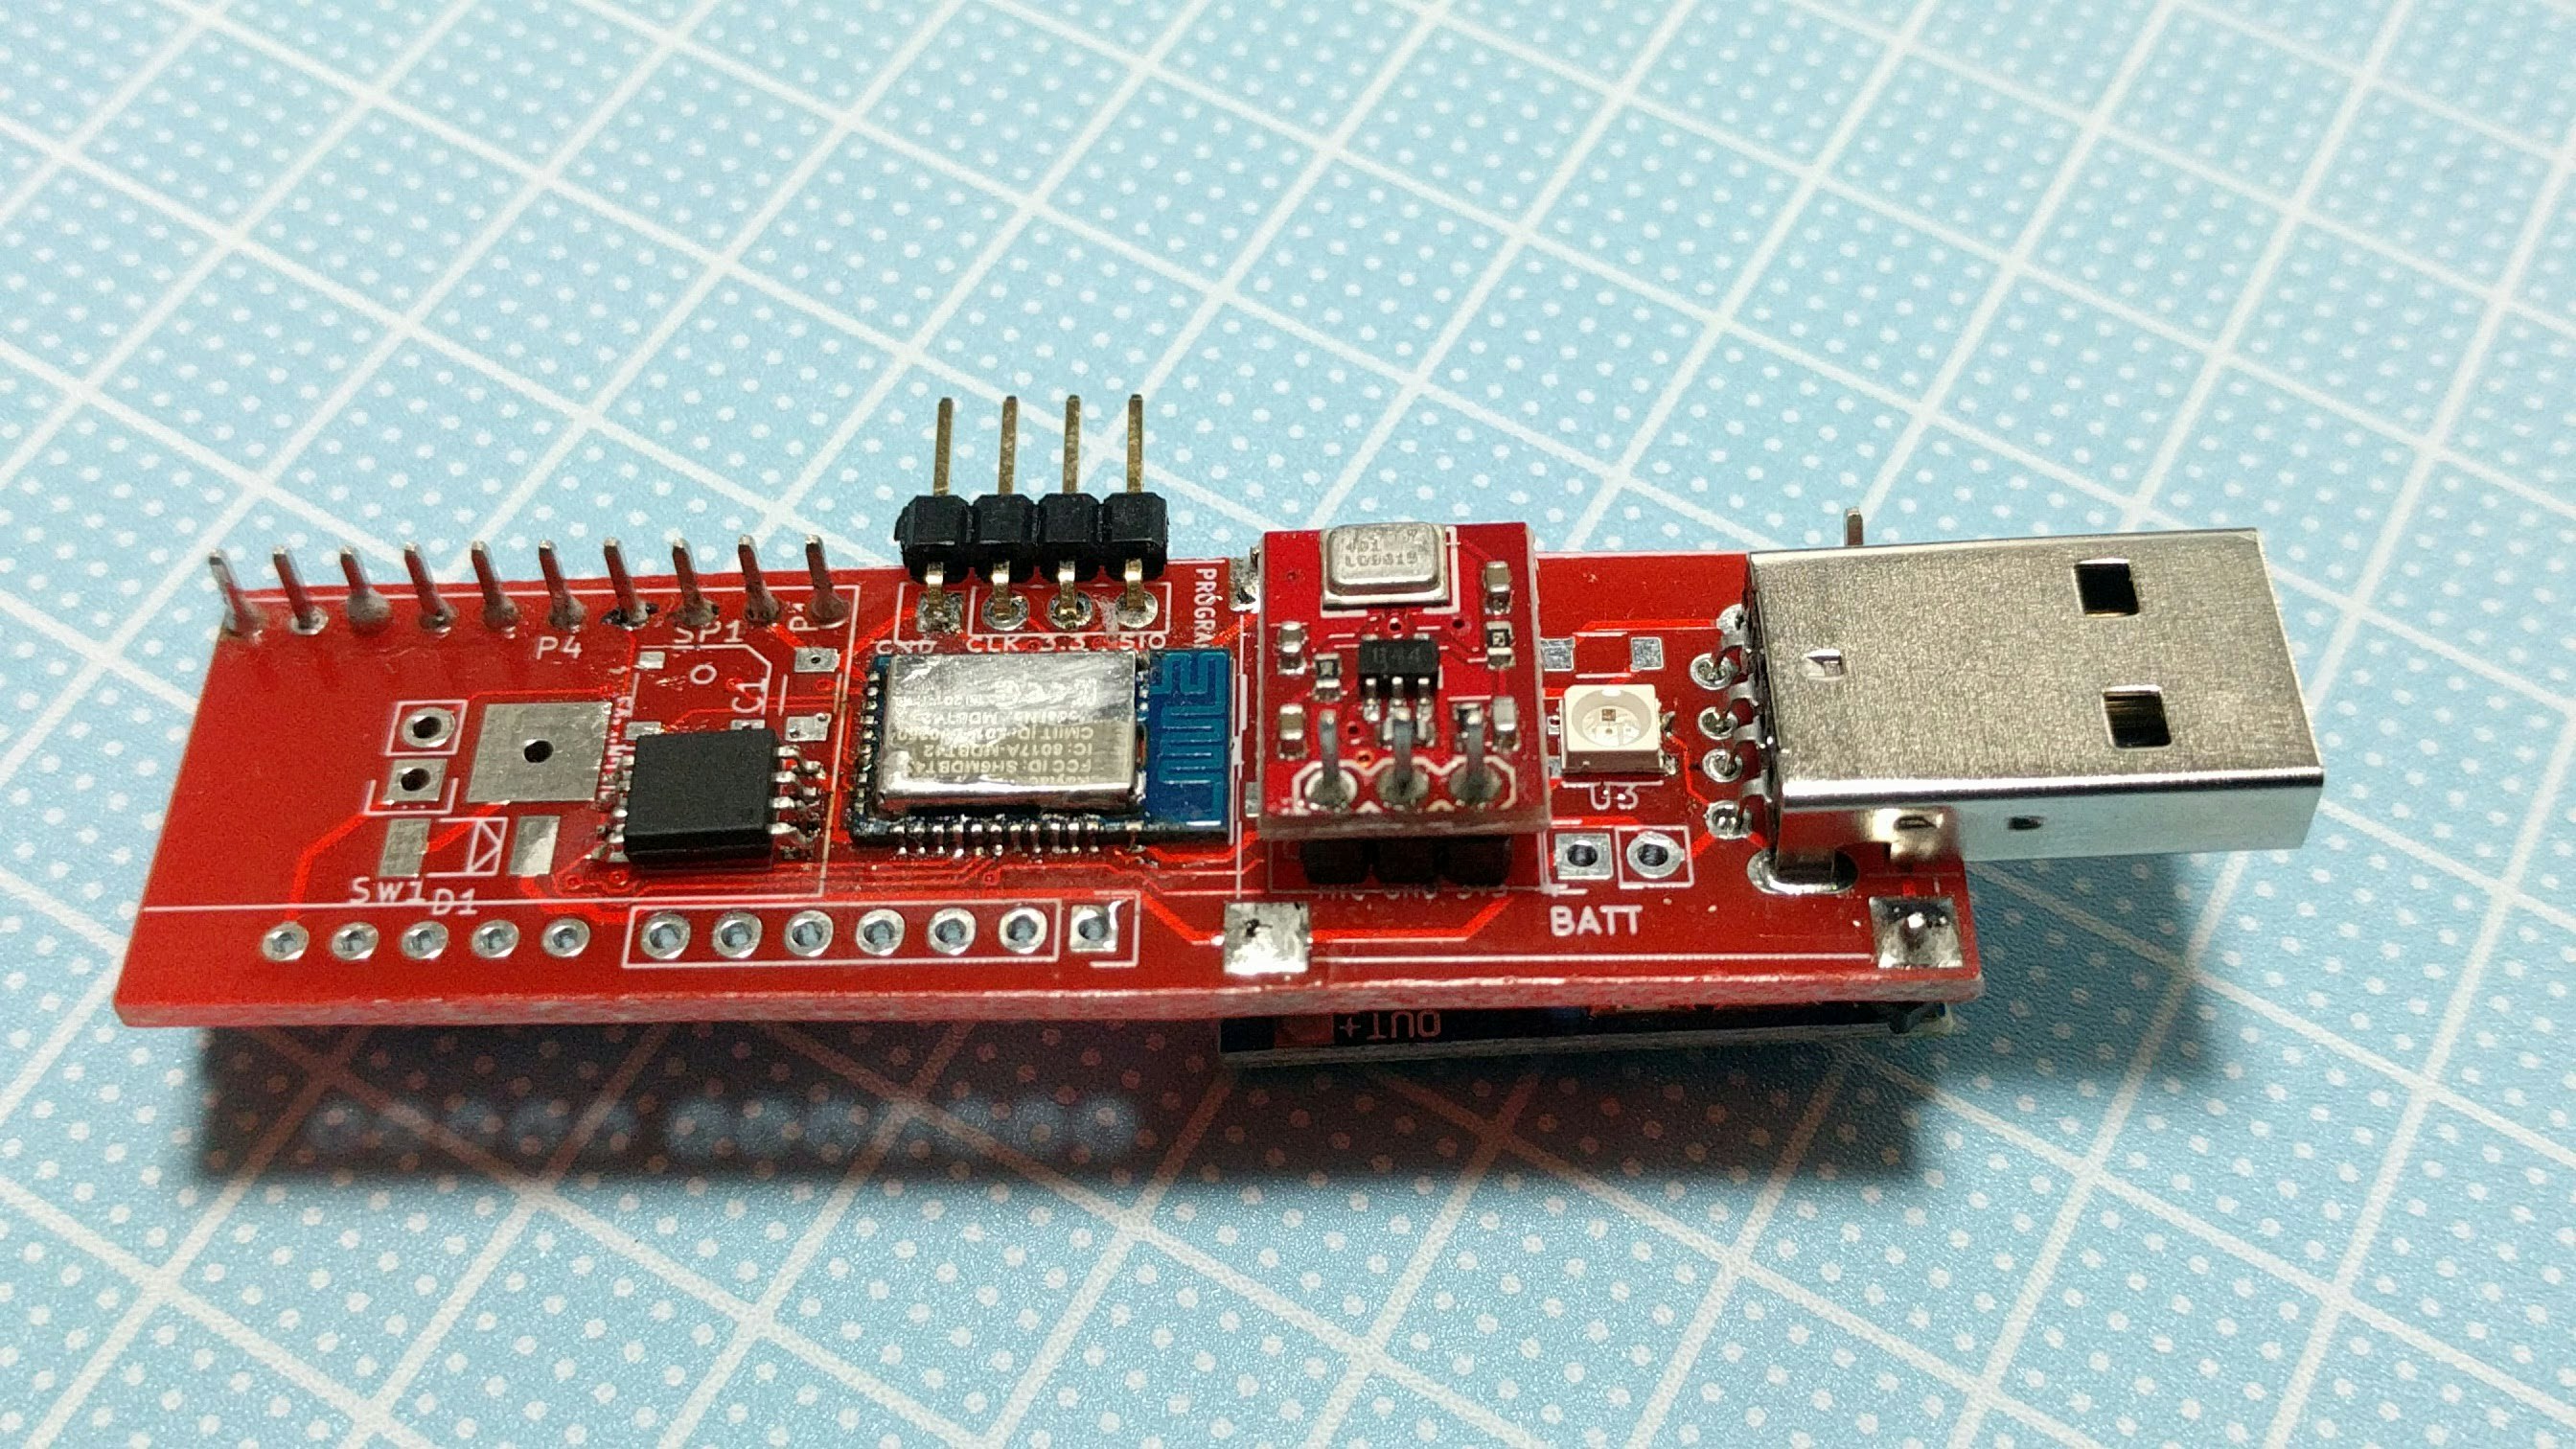
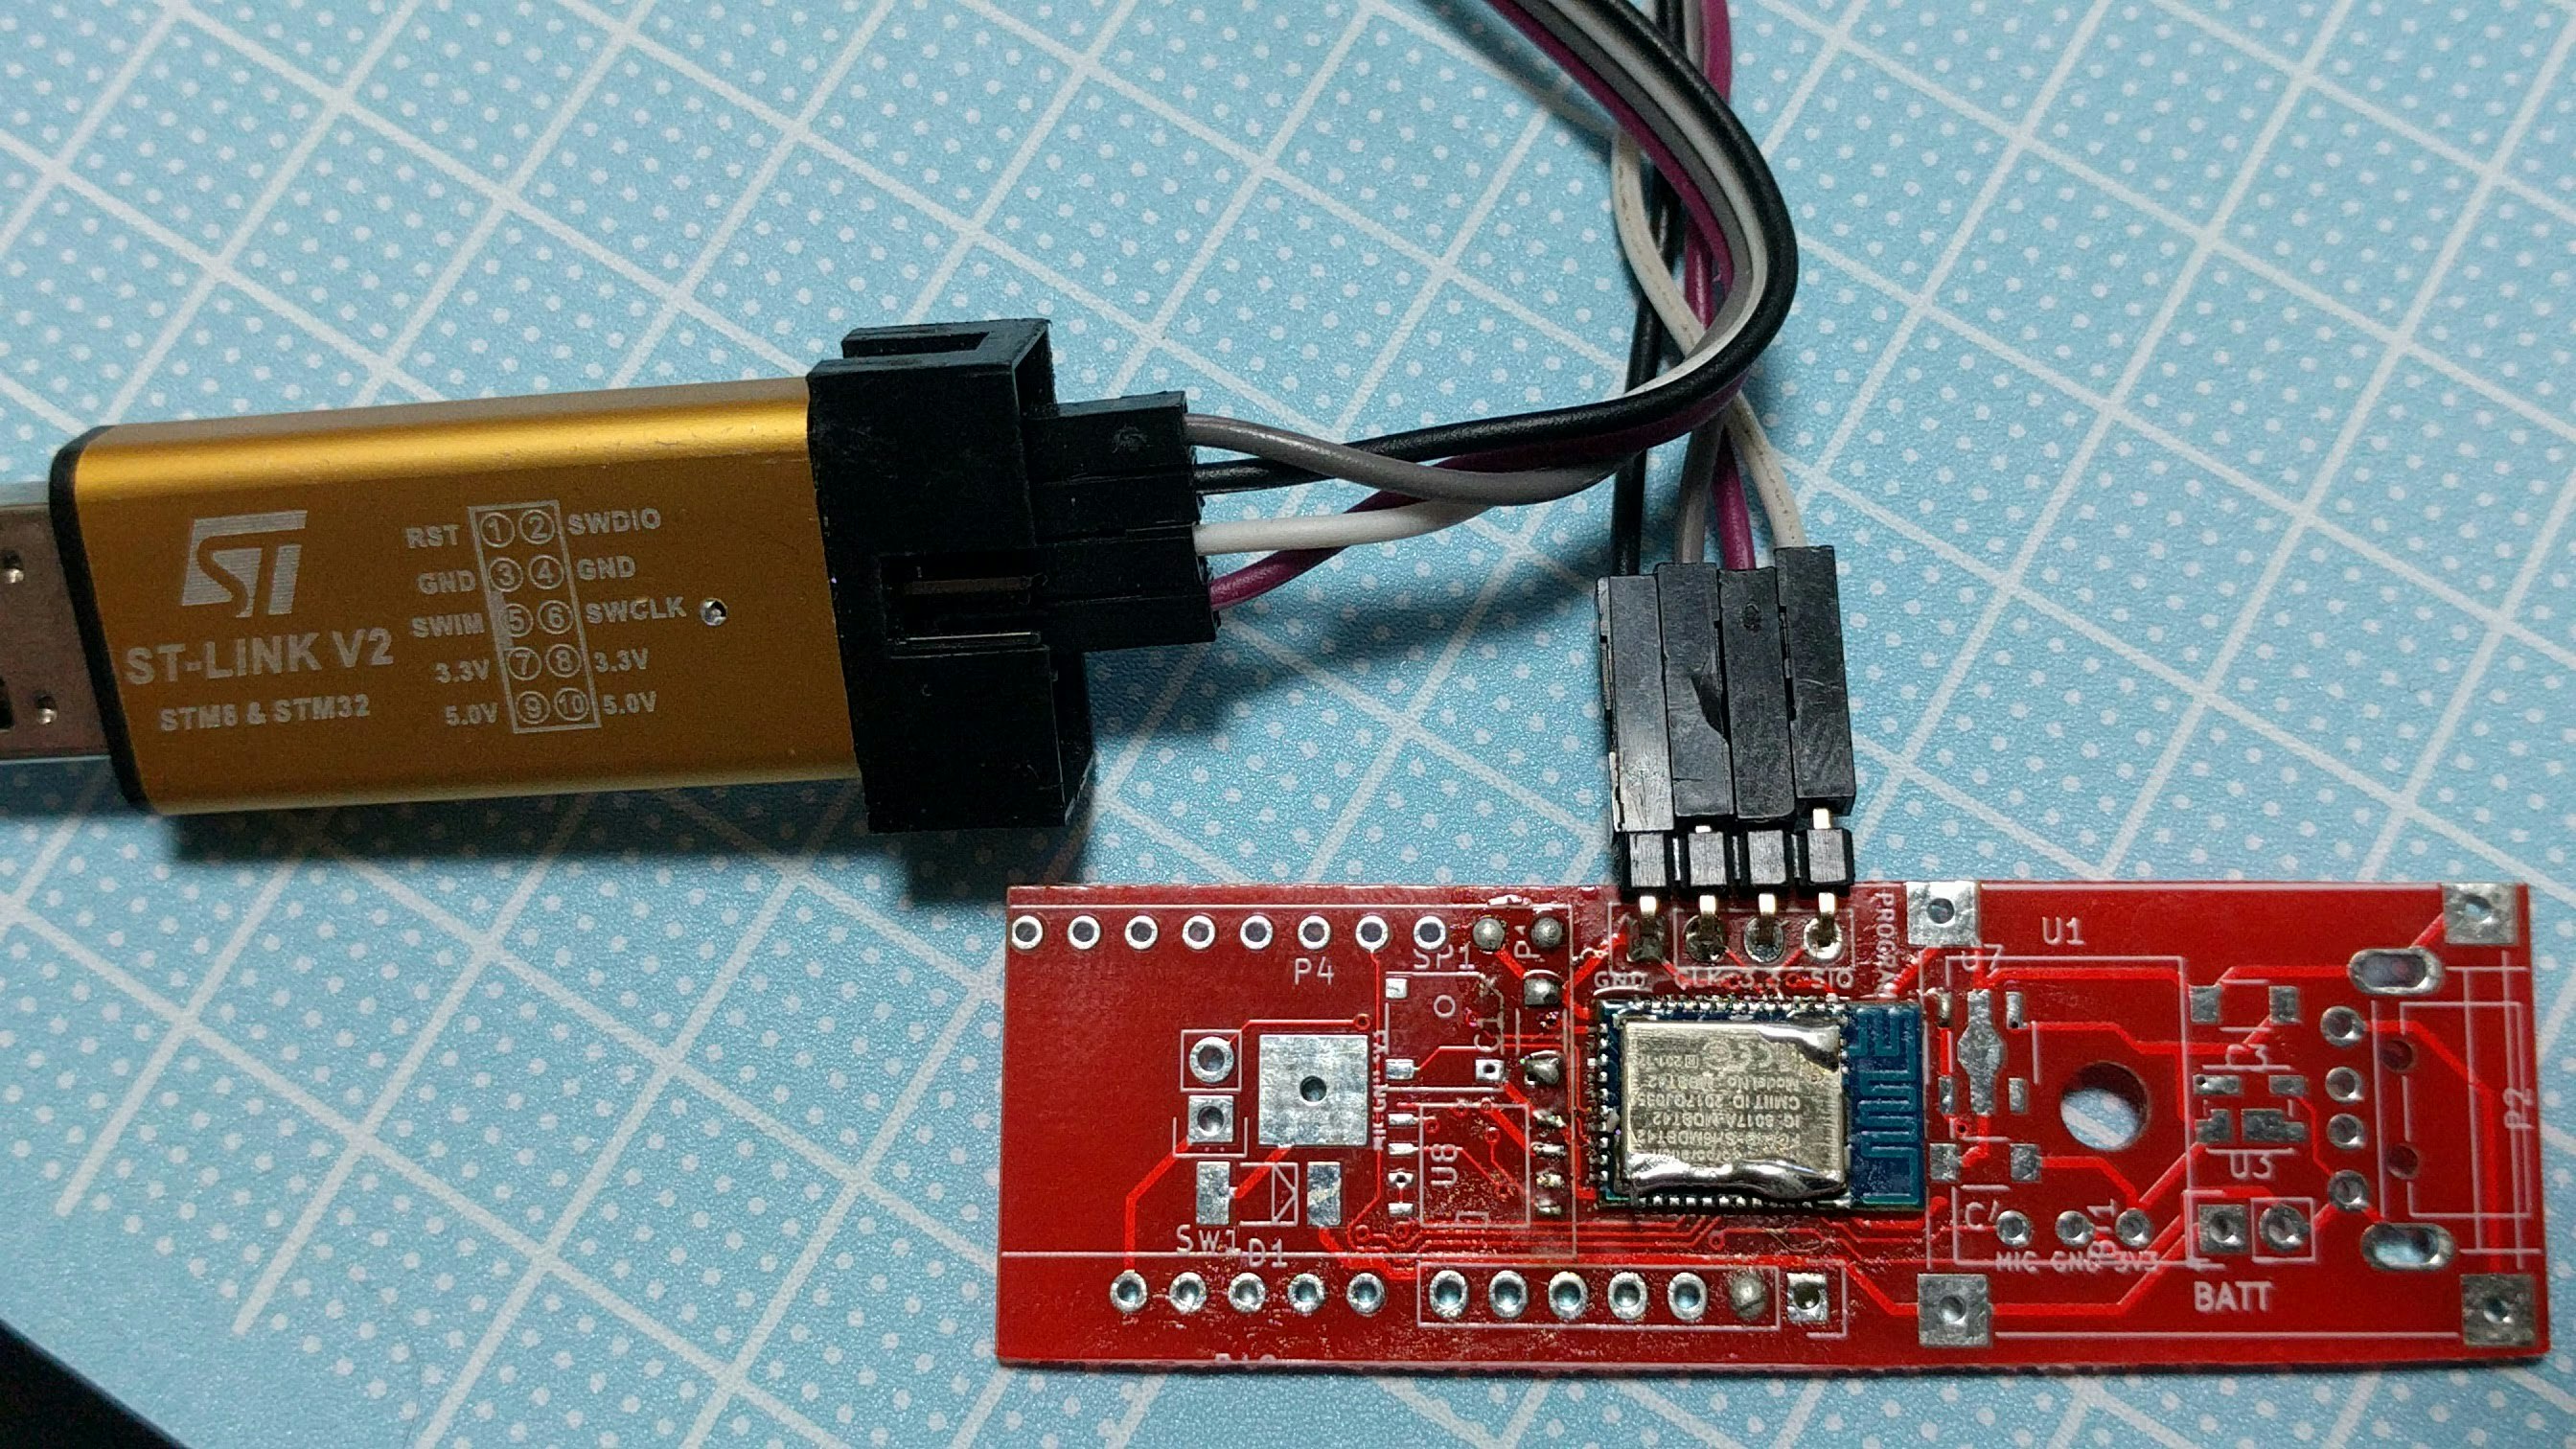
手作業で配線するのはメンドクサイのでPCBを作りました
上記はいろんな機能をつけています
最低限は以下のようにして使います。
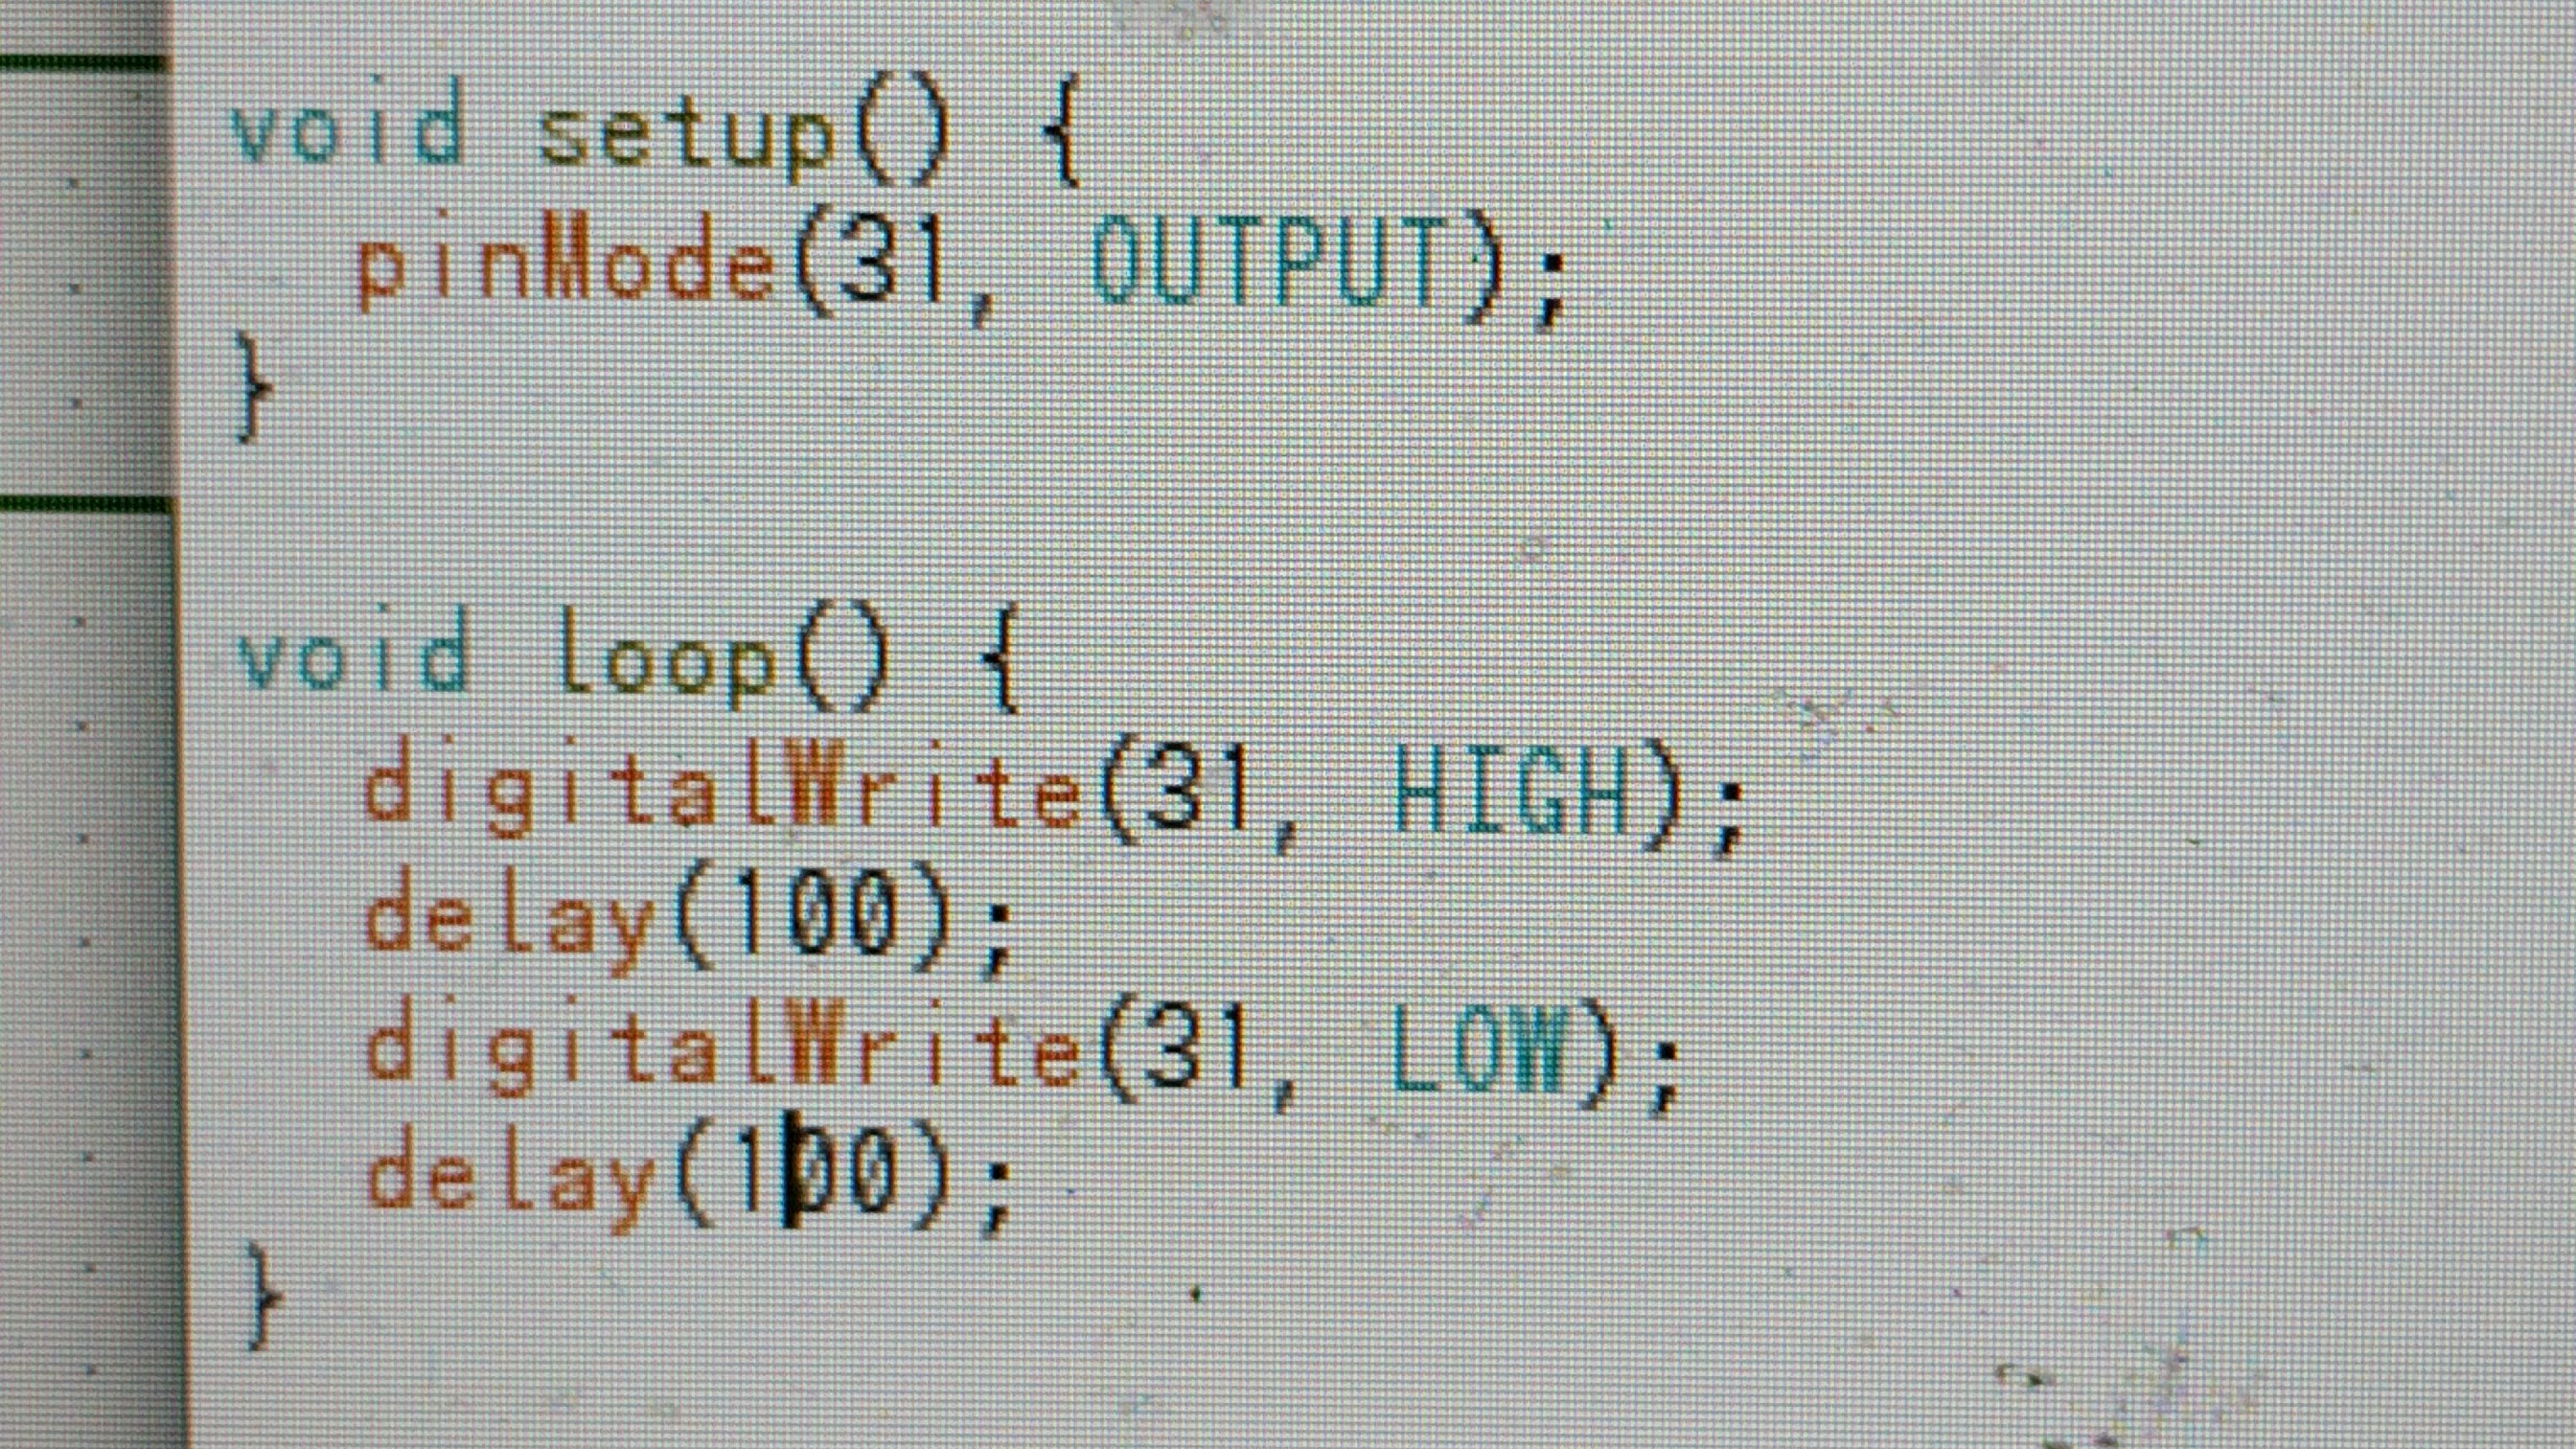
マイク端子を使ってLチカをするコードです
抵抗付きLEDを差し込んで、動作確認します。
トラブルシューティング
fork/exec /home/nanbuwks/Downloads/ardublock/arduino/linux64/arduino-1.8.5_nRF5/portable/packages/adafruit/tools/gcc-arm-none-eabi/5_2-2015q4/bin/arm-none-eabi-g++: no such file or directory
ボードGeneric nRF52に対するコンパイル時にエラーが発生しました。
ボードマネージャで「Adafruit nRF52 by Adafruit」を選択しているとこれが起こる。
削除して対処。
In file included from /home/nanbuwks/Downloads/ardublock/arduino/linux64/arduino-1.8.5_nRF5/portable/sketchbook/libraries/BLEPeripheral/src/BLEPeripheral.h:24:0,
                 from /home/nanbuwks/Downloads/ardublock/arduino/linux64/arduino-1.8.5_nRF5/portable/sketchbook/libraries/BLEPeripheral/src/BLEHIDPeripheral.h:9,
                 from /home/nanbuwks/Downloads/ardublock/arduino/linux64/arduino-1.8.5_nRF5/portable/sketchbook/libraries/BLEPeripheral/examples/HID/HID_keyboard/HID_keyboard.ino:6:
/home/nanbuwks/Downloads/ardublock/arduino/linux64/arduino-1.8.5_nRF5/portable/sketchbook/libraries/BLEPeripheral/src/nRF51822.h:11:25: fatal error: ble_gatts.h: No such file or directory
compilation terminated.
Arduino IDEの「ツール」-「Softdevice」が「なし」になっていた。「S132」を選択したらOK.
libusb error not supported
Windowsで、ST-Linkのドライバがインストールされていない。
http://www.st.com/ja/development-tools/stsw-link009.html
このページから STSW-LINK009 をダウンロード、インストールしてください。
