「PNG に編集ソースファイルを埋め込んで再編集可能にする その1」
https://qiita.com/nanbuwks/items/1af5b5ec87ebbe2a7712
では LibreOffice を使って、 Qiita に貼った png ファイルに編集ソースを埋め込む仕組みを解説しました。
ここから、先の規定に基づいて png を作る拡張を作りました。(開発中です。)
と書きましたが、今回はその前段階としてのマクロを解説します。
環境
- Ubuntu 20.04 LTS
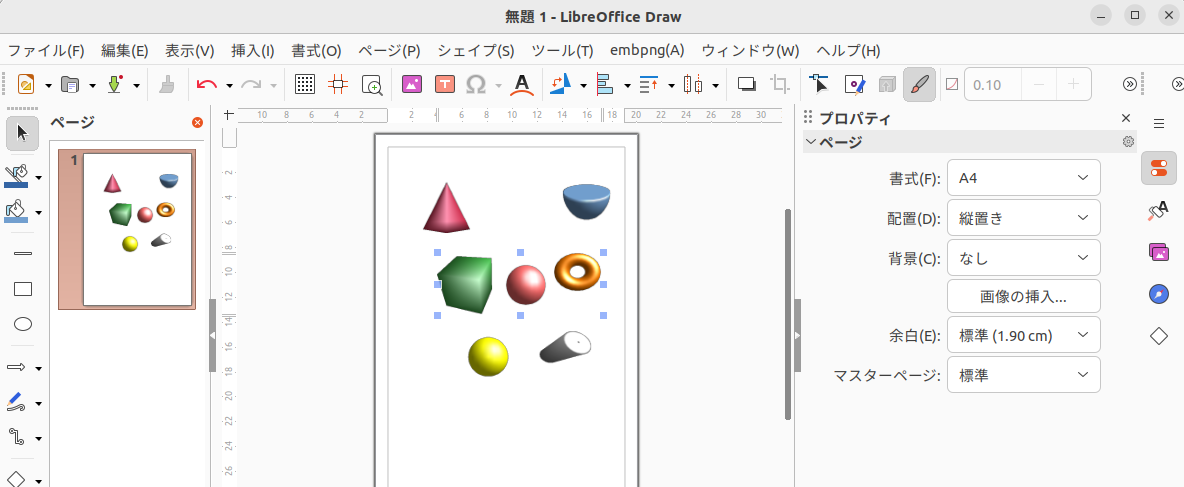
- コンバート対象 LibreOffice Draw ファイル
~/.config/libreoffice/4/user/Scripts/python
このディレクトリに以下を配置します。
- drawFromEmbPng.py LibreOffice用マクロ
- makeandclipboard.sh LibreOfficeから呼び出すヘルパースクリプト
- fileconv.py LibreOffice ファイルを json テキストに埋め込む Python プログラム ヘルパースクリプトで使用
- makeembpng.py png ファイルに fileconv.py で作った json を埋め込むプログラム ヘルパースクリプトで使用
drawFromEmbPng.py
from com.sun.star.beans import PropertyValue
import subprocess
CTX = uno.getComponentContext()
SM = CTX.getServiceManager()

def call_dispatch(doc, url, args=()):
    frame = doc.getCurrentController().getFrame()
    dispatch = create_instance('com.sun.star.frame.DispatchHelper')
    dispatch.executeDispatch(frame, url, '', 0, args)
    return

def create_instance(name, with_context=False):
    if with_context:
        instance = SM.createInstanceWithContext(name, CTX)
    else:
        instance = SM.createInstance(name)
    return instance

def makeEmbPng():
    # export png from selected object
    properties=[]
    p=PropertyValue()
    p.Name='FilterName'
    p.Value='calc_png_Export'
    properties.append(p)
    p2=PropertyValue()
    p2.Name='SelectionOnly'
    p2.Value=True
    properties.append(p2)
    docsource = XSCRIPTCONTEXT.getDocument()
    docsource.storeToURL('file:///tmp/embpngsource.png',tuple(properties))
    # copy from current draw file
    call_dispatch(docsource, '.uno:Copy')
    # paste to new draw file
    desktop = create_instance('com.sun.star.frame.Desktop', True)
    path = 'private:factory/sdraw'
    docdist = desktop.loadComponentFromURL(path, '_default', 0, ())
    call_dispatch(docdist, '.uno:Paste')
    # save new draw file to /tmp
    docdist.storeAsURL(convertToURL( "/tmp/embpngsource.odg"),())
    docdist.dispose
    subprocess.call("/home/nanbuwks/.config/libreoffice/4/user/Scripts/python/makeandclipboard.sh" )

# https://wiki.openoffice.org/wiki/Danny.OOo.OOoLib.py (LGPL License)
#------------------------------------------------------------
#   General Utility functions
#------------------------------------------------------------
def convertToURL( cPathname ):
    """Convert a Windows or Linux pathname into an OOo URL."""
    if len( cPathname ) > 1:
        if cPathname[1:2] == ":":
            cPathname = "/" + cPathname[0] + "|" + cPathname[2:]
    cPathname = cPathname.replace( "\\", "/" )
    cPathname = "file://" + cPathname
    return cPathname
makeandclipboard.sh
#!/bin/bash
cd `dirname $0`
mkdir /tmp/embeddedpng
python fileconv.py /tmp/embpngsource.odg > /tmp/embpngtxt.txt
python makeembpng.py /tmp/embpngsource.png /tmp/embpngtxt.txt /tmp/embeddedpng/embeddedpng.png
sleep 1
nautilus /tmp/embeddedpng/embeddedpng.png
fileconv.py
import json
import base64
import os
import sys

filepath = sys.argv[1]
filename = os.path.basename(filepath)
# 拡張子を取得
type = os.path.splitext(filename)[1][1:]


data = {}
with open(filepath, mode='rb') as file:
    img = file.read()
data['type'] = type
data['filename'] = filename
data['file'] = base64.encodebytes(img).decode('utf-8')
print(json.dumps(data))
makeembpng.py
import png
import shutil
import sys
TEXT_CHUNK_FLAG = b'tEXt'

def generate_chunk_tuple(type_flag, content):
    return tuple([type_flag, content])

def generate_text_chunk_tuple(str_info):
    type_flag = TEXT_CHUNK_FLAG
    return generate_chunk_tuple(type_flag, bytes(str_info, 'utf-8'))

def insert_text_chunk(target, textfile, index=1):
    f = open(textfile, 'r')
    data = f.read()
    f.close()
    if index < 0:
        raise Exception('The index value {} less than 0!'.format(index))

    reader = png.Reader(filename=target)
    chunks = reader.chunks()
    chunk_list = list(chunks)

    chunk_item = generate_text_chunk_tuple(keyword+data)
    chunk_list.insert(index, chunk_item)

    with open(target, 'wb') as dst_file:
        png.write_chunks(dst_file, chunk_list)

#pngsrc = '/tmp/pngSource.png'
# txtsrc = r'/tmp/embtxt.txt'
#pngdst = '/tmp/embeddedpng/embeddedpng.png'
pngsrc = sys.argv[1]
txtsrc = sys.argv[2]
pngdst = sys.argv[3]
keyword = "Embedded Source\0"
# pngsrc から pngdst にコピーする
shutil.copyfile(pngsrc, pngdst)
# pngdst に txtsrc を埋め込む
insert_text_chunk(pngdst, txtsrc)
設定方法
各ファイルを配置します。
drawFromEmbPng.py の
subprocess.call("/home/nanbuwks/.config/libreoffice/4/user/Scripts/python/makeandclipboard.sh" )
を各自の環境に合わせて変更します。
makeandclipboard.sh に実行権をつけておきます。
「PNG にテキストを埋め込む」
https://qiita.com/nanbuwks/items/969642abde48bb272c25
の「python プログラム でテキストを埋め込む」を参照して、pypng をインストールします。
使い方
Draw 描画を作り、エクスポートしたいオブジェクトを選択します。
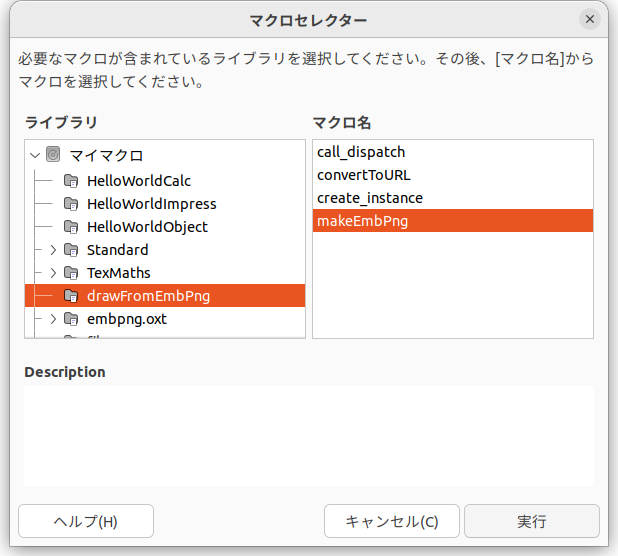
「ツール」-「マクロ」-「マクロを実行」で「マイマクロ」の「drawFromEmbPng」-「makeEmbPng」を選んで「実行」
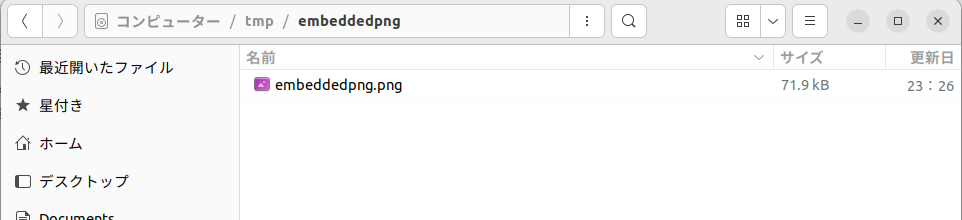
すると、ファイルマネージャが開いて embeddedpng が開きます。
それを Qiita や GitHub 、その他もろもろに貼ります。

(Qiita画像アップロードに問題があり、治り次第画像を登録します。→ 2023/7/21 どうやら画像アップロード上限に達していたようです。対応して画像を貼り直しました。)
貼った png は、
「PNG に編集ソースファイルを埋め込んで再編集可能にする その2」
https://qiita.com/nanbuwks/items/efdd7e909c588281cf1a
にあるヘルパーアプリケーションを使って元 odg を復元できます。
想定問答
Windowsは? Macは?
Linux 版もまだまだ未完成です。Linux 版でアップデートを重ねた後、Windows / Mac の対応を進めます。
oxt 形式の拡張じゃないの?
「その6」あたりで・・・
いいね! 勝手に応用したいな!
この形式のライセンスはPublicDomein としています
ファイルフォーマットは「PNG に編集ソースファイルを埋め込んで再編集可能にする その1」
https://qiita.com/nanbuwks/items/1af5b5ec87ebbe2a7712
にあります。
ご活用ください。
関連投稿
今回のプログラムは、以下の調査を元に作成しています。
PNG にテキストを埋め込む
https://qiita.com/nanbuwks/items/969642abde48bb272c25
Qiita に画像を貼る方法
https://qiita.com/nanbuwks/items/e0c9f02c1b556dde140a
LibreOffice マクロ:Pythonでのプログラム例集
https://qiita.com/nanbuwks/items/1f25e8839089eaefd6d4
LibreOffice マクロを Ubuntu + Python で作る
https://qiita.com/nanbuwks/items/77d5707b9a2507972676
Python で LibreOffice 拡張をステップバイステップで作ってみる
https://qiita.com/nanbuwks/items/53861bac26c521c4b549