「リモート環境で Wio Terminal で組み込み Rust を動かしてみるハンズオン」
https://qiita.com/nanbuwks/items/0d1be9589b4b94bc32b4
で使うことを想定したテキストです。
以下は Linux PC 用ですが、他のOSも大きく違わないでしょう。
環境
- Ubuntu 20.04 LTS
- Wio Terminal
(2022/07/30 追記: Ubuntu 22.04 LTS 環境でも確認OKでした )
テキストの流れ
- Rust開発環境インストール
- hello.rs を PC で実行してみる
- クレートでライブラリを使ってみる
- クロス開発環境をインストール
- hello.rs がクロスビルドできない
- ATSAMD Rustレポジトリを利用する
- ビルド
- uf2 ファイル作成
- 書き込み
Rust 開発環境をインストール
https://rustup.rs/ にアクセスし、示されているコードをコピーします。
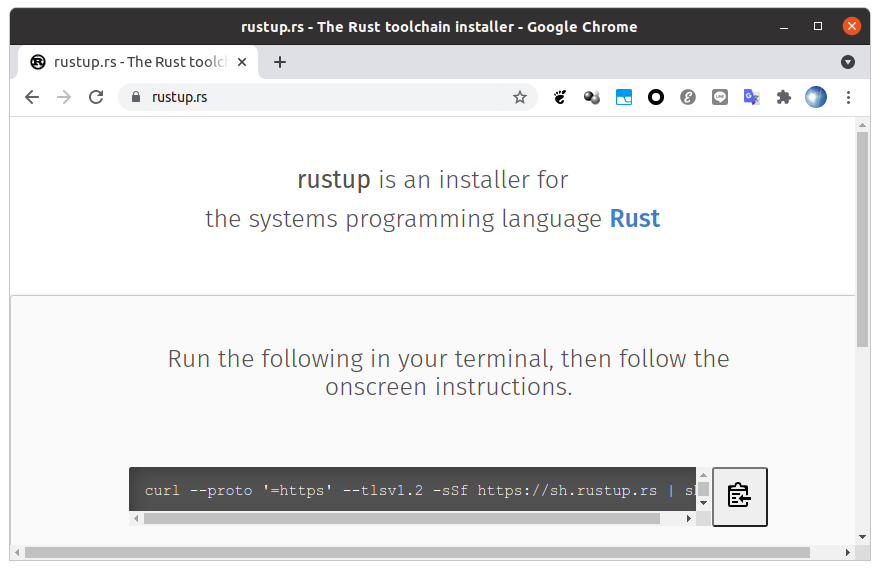
curl --proto '=https' --tlsv1.2 -sSf https://sh.rustup.rs | sh
これを実行すると、インストーラがダウンロードされてインストールされる。
info: downloading installer

Welcome to Rust!

This will download and install the official compiler for the Rust
programming language, and its package manager, Cargo.

Rustup metadata and toolchains will be installed into the Rustup
home directory, located at:

  /home/nanbuwks/.rustup

This can be modified with the RUSTUP_HOME environment variable.

The Cargo home directory located at:

  /home/nanbuwks/.cargo

This can be modified with the CARGO_HOME environment variable.

The cargo, rustc, rustup and other commands will be added to
Cargo's bin directory, located at:

  /home/nanbuwks/.cargo/bin

This path will then be added to your PATH environment variable by
modifying the profile files located at:

  /home/nanbuwks/.profile
  /home/nanbuwks/.bash_profile
  /home/nanbuwks/.bashrc

You can uninstall at any time with rustup self uninstall and
these changes will be reverted.

Current installation options:


   default host triple: x86_64-unknown-linux-gnu
     default toolchain: stable (default)
               profile: default
  modify PATH variable: yes

1) Proceed with installation (default)
2) Customize installation
3) Cancel installation
>
- を選んで、開発環境をダウンロード/インストールします。
info: profile set to 'default'
info: default host triple is x86_64-unknown-linux-gnu
info: syncing channel updates for 'stable-x86_64-unknown-linux-gnu'
info: latest update on 2021-07-29, rust version 1.54.0 (a178d0322 2021-07-26)
info: downloading component 'cargo'
info: downloading component 'clippy'
info: downloading component 'rust-docs'
 16.7 MiB /  16.7 MiB (100 %)  10.1 MiB/s in  1s ETA:  0s
info: downloading component 'rust-std'
 21.9 MiB /  21.9 MiB (100 %)  10.4 MiB/s in  2s ETA:  0s
info: downloading component 'rustc'
 50.1 MiB /  50.1 MiB (100 %)  10.6 MiB/s in  5s ETA:  0s
info: downloading component 'rustfmt'
info: installing component 'cargo'
  6.0 MiB /   6.0 MiB (100 %)   4.6 MiB/s in  1s ETA:  0s
info: installing component 'clippy'
info: installing component 'rust-docs'
 16.7 MiB /  16.7 MiB (100 %)   1.9 MiB/s in  8s ETA:  0s
info: installing component 'rust-std'
 21.9 MiB /  21.9 MiB (100 %)   4.6 MiB/s in  4s ETA:  0s
info: installing component 'rustc'
 50.1 MiB /  50.1 MiB (100 %)   5.0 MiB/s in  9s ETA:  0s
info: installing component 'rustfmt'
info: default toolchain set to 'stable-x86_64-unknown-linux-gnu'

  stable-x86_64-unknown-linux-gnu installed - rustc 1.54.0 (a178d0322 2021-07-26)


Rust is installed now. Great!

To get started you may need to restart your current shell.
This would reload your PATH environment variable to include
Cargo's bin directory ($HOME/.cargo/bin).

To configure your current shell, run:
source $HOME/.cargo/env
最後の表示のとおり、以下を実行して Rust ツールチェインのパスを通します。
$ source $HOME/.cargo/env
インストールされたものは以下の通りです。
$ ls ~/.cargo/bin
cargo         cargo-fmt   clippy-driver  rust-gdb   rustc    rustfmt
cargo-clippy  cargo-miri  rls            rust-lldb  rustdoc  rustup
この時点で、サーバでできるようにしてみる。
$ cargo new hello
     Created binary (application) `hello` package
cargo とは、Rust のパッケージマネージャおよびビルドツール
$ ls -alh
合計 64K
drwxrwxr-x  3 nanbuwks nanbuwks 4.0K  8月  2 19:28 .
drwxr-xr-x 61 nanbuwks nanbuwks  52K  8月  2 19:27 ..
drwxrwxr-x  4 nanbuwks nanbuwks 4.0K  8月  2 19:28 hello
hello ディレクトリができている。
$ cd hello
$ ls -alh
合計 24K
drwxrwxr-x 4 nanbuwks nanbuwks 4.0K  8月  2 19:28 .
drwxrwxr-x 3 nanbuwks nanbuwks 4.0K  8月  2 19:28 ..
drwxrwxr-x 6 nanbuwks nanbuwks 4.0K  8月  2 19:28 .git
-rw-rw-r-- 1 nanbuwks nanbuwks    8  8月  2 19:28 .gitignore
-rw-rw-r-- 1 nanbuwks nanbuwks  174  8月  2 19:28 Cargo.toml
drwxrwxr-x 2 nanbuwks nanbuwks 4.0K  8月  2 19:28 src
helloディレクトリに移って作業。
$ ls -alh src
合計 12K
drwxrwxr-x 2 nanbuwks nanbuwks 4.0K  8月  2 19:28 .
drwxrwxr-x 4 nanbuwks nanbuwks 4.0K  8月  2 19:28 ..
-rw-rw-r-- 1 nanbuwks nanbuwks   45  8月  2 19:28 main.rs
src/main.rs ができているので編集
fn main() {
    println!("Hello, world!");
}
おっと、もう中身ができていますね。
そのまま中断して、
$ cargo build
   Compiling hello v0.1.0 (/home/nanbuwks/Downloads/rust/hello)
    Finished dev [unoptimized + debuginfo] target(s) in 1.96s
でビルド。
$ ls -alh target/debug/
合計 3.2M
drwxrwxr-x 7 nanbuwks nanbuwks 4.0K  8月  2 19:32 .
drwxrwxr-x 3 nanbuwks nanbuwks 4.0K  8月  2 19:32 ..
-rw-rw-r-- 1 nanbuwks nanbuwks    0  8月  2 19:32 .cargo-lock
drwxrwxr-x 3 nanbuwks nanbuwks 4.0K  8月  2 19:32 .fingerprint
drwxrwxr-x 2 nanbuwks nanbuwks 4.0K  8月  2 19:32 build
drwxrwxr-x 2 nanbuwks nanbuwks 4.0K  8月  2 19:32 deps
drwxrwxr-x 2 nanbuwks nanbuwks 4.0K  8月  2 19:32 examples
-rwxrwxr-x 2 nanbuwks nanbuwks 3.2M  8月  2 19:32 hello
-rw-rw-r-- 1 nanbuwks nanbuwks  104  8月  2 19:32 hello.d
drwxrwxr-x 3 nanbuwks nanbuwks 4.0K  8月  2 19:32 incremental
hello は実行可能バイナリです。実行してみると
$ target/debug/hello
Hello, world!
無事成功しました。
なお、以下のようにすると、ビルドと実行がセットで行われる。
$ cargo run
クレートを試す
クレートというのは ライブラリとバイナリをいっしょに考えてクレートと呼ぶらしい。
試しに、 rust-ansi-term というクレートを インストールしてみましょう。
ANSI端末でテキストの色を指定したりして装飾ができるようになるライブラリです。
作業ディレクトリに移って、
$ cargo new ansiterm
     Created binary (application) `ansiterm` package
$ cd ansiterm
$ vim Cargo.toml
として、
[package]
name = "ansiterm"
version = "0.1.0"
edition = "2018"

# See more keys and their definitions at https://doc.rust-lang.org/cargo/reference/manifest.html

[dependencies]
ansi_term = "0.12"
ファイルの一番下に
ansi_term = "0.12"
を書き加えます。
0.12 はバージョンです。 https://crates.io/crates/ansi_term の記述どおりにしてみました。
$ vim src/main.rs
とすると、
fn main() {
    println!("Hello, world!");
}
が出てきました。どうやらこのコードは常に配置されるようです。以下のように書き換えます。これも、先のサイトの記述を元にしています。
use ansi_term::Colour::Red;

fn main(){
    println!("This is in red: {}", Red.paint("a red string"));
}
初回のビルドでは、ansi_termクロートが自動でダウンロードされます。
$ cargo build
    Updating crates.io index
  Downloaded ansi_term v0.12.1
  Downloaded 1 crate (24.8 KB) in 1.57s
   Compiling ansi_term v0.12.1
   Compiling ansiterm v0.1.0 (/home/nanbuwks/Downloads/rust/ansiterm)
    Finished dev [unoptimized + debuginfo] target(s) in 38.20s
実行してみます。
$ target/debug/ansiterm
This is in red: a red string
"a red string" のところが赤く表示されました。
クロス開発環境をインストール
Wio Terminal は ARM の MPU なので、それ用にビルドできるようにしないといけません。
サポートされているクロス開発のターゲットは以下のようにしてリストアップできます。
$ rustup target list
aarch64-apple-darwin
aarch64-apple-ios
aarch64-fuchsia
aarch64-linux-android
aarch64-pc-windows-msvc
aarch64-unknown-linux-gnu
aarch64-unknown-linux-musl
aarch64-unknown-none
aarch64-unknown-none-softfloat
.
.
.
thumbv6m-none-eabi
thumbv7em-none-eabi
thumbv7em-none-eabihf
thumbv7m-none-eabi
thumbv7neon-linux-androideabi
thumbv7neon-unknown-linux-gnueabihf
thumbv8m.base-none-eabi
thumbv8m.main-none-eabi
thumbv8m.main-none-eabihf
.
.
.
x86_64-linux-android
x86_64-pc-solaris
x86_64-pc-windows-gnu
x86_64-pc-windows-msvc
x86_64-sun-solaris
x86_64-unknown-freebsd
x86_64-unknown-illumos
x86_64-unknown-linux-gnu (installed)
x86_64-unknown-linux-gnux32
x86_64-unknown-linux-musl
x86_64-unknown-netbsd
x86_64-unknown-redox
「Platform Support - The rustc book」
https://doc.rust-lang.org/nightly/rustc/platform-support.html
によると、 Cortex-M 系のものは以下の対応となります。
| target | std | note |
|---|---|---|
| thumbv6m-none-eabi | * | Bare Cortex-M0, M0+, M1 |
| thumbv7em-none-eabi | * | Bare Cortex-M4, M7 |
| thumbv7em-none-eabihf | * | Bare Cortex-M4F, M7F, FPU, hardfloat |
| thumbv7m-none-eabi | * | Bare Cortex-M3 |
-
- indicates the target only supports no_std development.
Wio Terminal に搭載された MPU は Microchip 社の ATSAMD51P19。これは FPUが搭載された Cortex-M4F となり、上リストによるとthumbv7em-none-eabihf になることがわかります。
また、std のところに * がついてますが、これは std ライブラリが使えないことを意味します。
thumbv7em-none-eabihf アーキテクチャのクロスコンパイル環境を追加するために以下の作業を行います。
$ rustup target add thumbv7em-none-eabihf
info: downloading component 'rust-std' for 'thumbv7em-none-eabihf'
info: installing component 'rust-std' for 'thumbv7em-none-eabihf'
hello プロジェクトを thumbv7em-none-eabihf でビルドしてエラーを出す
$ cd hello
$ cargo build --target=thumbv7em-none-eabihf
   Compiling hello v0.1.0 (/home/nanbuwks/Downloads/rust/hello)
error[E0463]: can't find crate for `std`
  |
  = note: the `thumbv7em-none-eabihf` target may not support the standard library
  = note: `std` is required by `hello` because it does not declare `#![no_std]`

error: aborting due to previous error

For more information about this error, try `rustc --explain E0463`.
error: could not compile `hello`

To learn more, run the command again with --verbose.
エラーが出ましたね。not support the standard library とあります。
標準 Rust プログラムと 組み込み Rust プログラムの違い
先にあったように、thumbv7em-none-eabihf は
- indicates the target only supports no_std development.
なので std を使わないようにプログラムしないといけません。Rust において std を使う場合、 libstd ランタイムを使うことになります。 libstd は、OS によって提供されている POSIX のような機能にアクセスするためにあります。しかしながら Wio Terminal では POSIX を搭載したような OS は動いておらず、ベアメタルとして動かす必要があります。
libstd が使えない場合、 libcore クレートを使うことになります。それを示すには
#![no_std]
をプログラムの冒頭に記述します。
また、 libstd は main スレッドの生成なども行っています。
そのため、標準のmain関数を使わないようにするために、以下の記述も冒頭に記述します。
#![no_main]
さて、今回は Wio Terminal の LEDを点滅させようとしています。点滅のためにはマイコンのタイマー動作、および GPIO を経由して LEDを操作するようになります。
それらは Wio Terminal 用のクレートを呼び出して実現することになります。
atsamd rust レポジトリの使用
ここから、以下のレポジトリを利用するようにします。
https://github.com/atsamd-rs/atsamd
このレポジトリ内に wio_terminal の対応が含まれていて、Wio Terminal 用の様々なクレートが用意されています。
サンプルプログラムも収録されており、今回はこれに含まれている blinky をビルドすることにします。
作業場所に戻って、
$ git clone https://github.com/atsamd-rs/atsamd.git
Cloning into 'atsamd'...
remote: Enumerating objects: 136680, done.
remote: Counting objects: 100% (666/666), done.
remote: Compressing objects: 100% (437/437), done.
remote: Total 136680 (delta 318), reused 413 (delta 198), pack-reused 136014
Receiving objects: 100% (136680/136680), 38.52 MiB | 2.22 MiB/s, done.
Resolving deltas: 100% (121689/121689), done.
Updating files: 100% (12317/12317), done.

$ cd atsamd/boards/wio_terminal
LED点滅プログラム
ここで、 LEDを点滅する blinky.rs が example にあります。
#![no_std]
#![no_main]

use panic_halt as _;
use wio_terminal as wio;

use wio::hal::clock::GenericClockController;
use wio::hal::delay::Delay;
use wio::pac::{CorePeripherals, Peripherals};
use wio::prelude::*;
use wio::{entry, Pins, Sets};

#[entry]
fn main() -> ! {
    let mut peripherals = Peripherals::take().unwrap();
    let core = CorePeripherals::take().unwrap();

    let mut clocks = GenericClockController::with_external_32kosc(
        peripherals.GCLK,
        &mut peripherals.MCLK,
        &mut peripherals.OSC32KCTRL,
        &mut peripherals.OSCCTRL,
        &mut peripherals.NVMCTRL,
    );
    let mut delay = Delay::new(core.SYST, &mut clocks);

    let mut sets: Sets = Pins::new(peripherals.PORT).split();
    let mut user_led = sets.user_led.into_open_drain_output(&mut sets.port);
    user_led.set_low().unwrap();

    loop {
        user_led.toggle();
        delay.delay_ms(200u8);
    }
}
これを以下のようにしてビルドします。
$ cargo build --example blinky
バイナリ処理と書き込み
バイナリができます。
$ ls -alh target/thumbv7em-none-eabihf/debug/examples/blinky
-rwxrwxr-x 2 nanbuwks nanbuwks 3.9M  8月  2 23:44 target/thumbv7em-none-eabihf/debug/examples/blinky
大きいですね
$ cargo build --release --example blinky
としてバイナリを作り直します。
$ ls -alh target/thumbv7em-none-eabihf/release/examples/blinky
-rwxrwxr-x 2 nanbuwks nanbuwks 17K  8月  2 23:49 target/thumbv7em-none-eabihf/release/examples/blinky
さて、バイナリを書き込むには UF2 ファイルに変換しないといけません。
$  rustup component add llvm-tools-preview
$ cargo install uf2conv cargo-binutils
として、変換ツールをインストールします。
$ cargo objcopy --example blinky --release --  -O binary blinky.bin
    Finished release [optimized] target(s) in 0.15s
$ uf2conv blinky.bin --base 0x4000 --output blinky.uf2
できたuf2ファイルを書き込みます
wio_terminal の電源スイッチを2回素早くスライドしてブートローダーモードにすると、ストレージとして認識します。
$ cp blinky.uf2 /media/nanbuwks/Arduino/
これで、書き込んだ直後に青LEDが点滅するようになれば成功です。