はじめに
画像のみから骨格推定が可能なOpenPose。
https://github.com/CMU-Perceptual-Computing-Lab/openpose

Latest Features
・ Mar 2018: CPU version!
とのことで、今年CPU版も出たようです。CPU版を試してみたかったのですが、、、
環境の準備がそこそこ大変そうだったので、
Tensorflowで実装されたこちらを試してみました。
環境
-
Google Colaboratory(python3/GPU)
-
windows10 home(64bit)
-
python 3.5.4
-
tensorflow 1.2.1
-
openCV 3.3.1
-
anaconda navigator 1.8.3
windows端末とColaboratory(ubuntu)両方で実行してみました。
Google Colaboratoryで実行
Colab Notebooksを新規作成(python3/GPU)し、作業を進めます。
実行ソースはこちら→GitHub
導入
- インストール
anacondaの「Environments」から「Open Terminal」でターミナルを起動。
ターミナル
# gitからclone
!git clone https://github.com/ildoonet/tf-pose-estimation.git

# 確認
!ls

# 必要なライブラリをインストール
%cd ./tf-pose-estimation
!ls
!pip install -r requirements.txt
- 学習済モデル(.pbファイル)を取得
%cd /content/tf-pose-estimation/models/graph/cmu
!bash download.sh
実行
先人に習って同じ画像でまずは骨格推定
# 画像を取得
!wget https://www.pakutaso.com/shared/img/thumb/150415022548_TP_V.jpg

# 確認
!ls

# 実行
%cd /content/tf-pose-estimation/src
%run -i run.py --model=mobilenet_thin --resolution=432x368 --image=/content/tf-pose-estimation/models/graph/cmu/150415022548_TP_V.jpg
画像が小さくて分かりずらいですが、、うまく骨格を検出できているようです。

windowsで実行
基本的にはGoogle Colaboratoryと同じです。
前準備
- gitをコマンドラインから使えるようにする
こちらを参考に、gitをインストール。
環境変数にもパスを通しておきました。
- ソース取得&修正
https://github.com/ildoonet/tf-pose-estimation からzipをダウンロードし、適当なディレクトリに展開。
インストールでエラーになってしまったので、tf-pose-estimation-master/requirements.txtから「ast」をコメントアウトしました。
argparse
matplotlib
scipy
tqdm
requests
fire
# ast ←コメントアウト
dill
git+https://github.com/ppwwyyxx/tensorpack.git
導入
- インストール
# 展開ディレクトリへ移動
cd ./tf-pose-estimation-master

# 必要なライブラリをインストール
pip install -r requirements.txt
実行前準備
- 実行結果表示サイズを大きく
run.pyの50行目くらい、出力サイズを指定するよう修正
    # fig = plt.figure()
    fig = plt.figure(figsize=(15, 10)) # ←変更
- 実行結果をファイルに保存
実行結果をファイルに出力したかったので、ファイル出力処理を追加しました。
(横着して、フォルダとファイル名は固定・・・)
同じくrun.pyの50行目くらい、ファイル出力を追加
    a = fig.add_subplot(2, 2, 1)
    a.set_title('Result')
    plt.imshow(cv2.cvtColor(image, cv2.COLOR_BGR2RGB))
    cv2.imwrite('./result.jpg', image) # ←追加
実行
jupyterNotebookを新規作成し、実行します。
%run -i run.py --model=mobilenet_thin --resolution=432x368 --image=C:/path/to/image/AdobeStock_122984958.jpeg
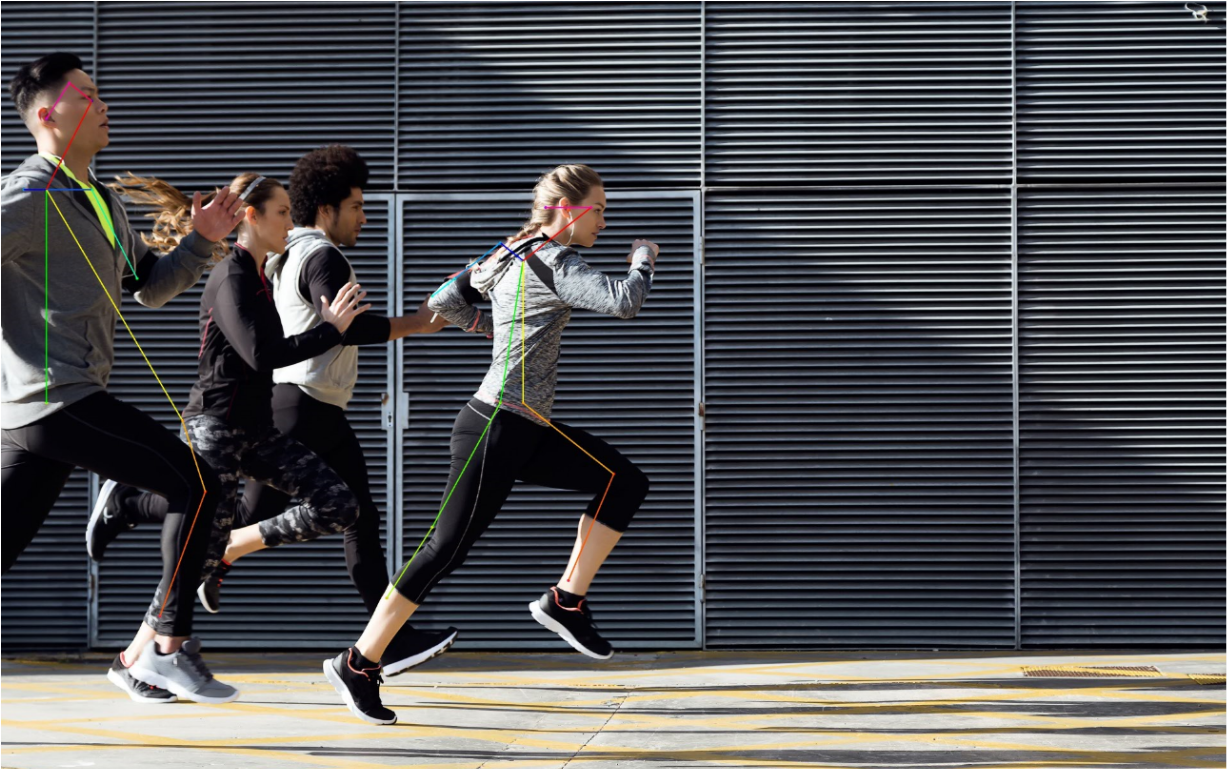
Mask R-CNN(keras)で人物検出 on Colaboratoryでも使ったスポーツシーンの画像で試した結果


まとめ
複雑な姿勢はうまく検出できないていないところもありましたが、動きがあるような動作でも見事に骨格推定できています。
次はそれぞれの座標データを取れるようにしてみたい。