こんにちは、piyopiyo.ex共同開催者のnakoです。
この記事は2022/2/5開催のpiyopiyo.ex#4の手順をまとめたものです。
(2022/6/10追記)
「PostgreSQLにdev.exsのユーザーが登録されているか確認しよう」を追記しました。
前提
本記事はMacユーザー向けのため、Windowsユーザーの方はこちらの記事を参考にしてください。
Elixirをインストール
公式を参考にインストールしていきます。
HomebrewでElixirをインストール
起動したターミナルで下記を実行。
$ brew install elixir
インストールが完了したらバージョン確認。
$ elixir -v
Erlang/OTP 24 [erts-12.2.1] [source] [64-bit] [smp:8:8] [ds:8:8:10] [async-threads:1] [jit] [dtrace]

Elixir 1.13.2 (compiled with Erlang/OTP 24)
ちなみにPhoenix v1.6はElixir v1.9以上が必要。
Phoenix v1.6 requires Elixir v1.9+.
Phoenixのインストール
ターミナルで下記を実行。
$ mix archive.install hex phx_new
なおアンインストール
$ mix archive.uninstall phx_new
インストールできたらバージョンを確認します。
※2022/1/31現在、Phoenixの最新バージョンは1.6.6です。
$ mix phx.new -v
Phoenix installer v1.6.6
PostgreSQLのインストール、初期設定
HomebrewでPostgreSQLをインストール
ターミナルで下記を実行。
$ brew install postgresql
PostgreSQLのPATHを通す
インストールしたPostgreSQLのパスを確認。
brew --prefix [パッケージ名]でパッケージのインストールディレクトリが確認できます。
$ brew --prefix postgresql
.zprofileを編集します。
ここではviでファイルを編集していますが、好きなエディタで編集してください。
$ vi ~/.zprofile
.zprofileにパスを追記します。
# postgreSQL
export PATH="/usr/local/opt/postgresql/bin:$PATH"
編集した.zprofileの内容を反映。
$ source ~/.zprofile
バージョンの確認をします。
$ postgres --version
postgres (PostgreSQL) 14.1
Visual Studio Code(VSCode)のダウンロード
VSCodeのダウンロードページにアクセスします。
自分の使っているOS(ここではMac)を選んでポチーします。
 |
|---|
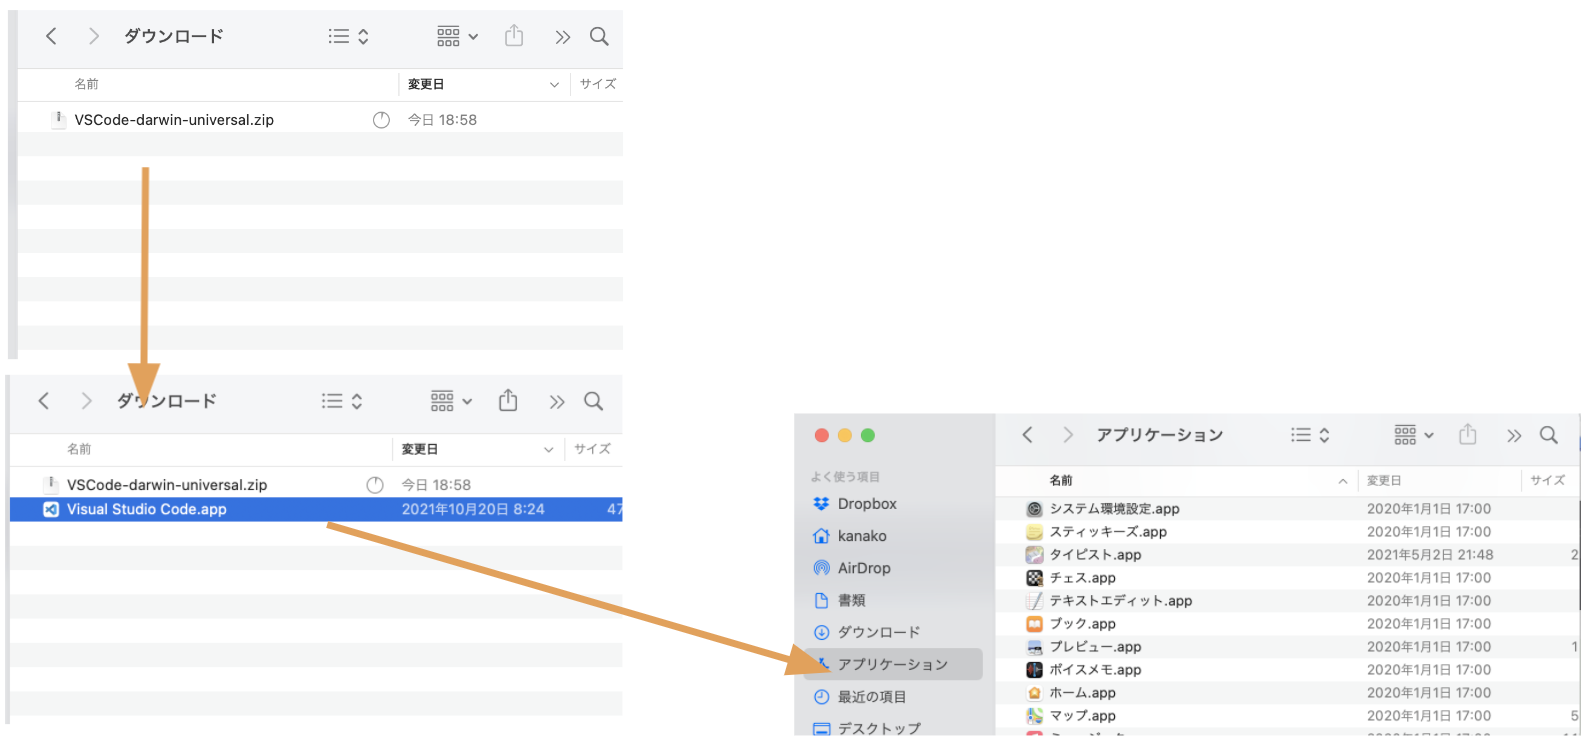
zipファイルがダウンロードできるので、ダブルクリックして展開しましょう。
展開したappファイルはアプリケーションフォルダに移動しましょう。
 |
|---|
VSCodeのelixirの拡張機能をインストールする
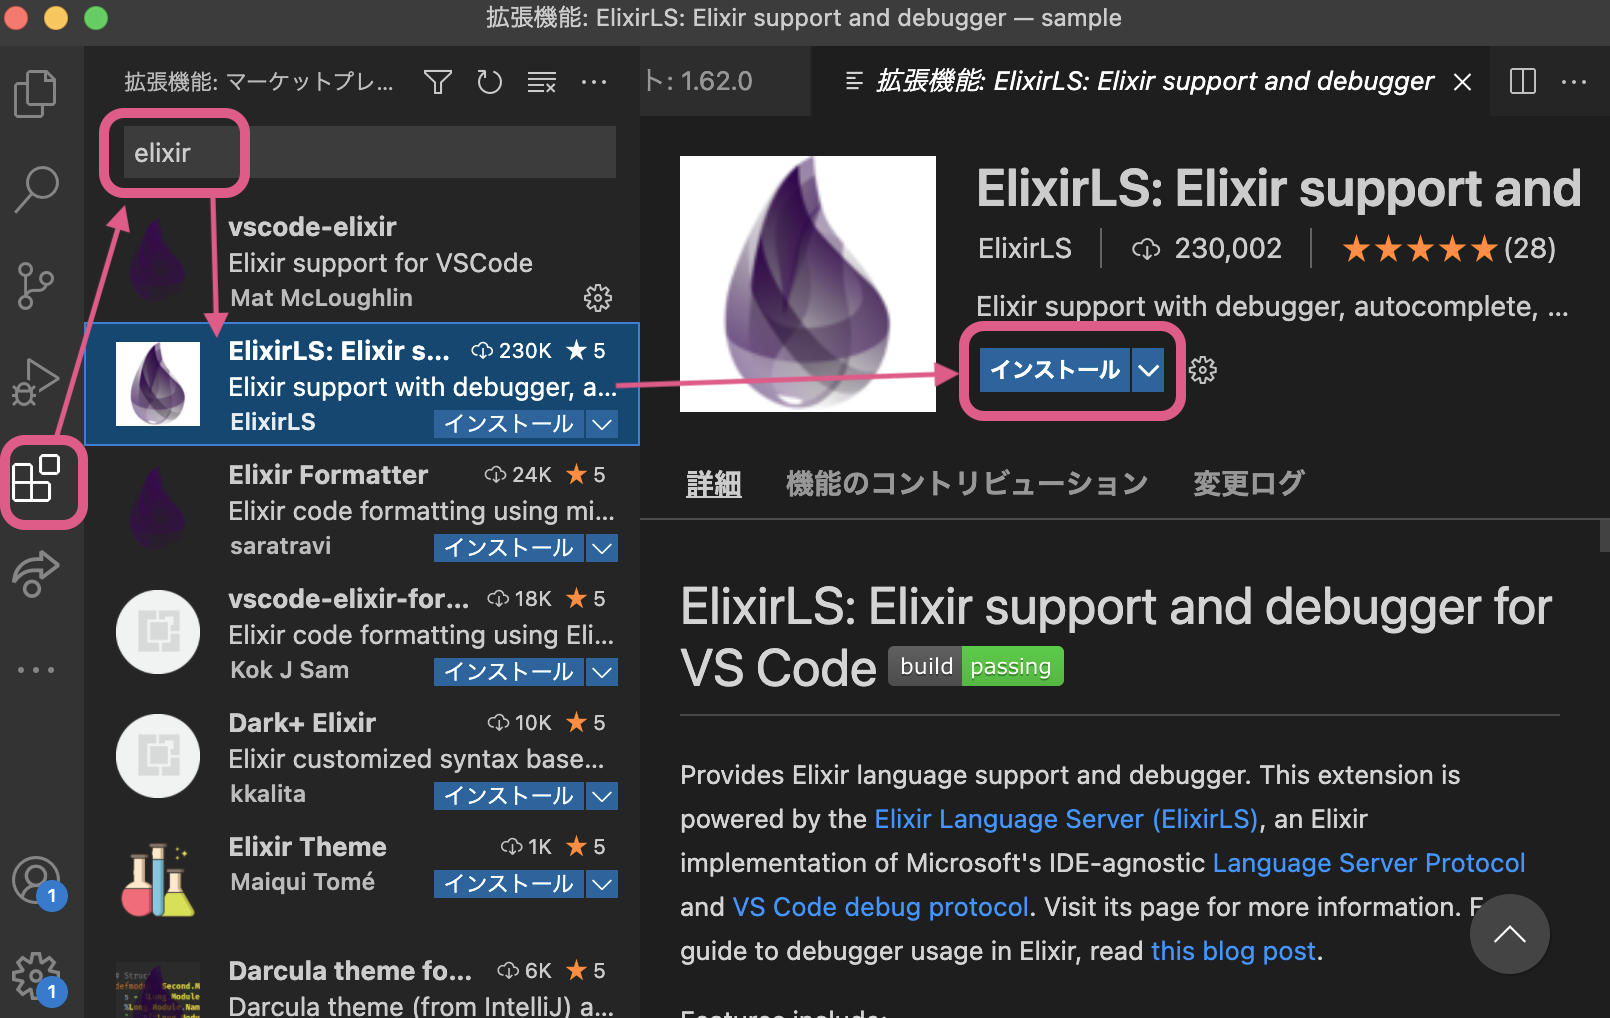
VSCodeの拡張機能アイコンをクリックし、「elixir」と検索、「ElixirLS」をインストールします。
Hello, world!しよう
Phoenix PJの作成
$ mix phx.new sample
* creating sample/config/config.exs
* creating sample/config/dev.exs
* creating sample/config/prod.exs

〜略〜

Fetch and install dependencies? [Yn] Y # 途中で依存するライブラリのインストールをするか聞かれるのでYを入力
最後に作成されたプロジェクトの起動方法が表示されます。
We are almost there! The following steps are missing:

    $ cd sample

Then configure your database in config/dev.exs and run:

    $ mix ecto.create

Start your Phoenix app with:

    $ mix phx.server

You can also run your app inside IEx (Interactive Elixir) as:

    $ iex -S mix phx.server
sampleディレクトリに移動し、ecto.createでDBを作成するようメッセージが表示されています。
が、その前にDBの設定を確認しましょう。
PostgreSQLにdev.exsのユーザーが登録されているか確認しよう(2022/6/10追記)
config/dev.exs ファイルを開いてみましょう。
おそらく下記のような内容が書かれているはずです。
import Config

# Configure your database
config :sample, Sample.Repo,
  username: "postgres",
  password: "postgres",
  hostname: "localhost",
  database: "sample_dev",
~略~
ユーザー名とパスワードがpostgresで設定がされていますね。
このpostgresユーザーがPostgreSQLに登録されているか確認しましょう。
$ psql postgres
psql (14.3)
Type "help" for help.

postgres=#
psqlが実行できたら、PostgreSQLに登録されているユーザーを確認しましょう。
postgres=# select * from pg_user;
 usename  | usesysid | usecreatedb | usesuper | userepl | usebypassrls |  passwd  | valuntil | useconfig
----------+----------+-------------+----------+---------+--------------+----------+----------+-----------
 my-user   |       10 | t           | t        | t       | t            | ******** |          |
 postgres |    16384 | f           | t        | f       | f            | ******** |          |
(2 rows)
もしpostgresユーザーが居なければ作成しましょう。
create role postgres with superuser login password '';
なお、psqlを終了する場合は\qを入力します。
postgres=# \q
また、上記以外でpsqlにアクセスできない場合は、下記の記事などを参考にしてみると良いかもしれません。
DBの作成をしよう
メッセージ通り、sampleディレクトリに移動し、ecto.createでDBを作成します。
※EctoはElixirのデータベースラッパーです。
$ cd sample
$ mix ecto.create
作成したPhoenix PJを起動します。
$ mix phx.server
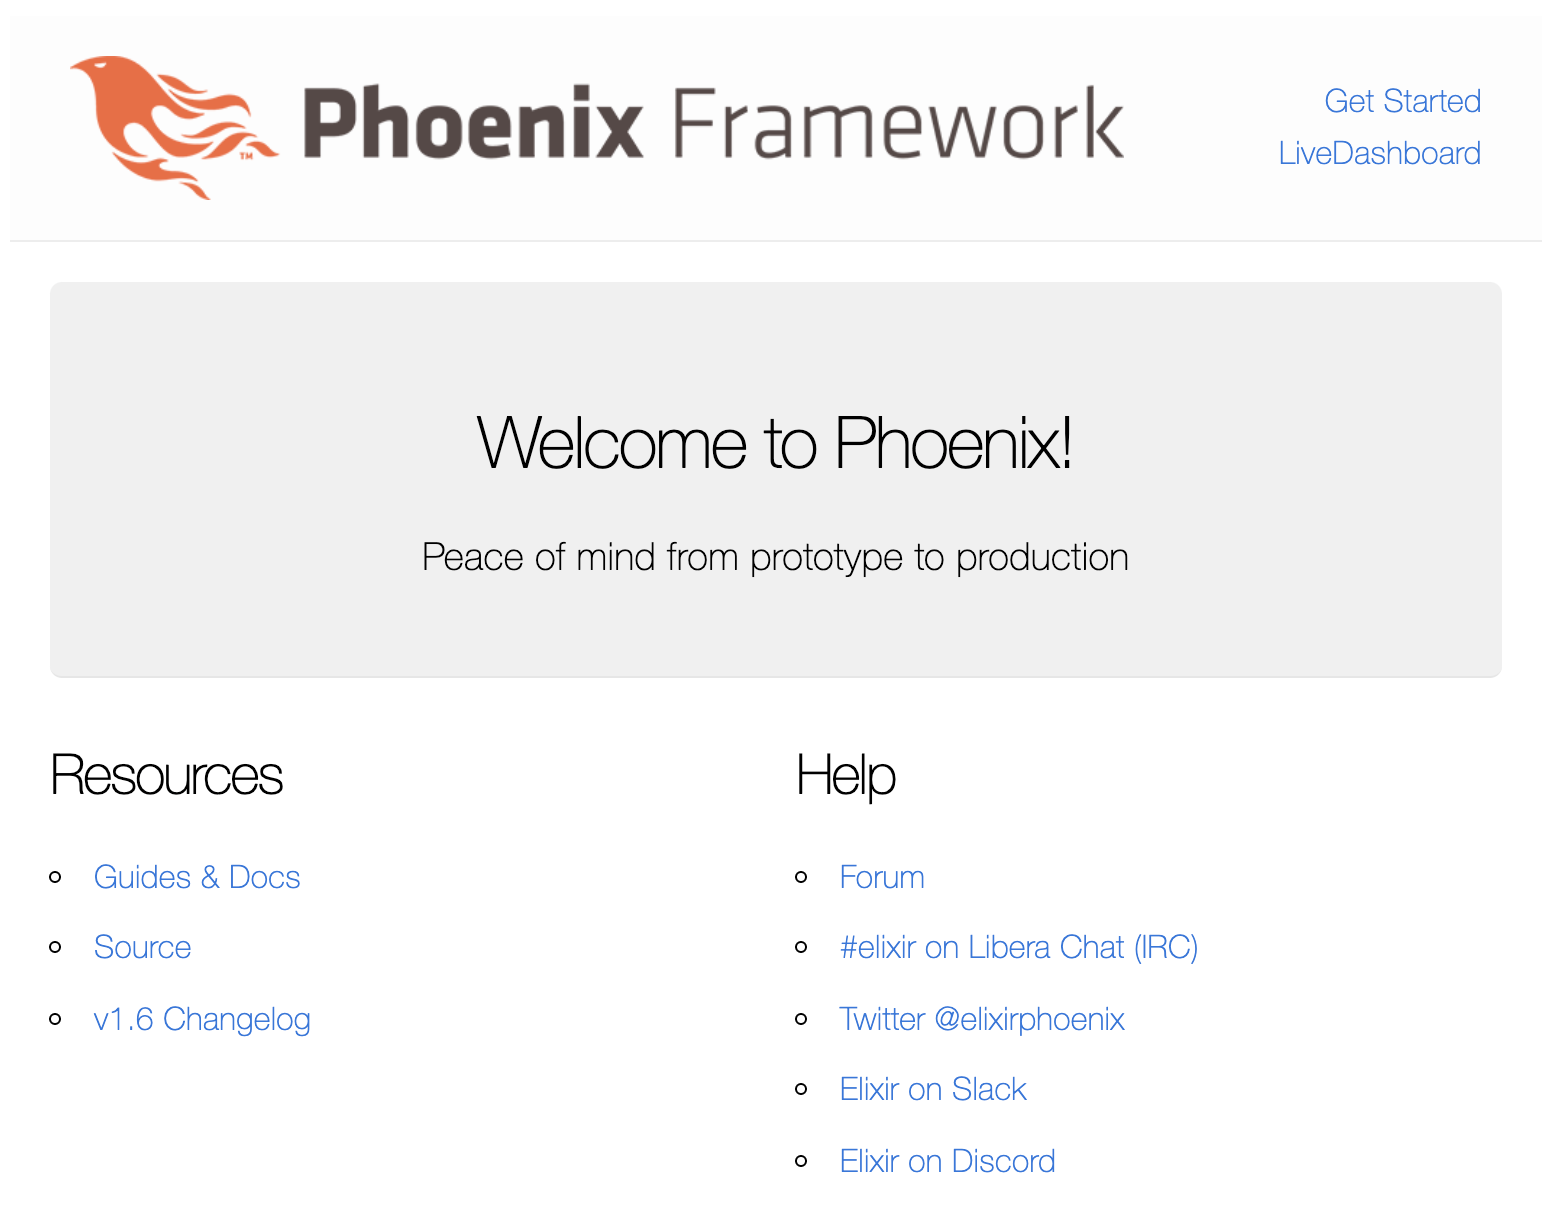
ブラウザでhttp://localhost:4000を表示しましょう。
 |
|---|
ビューを書き換える
今回はビューのページを少し変更してみましょう。
sample/lib/sample_web/templates/配下にテンプレートファイルがあります。
※ビューとテンプレートについては下記を参照。
https://zenn.dev/koga1020/books/phoenix-guide-ja-1-6/viewer/views
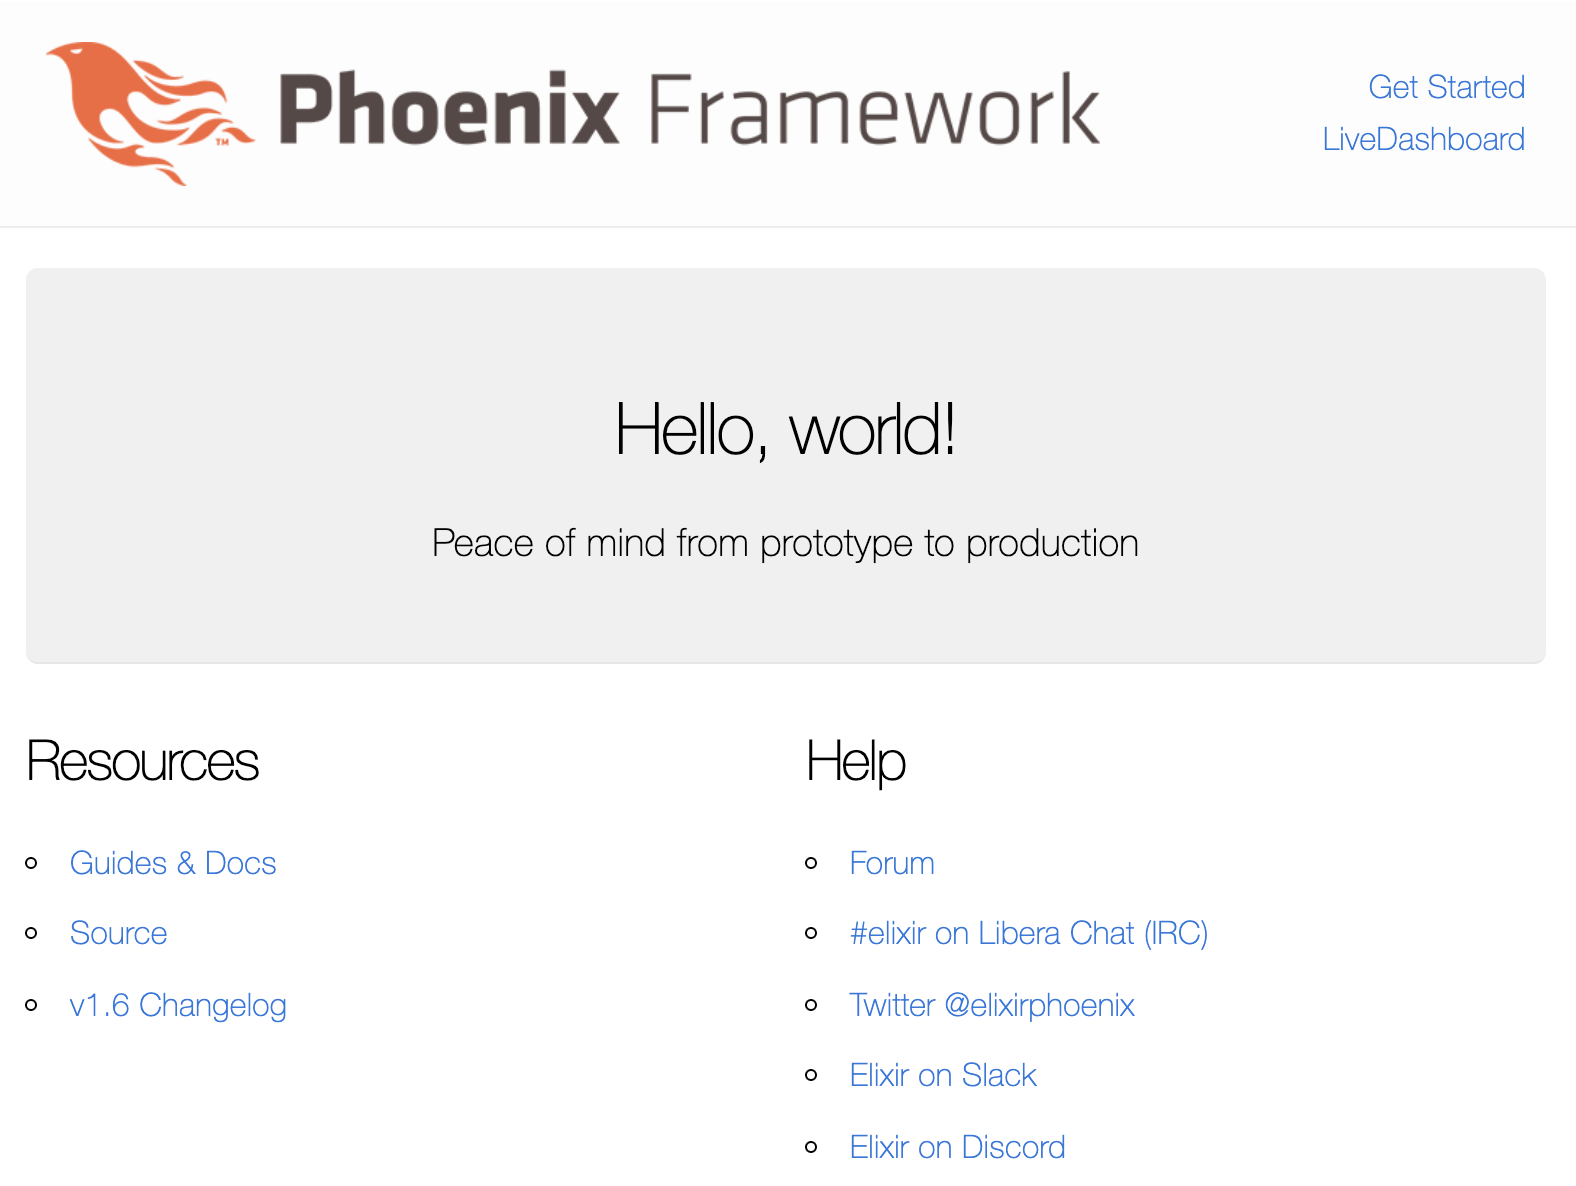
2行目のh1タグを書き換えてみましょう。
<section class="phx-hero">
  <!-- <h1><%= gettext "Welcome to %{name}!", name: "Phoenix" %></h1> -->
  <h1>Hello, world!</h1>
  <p>Peace of mind from prototype to production</p>
</section>
無事変更されました。ようこそPhoenixへ!
 |
|---|
おわりに
本記事ではいろいろ説明をはしょりましたが、ディレクトリ構造などは公式ドキュメントや、日本語訳ならこちらがおすすめです。
