はじめに
Qiitaでイベントをやっているので、参加するためにSkyWayを使ってみました🙆♂️
前の記事ではJavaScriptで書きましたが、今回はAndroidアプリ化しました。
ドキュメントはこちらから。
出来上がったもの
スマホの画面はこんな感じ。
左が自分の映像、右が相手の映像です!

構成
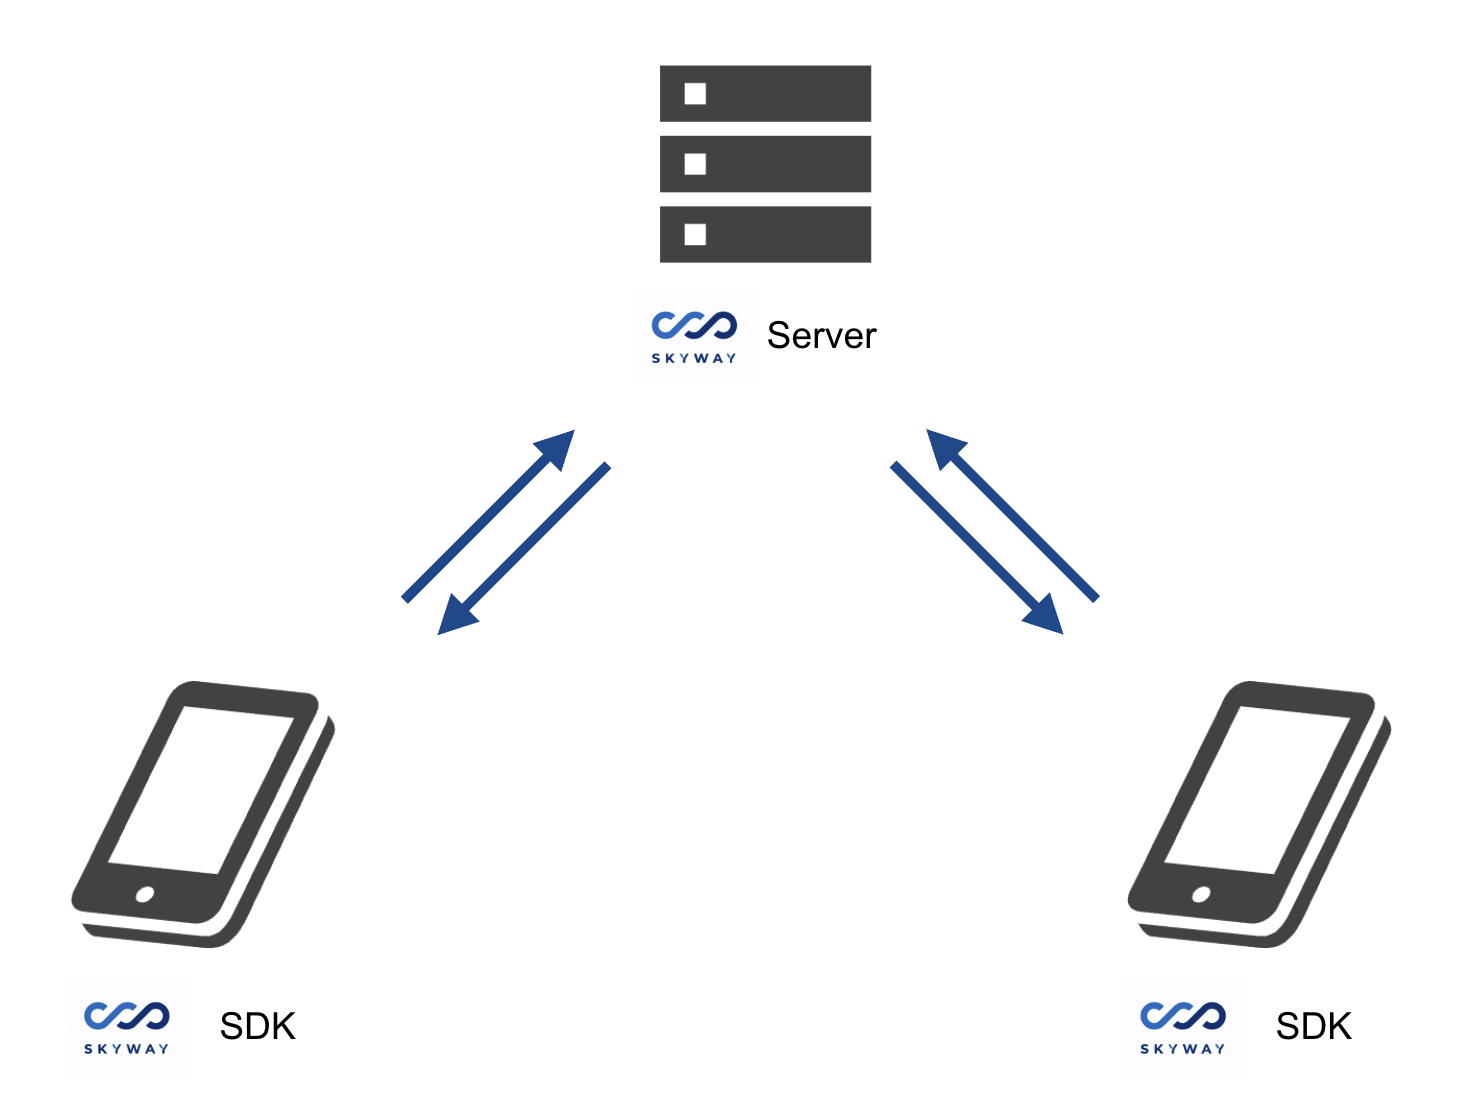
構成は至ってシンプル。Androidアプリ内にSkyWay SDKを組み込み、SkyWay Serverに接続する感じです。

方法
公式ドキュメントではfindViewByIdを使用していますが、ここではViewBindingでコードを書いてみます!
1. プロジェクト作成
Android Studioで新しいAndroidプロジェクトを作成します。
2. ライブラリの配置
ここから4つのライブラリをダウンロード。
- libwebrtc.aar
- skyway-core.aar
- skyway-sfubot.aar
- skyway-room.aar
app/libsフォルダを作成し、フォルダ内に4つのライブラリを配置します。
3. ビルド設定
app/build.gradleに以下を追記します。ViewBinding有効化&compose無効化とライブラリの読み込みの設定を記述します。
android {

    //...

    buildFeatures {
		viewBinding true
        compose false
    }
}

dependencies {

    // ...

    // skyway
    implementation files('libs/libwebrtc.aar')
    implementation files('libs/skyway-core.aar')
    implementation files('libs/skyway-sfubot.aar')
    implementation files('libs/skyway-room.aar')

    // WebSocket
    implementation "com.squareup.okhttp3:okhttp:4.10.0"
    implementation "com.squareup.okhttp3:logging-interceptor:4.10.0"

    // gson
    implementation 'com.google.code.gson:gson:2.9.0'
}
4. パーミッション設定
インターネットの接続とカメラ・マイク使用の許可を行います。
<!-- ネットワーク接続に必要なパーミッション  -->
<uses-permission android:name="android.permission.INTERNET"/>
<uses-permission android:name="android.permission.ACCESS_NETWORK_STATE"/>

<!-- カメラ映像・マイク音声の取得に必要なパーミッション  -->
<uses-permission android:name="android.permission.CAMERA"/>
<uses-permission android:name="android.permission.RECORD_AUDIO"/>
<uses-permission android:name="android.permission.MODIFY_AUDIO_SETTINGS"/>
5.レイアウト作成
- 自分の映像ビュー
- 相手の映像ビュー
- room名入力用のEditText
- 参加ボタン
を追加します。
<?xml version="1.0" encoding="utf-8"?>
<androidx.constraintlayout.widget.ConstraintLayout
	xmlns:android="http://schemas.android.com/apk/res/android"
	xmlns:app="http://schemas.android.com/apk/res-auto"
	xmlns:tools="http://schemas.android.com/tools"
	android:layout_width="match_parent"
	android:layout_height="match_parent"
	tools:context=".MainActivity">

	<LinearLayout
		android:id="@+id/view_group"
		android:layout_width="match_parent"
		android:layout_height="wrap_content"
		android:orientation="vertical"
		app:layout_constraintEnd_toEndOf="parent"
		app:layout_constraintStart_toStartOf="parent"
		app:layout_constraintTop_toTopOf="parent">

		<LinearLayout
			android:id="@+id/videos"
			android:layout_width="wrap_content"
			android:layout_height="wrap_content"
			android:layout_gravity="center"
			android:orientation="horizontal">

			<!-- ローカルのビデオ -->
			<com.ntt.skyway.core.content.sink.SurfaceViewRenderer
				android:id="@+id/local_renderer"
				android:layout_width="150dp"
				android:layout_height="150dp"/>

			<!-- リモートのビデオ -->
			<com.ntt.skyway.core.content.sink.SurfaceViewRenderer
				android:id="@+id/remote_renderer"
				android:layout_width="150dp"
				android:layout_height="150dp"
				android:layout_marginStart="20dp"/>
		</LinearLayout>

		<LinearLayout
			android:layout_width="match_parent"
			android:layout_height="wrap_content"
			android:orientation="horizontal">

			<TextView
				android:layout_width="wrap_content"
				android:layout_height="50dp"
				android:text=" room: "
				android:textSize="13sp"/>

			<EditText
				android:id="@+id/roomName"
				android:layout_width="match_parent"
				android:layout_height="50dp"
				android:textSize="15sp"/>
		</LinearLayout>

		<Button
			android:id="@+id/joinButton"
			android:layout_width="150dp"
			android:layout_height="70dp"
			android:layout_gravity="center"
			android:text="Join"
			android:textSize="15sp"/>
	</LinearLayout>
</androidx.constraintlayout.widget.ConstraintLayout>
6.トークン発行
アプリの内部処理を記述する前に、JavaScriptコードでトークンを発行しておく必要があります。
アプリケーションIDとシークレットキーはこちらでSkyWayのアカウントを作成すると貰えます。
const { SkyWayAuthToken, uuidV4 } = require('@skyway-sdk/token');
const token = new SkyWayAuthToken({
  jti: uuidV4(),
  iat: Math.floor(Date.now() / 1000),
  exp: Math.floor(Date.now() / 1000) + 60 * 60 * 24,
  scope: {
    app: {
      id: 'ここにアプリケーションIDをペーストしてください',
      turn: true,
      actions: ['read'],
      channels: [
        {
          id: '*',
          name: '*',
          actions: ['write'],
          members: [
            {
              id: '*',
              name: '*',
              actions: ['write'],
              publication: {
                actions: ['write'],
              },
              subscription: {
                actions: ['write'],
              },
            },
          ],
          sfuBots: [
            {
              actions: ['write'],
              forwardings: [
                {
                  actions: ['write'],
                },
              ],
            },
          ],
        },
      ],
    },
  },
}).encode('ここにシークレットキーをペーストしてください');
console.log(token);
Terminalで以下を実行すると、トークンが発行されます。
$ npm i @skyway-sdk/token
$ node token.js
7.アプリ内部処理作成
MainActivity.ktに以下のコードを記述します。ViewBinding化することで、公式ドキュメントよりもスッキリしたコードになった気がします!
class MainActivity : AppCompatActivity() {
	companion object {
		//TODO
		private const val TOKEN = "YOUR_TOKEN"
	}

	/** ViewBinding */
	private lateinit var binding: ActivityMainBinding

	override fun onCreate(savedInstanceState: Bundle?) {
		super.onCreate(savedInstanceState)
		binding = ActivityMainBinding.inflate(layoutInflater)
		setContentView(binding.root)

		// 権限の要求
		if (
			ContextCompat.checkSelfPermission(applicationContext, Manifest.permission.CAMERA) != PermissionChecker.PERMISSION_GRANTED
			|| ContextCompat.checkSelfPermission(applicationContext, Manifest.permission.RECORD_AUDIO) != PermissionChecker.PERMISSION_GRANTED
		) {
			ActivityCompat.requestPermissions(this, arrayOf(Manifest.permission.CAMERA, Manifest.permission.RECORD_AUDIO), 0)
		}

		binding.joinButton.setOnClickListener {
			joinAndPublish()
		}
	}

	private fun joinAndPublish() {
		CoroutineScope(Dispatchers.IO).launch {
			SkyWayContext.setup(applicationContext, SkyWayContext.Options(authToken = TOKEN))

			// camera映像のキャプチャを開始
			val device = CameraSource.getFrontCameras(applicationContext).first()
			val cameraOption = CameraSource.CapturingOptions(800, 800)
			CameraSource.startCapturing(applicationContext, device, cameraOption)

			// 描画やpublishが可能なStreamを作成
			val localVideoStream = CameraSource.createStream()

			// SurfaceViewRenderer描画
			runOnUiThread {
				binding.localRenderer.setup()
				localVideoStream.addRenderer(binding.localRenderer)
			}

			AudioSource.start()

			// publishが可能なStreamを作成します
			val localAudioStream = AudioSource.createStream()
			val room = P2PRoom.findOrCreate(name = binding.roomName.text.toString())
			val memberInit = RoomMember.Init(name = "member_" + UUID.randomUUID())
			val localRoomMember = room?.join(memberInit)

			runOnUiThread {
				Toast.makeText(applicationContext, if (room == null) "Join failed" else "Joined room", Toast.LENGTH_SHORT).show()
			}

			room?.publications?.forEach {
				if (it.publisher?.id == localRoomMember?.id) return@forEach
				subscribe(localRoomMember, it)
			}

			room?.onStreamPublishedHandler = Any@{
				if (it.publisher?.id == localRoomMember?.id) return@Any
				subscribe(localRoomMember, it)
			}

			localRoomMember?.publish(localVideoStream)
			localRoomMember?.publish(localAudioStream)
		}
	}

	private fun subscribe(localRoomMember: LocalRoomMember?, publication: RoomPublication) {
		CoroutineScope(Dispatchers.IO).launch {
			// Publicationをsubscribeします
			val subscription = localRoomMember?.subscribe(publication)
			runOnUiThread {
				binding.remoteRenderer.setup()
				val remoteStream = subscription?.stream
				if (remoteStream?.contentType == Stream.ContentType.VIDEO) {
					(remoteStream as RemoteVideoStream).addRenderer(binding.remoteRenderer)
				}
			}
		}
	}
}
※注意点として、公式ドキュメントでは以下のコードが間違っているようでした。(2023/7/18現在)
//誤り(公式ドキュメント)
findViewById<EditText>(R.id.roomName).toString())

//正しくはこう
findViewById<EditText>(R.id.roomName).text.toString())
さいごに
SkyWay SDKを組み込むだけでビデオ通話アプリができるようになりました!
いいね/ストック宜しくお願いします👍