前のNuxt.js x SkyWayビデオチャットの記事の反響が少しあったのでVue.jsでSkyWayを触る手順を追いつつ記事にしてみます。
もとになっているコードはこちらです。
とりあえずローカルビデオアクセスまで出来れば今回は僕は満足なのでvol1だけで一旦まとめます。
追記: と進めてて気づいたけどvol1はSkyWay全く使ってないですね()
1. index.htmlとapp.jsを用意
htmlにはvue.jsの読み込みとapp.jsの読み込みを記述して、元となるdiv要素(id="app")を作成します。
<!DOCTYPE html>
<html lang="ja">
<head>
    <meta charset="UTF-8">
    <meta name="viewport" content="width=device-width, initial-scale=1.0">
    <meta http-equiv="X-UA-Compatible" content="ie=edge">
    <title>Document</title>
</head>
<body>
    <div id="app">
    </div>
    <script src="https://cdn.jsdelivr.net/npm/vue"></script>
    <script src="app.js"></script>
</body>
</html>
取り急ぎはこんな感じ。
const app = new Vue({
    el: '#app',
    data: {

    },
    methods: {

    },
    mounted: async function () {

    }
});
- 利用する変数や定数をdataに定義
- 利用する関数をmethodsに定義
- 初期ロード時に実行させたい処理をmountedに記述
これくらいを覚えておけばVue.js書き換えはすぐいけます。
デバイスへのアクセスを記述
app.jsのmounted内に追記ます。
//省略

    mounted: async function () {
        //デバイスへのアクセス
        const deviceInfos = await navigator.mediaDevices.enumerateDevices();
        console.log(deviceInfos);
    }

//省略
2. サーバーを起動して確認
ローカルサーバーが起動できれば大丈夫です。
$ python -m SimpleHTTPServer 3000
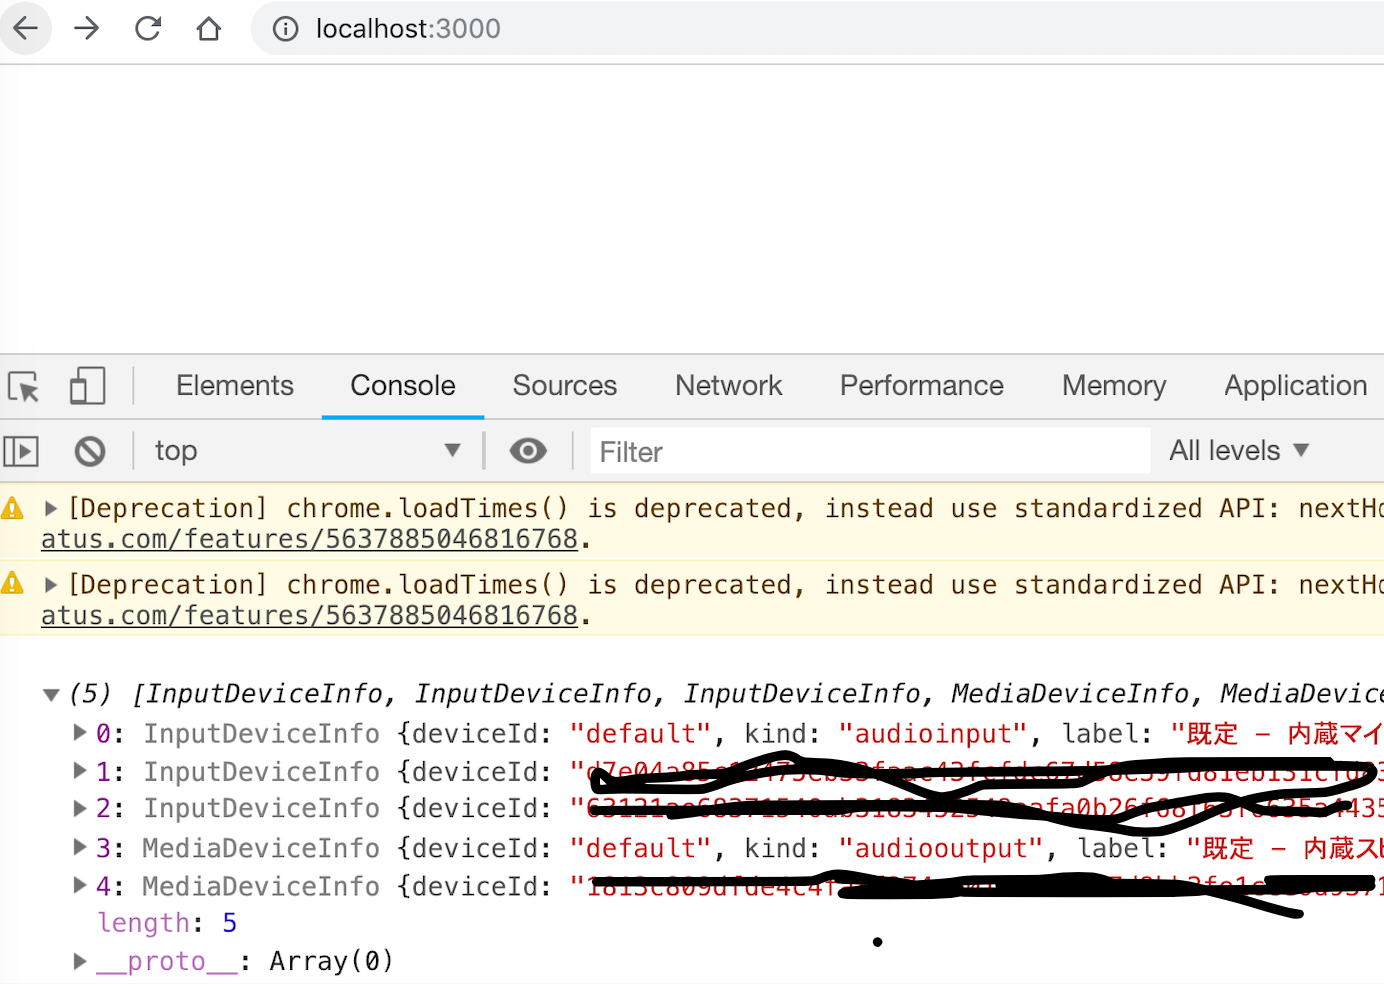
localhost:3000にアクセスしてコンソールを確認すると接続されてるメディアデバイス(カメラやマイクなど)の情報が出てきます。
3. 利用するカメラとオーディオデバイスを抽出
dataオブジェクトにaudioとvideoの格納用の配列を用意
    data: {
        audios: [],
        videos: []
    }
    mounted: async function () {
            //デバイスへのアクセス
        const deviceInfos = await navigator.mediaDevices.enumerateDevices();

        //1. オーディオデバイスの情報を取得
        deviceInfos
        .filter(deviceInfo => deviceInfo.kind === 'audioinput')
        .map(audio => this.audios.push({text: audio.label || `Microphone ${this.audios.length + 1}`, value: audio.deviceId}));

        //2. カメラの情報を取得
        deviceInfos
        .filter(deviceInfo => deviceInfo.kind === 'videoinput')
        .map(video => this.videos.push({text: video.label || `Camera  ${this.videos.length - 1}`, value: video.deviceId}));

        console.log(this.audios, this.videos);
    }
-
- filterでaudioinputの配列(各デバイス)情報を抽出してそれをthis.aduiosにpushして格納しています。
-
- カメラに関しても同様
補足: ここまでのコード

こんな感じでVue.js内の変数として認識されるようになってます。
4. セレクトボックスで選択させる
選択しているデバイスたちを覚えてく変数selectAudioとselectVideoを追加
    data: {
        audios: [],
        videos: [],
        selectedAudio: '', //追記
        selectedVideo: '', //追記
    }
methodsにデバイスが選択されるたびに呼び出される関数onChangeと、両方が選択されたら発火するconnectLocalCameraを定義
    methods: {
        onChange: function (){
            if(this.selectedAudio != '' && this.selectedVideo != ''){
                this.connectLocalCamera();
            }
        },

        connectLocalCamera: async function (){
            alert('デバイスが選択されました。');
        }
    },
htmlにセレクトボックスを定義。
ここで選択されると、先ほどdataオブジェクト内で定義したselectAudioとselectVideoに反映される。
    <div id="app">

        マイク:
        <select v-model="selectedAudio" @change="onChange">
          <option disabled value="">Please select one</option>
          <option v-for="(audio, key, index) in audios" v-bind:key="index" :value="audio.value">
            {{ audio.text }}
          </option>
        </select>

        カメラ:
        <select v-model="selectedVideo" @change="onChange">
          <option disabled value="">Please select one</option>
          <option v-for="(video, key, index) in videos" v-bind:key="index" :value="video.value">
            {{ video.text }}
          </option>
        </select>
    </div>
動かすとこんな感じ

ここまでのapp.jsをまとめるとこんな感じです。
5. カメラの情報をブラウザに反映させる
index.htmlの<div id="app"></div>内に以下のvideoタグを追記
<video id="my-video" muted="true" width="500" autoplay playsinline></video>
app.jsのmethods内のconnectLocalCameraをまるっと差し替え
        connectLocalCamera: async function (){
            const constraints = {
                audio: this.selectedAudio ? { deviceId: { exact: this.selectedAudio } } : false,
                video: this.selectedVideo ? { deviceId: { exact: this.selectedVideo } } : false
            }

            const stream = await navigator.mediaDevices.getUserMedia(constraints);
            document.getElementById('my-video').srcObject = stream;
        }
ほんとはここでdocument.getElementByIdを使わないでやりたかったんですけど、うまくいかず調べたら同じような感じで悩んでる人多そうだったのでそっと閉じました。
動かすとこんな感じです。

ここまでのコード(index.htmlとapp.js)はこちらにまとめておきます。
まとめ
やはりVue.jsで書くと処理の流れの見通しがつきやすくなりますね。
今回までのコードは、とりあえずWebページでカメラの映像とかとりたい時に使えそうです。
参考になれば幸いです。
