某作業で必要になりそうだったのでElixir/PhoenixのサーバーをAzureに立ててみます。
仮想マシンを作成
仮想マシンの作り方はAzureのCLIツールを使ってCoreOS/Docker上にWebサーバーを立ててみる。など他の記事にもあるので割愛です。
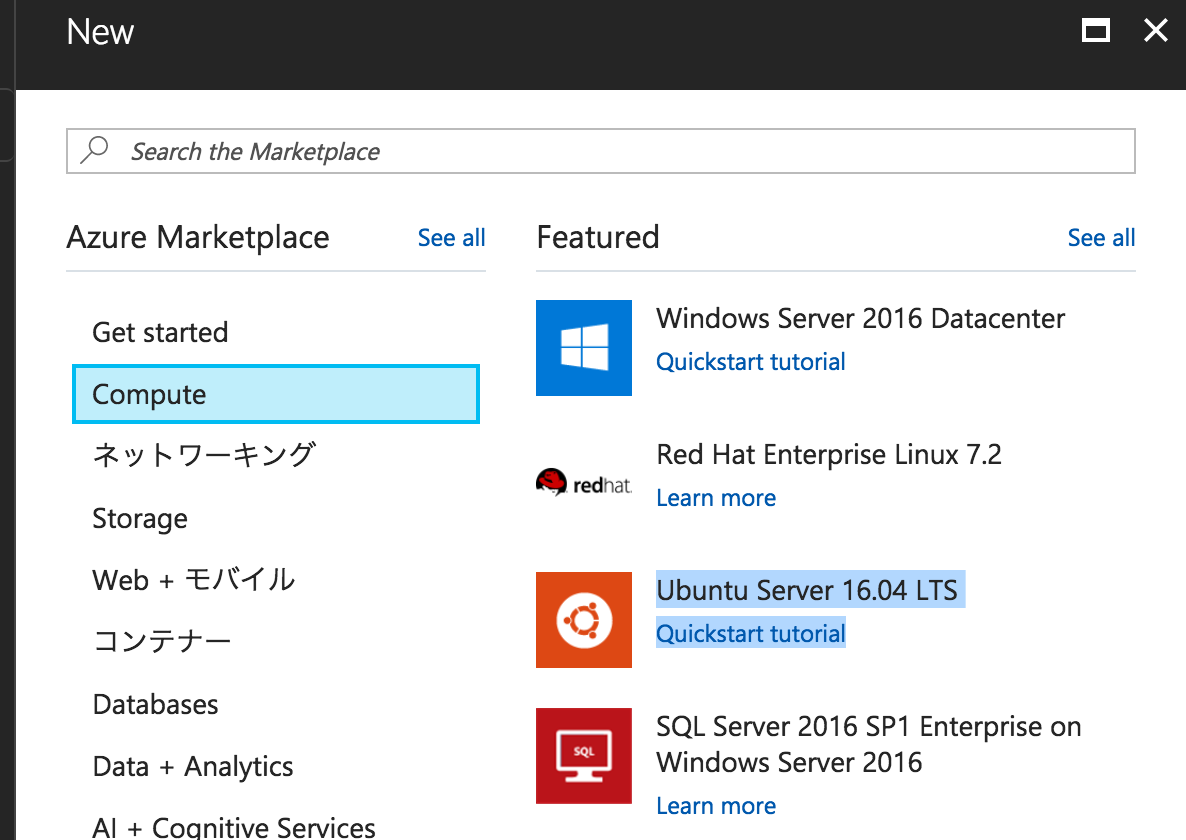
Ubuntu Server 16.04を利用します。
SSHで接続します。
サーバーにElixir/Phenixの環境を作る
Erlangのインストール
$ sudo apt-get install erlang-nox erlang-dev
$ sudo apt-get install erlang-base-hipe
特に問題なく出来ました。
Elixirのインストール
$ git clone https://github.com/elixir-lang/elixir.git
$ git checkout refs/tags/v1.5.2
ここでmakeをするんですけど、入ってなくて怒られました。
$ sudo apt-get install make
インストール
$ make
$ make install
少し時間がかかります。
$ iex -v
Erlang/OTP 18 [erts-7.3] [source] [64-bit] [async-threads:10] [hipe] [kernel-poll:false]

warning: the VM is running with native name encoding of latin1 which may cause Elixir to malfunction as it expects utf8. Please ensure your locale is set to UTF-8 (which can be verified by running "locale" in your shell)
IEx 1.5.2
これでインストール完了です。
Phoenixのインストール
$ mix local.hex
$ mix archive.install https://github.com/phoenixframework/archives/raw/master/phx_new.ez
こちらのハンズオン資料での確認方法です。
$ mix help
mix                   # Runs the default task (current: "mix run")
〜略〜
mix phx.new           # Creates a new Phoenix v1.3.0 application <= ★これがあればインストールされています★
〜略〜
Node.jsのインストール
PhoenixフレームワークのフロントエンドソースコードのビルドにNode.jsを利用しているのでNode.jsのインストールをします。
nodebrewのインストール
$ curl -L git.io/nodebrew | perl - setup
.bashrcに以下を追記
export PATH=$HOME/.nodebrew/current/bin:$PATH
適用
$ source ~/.bashrc
これでnodebrewが使えるようになったのでNode.jsのインストールをします。
$ nodebrew install-binary 9.2.0
$ node -v
v9.2.0
npmコマンドも利用できるようになります。
$ npm -v
5.5.1
デモアプリの作成
$ mix phx.new demo --no-ecto
$ cd demo
$ mix phx.server
ここでエラーがでたけど......
[error] `inotify-tools` is needed to run `file_system` for your system, check https://github.com/rvoicilas/inotify-tools/wiki for more information about how to install it. If it's already installed but not be found, appoint executable file with `config.exs` or `FILESYSTEM_FSINOTIFY_EXECUTABLE_FILE` env.
[warn] Could not start Phoenix live-reload because we cannot listen to the file system.
You don't need to worry! This is an optional feature used during development to
refresh your browser when you save files and it does not affect production.
起動はできてるので進みます。(後述)
[info] Running DemoWeb.Endpoint with Cowboy using http://0.0.0.0:4000
07:28:01 - info: compiled 6 files into 2 files, copied 3 in 954 ms
4000番ポートでPhoenixのサーバーが起動しました。
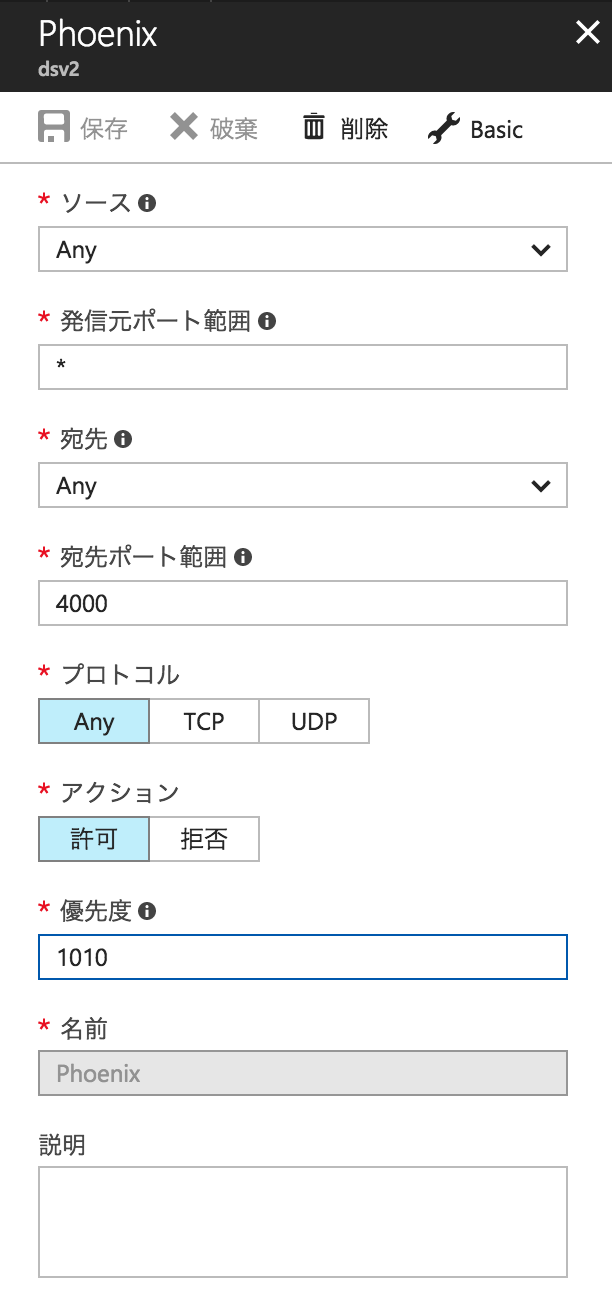
Azureのネットワーク設定
Azureの仮想マシンだと基本デフォルトでポートは閉じてるので、ネットワーク設定で4000番ポートを開けます。
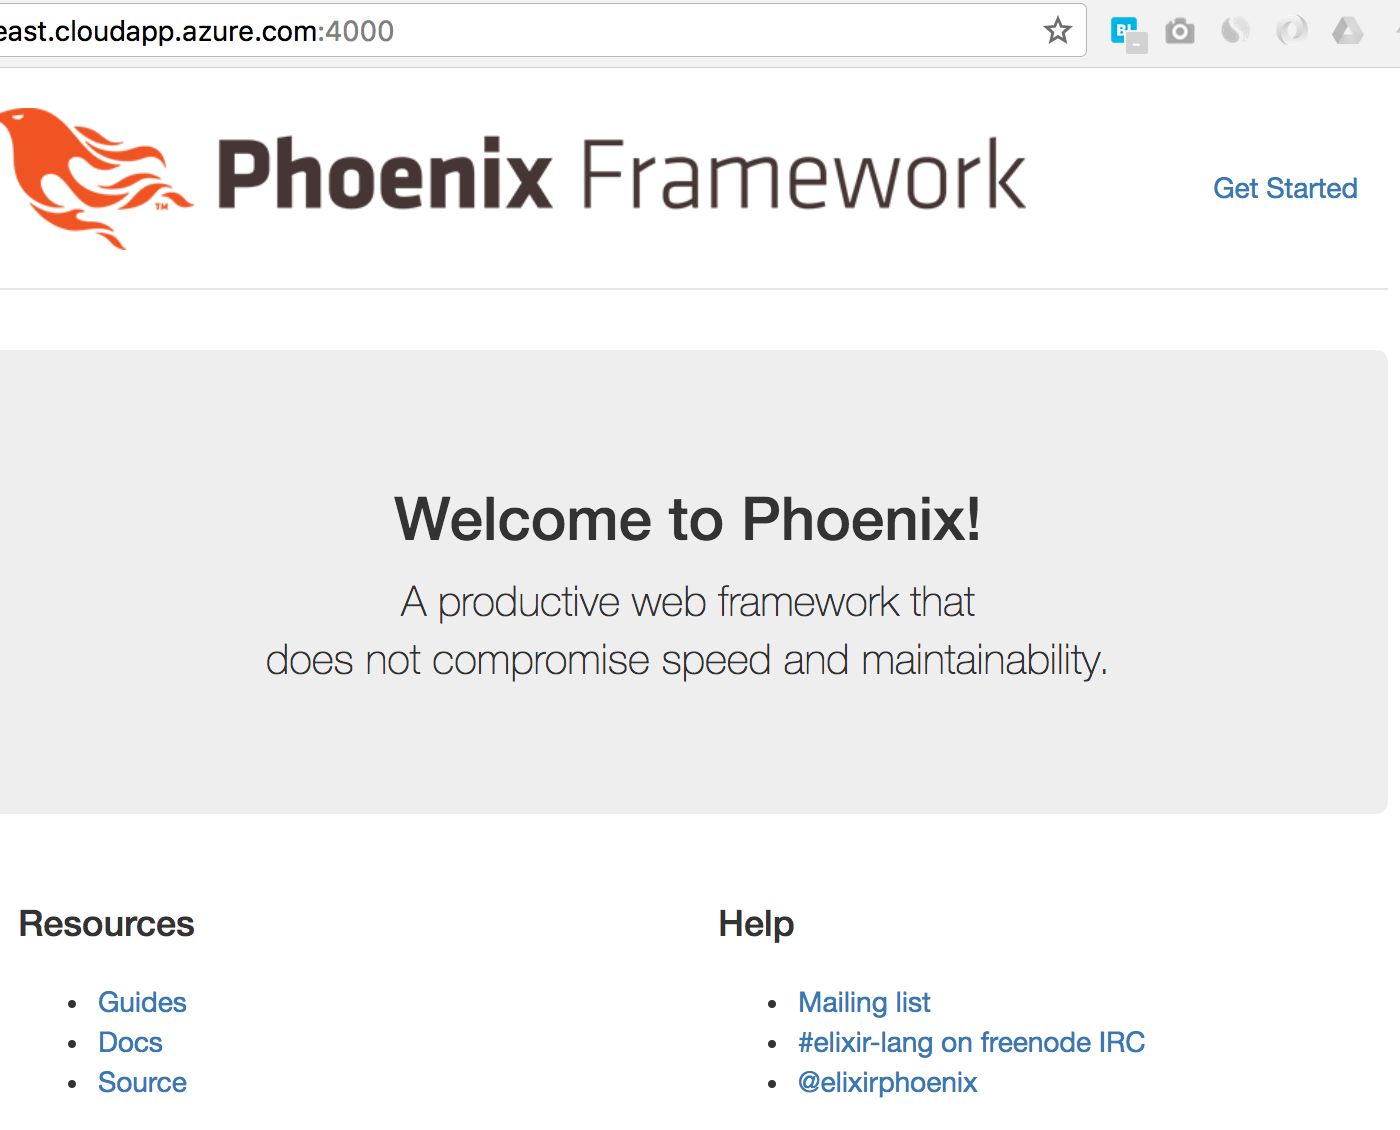
動作確認
自分のAzureドメイン:4000にアクセスすると起動します。
エラー解消
[error] inotify-tools is needed to run file_system for your system,
これはError: inotify-tools is needed to run file_system for your system in elixir.phoenixなどに載っていました。
Macで試した時は出なかったですけどUbuntuでは怒られる模様
sudo apt-get install -y inotify-tools
これで解消されます。
warning: the VM is running with native name encoding of latin1 which may cause Elixir to malfunction as it expects utf8.
起動するとwargningが出てました。
$ mix phx.server

warning: the VM is running with native name encoding of latin1 which may cause Elixir to malfunction as it expects utf8. Please ensure your locale is set to UTF-8 (which can be verified by running "locale" in your shell)
[info] Running DemoWeb.Endpoint with Cowboy using http://0.0.0.0:4000
07:41:06 - info: compiled 6 files into 2 files, copied 3 in 939 ms
ここに載ってました。
.bashrcにexport LC_ALL=en_US.UTF-8を追記することで治りました。
参考
関係ないですが、この環境でnodebrewを使うときにこのようなエラーが出てたのですが、これも一緒に解消できました。
perl: warning: Setting locale failed.
perl: warning: Please check that your locale settings:
	LANGUAGE = (unset),
	LC_ALL = (unset),
	LC_CTYPE = "ja_JP.UTF-8",
	LANG = "en_US.UTF-8"
    are supported and installed on your system.
perl: warning: Falling back to a fallback locale ("en_US.UTF-8").
これでエラーなく起動できました。
$ mix phx.server
[info] Running DemoWeb.Endpoint with Cowboy using http://0.0.0.0:4000
07:56:46 - info: compiled 6 files into 2 files, copied 3 in 927 ms
永続化する
Elixir/Phoenixの永続化の方法ってどうやるんでしょ? (王道みたいなのがあればどなたか...)
Node.jsの場合はPM2を使って永続化してたので、PM2で永続化してみます。
$ npm i -g pm2
$ pm2 -v
2.8.0
ちなみにnpmは↑で使えるようにしているので問題ないと思います。
action.shを作成して、phoenixの起動コマンドを記述
mix phx.server
実行権限を付与
chmod 700 action.sh
PM2で永続化スタート
$ pm2 start ./action.sh

Use --update-env to update environment variables
[PM2] Applying action restartProcessId on app [action](ids: 2)
[PM2] [action](2) ✓
┌──────────┬────┬──────┬───────┬────────┬─────────┬────────┬─────┬───────────┬──────────┬──────────┐
│ App name │ id │ mode │ pid   │ status │ restart │ uptime │ cpu │ mem       │ user     │ watching │
├──────────┼────┼──────┼───────┼────────┼─────────┼────────┼─────┼───────────┼──────────┼──────────┤
│ action   │ 2  │ fork │ 55669 │ online │ 0       │ 0s     │ 0%  │ 4.0 KB    │ n0bisuke │ disabled │
これで永続化できました。Azureのコンソールから抜けても永続化されてアプリケーションが動いていることが確認できます。
$ exit