概要
AWSのEKSサービスを利用して作成したKubernetesクラスターのログを管理する方法を調査・検証したので、結果をまとめました。
EKSクラスター環境の監視方法
Kubernetesクラスター環境の監視を実施する場合、PrometheusやGrafana、Fluenetdなどの各種ツールが思い浮かびますが、
AWSには CloudWatch Container Insights というEKSやECSなどのコンテナベース環境の監視に特化したサービスが用意されています。
Container Insightsは以下のような構成で動作しています。
- CloudWatch Agent:ノードやポッドのメトリクス収集
- Fluent Bit:ログをCloudWatch Logsに転送
- CloudWatch:ログやメトリクスのデータを保存、可視化
今回の検証では、ログ管理に特化してFluent Bitを利用したログ転送の動作を確認しました。
検証環境
Container Insightsは、EKSのバージョン 1.23 以降でサポートされています。
今回の検証では、バージョン 1.32 を利用しました。
検証手順
ワーカーノード用IAMロールへのポリシー追加
EKSワーカーノードからCloudWatchにログを送信できるようにするため
、ワーカノードにアタッチされているIAMロールにCloudWatchのアクセス許可権限を付与します。
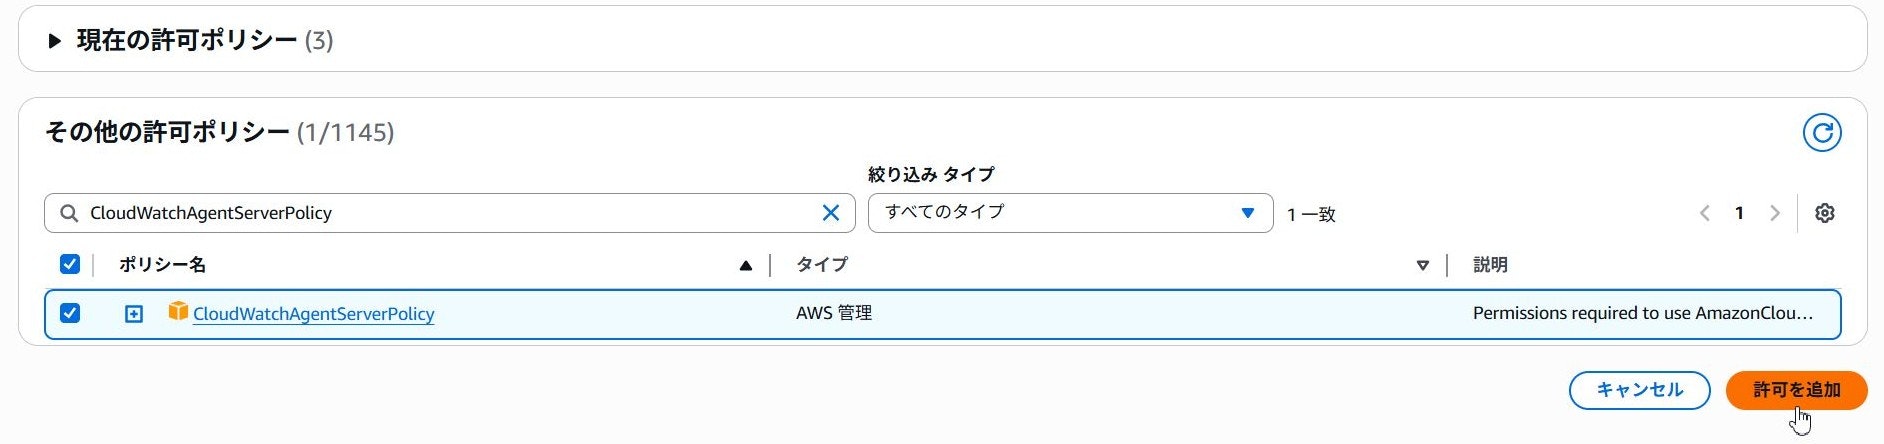
対象IAMロールの詳細画面を開き、許可ポリシー一覧の許可を追加>ポリシーをアタッチボタンをクリックします。

追加画面が表示されたら、その他の許可ポリシー一覧からCloudWatchAgentServerPolicyを選択し、許可を追加ボタンをクリックします。
Fluent Bit用NS作成
続いて、Fluent Bitをデプロイするためのamazon-cloudwatchという名前空間を作成します。
対象EKSクラスターに接続できる環境で以下のコマンドを実行します。
kubectl apply -f https://raw.githubusercontent.com/aws-samples/amazon-cloudwatch-container-insights/latest/k8s-deployment-manifest-templates/deployment-mode/daemonset/container-insights-monitoring/cloudwatch-namespace.yaml
Fluent Bit用CM作成
次のコマンドを実行して、クラスター名とログを送信するリージョンの情報を持つcluster-infoという名前のConfigMapを作成します。
ClusterName=cluster-name
RegionName=cluster-region
FluentBitHttpPort='2020'
FluentBitReadFromHead='Off'
[[ ${FluentBitReadFromHead} = 'On' ]] && FluentBitReadFromTail='Off'|| FluentBitReadFromTail='On'
[[ -z ${FluentBitHttpPort} ]] && FluentBitHttpServer='Off' || FluentBitHttpServer='On'
kubectl create configmap fluent-bit-cluster-info \
--from-literal=cluster.name=${ClusterName} \
--from-literal=http.server=${FluentBitHttpServer} \
--from-literal=http.port=${FluentBitHttpPort} \
--from-literal=read.head=${FluentBitReadFromHead} \
--from-literal=read.tail=${FluentBitReadFromTail} \
--from-literal=logs.region=${RegionName} -n amazon-cloudwatch
Fluent Bitデプロイ
次のコマンドを実行して、Fluent Bit デーモンセットをデプロイします。
kubectl apply -f https://raw.githubusercontent.com/aws-samples/amazon-cloudwatch-container-insights/latest/k8s-deployment-manifest-templates/deployment-mode/daemonset/container-insights-monitoring/fluent-bit/fluent-bit.yaml
デプロイに成功すると、クラスターを構成する各ノードでfluent-bit-xxxxポッドが起動します。
$ kubectl get pod -n amazon-cloudwatch -o wide
NAME               READY   STATUS    RESTARTS   AGE   IP              NODE                                          NOMINATED NODE   READINESS GATES
fluent-bit-7rxqs   1/1     Running   0          59s   172.20.10.195   ip-172-20-10-195.us-west-2.compute.internal   <none>           <none>
fluent-bit-bfwcx   1/1     Running   0          59s   172.20.10.218   ip-172-20-10-218.us-west-2.compute.internal   <none>           <none>
fluent-bit-vp5xw   1/1     Running   0          59s   172.20.10.41    ip-172-20-10-41.us-west-2.compute.internal    <none>           <none>
fluent-bit-whvvq   1/1     Running   0          59s   172.20.10.168   ip-172-20-10-168.us-west-2.compute.internal   <none>           <none>
fluent-bit-xftdk   1/1     Running   0          59s   172.20.10.224   ip-172-20-10-224.us-west-2.compute.internal   <none>           <none>
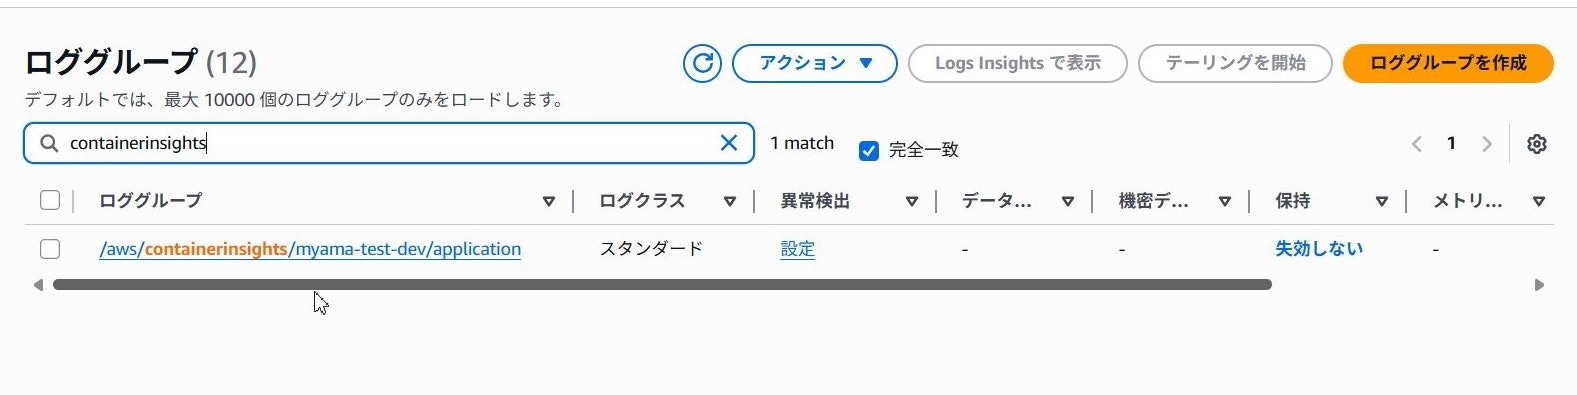
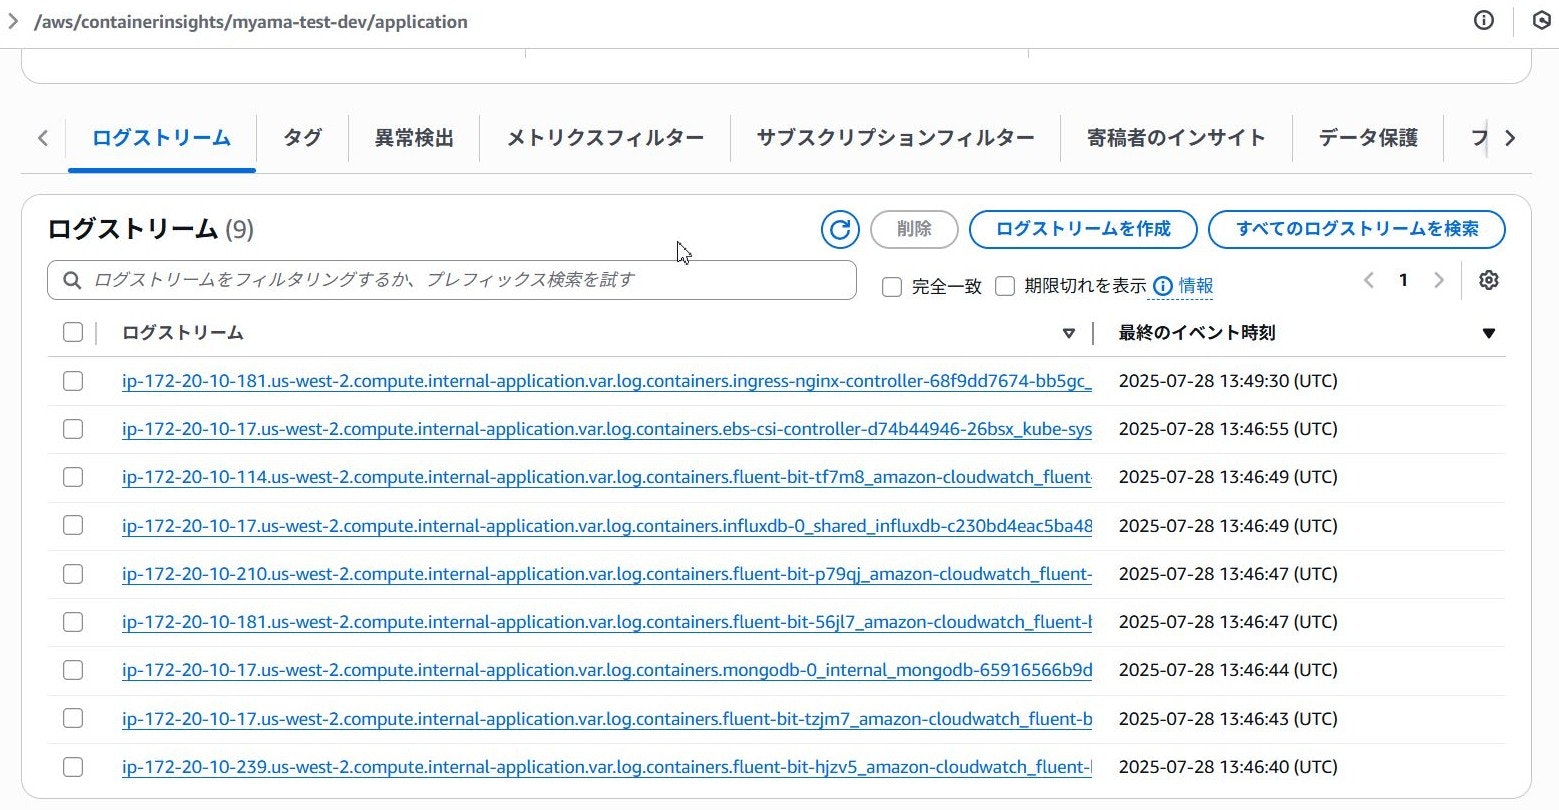
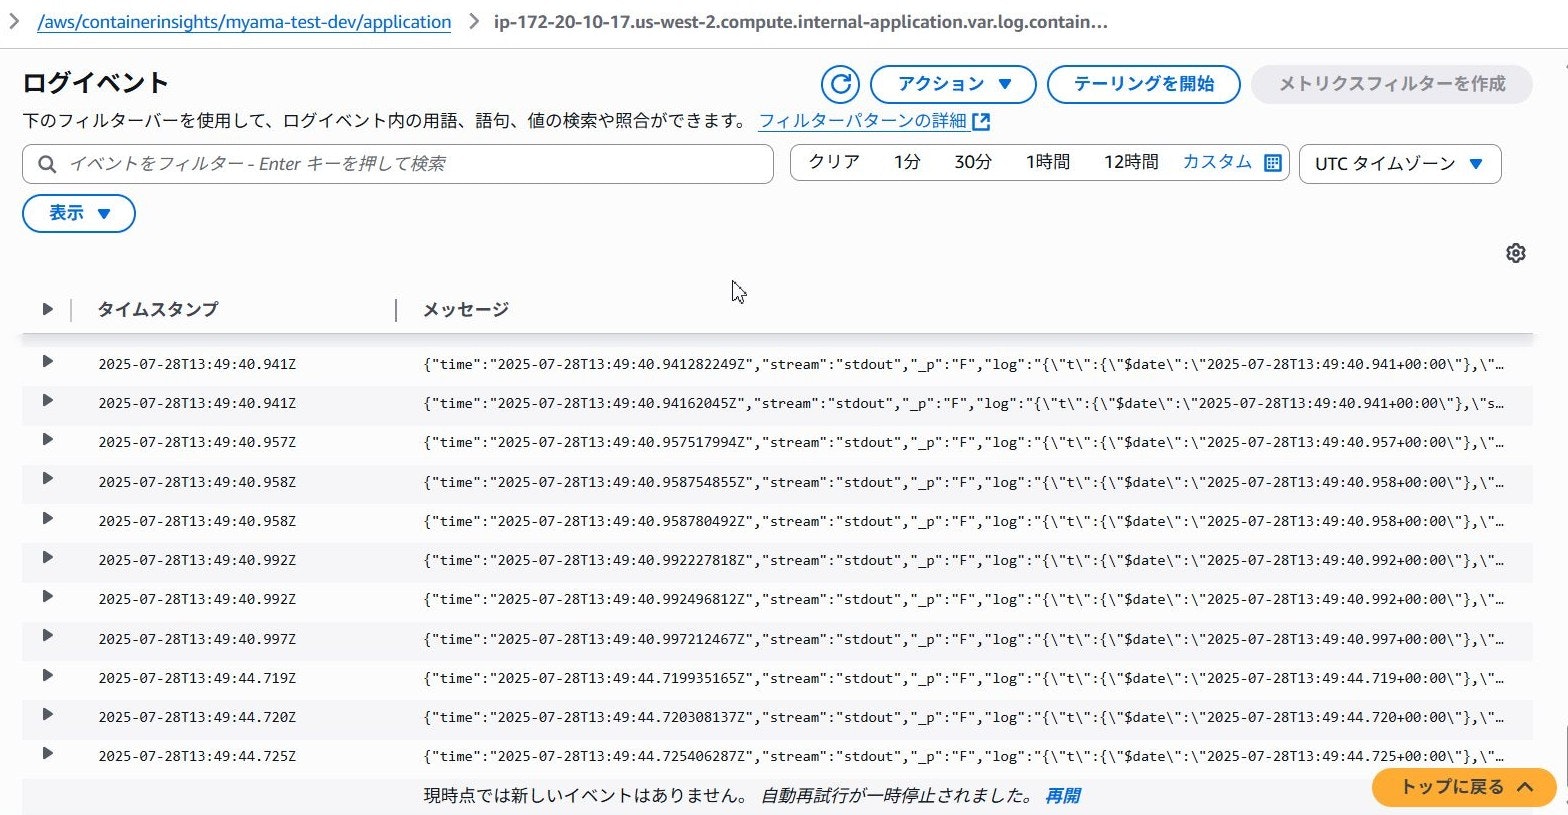
上記の手順が完了すると、CloudWatch Logsに以下のロググループが作成され、収集されたログが保存されます。
| ロググループ名 | ソース |
|---|---|
| /aws/containerinsights/Cluster_Name/application | /var/log/containers配下のログファイル |
| /aws/containerinsights/Cluster_Name/host | /var/log/dmesg、/var/log/secure、/var/log/messages |
| /aws/containerinsights/Cluster_Name/dataplane | /var/log/journal内のkubelet/kubeproxy/dockerサービスのログ |
備考:ログをCloudWatch Logs以外に転送する場合
Container Insightsのデフォルト設定では、ログの転送先はCloudWatch Logsのロググループになっていますが、Fluent Bitは出力先を複数設定できるため、CloudWatch Logs以外に転送することも可能です。
転送先を追加したい場合は、
上記手順でFluent Bitデーモンセットをデプロイする際に指定したマニフェストfluent-bit.yamlを一旦ローカルにダウンロードして、
fluent-bit-configConfigMapに[OUTPUT]設定を追加します。
今回の検証では、別ノードに構築したシステムへHTTP POSTリクエストでログデータを送信するため、以下の設定を追加しました。
より詳細な設定やhttp以外のプラグインについては、Fluent Bitの公式マニュアルを参照してください。
[OUTPUT]
    Name        http
    Match       application.*
    Host        test-log-mgmt.com
    Port        8080
    URI         /test/uri
    Format      json
    Header      Content-Type application/json
    Header      Authorization Bearer token
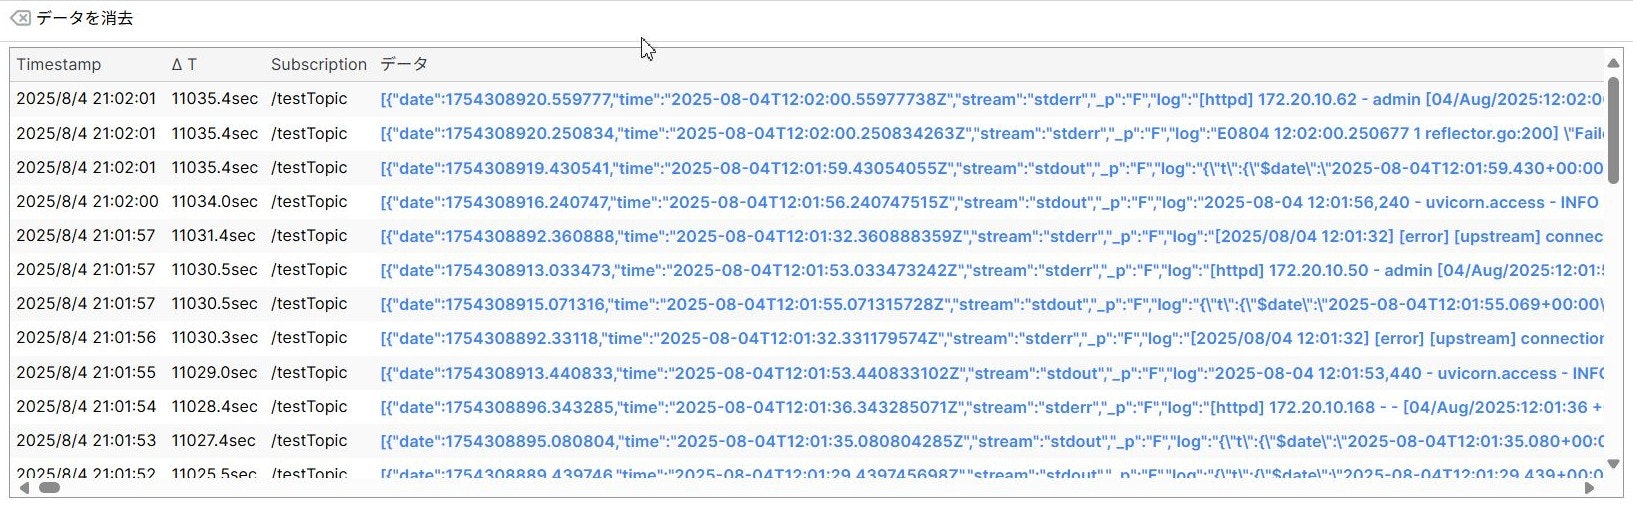
追加した設定を反映すると、指定した出力先にログが送信されます。
参考記事
https://docs.aws.amazon.com/ja_jp/AmazonCloudWatch/latest/monitoring/ContainerInsights.html
https://docs.aws.amazon.com/ja_jp/AmazonCloudWatch/latest/monitoring/deploy-container-insights-EKS.html
https://docs.aws.amazon.com/ja_jp/AmazonCloudWatch/latest/monitoring/Container-Insights-EKS-logs.html
https://docs.aws.amazon.com/ja_jp/AmazonCloudWatch/latest/monitoring/Container-Insights-setup-logs-FluentBit.html