これはなに?
個人的な興味でNestJS, Firebaes Auth, GraphQLを使って認証機能を実装したので備忘録として残しておきます。
この記事のゴール
以下の理解を得ることをゴールとします
- NestJSでFirebase AuthのVerifyIdTokenを使ったAuthGuardの実装ができるようになること
↓リポジトリはこちら
1. Firebase adminの導入
インストールはこちらの公式の記事を参照してください
セットアップが完了したらfirebaseをモジュール全体から呼び出せるように設定していきます。
※ちなみに筆者は以下のようなディレクトリ構成にしています
src
 ├ decorators/
 ├ guards/
 ├ libs/
 ├ modules/
 │  └ auth/
 │     ├ models/
 │     ├ services/
 │     ├ auth.module.ts
 │     ├ auth.resolver.ts
 │     └ firebase-auth.strategy.ts
 │
 ├ app.module.ts
 └ main.ts
import { Global, Module } from '@nestjs/common'
import { FirebaseService } from './firebase.service'

@Global()
@Module({
  providers: [FirebaseService],
  exports: [FirebaseService],
})
export class FirebaseModule {}
ここではFirebaseServiceをexportして、
@Globalでモジュール全体で呼び出せるように設定しています。
import { Injectable } from '@nestjs/common'
import * as firebase from 'firebase-admin'
import { ServiceAccount } from 'firebase-admin'
import serviceAccount from '../../../firebase-service-account.json'

@Injectable()
export class FirebaseService {
  private firebaseApp: firebase.app.App

  constructor() {
    if (firebase.apps.length === 0) {
      this.firebaseApp = firebase.initializeApp({
        credential: firebase.credential.cert(serviceAccount as ServiceAccount),
      })
    }
  }

  getAuth = (): firebase.auth.Auth => {
    return this.firebaseApp.auth()
  }
}
2. 認証なしResolverの作成
まずはGuardを実装していないシンプルなResolverを作成していきます。
loginが呼ばれるとhogehogeというダミーのユーザIDを返す処理を実装しています
import { Mutation, Resolver } from '@nestjs/graphql'
import { AuthLoginService } from './services/auth-login.service'
import { Auth } from '@/modules/auth/models/auth-login.model'

@Resolver()
export class AuthResolver {
  constructor(private readonly authLoginService: AuthLoginService) {}

  @Mutation(() => Auth)
  async login() {
    const dummyUserId = 'hogehoge'
    return this.authLoginService.login(dummyUserId)
  }
}
import { Module } from '@nestjs/common'
import { PassportModule } from '@nestjs/passport'
import { AuthController } from './auth.controller'
import { AuthResolver } from './auth.resolver'
import { AuthLoginService } from './services/auth-login.service'
import { AuthSignupService } from './services/auth-signup.service'
import { FirebaseAuthStrategy } from '@/modules/auth/firebase-auth.strategy'

@Module({
  imports: [PassportModule],
  providers: [
    AuthLoginService,
    AuthResolver,
  ],

})
export class AuthModule {}
import { Injectable, Logger } from '@nestjs/common'

@Injectable()
export class AuthLoginService {
  async login(userId: string) {
    return {
      userId: userId,
    }
  }
}
import { Field, ObjectType } from '@nestjs/graphql'

@ObjectType()
export class Auth {
  @Field()
  userId: string
}
実際にplaygroundで結果を確認してみます。

はい、無事に表示されました。
3. 認証機能の作成
AuthGuardの作成
次にいよいよ認証部分であるGuardの実装をしていきます。
import {
  ForbiddenException,
  Injectable,
  Logger,
  UnauthorizedException,
} from '@nestjs/common'
import { PassportStrategy } from '@nestjs/passport'
import { auth, FirebaseError } from 'firebase-admin'
import * as firebaseAdmin from 'firebase-admin'
import { Strategy } from 'passport-http-bearer'
import { FirebaseService } from '@/libs/firebase/firebase.service'

type DecodedIdToken = firebaseAdmin.auth.DecodedIdToken
export type FirebaseAuthDecodedUser = Readonly<
  Pick<DecodedIdToken, 'uid' | 'email' | 'email_verified'>
>

export constStrategyName= 'firebase-auth'

@Injectable()
export class FirebaseAuthStrategy extends PassportStrategy(
  Strategy,
StrategyName
) {
  private readonly checkRevoked = false
  private readonly logger = new Logger(FirebaseAuthStrategy.name)

  constructor(private readonly firebase: FirebaseService) {
    super()
  }

async validate(jwtToken: string): Promise<auth.UserRecord> {
    const payload = await this.authorize(jwtToken)
    const user = await this.firebase.getAuth().getUser(payload.uid)
    if (user.disabled) {
      throw new ForbiddenException()
    }

    return user
  }

  private async authorize(jwtToken: string): Promise<DecodedIdToken> {
    try {
      return await this.firebase
        .getAuth()
        .verifyIdToken(jwtToken, this.checkRevoked)
    } catch (err: unknown) {
      const e = err as FirebaseError
      if (e.code === 'auth/id-token-expired') {
        this.logger.warn('auth/id-token-expired')
      } else if (e.code === 'auth/id-token-revoked') {
        this.logger.warn('auth/id-token-revoked')
      }

      throw new UnauthorizedException()
    }
  }
}
tokenの検証をvefifyIdTokenで行います。
第一引数にはjwt, 第二引数にcheckRevokedを指定していて、
checkRevokedはユーザーが有効であるかどうかと、jwtに対するセッションが有効かどうかを検証しています。
Authorizationヘッダからtokenを取得する方法として今回はpassport-http-bearerを使用しています。
import { ExecutionContext, Injectable } from '@nestjs/common'
import { GqlExecutionContext } from '@nestjs/graphql'
import { AuthGuard } from '@nestjs/passport'

@Injectable()
export class GqlFirebaseAuthGuard extends AuthGuard('firebase-auth') {
  getRequest(context: ExecutionContext) {
    const ctx = GqlExecutionContext.create(context)
    return ctx.getContext().req
  }
}
4. 認証付きResolverを実装してPlaygroundで確認
import { UseGuards } from '@nestjs/common'
import { Mutation, Resolver } from '@nestjs/graphql'
import { AuthLoginService } from './services/auth-login.service'
import { CurrentUser } from '@/decorators/current-user.decorator'
import { GqlFirebaseAuthGuard } from '@/guards/gql-firebase-auth.guard'
import { FirebaseAuthDecodedUser } from '@/modules/auth/firebase-auth.strategy'
import { Auth } from '@/modules/auth/models/auth-login.model'

@Resolver()
export class AuthResolver {
  constructor(private readonly authLoginService: AuthLoginService) {}

  @Mutation(() => Auth)
  @UseGuards(GqlFirebaseAuthGuard)
  async login(@CurrentUser() user: FirebaseAuthDecodedUser) {
    const userId = user.uid
    return this.authLoginService.login(userId)
  }
}
@UseGuards(GqlFirebaseAuthGuard)
上を追記してloginに認証機能を付与します。
import { UseGuards } from '@nestjs/common'
import { Mutation, Resolver } from '@nestjs/graphql'
import { AuthLoginService } from './services/auth-login.service'
import { CurrentUser } from '@/decorators/current-user.decorator'
import { GqlFirebaseAuthGuard } from '@/guards/gql-firebase-auth.guard'
import { FirebaseAuthDecodedUser } from '@/modules/auth/firebase-auth.strategy'
import { Auth } from '@/modules/auth/models/auth-login.model'

@Resolver()
export class AuthResolver {
  constructor(private readonly authLoginService: AuthLoginService) {}

  @Mutation(() => Auth)
  @UseGuards(GqlFirebaseAuthGuard)
  async login(@CurrentUser() user: FirebaseAuthDecodedUser) {
    const userId = user.uid
    return this.authLoginService.login(userId)
  }
}
また、認証され場合は認証済みのユーザー情報からidを返すように変更します。
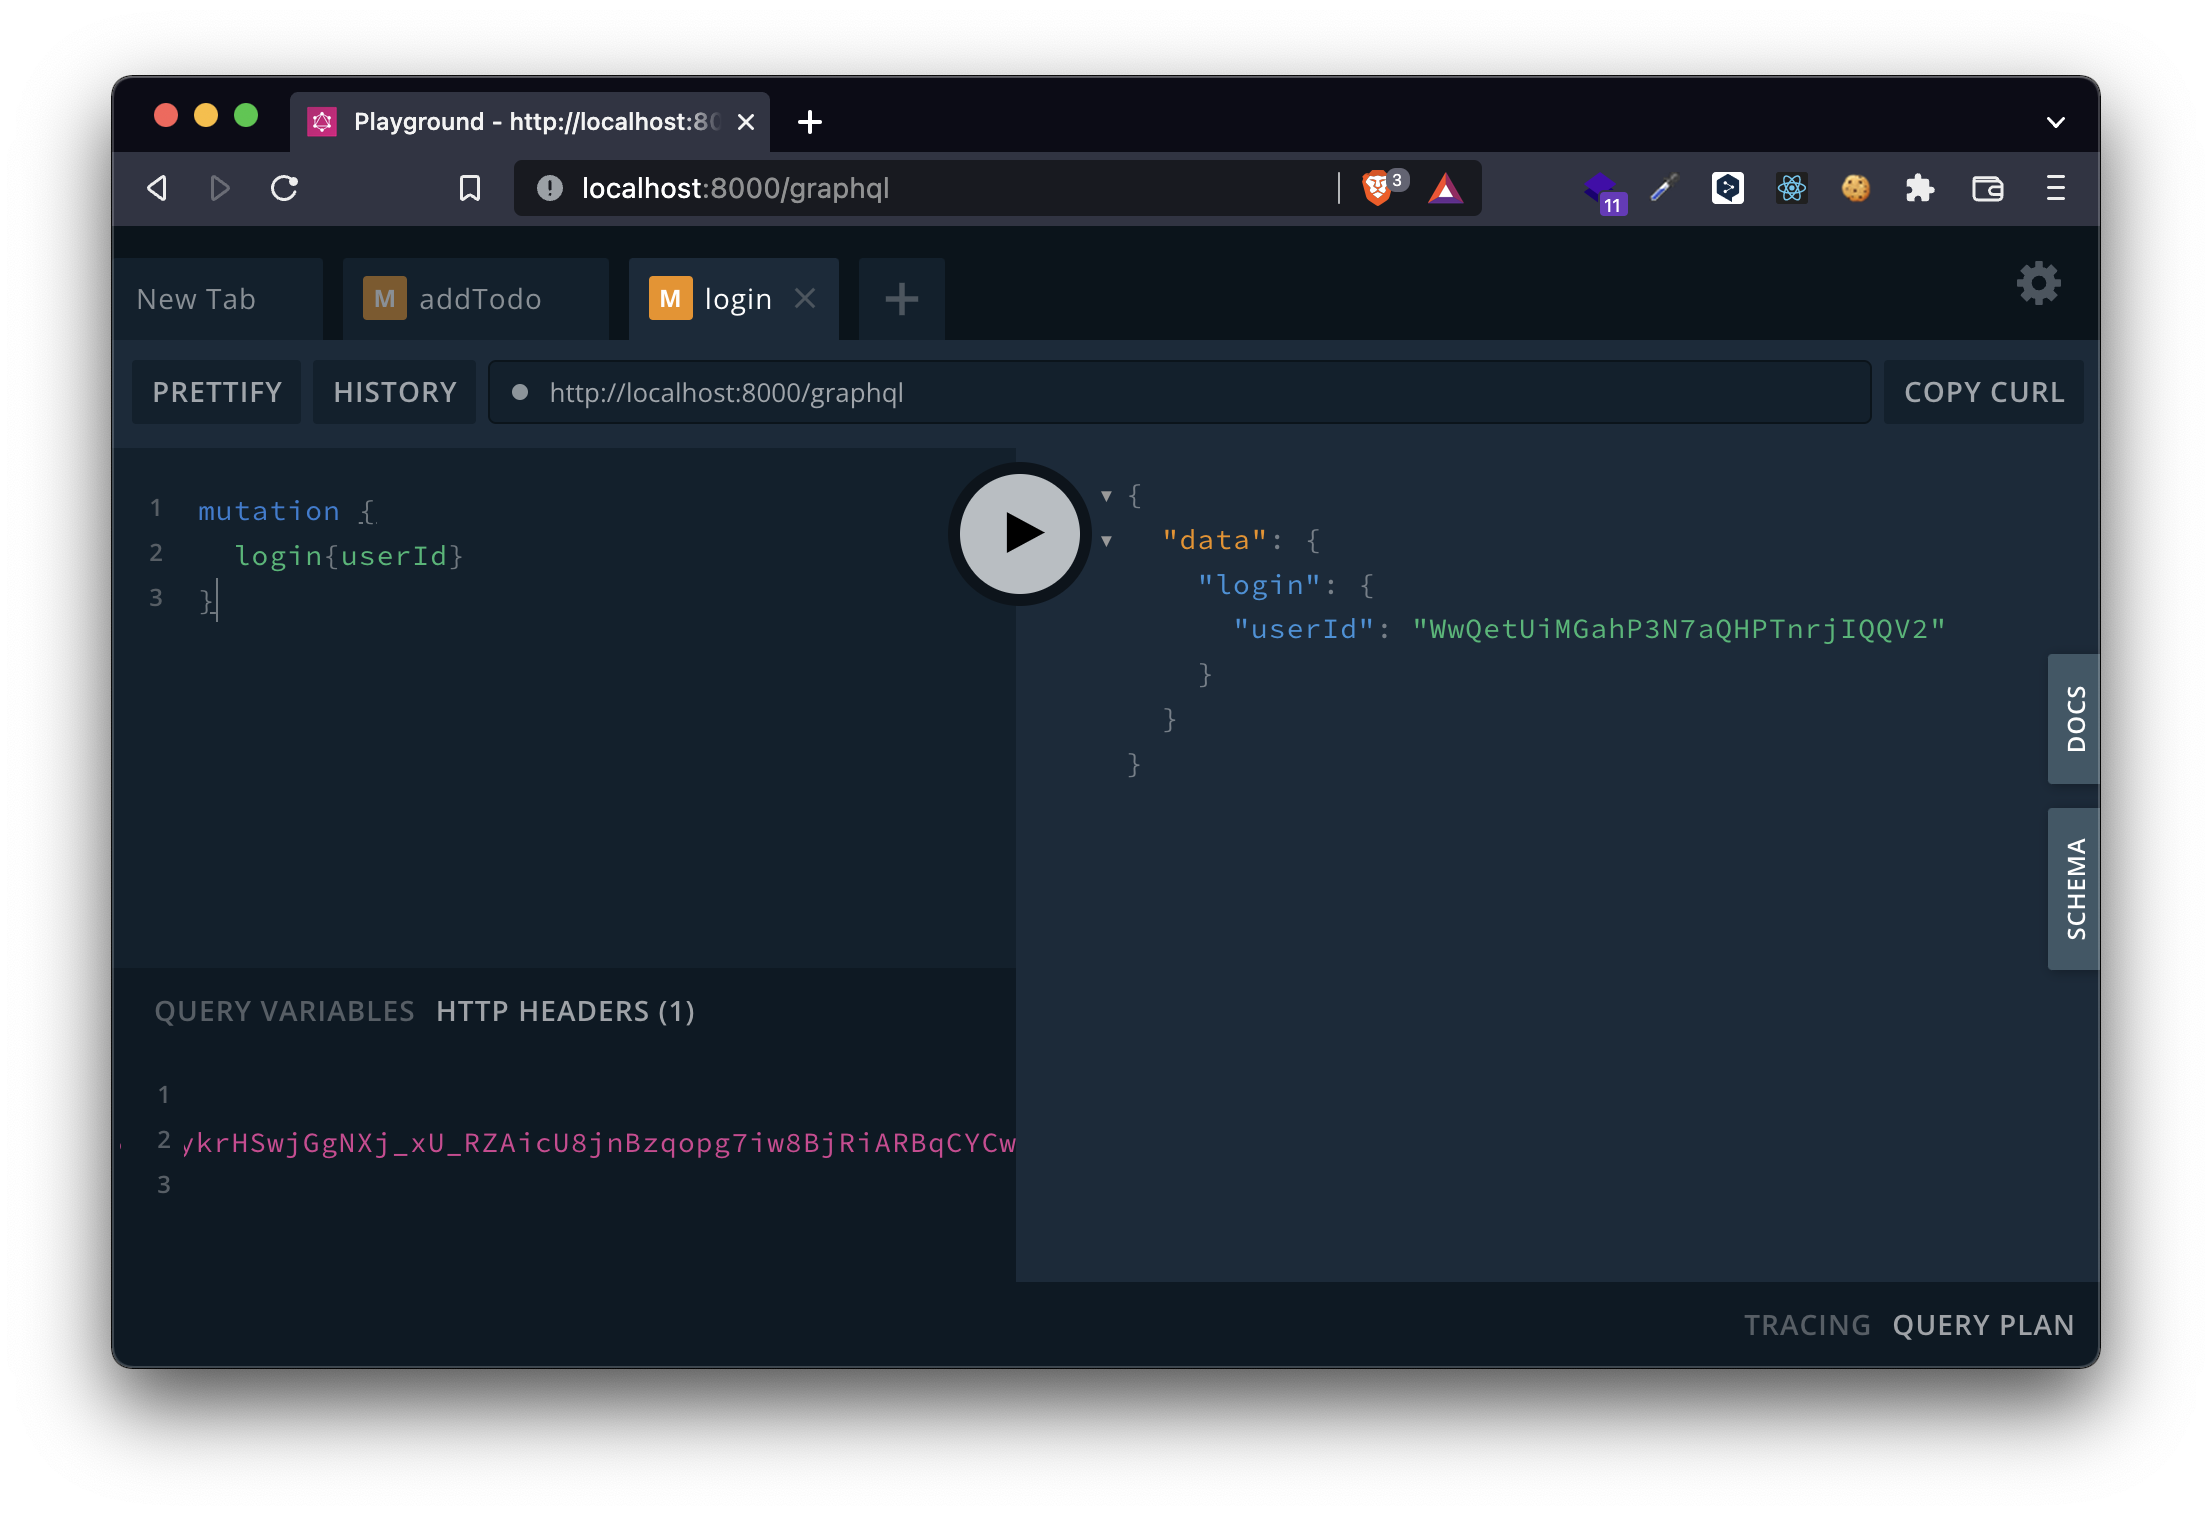
無事Guard付きのloginが実行できました!
余談
GrahQLの書き方や、Authorizationヘッダからどうやってトークンを取得しようか等に悩んでいましたが、無事実装できました!
引き続きこの技術スタックで開発を進めていこうと思います!
ではまた!
参考記事