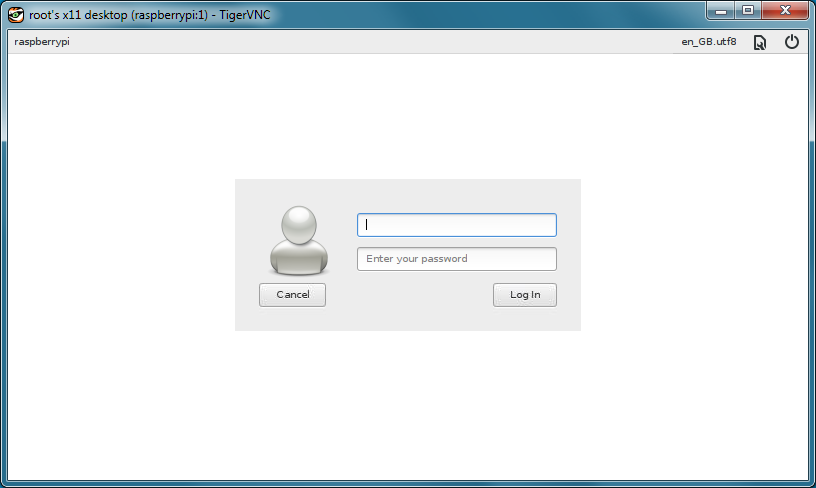
- Raspbian 2016-09-23より、RealVNCが使える
=>
[メモ] Raspberry Pi : VNCサーバ設定(raspbian 2016-09-23~)
概要
- 元記事: VNC server in Jessie (using a systemd service)
のまま - lightdmでの方法を追加

ためした環境
- Raspbeey Pi 2 / 3
-
2016-05-27-raspbian-jessie.img(X使うので、liteじゃないよ)
手順
その1: systemd
-
いつもの(microSDにimgやいて、
sudo apt-get update; sudo apt-get upgrade -y; sudo reboot..) -
インストール:
sudo apt-get install -y tightvncserver -
手動で一回立ち上げて、パスワード設定:
vncserver :1 -
systemdのファイル編集:
sudo vi /etc/systemd/system/vncserver@.service/etc/systemd/system/vncserver@.service
[Unit]
Description=Remote desktop service (VNC)
After=syslog.target network.target
[Service]
Type=forking
User=pi
PAMName=login
PIDFile=/home/pi/.vnc/%H:%i.pid
ExecStartPre=-/usr/bin/vncserver -kill :%i > /dev/null 2>&1
ExecStart=/usr/bin/vncserver -depth 24 -geometry 1280x800 :%i
ExecStop=/usr/bin/vncserver -kill :%i
[Install]
WantedBy=multi-user.target
5. サービス登録:<br>`sudo systemctl daemon-reload && sudo systemctl enable vncserver@1.service`
6. 再起動:<br>`sudo reboot`
7. `vncviewer.exe`(Windows クライアント)をダウンロードインストール
- [RealVNC](https://www.realvnc.com/download/viewer/windows/) 名前とEmailの登録が必要
<br>
- [TigerVNC](https://github.com/TigerVNC/tigervnc/releases) => [Binaries are available from bintray:](https://bintray.com/tigervnc/stable/tigervnc/1.6.0)
<br>
8. `VNC Server:`へ、"ラズパイのIPアドレス:5901"を入れて `[Connect]`、パスワードいれてログイン

9. もうテレビでGUI loginしなくてもいいなら、Textログインでいいよね??
- `sudo raspi-config` で、`3 Boot Options` > `B1 Console` を選択、再起動。
### その2: `lighdm`
1. いつもの(microSDにimgやいて、`sudo apt-get update; sudo apt-get upgrade -y; sudo reboot`..)
2. インストール: <br>`sudo apt-get install -y tightvncserver`
3. 手動で一回立ち上げて、パスワード設定: <br>`vncserver :1`
<br>やらないと、パスなしになる
4. `lightdm`設定編集:<br>`sudo vi /etc/lightdm/lightdm.conf`
```txt:/etc/lightdm/lightdm.conf
...
... 最後方。コメントはずして編集
[VNCServer]
enabled=true
command=Xvnc
port=5900
width=1280
height=800
depth=24
-
sudo raspi-configの3 Boot Options sudo reboot-
vncviewer.exe(Windows クライアント)をダウンロードインストール、 -
VNC Server:へ、"ラズパイのIPアドレス:5900"を入れて[Connect]、パスワードいれてログイン
その他
- 画面のサイズをかえたい
設定ファイル/etc/systemd/system/vncserver@.serviceの1280x800を変更。サービス再起動。
sudo systemctl daemon-reload && sudo systemctl restart vncserver@1.service - セッションを増やす?
sudo systemctl enable vncserver@2.serviceで、IP_address:5902でログインできるが、、設定ファイルがUser=pi...
設定ログ
pi@raspberrypi:~ $ sudo apt-get install -y tightvncserver
Reading package lists... Done
Building dependency tree
Reading state information... Done
The following extra packages will be installed:
  xfonts-base
Suggested packages:
  tightvnc-java
The following NEW packages will be installed:
  tightvncserver xfonts-base
0 upgraded, 2 newly installed, 0 to remove and 33 not upgraded.
Need to get 6,736 kB of archives.
After this operation, 9,895 kB of additional disk space will be used.
Get:1 http://mirrordirector.raspbian.org/raspbian/ jessie/main tightvncserver armhf 1.3.9-6.5 [555 kB]
Get:2 http://mirrordirector.raspbian.org/raspbian/ jessie/main xfonts-base all 1:1.0.3 [6,181 kB]
Fetched 6,736 kB in 3s (2,013 kB/s)
Selecting previously unselected package tightvncserver.
(Reading database ... 118080 files and directories currently installed.)
Preparing to unpack .../tightvncserver_1.3.9-6.5_armhf.deb ...
Unpacking tightvncserver (1.3.9-6.5) ...
Selecting previously unselected package xfonts-base.
Preparing to unpack .../xfonts-base_1%3a1.0.3_all.deb ...
Unpacking xfonts-base (1:1.0.3) ...
Processing triggers for man-db (2.7.0.2-5) ...
Processing triggers for fontconfig (2.11.0-6.3) ...
Setting up tightvncserver (1.3.9-6.5) ...
update-alternatives: using /usr/bin/tightvncserver to provide /usr/bin/vncserver (vncserver) in auto mode
update-alternatives: using /usr/bin/Xtightvnc to provide /usr/bin/Xvnc (Xvnc) in auto mode
update-alternatives: using /usr/bin/tightvncpasswd to provide /usr/bin/vncpasswd (vncpasswd) in auto mode
Setting up xfonts-base (1:1.0.3) ...
pi@raspberrypi:~ $ vncserver :1

You will require a password to access your desktops.

Password:
Verify:
Would you like to enter a view-only password (y/n)? n

New 'X' desktop is raspberrypi:1

Creating default startup script /home/pi/.vnc/xstartup
Starting applications specified in /home/pi/.vnc/xstartup
Log file is /home/pi/.vnc/raspberrypi:1.log

pi@raspberrypi:~ $ sudo vi /etc/systemd/system/vncserver@.service
pi@raspberrypi:~ $ sudo systemctl daemon-reload && sudo systemctl enable vncserver@1.service
Created symlink from /etc/systemd/system/multi-user.target.wants/vncserver@1.service to /etc/systemd/system/vncserver@.service.
pi@raspberrypi:~ $ sudo reboot
