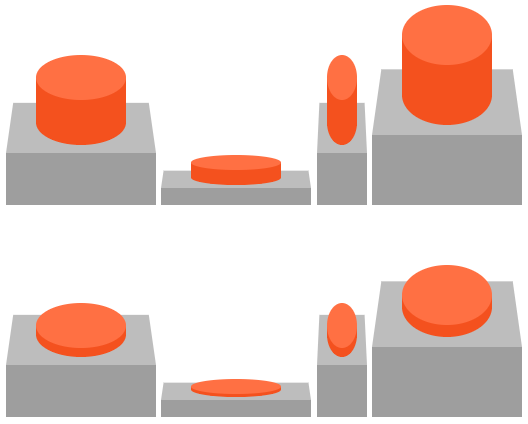
完成形
 # ボタン本体の作成
※説明順にCSSを追加していくので一部読みにくいCSSになっているかと思います。
HTML
<div class="bt">
  <div class="bt-top"></div>
  <div class="bt-body"></div>
</div>
ボタン全体の大きさを決める
なるべく細部のCSSは固定したいので各パーツはこの値に対する%で指定していく。
今回はw=300px,h=300pxとする。
.bt{
  width: 300px;
  height: 300px;
}
各パーツのheightを決める
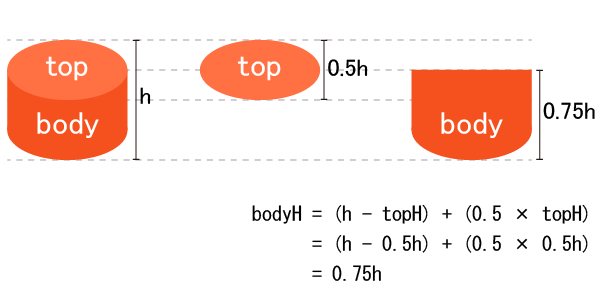
下の図を参考に全体のheightに対する上面(top)と側面(body)のheightを決める。
色は上面に対して側面をやや濃くするとそれっぽく見える。
.bt-top{
  width: 100%;
  height: 50%;
  background-color: #FF7043;
}
.bt-body{
  width: 100%;
  height: 75%;
  background-color: #F4511E;
}
イメージ図:各パーツのheight
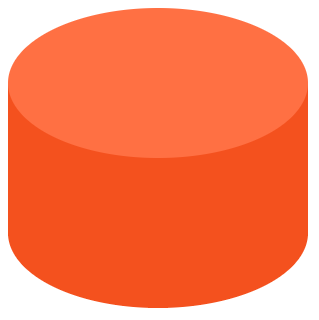
現時点での形

丸みを加える
上面は単純に楕円形にすれば良い。
側面は右下と左下のみ丸みを加えるが、上面と同じ曲率にしなければならない。widthが同じなので水平方向は同じく50%で良いが、heightは違うので少し計算が必要。
上面のheightをtopH、側面のheightをbodyH、側面の垂直方向のradius半径をbodyVR[%]とすると、
bodyVR = ( topH / bodyH ) × 50%
で求められる。
※今回だとbodyVR = ( 50% / 75% ) × 50% = 2500% / 75 = 33.333…%
.bt-top{
  width: 100%;
  height: 50%;
  background-color: #FF7043;
  /* ここから新規項目 */
  border-radius: 50%;
}
.bt-body{
  width: 100%;
  height: 75%;
  background-color: #F4511E;
  /* ここから新規項目 */
  border-radius: 0 0 50% 50% / 0 0 33.3% 33.3%; /*簡易的な数値*/
  border-radius: 0 0 50% 50% / 0 0 calc(2500% / 75) calc(2500% / 75); /*より厳密な数値*/
}
現時点での形

上面と側面を重ねる
positionを使用。
.bt{
  width: 300px;
  height: 300px;
  /* ここから新規項目 */
  position: relative;
}
.bt-top{
  width: 100%;
  height: 50%;
  background-color: #FF7043;
  border-radius: 50%;
  /* ここから新規項目 */
  position: relative;
  z-index: 1;
}
.bt-body{
  width: 100%;
  height: 75%;
  background-color: #F4511E;
  border-radius: 0 0 50% 50% / 0 0 33.3% 33.3%; /*簡易的な数値*/
  border-radius: 0 0 50% 50% / 0 0 calc(2500% / 75) calc(2500% / 75); /*より厳密な数値*/
  /* ここから新規項目 */
  position: absolute;
  bottom: 0;
  z-index: 0;
}
現時点での形
ボタンを押し込む
今回はボタン全体に対してクリックを受け付ける(側面をクリックしても動作する)。
上面は高さが固定で位置だけの移動となる。
今回は上面のheightが50%なので、top<100%-50%にする。
※top>=100%-50%になると側面より下にめり込む位置になる。
側面は位置が固定で高さが以下のように変更となる。
bodyH = 100% - ( topH / 2 + (上面のtop) )
※今回は bodyH = 100% - ( 50% / 2 + (40%) ) = 35%
注意点としてはheightが変わるのでそれに伴いborder-radiusも再計算する必要があること。
.bt:active > .bt-top{
  top: 40%;
}
.bt:active > .bt-body{
  height: 35%;
  border-radius: 0 0 50% 50% / 0 0 71% 71%; /*簡易的な数値*/
  border-radius: 0 0 50% 50% / 0 0 calc(2500% / 35) calc(2500% / 35); /*より厳密な数値*/
}
ボタンのメイン部分の完成

.btのサイズのみを変更してみる
土台の作成
HTML
<div class="bt-outer">
  <div class="bt">
    <div class="bt-top"></div>
    <div class="bt-body"></div>
  </div>
  <div class="base-top"></div>
  <div class="base-body"></div>
</div>
ボタン部分のCSS修正
widthとheightを.bt-outerに対する割合に変更。
.bt{
  /* width: 300px; 変更前*/
  width: 60%;
  /* height: 300px; 変更前*/
  height: 60%;
  margin: 0 auto;
  position: relative;
}
全体と土台のCSS
perspectiveについては勉強不足なので結果を見つつ値を調整。
.bt-outer{
  width: 400px;
  height: 300px;
  transform-style: preserve-3d;
  perspective: 500px;
}
.base-top{
  width: 100%;
  height: 50%;
  background-color: #BDBDBD;
  transform: rotateX(45deg);
  transform-origin: 50% 100%;
  position: absolute;
  bottom: 35%;
}
.base-body{
  width: 100%;
  height: 35%;
  background-color: #9E9E9E;
  position: absolute;
  bottom: 0;
}
土台付きボタン完成
 ### `.bt-outer`のサイズのみを変更してみる

### `.bt-outer`のサイズのみを変更してみる

おまけ
側面をグラデーションにしたver.

.bt-body{
  /* 略 */
  /* background-color: #F4511E; */
  background: linear-gradient(to right,#FF7043,#E64A19 70%,#E64A19 80%,#FF7043);
  /* 略 */
}


