目的
【Windows7】VirtualBox + Vagrant + Ruby + Rails4 開発環境の構築【初心者必見】
【Windows7】VirtualBox + Vagrant + Ruby + Rails4 開発環境の構築【mysql編】
ここまで仮想マシンでの開発環境を構築してきました。
本編ではRubyおよびRailsのIDEとして有名なRubyMineを使用してリモートデバックを行うこと記述していきたいと思います。
1234番ポートの転送設定
RubyMineのリモートデバッカーは1234番ポートを使用します。
ですので、これまで通りVagrantfileを編集します。
※仮想マシンが起動中の場合はvagrant haltで停止しておいてください。
今までの設定が全て記載されていれば
  # Create a forwarded port mapping which allows access to a specific port
  # within the machine from a port on the host machine. In the example below,
  # accessing "localhost:8080" will access port 80 on the guest machine.
  # config.vm.network "forwarded_port", guest: 80, host: 8080
  config.vm.network "forwarded_port", guest: 80, host: 80
  config.vm.network :forwarded_port, guest: 3000, host: 3000
となっているハズですが、これを、
  # Create a forwarded port mapping which allows access to a specific port
  # within the machine from a port on the host machine. In the example below,
  # accessing "localhost:8080" will access port 80 on the guest machine.
  # config.vm.network "forwarded_port", guest: 80, host: 8080
  config.vm.network "forwarded_port", guest: 80, host: 80
  config.vm.network :forwarded_port, guest: 3000, host: 3000
  config.vm.network :forwarded_port, guest: 1234, host: 1234
のように1234番ポートの設定を追加します。
編集が終わったらvagrant upで仮想マシンを起動します。
ruby-debug-ideのインストール
リモートデバッグが出来るように、ruby-debug-ide を入れます。
C:\src\work\CentOS6.5\sample\Gemfileに下記を追加します。
gem 'ruby-debug-ide'
gem 'debase'
ここ作業は仮想マシンとSSH接続したターミナルでの作業となります。
> cd /vagrant/sample
> bundle install
sampleアプリの起動
ここ作業は仮想マシンとSSH接続したターミナルでの作業となります。
> cd /vagrant/sample
> rdebug-ide --port 1234 --dispatcher-port 26162 --h 0.0.0.0 -- bin/rails s
を実行します。実行すると
Fast Debugger (ruby-debug-ide 0.4.22, debase 0.1.0) listens on 0.0.0.0:1234
と表示されてRubyMineの接続待ちとなります。
RubyMineの設定
RubyMineで前回作成したC:\src\work\CentOS6.5\sampleを読み込みます。
※RubyMineの基本的な操作説明は省略します。
読み込んだら
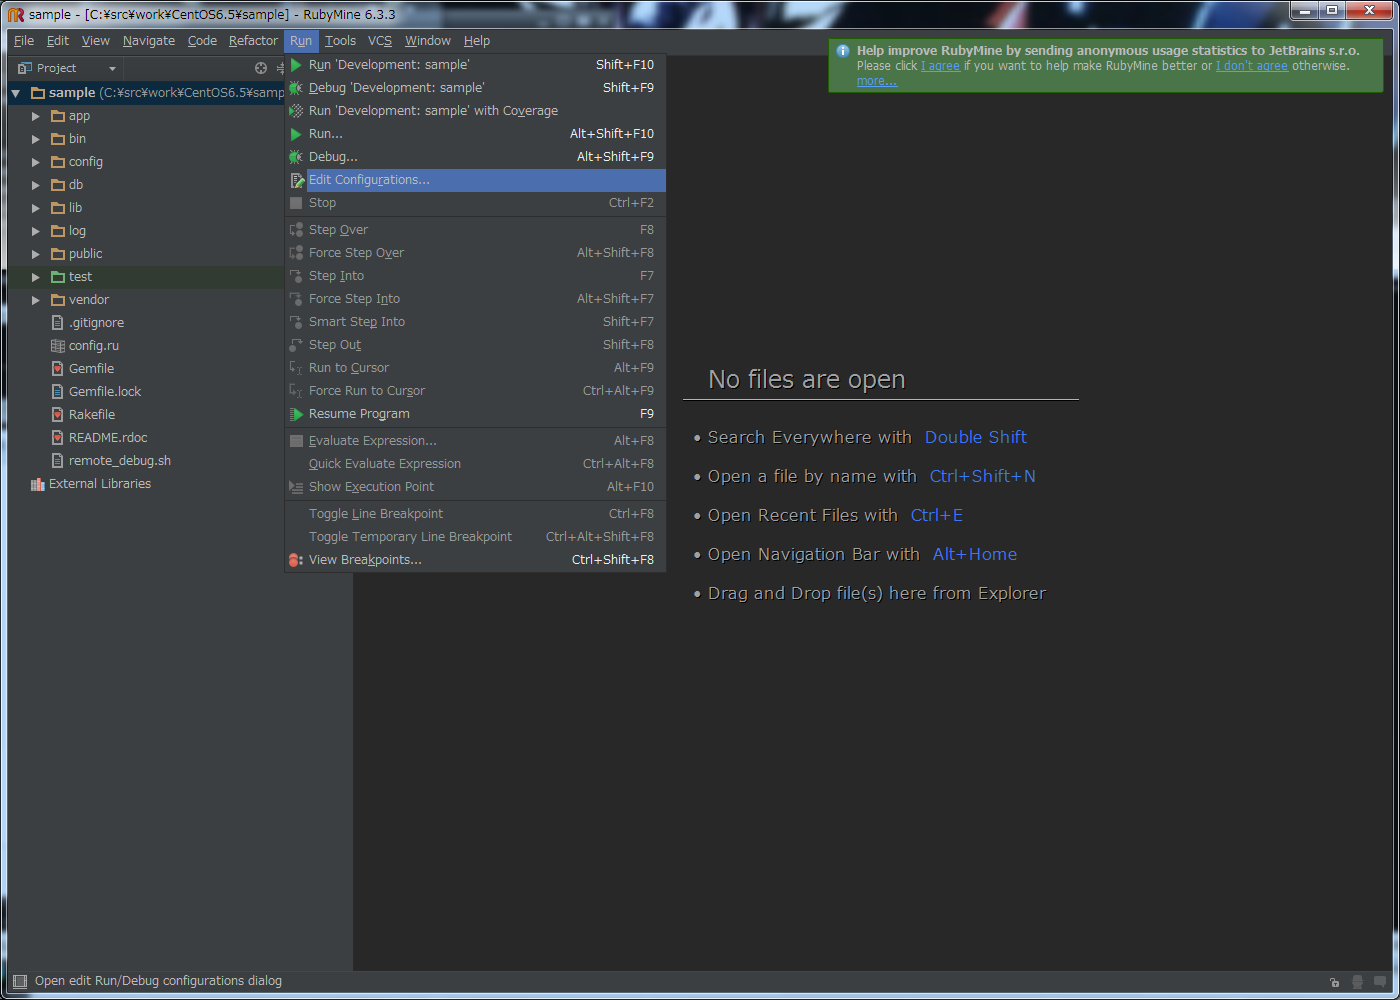
「Run」->「Edit Configurations...」を選択します。
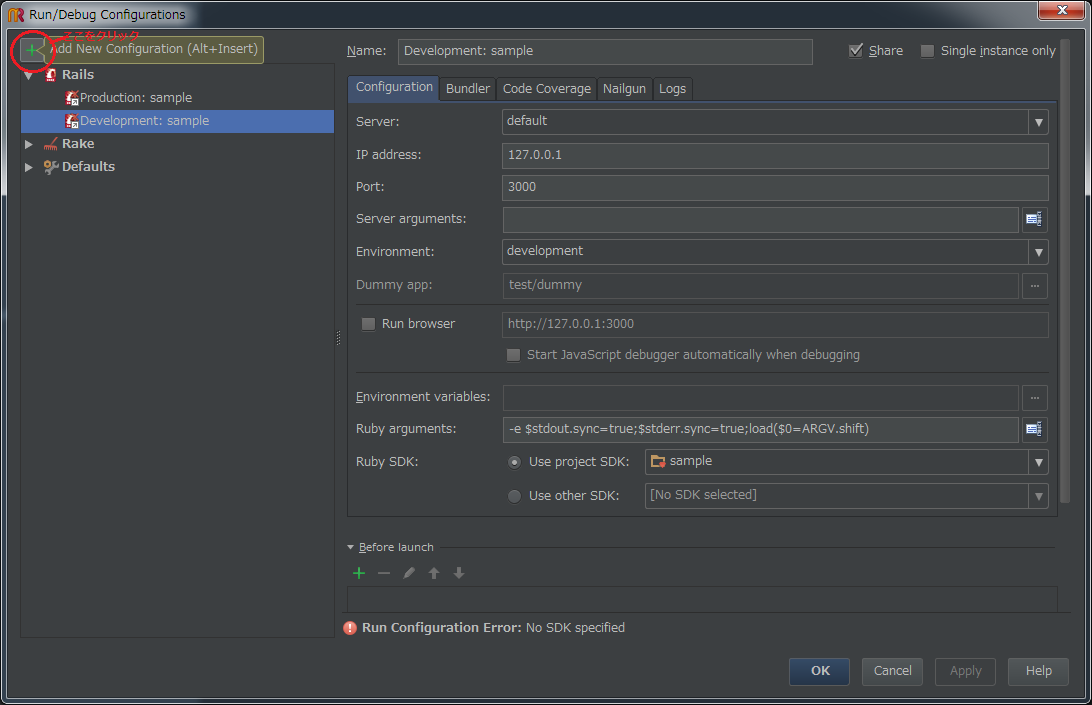
左上赤枠の「+」ボタンを押下します。
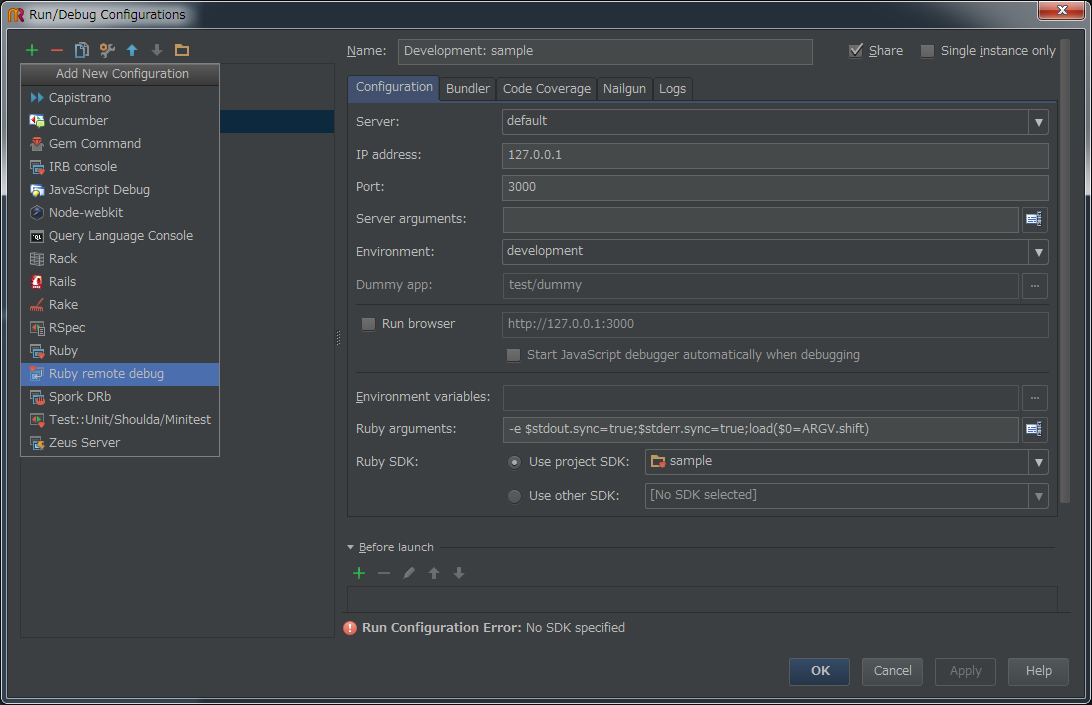
「Ruby remote debug」を選択します。
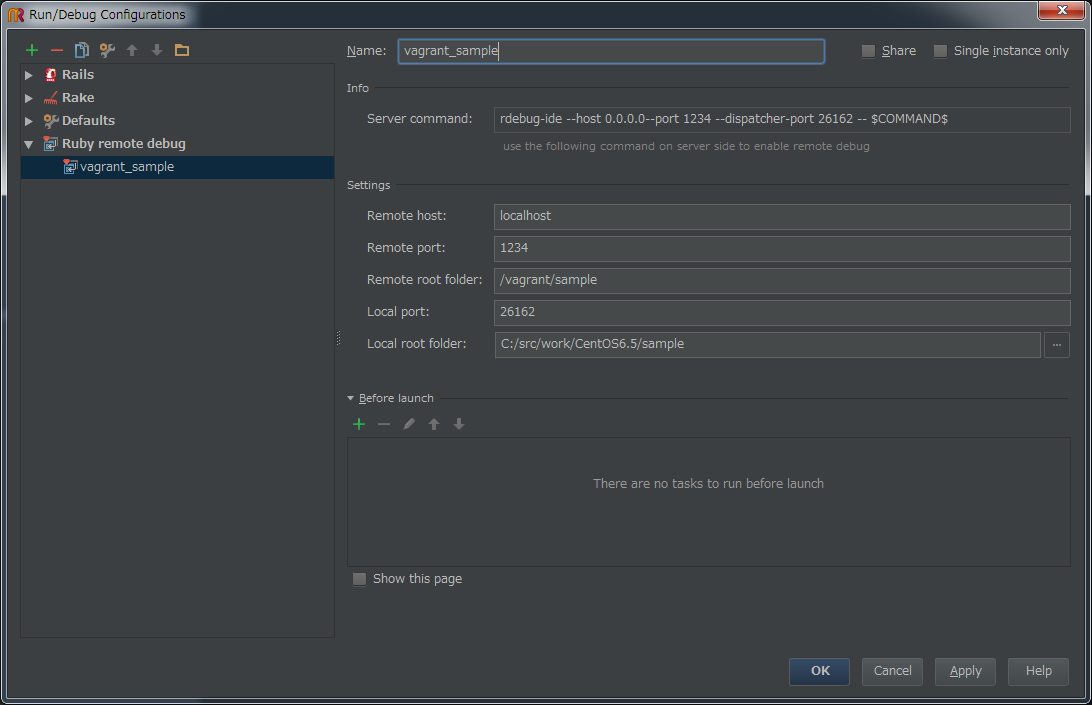
Name:vagrant_sample ← ここは任意です
Remote root folder: /vagrant/sample
Local root folder: C:\src\work\CentOS6.5\sample
を設定してOKを押下します。
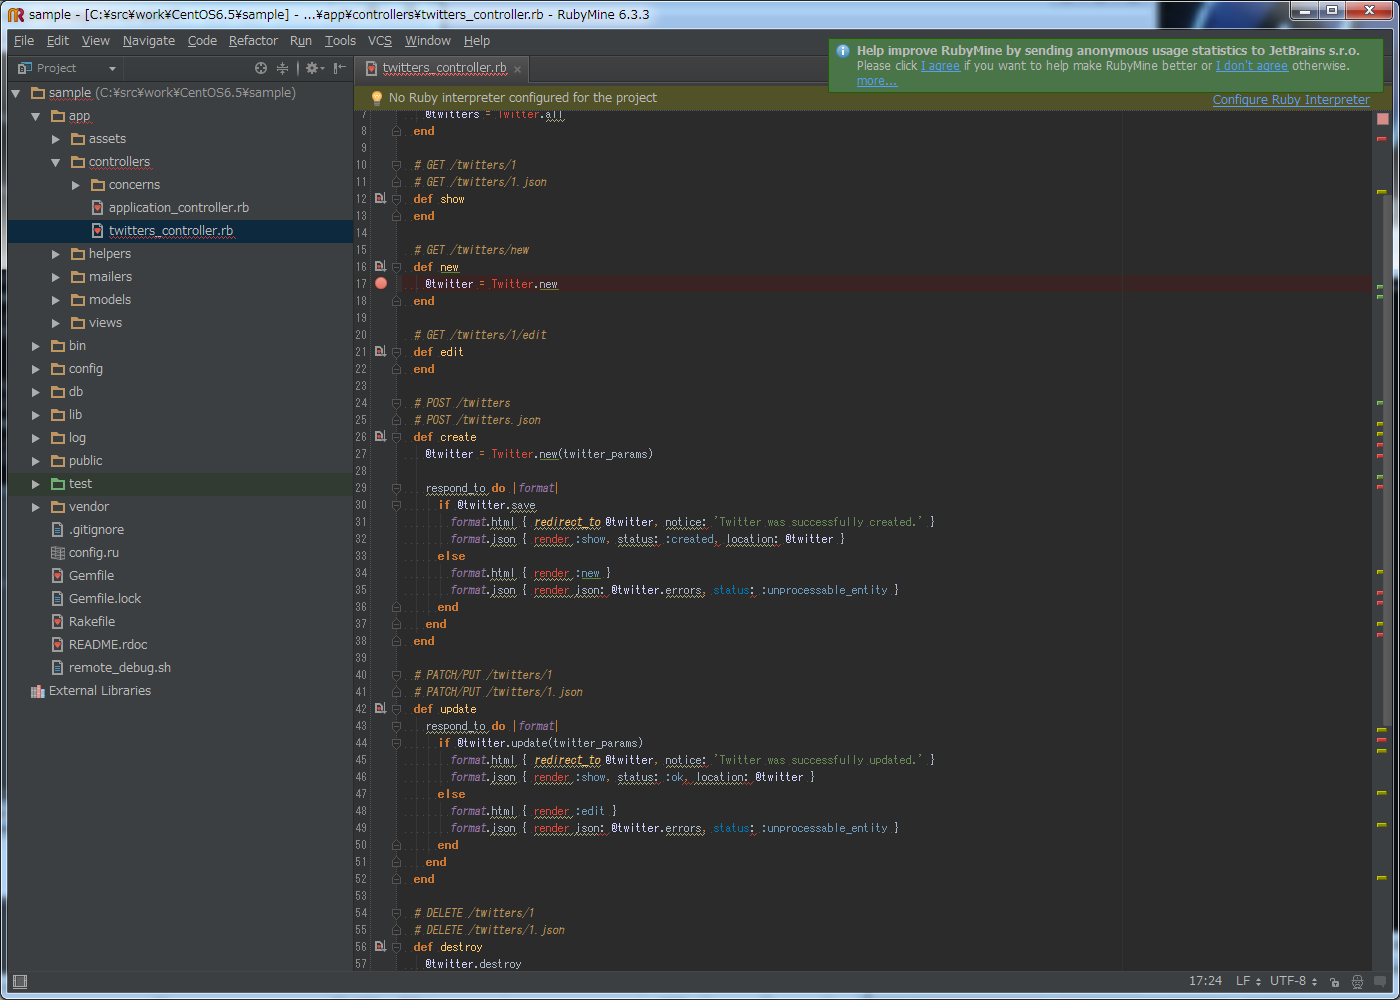
app\controllers\twitters_controller.rbの17行目あたりにブレークポイントを張ってみました。
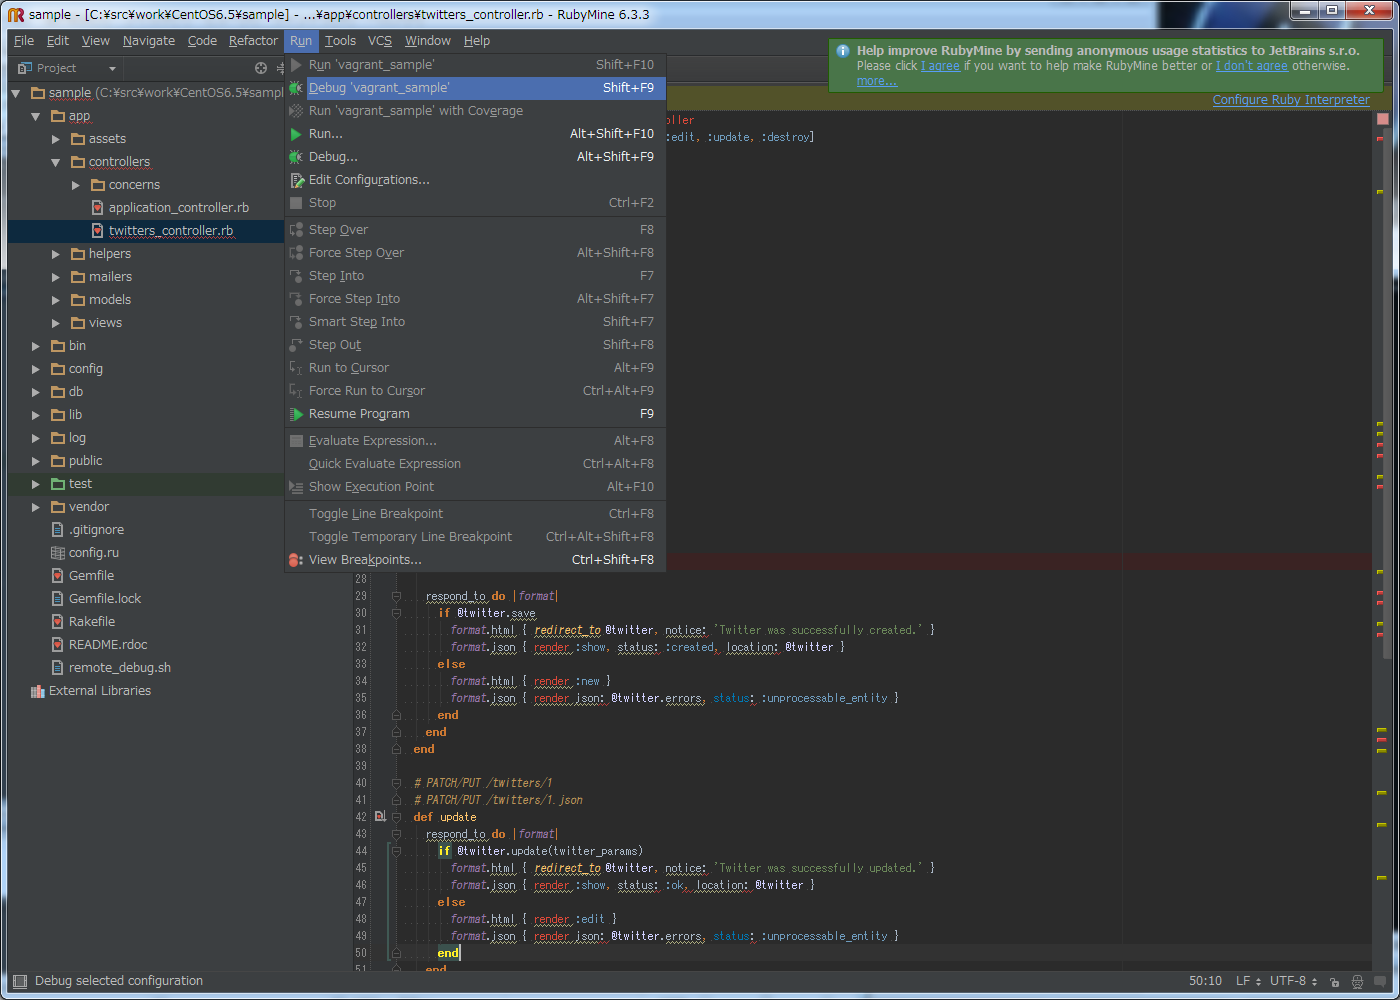
「Run」->「Debug 'vagrant_sample'」を選択します。
先ほどの「sampleアプリの起動」で
Fast Debugger (ruby-debug-ide 0.4.22, debase 0.1.0) listens on 0.0.0.0:1234
と表示されていたターミナルですが、
=> Booting WEBrick
=> Rails 4.1.7 application starting in development on http://0.0.0.0:3000
=> Run `rails server -h` for more startup options
=> Notice: server is listening on all interfaces (0.0.0.0). Consider using 127.0.0.1 (--binding option)
=> Ctrl-C to shutdown server
[2014-11-07 15:50:37] INFO  WEBrick 1.3.1
[2014-11-07 15:50:37] INFO  ruby 2.1.4 (2014-10-27) [x86_64-linux]
[2014-11-07 15:50:37] INFO  WEBrick::HTTPServer#start: pid=3197 port=3000
と表示されrails serverが起動されます。
ブラウザで
http://localhost:3000/twitters
にアクセスします。
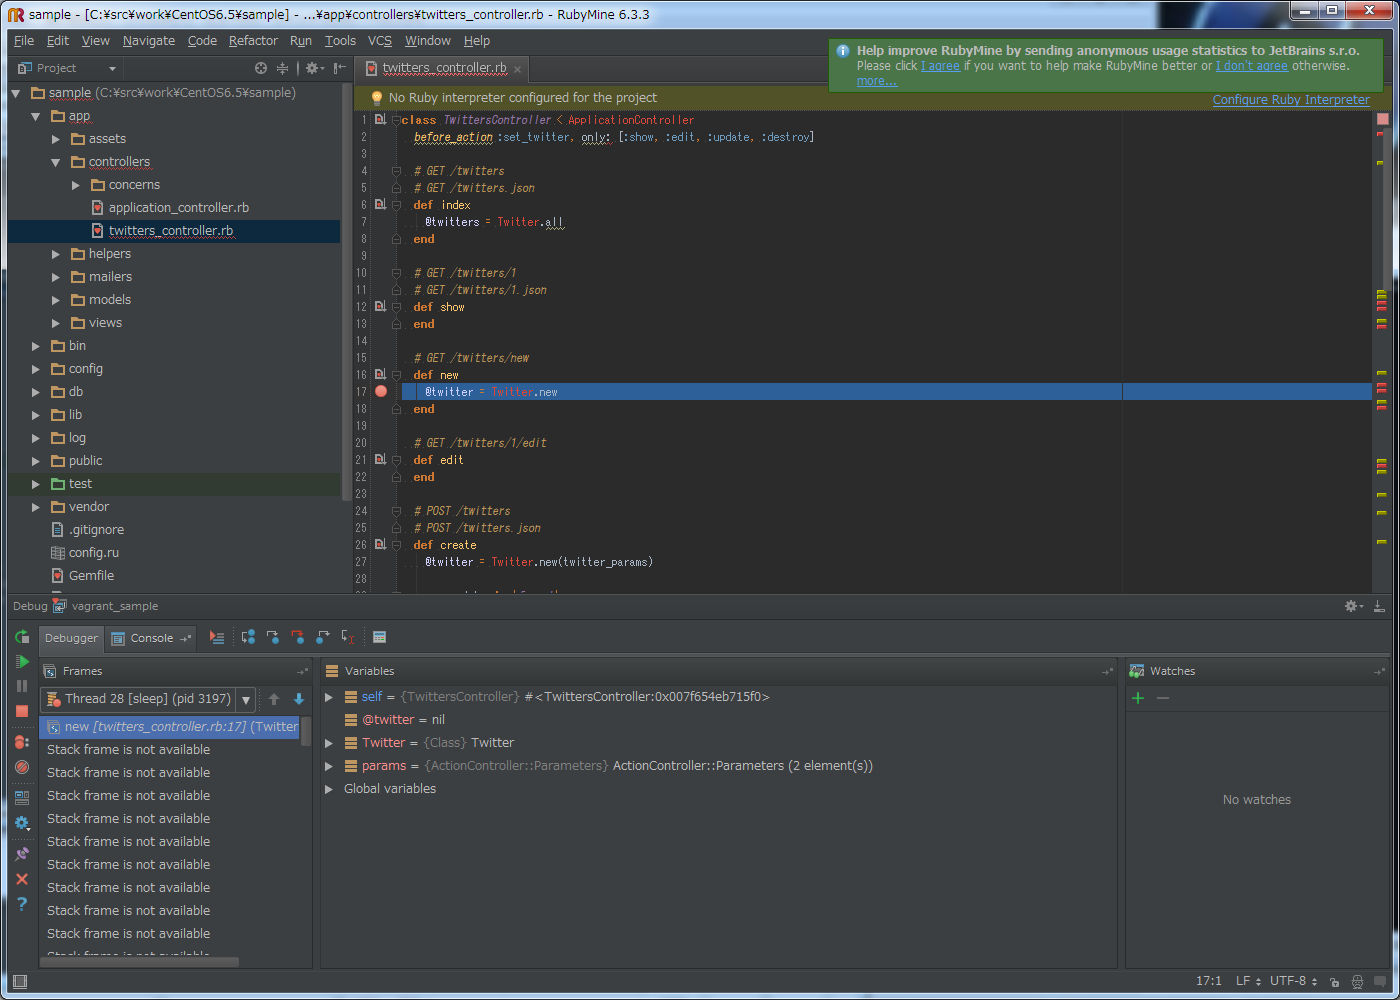
「New Twitter」のリンクをクリックすると
のように先ほど設定したブレークポイントで止まったことが確認できます。
関連エントリ
【Windows7】VirtualBox + Vagrant + Ruby + Rails4 開発環境の構築【初心者必見】
【Windows7】VirtualBox + Vagrant + Ruby + Rails4 開発環境の構築【mysql編】
【Yosemite】Mac OSX 10.10 Yosemite に Ruby + Rails4 開発環境の構築【初心者必見】
【Yosemite】Mac OSX 10.10 Yosemite にAMP環境の構築【初心者必見】【続編】
筆者紹介
札幌圏でリモート開発、在宅勤務を中心としたシステム開発の会社を立ち上げました!
ローラハウス
