JAWS Days 2019 Alexaワークショップの資料です。
前提
- AWS Coupon $25が提供されます
- Code Star(CloudFormation)により複数のリソースを立ち上げます。消し忘れによる課金に注意してください
- Twilioは無料トライアルアカウントがありますが、すでにトライアル期間を終了しているなどの場合、以下の課金が発生します
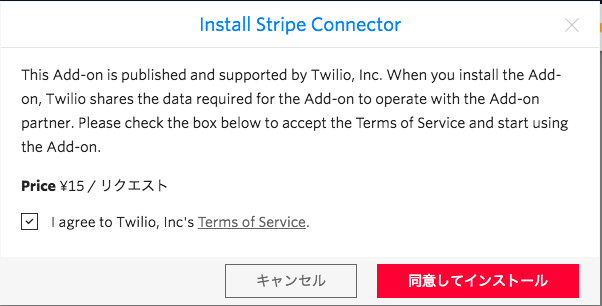
- Twilio Payは1リクエスト(成功したリクエスト、もしくはトークン作成成功時のみ課金対象となります)あたり15円の課金が発生します
- Twilioで取得した電話番号にも課金が発生します
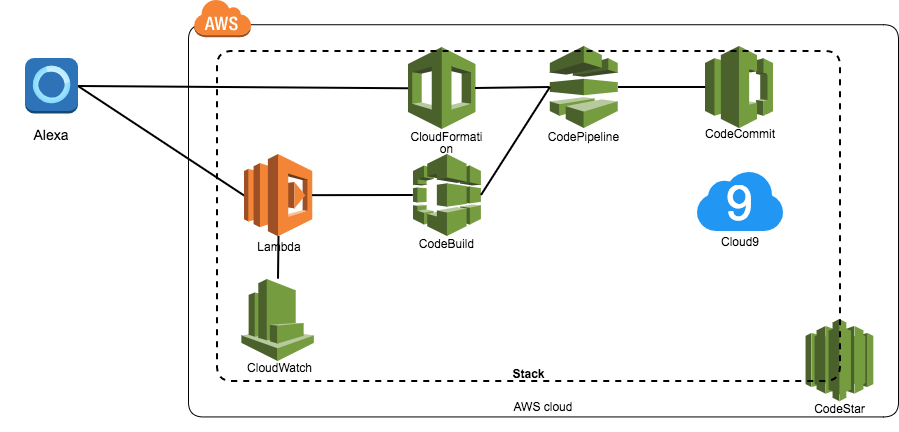
構成
Goal
AWSのリソースをフル活用した、Alexaスキルバックエンドの開発を体験する。
Checkpoint
- CodeStar他AWSをフル活用してAlexaスキルを開発する
- Cloud9を用いたインブラウザコーディングを体験する
- CodeStarを利用したCI / CDパイプラインの構築・運用について体験する
- Twilio / Stripeを用いたオンライン決済を体験する
- SAMを用いたServerless APIの実装を体験する
- AlexaのAPIを活用してユーザーに電話をかける実装を体験する
事前準備
本ワークショップでは、以下のアカウントが必要です。
事前に必ず用意してください。
- AWSアカウント
- Amazon開発者アカウント(日本語)
- Stripeアカウント
- Twilioアカウント
AWSアカウント
本ワークショップでは、AWS Lambda・CodeStarをはじめとした多数のAWSリソースを利用します。
https://aws.amazon.com/jp/register-flow/ より作成してください。
※当日はAWS Japanより25ドルのクーポンを提供していただきます。
Amazon開発者アカウント(日本語)
https://developer.amazon.com/ja/
https://developer.amazon.com/ja/blogs/alexa/post/9f852a38-3a44-48bd-b78f-22050269d7c7/hamaridokoro
Stripeアカウント
Twilio Payの決済にStripeを利用します。
https://dashboard.stripe.com/register よりアカウントを事前に作成してください。
※テストモードを利用します。本番環境利用の申請は不要です
Twilioアカウント
電話を利用した決済に、Twilioで取得した電話番号とTwilio Payが必要です。
https://jp.twilio.com/docs/usage/tutorials/how-to-use-your-free-trial-account
AWS / Alexaのリソース作成
Alexa / バックエンドはCodeStarで管理します。
Hosted Skillでもいけないことはないですが、AWSのイベントなのでAWS側でできるだけがんばりましょう。
リージョンをus-east-1に変える
今回利用するサービスの一部(Cloud9)は、東京リージョンで利用できません。
また、Alexa Skill / CodeStarにも現時点ではリージョンの制約があります。
そのため、本ワークショップは**かならずus-east-1(バージニア北部)**に切り替えてから取り組んでください。
CodeStarでスタック作成
CodeStarはテンプレートから起動できます。Alexa用のテンプレートが2種ありますが、Node.js側を選択してください。
Pythonでもできないことはないですが、メンターがPythonに詳しいという保証はありませんので自己責任でお願いします。

プロジェクト名とリポジトリの選択
プロジェクト名を設定します。後半にてCLIコマンドが出てくる関係から、twilio-payをプロジェクト名に設定してください。
またCI / CDパイプラインも構築するので、リポジトリが必要です。
今回はAWSを使い倒したいので、CodeCommitを選択しましょう。

Amazon開発者アカウントへのリンク
スキルをデプロイするためにアカウントリンクが必要です。
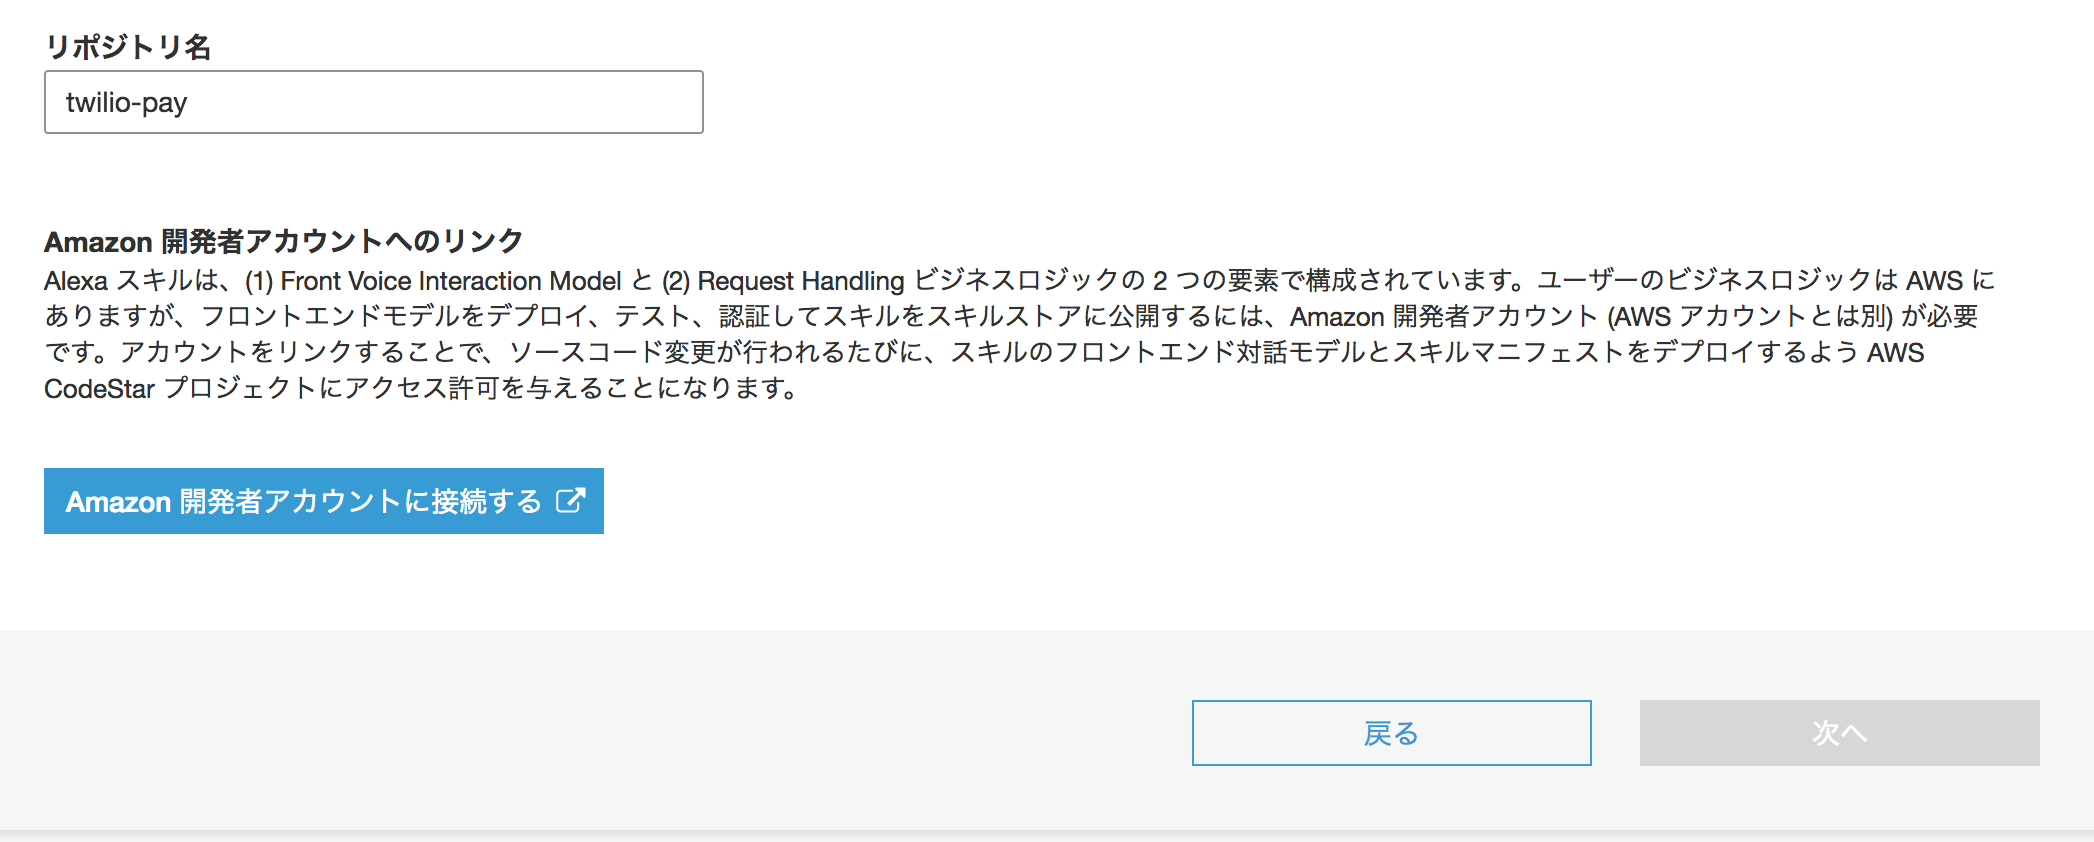
ボタンをクリックして、Amazon開発者アカウントでログインし、各種権限を与えましょう。
 "AWS CodeStar は Amazon 開発者アカウントに接続されました"と表示されればOKです。

構成のレビュー
Code Starは自動で複数のリソースを作成します。実装からデプロイまでどのようなフローになるか確認しておきましょう。

エディタの選択
エディタを選べます。任意のエディタを選択することもできますが、ワークショップではAWS Cloud9を使うことを前提として進めます。

セットアップ完了
以上で環境準備ができました。
AWS / Alexaの各種リソースが今作成されています。

Twilio Payの準備
AWS Cloud9が利用できるようになるまで時間があるので、先にTwilio Payの設定を行います。
Twilioの開発コンソールへログイン
URL: https://jp.twilio.com/console
参考資料:https://qiita.com/mobilebiz/items/31b061af62b35fd82724
Twilioの電話番号を取得する
Twilioがユーザーに架電するための番号が必要です。左側のメニューから[Phone Numbers]をクリックします。
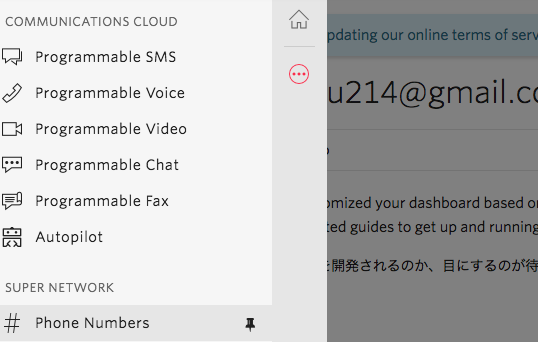
*画面の表示が異なる場合はこちらのページヘ移動してください。

こういう画像が出た場合は、こちらのページ
[アクティブな電話番号]に電話番号がある方は、「Twilio Pay設定ページへ移動する」までスキップします。
電話番号を購入する
電話番号を購入するには、左側のメニューから[番号を購入]をクリックします。
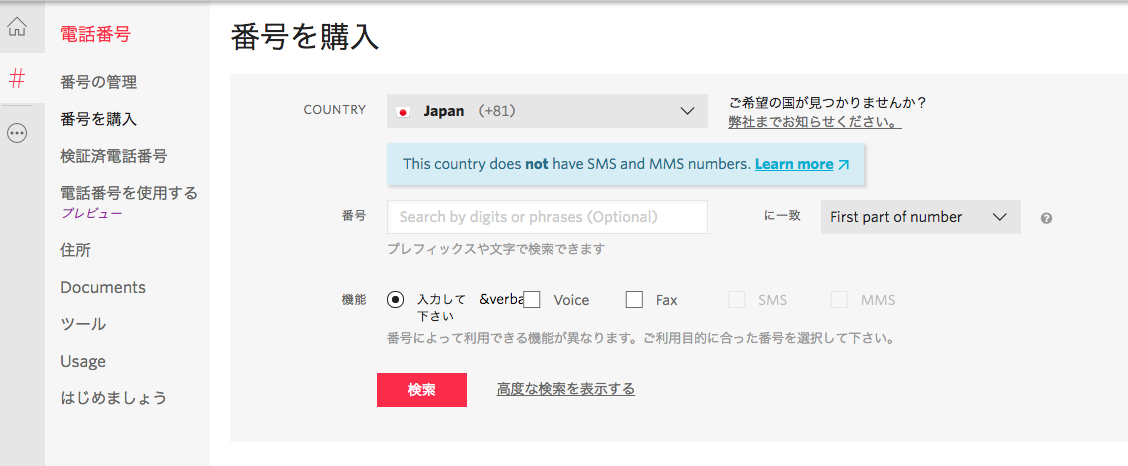
細かい指定が可能ですが、デフォルトのまま[検索]をクリックします。
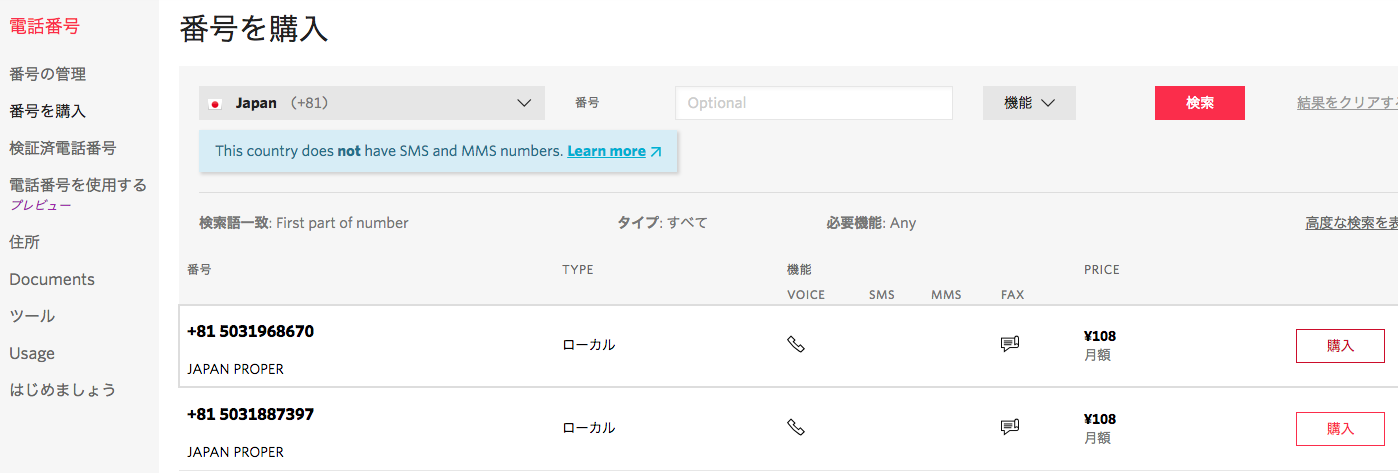
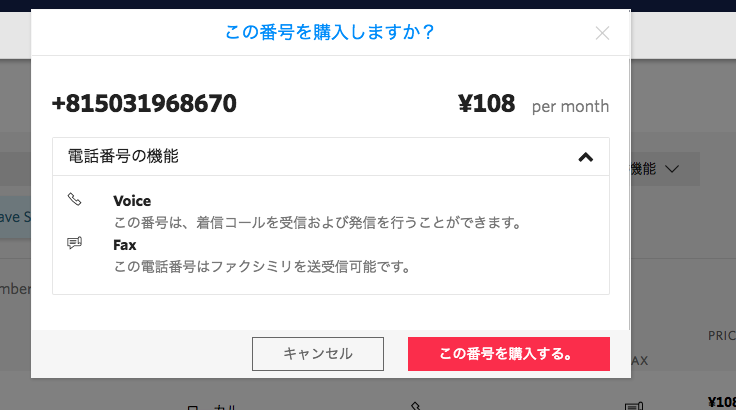
電話番号のリストが表示されますので、[Voice]にアイコンが表示されている電話番号を1つ選んで購入します。
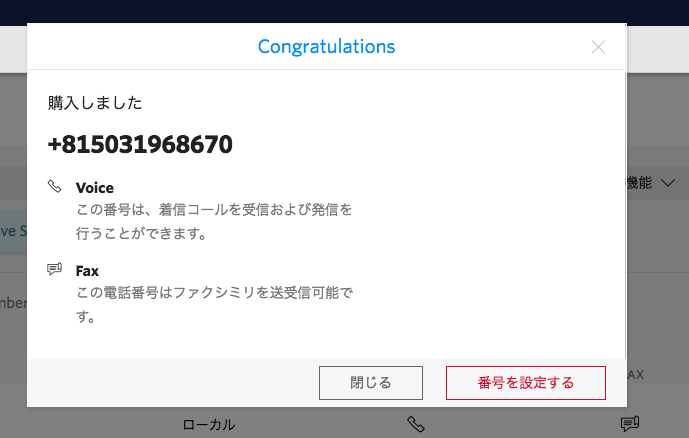
[閉じる]をクリックして、左側のメニューの[アクティブな電話番号]をクリックします。
電話番号が追加されていればOKです。
Twilio Pay設定ページへ移動する
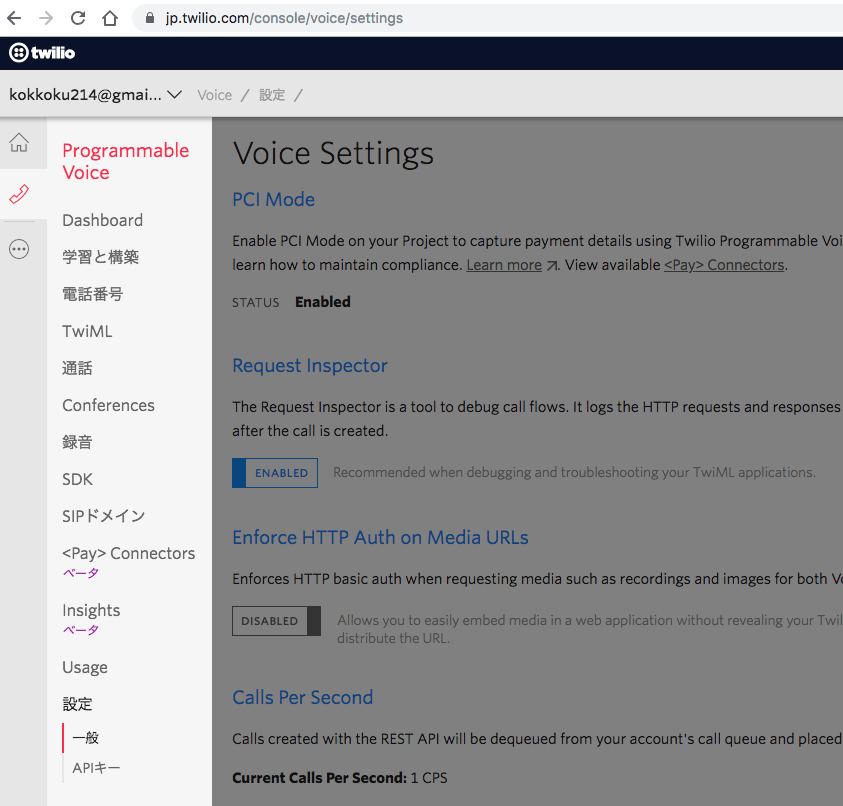
左側のメニューから[Programmable Voice > 設定]へ移動します。
https://jp.twilio.com/console/voice/settings
PCI Modeの有効化
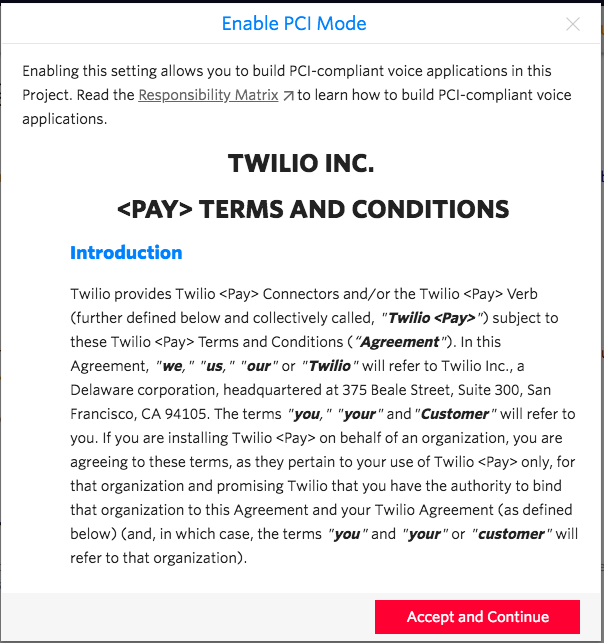
[PCI Mode]から[Enable PCI Mode]をクリックしてPCI Modeを有効化します。
利用規約のダイヤログが開きますので、右下にあるAcceptのボタンを押してください。
STATUSが"Enabled"になっていればOKです。

最後に下部の[Save]ボタンを押して保存しましょう。
Stripeコネクターの有効化
サイドバーから[Connectors]をクリックします。
利用規約と課金方法について表示されますので同意してインストールしてください。
Stripeとの連携設定
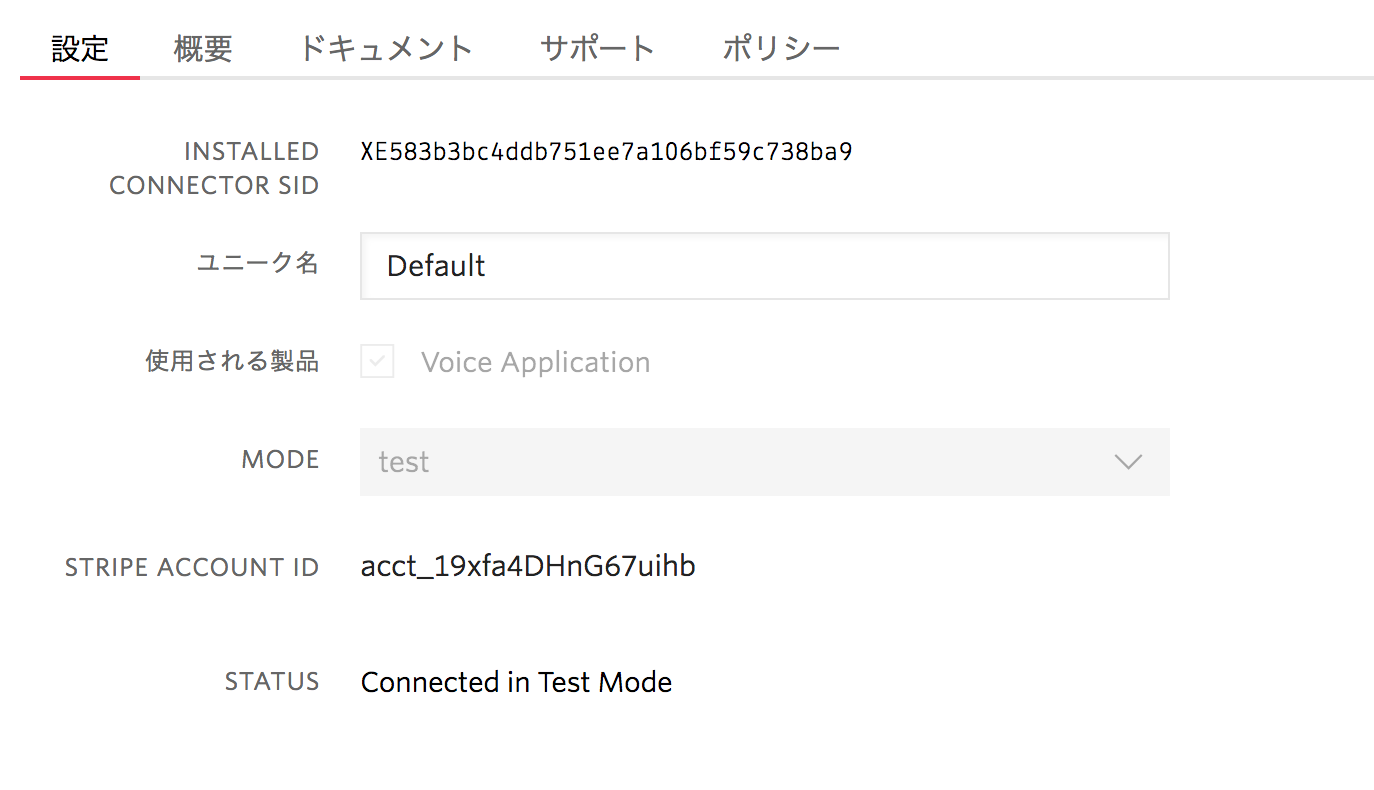
設定画面から連携の設定ができます。かならず以下の設定にしてください。
| 項目名 | 値 |
|---|---|
| ユニーク名 | Default |
| MODE | test |
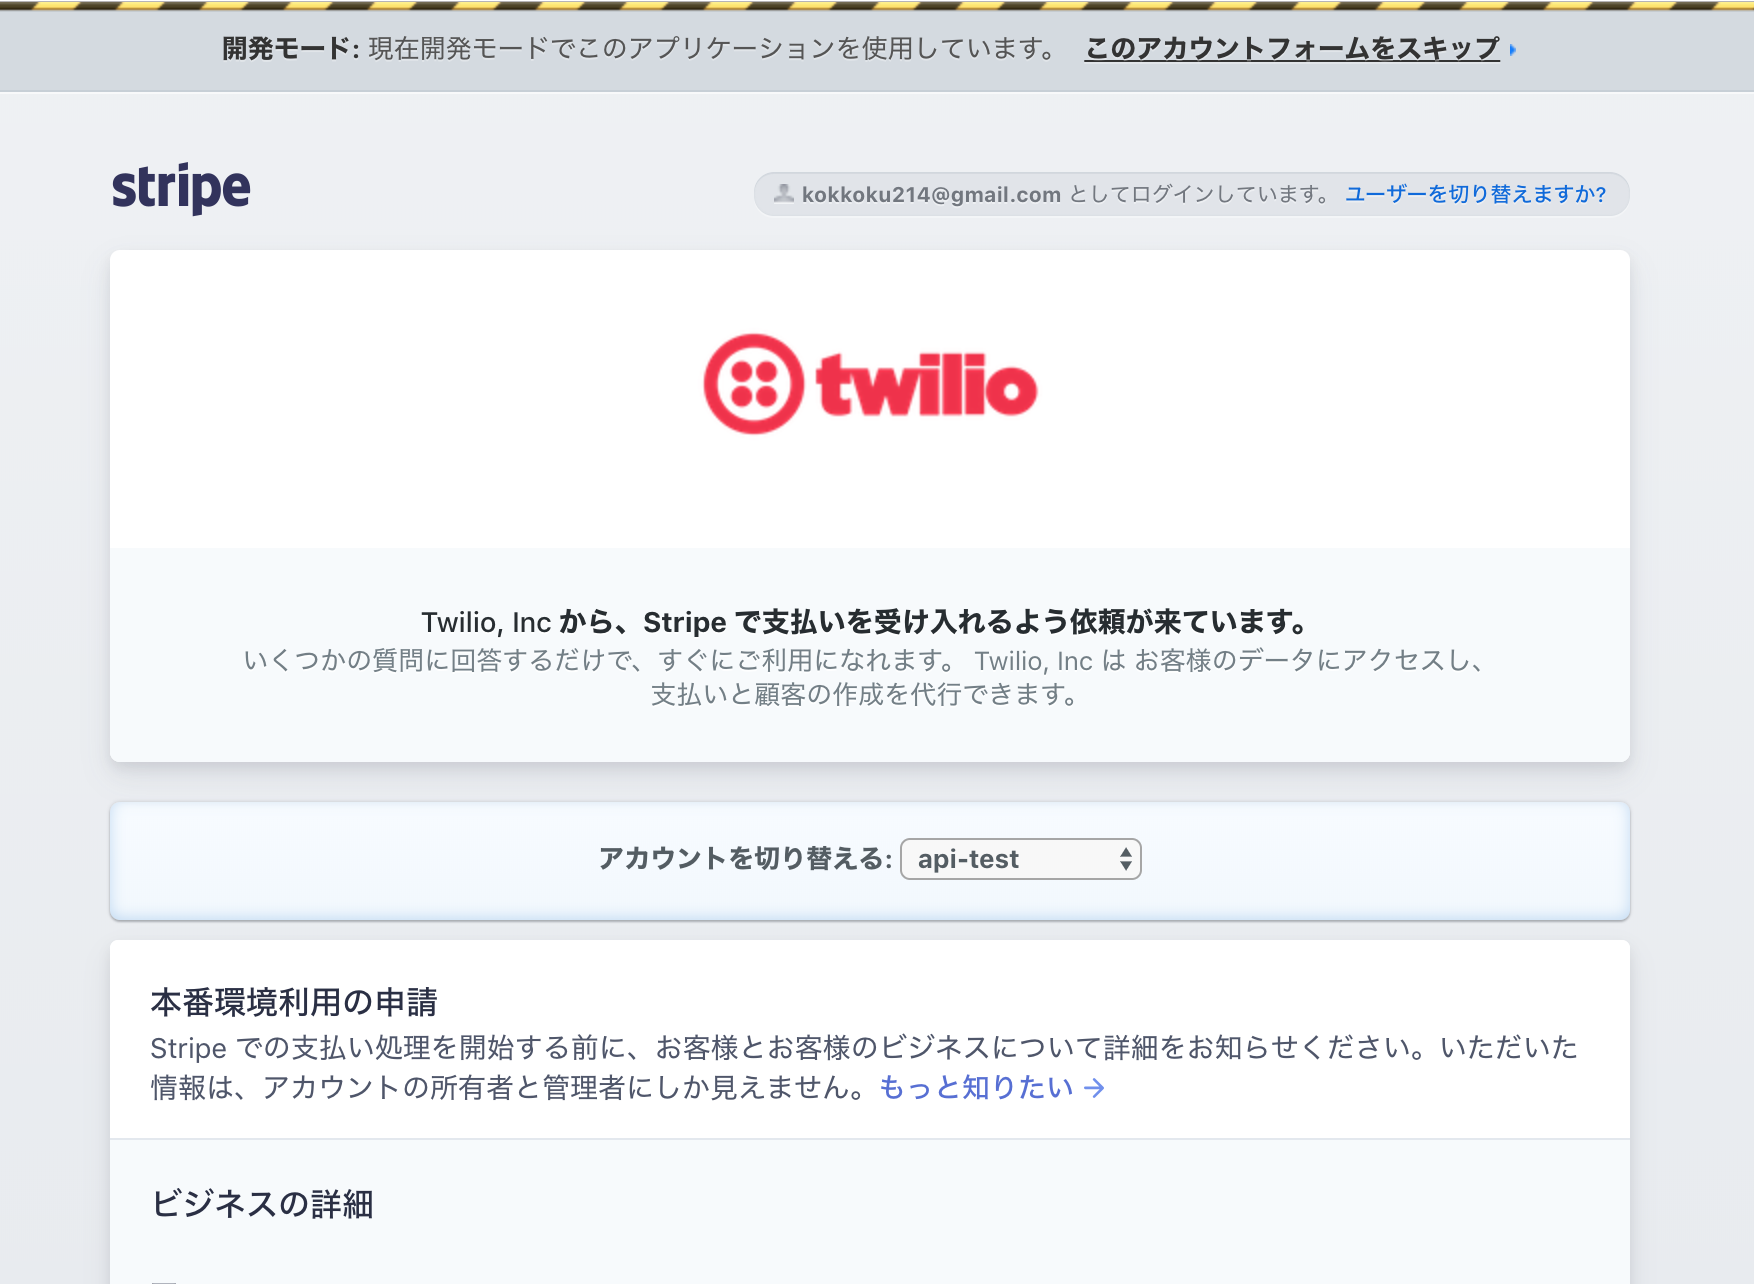
connect with Stripeをクリックすると、Stripeへのログイン画面が表示されます。作成したアカウントでログインしてください。

本番環境利用申請などの画面が出ます。今回はトライすることが目的なので、「このアカウントフォームをスキップ」でスキップしましょう。
Code StarでAlexaスキルを実装する
Code Starの準備ができていれば、以下のような画面がでます。
[コーディングの開始]をクリックしましょう。

Cloud9が起動します。
ディレクトリ構成がASK CLIでセットアップしたときと異なりますので注意してください。

スキルの日本語化
まずはスキルを日本語化します。(2019年2月時点では、英語でしかセットアップされない)
対話モデルの日本語化
対話モデルを日本語化しましょう。
対話モデルのJSONファイルは、interactionModels/customディレクトリ配下にあります。
$ mv twilio-pay/interactionModels/custom/en-US.json twilio-pay/interactionModels/custom/ja-JP.json
ja-JP.jsonには以下の内容を入れてください。
{
    "interactionModel": {
        "languageModel": {
            "invocationName": "電話決済",
            "intents": [
                {
                    "name": "AMAZON.CancelIntent",
                    "samples": []
                },
                {
                    "name": "AMAZON.HelpIntent",
                    "samples": []
                },
                {
                    "name": "AMAZON.StopIntent",
                    "samples": []
                },
                {
                    "name": "TwilioPayIntent",
                    "samples": [
                        "電話で決済してください",
                        "電話で決済して",
                        "電話で決済",
                        "電話決済してください",
                        "電話決済して",
                        "電話決済",
                        "カード決済してください",
                        "カード決済して",
                        "カード決済",
                        "決済してください",
                        "決済して",
                        "決済"
                    ]
                },
                {
                    "name": "HelloWorldIntent",
                    "slots": [],
                    "samples": [
                        "ハローワールド",
                        "ハロー",
                        "こんにちは",
                        "こんちは"
                    ]
                }
            ],
            "types": []
        }
    }
}
skill.jsonいじる
続いてスキル情報を更新します。
スキル情報はtwilio-pay/skill.jsonで設定します。
以下のコードをコピペして保存してください。
{
  "manifest": {
    "publishingInformation": {
      "locales": {
        "ja-JP": {
          "summary": "Alexaワークショップで作成したスキルです。",
          "examplePhrases": [
            "アレクサ、電話決済を開いて",
            "アレクサ、電話決済を開いて決済して",
            "アレクサ、電話決済"
          ],
          "name": "Alexaワークショップ",
          "description": "Alexaワークショップで作成したスキルです。"
        }
      },
      "isAvailableWorldwide": true,
      "testingInstructions": "Sample Testing Instructions.",
      "category": "EDUCATION_AND_REFERENCE",
      "distributionCountries": []
    },
    "apis": {
      "custom": {
      }
    },
    "manifestVersion": "1.0"
  }
}
Lambdaを変更してみる
続いてAlexaの返答を日本語にします。Alexaの返答はAWS Lambdaで設定します。
twilio-pay/lambda/custom/index.jsに以下のコードを貼り付けましょう。
const Alexa = require('ask-sdk-core');

const LaunchRequestHandler = {
    canHandle(handlerInput) {
      return handlerInput.requestEnvelope.request.type === 'LaunchRequest';
    },
    handle(handlerInput) {
      const speechText = 'ワークショップサンプルスキルです。何を試しますか?';
      return handlerInput.responseBuilder
        .speak(speechText)
        .reprompt(speechText)
        .getResponse();
    }
};
const HelloWorldIntentHandler = {
    canHandle(handlerInput) {
      return handlerInput.requestEnvelope.request.type === 'IntentRequest'
        && handlerInput.requestEnvelope.request.intent.name === 'HelloWorldIntent';
    },
    handle(handlerInput) {
      const speechText = 'こんにちは。何を試しますか?';
      return handlerInput.responseBuilder
        .speak(speechText)
        .reprompt('何を試しますか?')
        .getResponse();
    }
};
const HelpIntentHandler = {
    canHandle(handlerInput) {
      return handlerInput.requestEnvelope.request.type === 'IntentRequest'
        && handlerInput.requestEnvelope.request.intent.name === 'AMAZON.HelpIntent';
    },
    handle(handlerInput) {
      const speechText = 'このスキルはAlexaワークショップのサンプルスキルです。何を試しますか?';

      return handlerInput.responseBuilder
        .speak(speechText)
        .reprompt(speechText)
        .getResponse();
    }
};
const CancelAndStopIntentHandler = {
    canHandle(handlerInput) {
      return handlerInput.requestEnvelope.request.type === 'IntentRequest'
        && (handlerInput.requestEnvelope.request.intent.name === 'AMAZON.CancelIntent'
          || handlerInput.requestEnvelope.request.intent.name === 'AMAZON.StopIntent');
    },
   handle(handlerInput) {
      const speechText = 'ごきげんよう';
      return handlerInput.responseBuilder
        .speak(speechText)
        .getResponse();
    }
};
const SessionEndedRequestHandler = {
    canHandle(handlerInput) {
      return handlerInput.requestEnvelope.request.type === 'SessionEndedRequest';
    },
    handle(handlerInput) {
      // Any cleanup logic goes here.
      return handlerInput.responseBuilder.getResponse();
    }
};

// The intent reflector is used for interaction model testing and debugging.
// It will simply repeat the intent the user said. You can create custom handlers
// for your intents by defining them above, then also adding them to the request
// handler chain below.
const IntentReflectorHandler = {
    canHandle(handlerInput) {
      return handlerInput.requestEnvelope.request.type === 'IntentRequest';
    },
    handle(handlerInput) {
      const intentName = handlerInput.requestEnvelope.request.intent.name;
      const speechText = `${intentName} インテントが呼び出されました。他のインテントを試しますか?`;

      return handlerInput.responseBuilder
        .speak(speechText)
        .reprompt('他のインテントを試しますか?')
        .getResponse();
   }
};

// Generic error handling to capture any syntax or routing errors. If you receive an error
// stating the request handler chain is not found, you have not implemented a handler for
// the intent being invoked or included it in the skill builder below.
const ErrorHandler = {
    canHandle() {
      return true;
    },
    handle(handlerInput, error) {
      console.log(`~~~~ Error handled: ${error.message}`);
      const speechText = `すみません。うまく聞き取れませんでした。もう一度いってもらえますか?`;

      return handlerInput.responseBuilder
        .speak(speechText)
        .reprompt(speechText)
        .getResponse();
    }
};

// This handler acts as the entry point for your skill, routing all request and response
// payloads to the handlers above. Make sure any new handlers or interceptors you've
// defined are included below. The order matters - they're processed top to bottom.
exports.handler = Alexa.SkillBuilders.custom()
  .addRequestHandlers(
    LaunchRequestHandler,
    HelloWorldIntentHandler,
    HelpIntentHandler,
    CancelAndStopIntentHandler,
    SessionEndedRequestHandler,
    IntentReflectorHandler) // make sure IntentReflectorHandler is last so it doesn't override your custom intent handlers
  .addErrorHandlers(
    ErrorHandler)
  .lambda();
Code Starでデプロイしてみる
ここで一度編集内容をデプロイしてみましょう。
今回の構成では、Cloud9 -> (Git) -> CodeCommit -> (CodePipeline) -> CodeBuildというルートでデプロイされます。
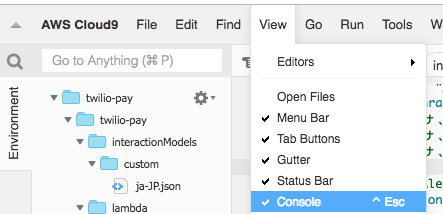
ターミナルの表示
ターミナルは画面下部に表示されている"bash - "から始まるタブです。

表示されていない場合、[View > console]をクリックしてください。
Gitの操作
まずはCloud9の画面下部から以下のコマンドを実行してGitで変更をコミットしましょう。
(とは自分のものに書き換えてください)
$ cd ~/environment/twilio-pay
$ echo 'node_modules/' > .gitignore
$ git config --global user.name <YOUR_USER_NAME>
git config --global user.email <YOUR_EMAIL_ADDRESS>
$ git add ~/environment/twilio-pay
$ git commit -m "translate japanese"
$ git push origin master
pushに成功していれば、CodeStarからビルドが開始していることが確認できます。

Alex開発コンソールで変更を確認する。
Alexa開発コンソール(https://developer.amazon.com/alexa/console/ask )で以下のようにスキルが追加・更新されていればOKです。

Twilio Payと連携する
ここからはいよいよTwilio Payと連携させてゆきます。
Twilio SDKのインストール
まずはSDKをインストールしましょう。
下部にあるコンソールでコマンドを打っていきます。twilio-pay以外のプロジェクト名の場合は、適宜ディレクトリ名を読み替えて下さい。
:~/environment $ cd twilio-pay/lambda/custom/
:~/environment/twilio-pay/lambda/custom (master) $ pwd
/home/ec2-user/environment/twilio-pay/lambda/custom
:~/environment/twilio-pay/lambda/custom (master) $ npm i -S twilio querystring
TwilioのAuth tokenと電話番号を確認する
[Dashboard > 設定] (https://jp.twilio.com/console/project/settings )から[API クレデンシャル]を取得します。かならず[ライブクレデンシャル]を利用しましょう。

続いて[Phone numbers] (https://jp.twilio.com/console/phone-numbers/incoming )から取得済の電話番号を確認します。

それぞれの値を、twilio-pay/lambda/custom/index.jsに以下のような形で保存しましょう。
const Alexa = require('ask-sdk-core');
const querystring = require('querystring');
const twilio = require('twilio');
const twilioConfig = {
  ACCOUNT_SID: '<ACCOUNT_SID>',
  AUTH_TOKEN: '<AUTH_TOKEN>',
  YOUR_PHONE_NUMBER: '+81<YOUR_PHONE_NUMBER>',
  YOUR_TWILIO_NUMBER: '+81<YOUR_TWILIO_NUMBER>'
}
const client = twilio(twilioConfig.ACCOUNT_SID, twilioConfig.AUTH_TOKEN);
+81<YOUR_PHONE_NUMBER>にはあなたの電話番号を入力してください(例:+0819099999999)
Twilio Payを実行する
続いて電話をかける処理を追加します。
twilio-pay/lambda/custom/index.jsの10行目以降(const client = twilio(twilioConfig.ACCOUNT_SID, twilioConfig.AUTH_TOKEN);)より下に以下のコードを追加しましょう。
const CallPayIntent = {
  canHandle(handlerInput) {
      return handlerInput.requestEnvelope.request.type === 'IntentRequest'
        && handlerInput.requestEnvelope.request.intent.name === 'TwilioPayIntent';
  },
  async handle(handlerInput) {
    // 喋らせる内容
    const twiml = `<Response>
  <Say language="ja-JP" voice="Polly.Takumi">ただいまより、クレジットカードで決済を行います。お支払い金額は990円です。</Say>
  <Pay chargeAmount="990" currency="jpy" postalCode="false" action="https://">
    <Prompt for="payment-card-number">
        <Say language="ja-JP" voice="Polly.Mizuki">まずは、クレジットカード番号を入力してください。入力が終わりましたら、シャープを押して下さい。</Say>
    </Prompt>
    <Prompt for="expiration-date">
        <Say language="ja-JP" voice="Polly.Mizuki">有効期限を、月と年のそれぞれ2桁の数字で入力してください。入力が終わりましたら、最後にシャープを押して下さい。</Say>
    </Prompt>
    <Prompt for="security-code">
        <Say language="ja-JP" voice="Polly.Mizuki">セキュリティコードを入力してください。セキュリティコードは、カードの裏面に記載されている3桁のコードです。セキュリティコードの最後にシャープを押して下さい。</Say>
    </Prompt>
  </Pay>
   <Say language="ja-JP" voice="Polly.Mizuki">990円の支払いが完了しました。ご利用ありがとうございました。</Say>
</Response>`;

    // 電話をかける処理
    try {
      const responseData = await client.calls.create({
        to: twilioConfig.YOUR_PHONE_NUMBER, //コール先の番号
        from: twilioConfig.YOUR_TWILIO_NUMBER, // 取得したtwilioの番号.
        url: 'http://twimlets.com/echo?Twiml=' + querystring.escape(twiml)
      })
      console.log(responseData.from)
      const { from } = responseData
      const messages = [
        from ? `${from}から` :'',
        'あなたの電話番号に決済の電話をコールします。',
        '電話の案内に従って決済をおこなってください。'
      ].join('')
      return handlerInput.responseBuilder
        .speak(messages)
        .getResponse();
    } catch (e) {
      console.log(e)
      const speechText = 'すみません。カードの処理に失敗しました。ログを確認して再度お試しください。';
      return handlerInput.responseBuilder
        .speak(speechText)
        .getResponse();
    }
  }
}
その後以下のようにaddRequestHandlersの引数にCallPayIntentを追加します。
exports.handler = Alexa.SkillBuilders.custom()
  .addRequestHandlers(
    LaunchRequestHandler,
    CallPayIntent,
    HelloWorldIntentHandler,
フルコードのサンプル
const Alexa = require('ask-sdk-core');
const querystring = require('querystring');
const twilio = require('twilio');
const twilioConfig = {
  ACCOUNT_SID: '<ACCOUNT_SID>',
  AUTH_TOKEN: '<AUTH_TOKEN>',
  YOUR_PHONE_NUMBER: '+81<YOUR_PHONE_NUMBER>',
  YOUR_TWILIO_NUMBER: '+81<YOUR_TWILIO_NUMBER>'
}
const client = twilio(twilioConfig.ACCOUNT_SID, twilioConfig.AUTH_TOKEN);

const CallPayIntent = {
  canHandle(handlerInput) {
      return handlerInput.requestEnvelope.request.type === 'IntentRequest'
        && handlerInput.requestEnvelope.request.intent.name === 'TwilioPayIntent';
  },
  async handle(handlerInput) {
    // 喋らせる内容
    const twiml = `<Response>
  <Say language="ja-JP" voice="Polly.Takumi">ただいまより、クレジットカードで決済を行います。お支払い金額は990円です。</Say>
  <Pay chargeAmount="990" currency="jpy" postalCode="false" action="https://">
    <Prompt for="payment-card-number">
        <Say language="ja-JP" voice="Polly.Mizuki">まずは、クレジットカード番号を入力してください。入力が終わりましたら、シャープを押して下さい。</Say>
    </Prompt>
    <Prompt for="expiration-date">
        <Say language="ja-JP" voice="Polly.Mizuki">有効期限を、月と年のそれぞれ2桁の数字で入力してください。入力が終わりましたら、最後にシャープを押して下さい。</Say>
    </Prompt>
    <Prompt for="security-code">
        <Say language="ja-JP" voice="Polly.Mizuki">セキュリティコードを入力してください。セキュリティコードは、カードの裏面に記載されている3桁のコードです。セキュリティコードの最後にシャープを押して下さい。</Say>
    </Prompt>
  </Pay>
   <Say language="ja-JP" voice="Polly.Mizuki">990円の支払いが完了しました。ご利用ありがとうございました。</Say>
</Response>`;

    // 電話をかける処理
    try {
      const responseData = await client.calls.create({
        to: twilioConfig.YOUR_PHONE_NUMBER, //コール先の番号
        from: twilioConfig.YOUR_TWILIO_NUMBER, // 取得したtwilioの番号.
        url: 'http://twimlets.com/echo?Twiml=' + querystring.escape(twiml)
      })
      console.log(responseData.from)
      const { from } = responseData
      const messages = [
        from ? `${from}から` :'',
        'あなたの電話番号に決済の電話をコールします。',
        '電話の案内に従って決済をおこなってください。'
      ].join('')
      return handlerInput.responseBuilder
        .speak(messages)
        .getResponse();
    } catch (e) {
      console.log(e)
      const speechText = 'すみません。カードの処理に失敗しました。ログを確認して再度お試しください。';
      return handlerInput.responseBuilder
        .speak(speechText)
        .getResponse();
    }
  }
}


const LaunchRequestHandler = {
    canHandle(handlerInput) {
      return handlerInput.requestEnvelope.request.type === 'LaunchRequest';
    },
    handle(handlerInput) {
      const speechText = 'ワークショップサンプルスキルです。何を試しますか?';
      return handlerInput.responseBuilder
        .speak(speechText)
        .reprompt(speechText)
        .getResponse();
    }
};
const HelloWorldIntentHandler = {
    canHandle(handlerInput) {
      return handlerInput.requestEnvelope.request.type === 'IntentRequest'
        && handlerInput.requestEnvelope.request.intent.name === 'HelloWorldIntent';
    },
    handle(handlerInput) {
      const speechText = 'こんにちは。何を試しますか?';
      return handlerInput.responseBuilder
        .speak(speechText)
        .reprompt('何を試しますか?')
        .getResponse();
    }
};
const HelpIntentHandler = {
    canHandle(handlerInput) {
      return handlerInput.requestEnvelope.request.type === 'IntentRequest'
        && handlerInput.requestEnvelope.request.intent.name === 'AMAZON.HelpIntent';
    },
    handle(handlerInput) {
      const speechText = 'このスキルはAlexaワークショップのサンプルスキルです。何を試しますか?';

      return handlerInput.responseBuilder
        .speak(speechText)
        .reprompt(speechText)
        .getResponse();
    }
};
const CancelAndStopIntentHandler = {
    canHandle(handlerInput) {
      return handlerInput.requestEnvelope.request.type === 'IntentRequest'
        && (handlerInput.requestEnvelope.request.intent.name === 'AMAZON.CancelIntent'
          || handlerInput.requestEnvelope.request.intent.name === 'AMAZON.StopIntent');
    },
   handle(handlerInput) {
      const speechText = 'ごきげんよう';
      return handlerInput.responseBuilder
        .speak(speechText)
        .getResponse();
    }
};
const SessionEndedRequestHandler = {
    canHandle(handlerInput) {
      return handlerInput.requestEnvelope.request.type === 'SessionEndedRequest';
    },
    handle(handlerInput) {
      // Any cleanup logic goes here.
      return handlerInput.responseBuilder.getResponse();
    }
};

// The intent reflector is used for interaction model testing and debugging.
// It will simply repeat the intent the user said. You can create custom handlers
// for your intents by defining them above, then also adding them to the request
// handler chain below.
const IntentReflectorHandler = {
    canHandle(handlerInput) {
      return handlerInput.requestEnvelope.request.type === 'IntentRequest';
    },
    handle(handlerInput) {
      const intentName = handlerInput.requestEnvelope.request.intent.name;
      const speechText = `${intentName} インテントが呼び出されました。他のインテントを試しますか?`;

      return handlerInput.responseBuilder
        .speak(speechText)
        .reprompt('他のインテントを試しますか?')
        .getResponse();
   }
};

// Generic error handling to capture any syntax or routing errors. If you receive an error
// stating the request handler chain is not found, you have not implemented a handler for
// the intent being invoked or included it in the skill builder below.
const ErrorHandler = {
    canHandle() {
      return true;
    },
    handle(handlerInput, error) {
      console.log(`~~~~ Error handled: ${error.message}`);
      const speechText = `すみません。うまく聞き取れませんでした。もう一度いってもらえますか?`;

      return handlerInput.responseBuilder
        .speak(speechText)
        .reprompt(speechText)
        .getResponse();
    }
};

// This handler acts as the entry point for your skill, routing all request and response
// payloads to the handlers above. Make sure any new handlers or interceptors you've
// defined are included below. The order matters - they're processed top to bottom.
exports.handler = Alexa.SkillBuilders.custom()
  .addRequestHandlers(
    LaunchRequestHandler,
    CallPayIntent,
    HelloWorldIntentHandler,
    HelpIntentHandler,
    CancelAndStopIntentHandler,
    SessionEndedRequestHandler,
    IntentReflectorHandler) // make sure IntentReflectorHandler is last so it doesn't override your custom intent handlers
  .addErrorHandlers(
    ErrorHandler)
  .lambda();
デプロイ・テスト
再びGitで変更を保存し、CodeStar(CodePipeline)でデプロイしましょう。
$ git add ~/environment/twilio-pay
$ git commit -m "call pay"
$ git push origin master
Alexa開発コンソールやAlexa開発アカウントと連携しているAlexaで「アレクサ、電話決済で決済して」と話しかけ、電話がかかればOKです。

Note: テストのカード番号
Stripeをテストモードで連携させていますので、テスト用のカード番号のみ利用できます。
- カード番号:4242 4242 4242 4242
- 有効期限: 10/20 (未来の年月ならOK)
- CVC: 123(3桁の数字ならなんでもOK)
カード番号については https://stripe.com/docs/testing#cards を参照。
電話の結果を処理する
参考:https://qiita.com/takeshifurusato/items/21e01852b634eb704102
template.ymlでAPI追加
twilio-pay/template.ymlにAWS Lambdaなどのリソースが定義されています。
そこでここにTwilio Payのcallbackを受け取るAPIを追加しましょう。
追加するコードはこちらです。
Resources:
  # 追加ここから
  TwilioPayCallBackFunction:
    Type: AWS::Serverless::Function
    Properties:
      CodeUri: 'lambda/custom'
      Handler: index.twilioHandler
      Runtime: nodejs8.10
      Role: !GetAtt LambdaExecutionRole.Arn
      Events:
        TwilioCallback:
          Type: Api
          Properties:
            Path: /pay-callback
            Method: post
  # 追加ここまで
  CustomDefaultFunction:
twilio-pay/lambda/custom/index.jsの最下部に以下のコードを追加しましょう。
exports.twilioHandler = (event, context,callback) => {
  console.log(JSON.stringify(event))
  const body = event.body.split('&')
  const results = body.filter(item => {
    const reg = new RegExp(/^Result/)
    return reg.test(item)
  })
  const t = results[0].split('=')
  const result = t[1]

  let twiml = new twilio.twiml.VoiceResponse();
  let text = ''
  switch (result) {
    case "success":
      text = "会費の決済が完了しました。ご利用ありがとうございました。";
      break;

    case "payment-connector-error":
      text = "エラーが発生しました。決済に失敗しました。";
      console.log(result);
      break;

    default:
        text = "決済に失敗しました。";
    }
    twiml.say({ language: 'ja-JP' },text);
    const response = {
        statusCode: 200,
        headers: {
            "Content-Type" : "text/xml; charset=utf8"
        },
        body: twiml.toString()
    }
    console.log(JSON.stringify(response))
    callback(null, response);
};
この状態でデプロイします。
$ git add ~/environment/twilio-pay
$ git commit -m "add callback api"
$ git push origin master
デプロイが完了したら、API GatewayのURLを確認しましょう。


TwiMLを更新する
Notice:TwiML / twimletsの利用について
TwiMLをハードコードし、twimletsを経由して実行するやり方は現在非推奨です。
今回はワークショップ進行の関係上敢えてこの形式を採用していますが、非推奨とされている実装であることをご了承ください。
実際に利用される場合は、TwiML Binを利用してください。
その他参考:https://qiita.com/mobilebiz/items/ca4a54e20dc1936378b0
TwiML更新部分
PAYタグのACTIONを追加したAPIに書き換えます。
    const twiml = `<Response>
  <Say language="ja-JP" voice="Polly.Takumi">ただいまより、クレジットカードで決済を行います。お支払い金額は990円です。</Say>
  <Pay chargeAmount="990" currency="jpy" postalCode="false" action="https://YOUR_API_GW_ENDPOINT/Prod/pay-callback">
    <Prompt for="payment-card-number">
        <Say language="ja-JP" voice="Polly.Mizuki">まずは、クレジットカード番号を入力してください。入力が終わりましたら、シャープを押して下さい。</Say>
    </Prompt>
    <Prompt for="expiration-date">
        <Say language="ja-JP" voice="Polly.Mizuki">有効期限を、月と年のそれぞれ2桁の数字で入力してください。入力が終わりましたら、最後にシャープを押して下さい。</Say>
    </Prompt>
    <Prompt for="security-code">
        <Say language="ja-JP" voice="Polly.Mizuki">セキュリティコードを入力してください。セキュリティコードは、カードの裏面に記載されている3桁のコードです。セキュリティコードの最後にシャープを押して下さい。</Say>
    </Prompt>
  </Pay>
   <Say language="ja-JP" voice="Polly.Mizuki">990円の支払いが完了しました。ご利用ありがとうございました。</Say>
</Response>`;
決済完了後の発話を確認する
再度スキルを実行して、電話の決済完了時にちゃんとメッセージが出てることを確認しましょう。
Alexaの電話番号情報を取得する
skill.jsonいじる(コピペ)
まずはskillでカスタマープロファイルAPIにアクセスするための設定を追加します。
以下のサンプルのように、permissionを追加します。
{
  "manifest": {
    "publishingInformation": {
      "locales": {
        "ja-JP": {
          "summary": "Alexaワークショップで作成したスキルです。",
          "examplePhrases": [
            "アレクサ、電話決済を開いて",
            "アレクサ、電話決済を開いて決済して",
            "アレクサ、電話決済"
          ],
          "name": "Alexaワークショップ",
          "description": "Alexaワークショップで作成したスキルです。"
        }
      },
      "isAvailableWorldwide": true,
      "testingInstructions": "Sample Testing Instructions.",
      "category": "EDUCATION_AND_REFERENCE",
      "distributionCountries": []
    },
    "apis": {
      "custom": {
      }
    },
    "permissions": [{
        "name": "alexa::profile:mobile_number:read"
      }
    ],
    "manifestVersion": "1.0"
  }
}
Customer Profile APIを設定する
LambdaからAPIクライアントを利用できるようにしましょう。
exports.handler = Alexa.SkillBuilders.custom()以下に.withApiClient(new Alexa.DefaultApiClient())を追加します。
exports.handler = Alexa.SkillBuilders.custom()
  .addRequestHandlers(
    ...
  )
  .addErrorHandlers(ErrorHandler)
  .withApiClient(new Alexa.DefaultApiClient())
  .lambda();
続いてCallPayIntentを以下の内容に変更します。
const CallPayIntent = {
  canHandle(handlerInput) {
      return handlerInput.requestEnvelope.request.type === 'IntentRequest'
        && handlerInput.requestEnvelope.request.intent.name === 'TwilioPayIntent';
  },
  getPhoneNumber(phoneNumber) {
    const phone = String(phoneNumber)
    if (/^0/.test(phone)) {
      return phone.replace(/^0/, '+81')
    } else if (/^\+/.test(phone)) {
      return phone
    }
    return `+81${phone}`
  },
  async handle(handlerInput) {

    const {serviceClientFactory } = handlerInput
    let phoneNumber = twilioConfig.YOUR_PHONE_NUMBER
    try {
      const upsServiceClient = serviceClientFactory.getUpsServiceClient();  // Clientの作成
      const mobileNumber = await upsServiceClient.getProfileMobileNumber(); // 携帯電話番号の取得
      if (mobileNumber.phoneNumber) phoneNumber = this.getPhoneNumber(mobileNumber.phoneNumber)
    } catch (e) {
      return handlerInput.responseBuilder
        .speak('連絡先の利用が許可されていません。アレクサアプリの設定を変更して下さい。')
        .withAskForPermissionsConsentCard([
          'alexa::profile:mobile_number:read'
        ])
        .getResponse();
    }

    // 喋らせる内容
    const twiml = `<Response>
  <Say language="ja-JP" voice="Polly.Takumi">ただいまより、クレジットカードで決済を行います。お支払い金額は990円です。</Say>
  <Pay chargeAmount="990" currency="jpy" postalCode="false" action="https://89uqt9cm8e.execute-api.us-east-1.amazonaws.com/Prod/pay-callback">
    <Prompt for="payment-card-number">
        <Say language="ja-JP" voice="Polly.Mizuki">まずは、クレジットカード番号を入力してください。入力が終わりましたら、シャープを押して下さい。</Say>
    </Prompt>
    <Prompt for="expiration-date">
        <Say language="ja-JP" voice="Polly.Mizuki">有効期限を、月と年のそれぞれ2桁の数字で入力してください。入力が終わりましたら、最後にシャープを押して下さい。</Say>
    </Prompt>
    <Prompt for="security-code">
        <Say language="ja-JP" voice="Polly.Mizuki">セキュリティコードを入力してください。セキュリティコードは、カードの裏面に記載されている3桁のコードです。セキュリティコードの最後にシャープを押して下さい。</Say>
    </Prompt>
  </Pay>
   <Say language="ja-JP" voice="Polly.Mizuki">990円の支払いが完了しました。ご利用ありがとうございました。</Say>
</Response>`;

    // 電話をかける処理
    try {
      const responseData = await client.calls.create({
        to: phoneNumber, //コール先の番号
        from: twilioConfig.YOUR_TWILIO_NUMBER, // 取得したtwilioの番号.
        url: 'http://twimlets.com/echo?Twiml=' + querystring.escape(twiml)
      })
      console.log(responseData.from)
      const { from } = responseData
      const messages = [
        from ? `${from}から` :'',
        'あなたの電話番号に決済の電話をコールします。',
        '電話の案内に従って決済をおこなってください。'
      ].join('')
      return handlerInput.responseBuilder
        .speak(messages)
        .getResponse();
    } catch (e) {
      console.log(e)
      const speechText = 'すみません。カードの処理に失敗しました。ログを確認して再度お試しください。';
      return handlerInput.responseBuilder
        .speak(speechText)
        .getResponse();
    }
  }
}
あとはgitで変更を保存することで、スキルがAlexaアカウントに紐付いた電話番号を利用するようになります。
電話番号の利用を許可する方法
テスト画面で「電話決済で決済して」のように実行すると、以下のように「連絡先の利用が許可されていません。アレクサアプリの設定を変更して下さい。」という返答が返ってきます。これはスキルが連絡先情報の利用許可を得ていないためです。
alexa.amazon.co.jpにスキルカードが表示されています。

[許可をアップデート]をクリックします。

[設定]をクリックします。

[アクセス権限を管理]をクリックします。
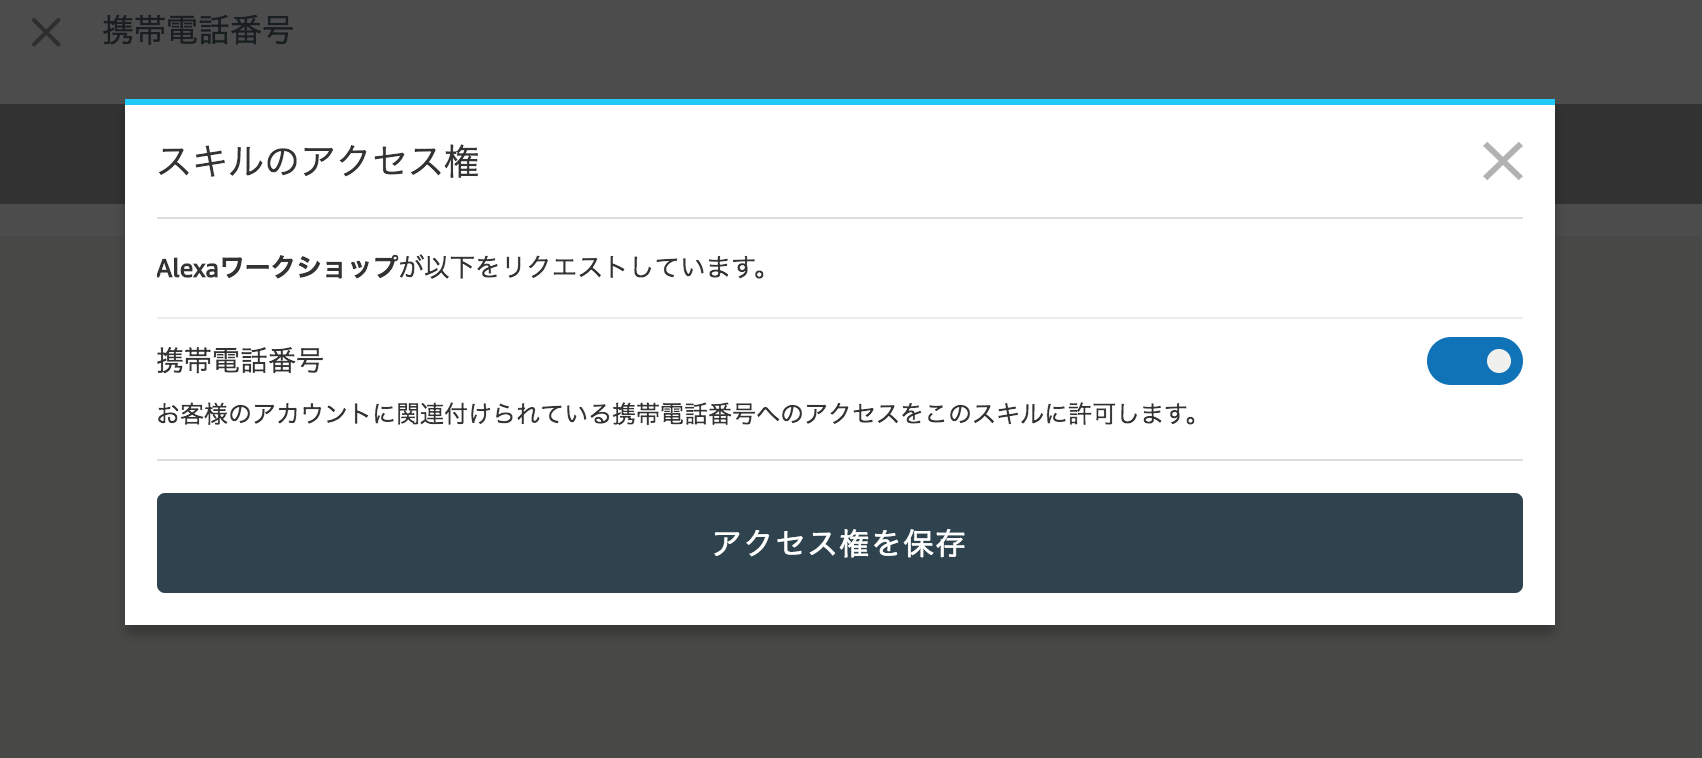
[携帯電話番号]をオンにして[アクセス権限を保存]をクリックします。
この状態で再度テスト画面で「電話決済で決済して」と試してみましょう。
無事電話がかかれば成功です。
Advanced
最後まで完走して、時間が余っている方はぜひチャレンジしてください。
- 決済結果をDynamoDBに保存する
- 決済結果に応じて次回からのAlexaの発話を変更する
- Twilio Payの価格を動的に変更する
- 実際のスキルとしてどう利用するか考えてTwitterに投稿する
- Lambda Layerを使う
片付け
月額の課金が発生するサービスが含まれています。
必ず最後に使用したサービスを終了させてください。
Stripeアカウント
Stripeは「本番環境にてクレジットカード決済が実行された場合」に課金されます。
テスト環境のみであれば課金されることはありませんが、今後も使う予定がない場合は、https://dashboard.stripe.com/account/data から解約が可能です。
Twilio
Twilio Payは決済が成功した場合のみ課金される仕組みのため、使わない分には請求は発生しません。
ただし購入した電話番号については月額の料金が発生します。
左側のメニューから[Phone Numbers]をクリックします。

[アクティブな電話番号]に表示されている電話番号をクリックし、ページ下部にある[この電話番号をリリースする]をクリックしましょう。
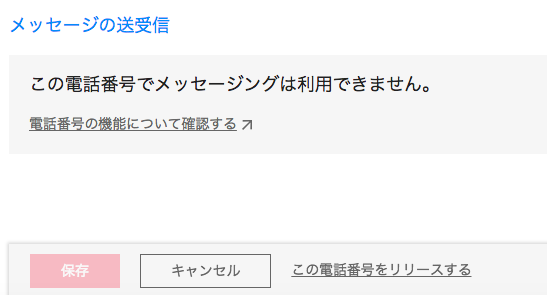
確認画面が表示されますので、[番号をリリースする]をクリックします。
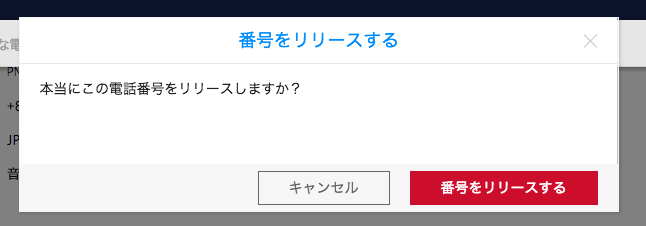
※なお、Twilioについては電話番号購入時に課金が発生します。
無料のトライアル枠を超えて利用されている場合にはご注意ください。
AWS / Alexa
CodeStarで管理していますので、CodeStarプロジェクトを削除するだけでOKです。
CodeStarプロジェクト詳細画面の左メニューから[プロジェクト]を選択します。
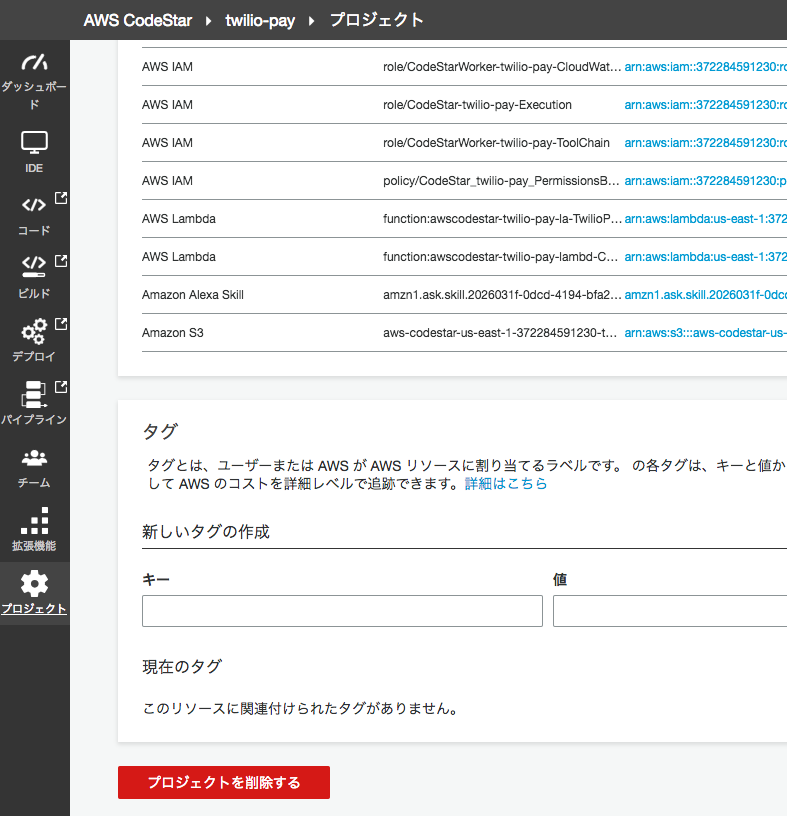
ページ下部に[プロジェクトを削除する]というボタンがありますので、クリック後に必要な情報を入力して削除しましょう。
CloudFormation経由で各種リソースを削除します。削除が完了するまで数十分程度かかる場合がありますのでご了承ください。
※DynamoDBなどを手動で作成された方は、そちらの削除もお忘れないようにお願いします。
困ったときは・・・
CodeStarのプロジェクト作成が失敗する
ログインしているAWSアカウントの権限が不足している可能性があります。
Administrator Accessのポリシーが付与されたアカウントで再度トライしてください。
Cloud9がIDEのリストにない
ap-northeast-1(東京)など、Cloud9がサポートされていない地域でプロジェクトを作成してる可能性があります。
us-east-1(バージニア北部)にて再度作成してください。
Alexaスキルが自分のAlexaアプリに表示されない
Alexaスキル開発には、日本人限定のハマりスポットがあります。
Alexa 開発者アカウント作成時のハマりどころを確認してください。
Lambdaがうまく動いていないっぽい
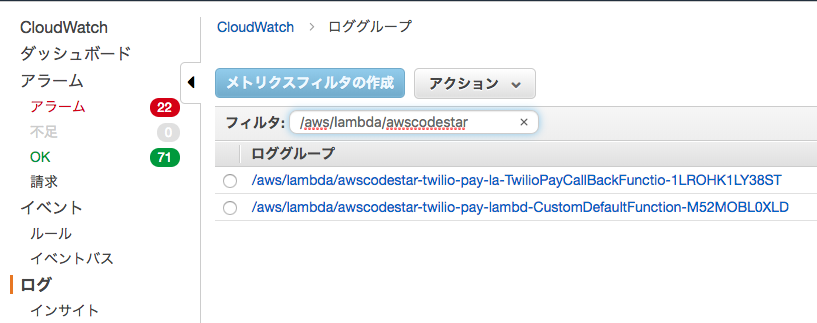
CloudWatch Logsでデバッグしましょう。
ロググループは[/aws/lambda/awscodestar-XXX]という命名規則ですので、[/aws/lambda/awscodestar]をフィルタに入れることである程度絞り込めます。
Twilio Payの決済に失敗する
本物のカード番号を入れていませんか?
Stripeの仕組み上、テストアカウントでは本物のカード番号を入力できません。
使用できるカード番号は、https://stripe.com/docs/testing#cards を確認してください。
Note
CodeStarでAlexaスキルを開発・運用するメリット・デメリット
メリット
- AWS側で一元管理できる
- CI / CDパイプラインやコラボレーション環境がオールインワンで立ち上がる
- AlexaスキルとバックエンドをCloudFormation(SAM)でコード管理できる
デメリット
- 対話モデルなどもコード管理されるため、Alexa開発コンソールで変更できない(しても上書きされる)
- フォルダ構成が異なるため、ASK-CLIとの併用も簡単ではない
- 無料枠を超えると、Cloud9 / Code XXXシリーズなどの利用料金が発生する
CodeStarでのAlexaスキルを推奨するケース
- チームでのスキル開発・運用を考えている
- CloudFormation / SAMを扱いなれている
- リモートで作業することが多く、どこからでもスキルを更新したい
- テストとビルドを自動化したい
CodeStarでのAlexaスキルを推奨しないケース
- 個人でさっさと作りたい -> Hosted Skill
- 複数のスキルを量産したい(パイプラインが増えるので、課金されやすい) -> ASK CLIのcloneコマンドやServerless Framework
- 実機テスト以外特に予定していない -> 好みに応じて
- Alexa開発コンソール / ASK CLI / Serverless Frameworkを使いたい -> 好みに応じて
