はじめに
AWS Amplify は使ったことはないけれど色々な投稿を見ていると使ってみたいと思ったので、
環境構築や WEB アプリの実装を通じて理解を深めたいと思います
間違っている点などありましたら、ご指摘ください
AWS Amplify とは
WEB やモバイルアプリケーションを容易に開発するためのフレームワーク
Amplify を用いることで、以下のような機能を手軽に実装することができてサービスの本質的な開発に注力することが出来る
- 認証機能
- アクセス権限制御ロジックの実装
- WebSocket サーバーの構築、運用、監視
- ネイティブアプリの Push 通知基盤の構築
- データ分析のためのダッシュボードの開発
開発環境
- Windows 10
- nodist(nodeのバージョン管理)
- node 12.13.0
Windows 環境に開発環境を構築する
amplify-cli をインストールする
npm install -g @aws-amplify/cli
インストールが完了したことを確認するために以下のコマンドを実行し Version が出るとインストール出来ている
amplify --version
Amplify のアカウントを作成する
amplify configure
上記のコマンドを実行すると、AWS へのログインを求められ、対話形式で色々聞かれるので、それに回答していく
Sign in to your AWS administrator account:
https://console.aws.amazon.com/
Press Enter to continue

Specify the AWS Region
? region:
  eu-west-1
  eu-west-2
  eu-central-1
> ap-northeast-1
  ap-northeast-2
  ap-southeast-1
  ap-southeast-2
(Move up and down to reveal more choices)
今回は東京リージョンで動作確認を行っていくので ap-northeast-1 を選択する
Specify the AWS Region
? region:  ap-northeast-1
Specify the username of the new IAM user:
? user name:  (amplify-HCeXC)
IAM の名前を聞かれるも、後々変更可能なのでそのまま Enter をッターン!

先ほどログインしたブラウザが立ち上がり、先ほどのユーザ名の書かれたページが表示される
今回はそのまま、「次のステップ:アクセス制限」をクリックする
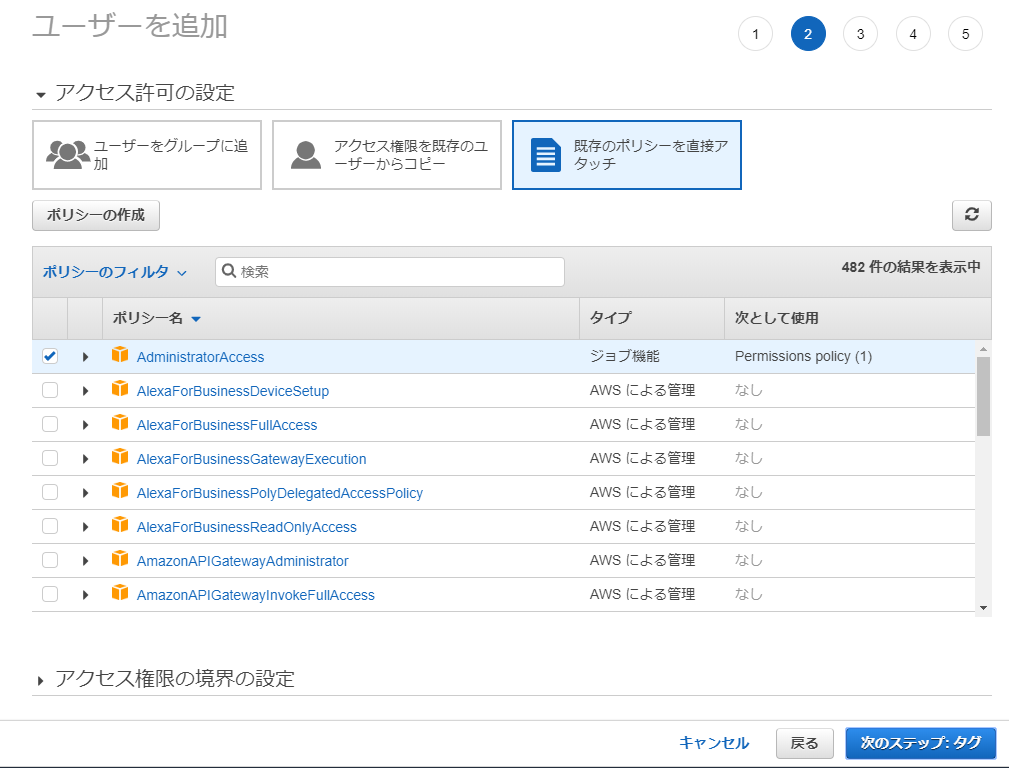
本来であれば IAM のセキュリティを考えて権限を付けたほうが良い
今時点ではよくわかっていないのでそのまま「次のステップ:タグ」を選択して進める(問題の先送りといわないで、、、)

特に追加する予定もないので「次のステップ:確認」を選択して進める
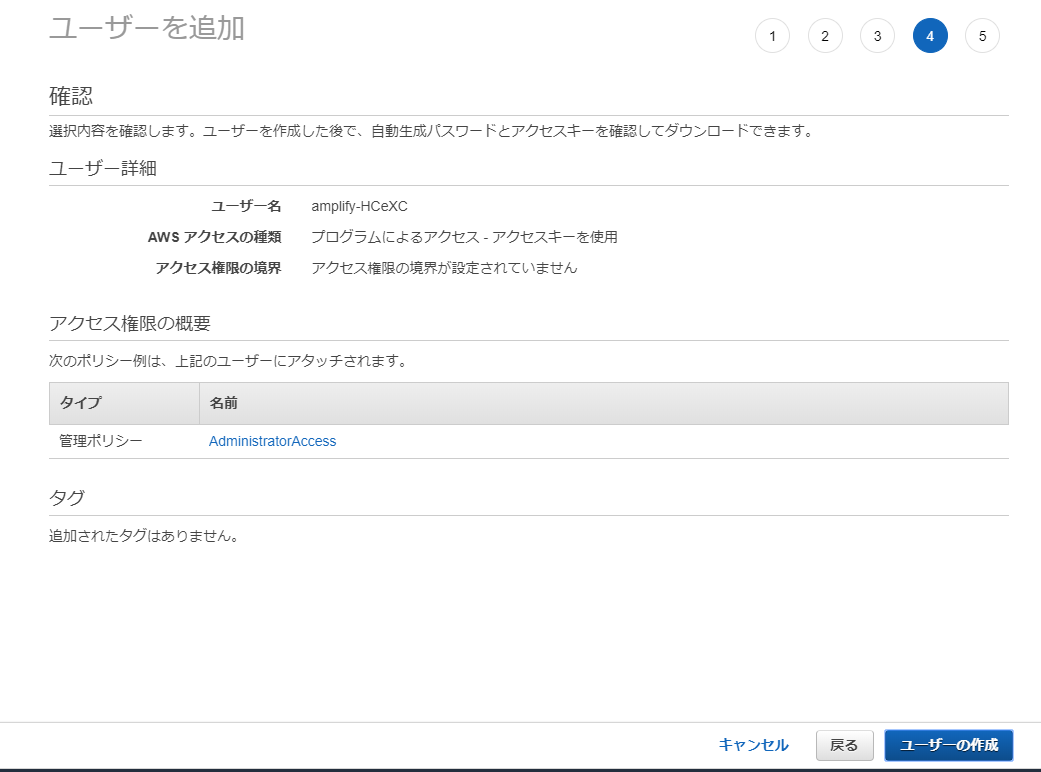
「ユーザの作成」を選択すると、次のページで アクセスキー と シークレットキー が作成される
Enter the access key of the newly created user:
? accessKeyId:  **********
? secretAccessKey:  ********************
This would update/create the AWS Profile in your local machine
? Profile Name:  amplify-example
ページを閉じると、先ほどコマンドプロンプトに戻ると、アクセスキー、シークレットキー Profile の名前を聞かれるのでそれぞれ入力する
Successfully set up the new user.
Amplify 向けの AWS アカウントの作成が完了する
Amplify のバックエンド側のセットアップを実施する
作業ディレクトリに移動した後以下の処理を実行する
amplify init
C:\work\amplify-example>amplify init
Note: It is recommended to run this command from the root of your app directory
? Enter a name for the project amplify-example
? Enter a name for the environment dev
? Choose your default editor:
> Visual Studio Code
  Atom Editor
  Sublime Text
  IntelliJ IDEA
  Vim (via Terminal, Mac OS only)
  Emacs (via Terminal, Mac OS only)
  None
プロジェクト名や environment を入力し、開発ツールも選択する(この時名称に大文字は使わないほうが良いみたいです)
(私は VSC を利用するのでこちらを選択しています)
C:\work\amplify-example>amplify init
Note: It is recommended to run this command from the root of your app directory
? Enter a name for the project amplify-example
? Enter a name for the environment dev
? Choose your default editor: Visual Studio Code
? Choose the type of app that you're building (Use arrow keys)
  android
  ios
> javascript
対象アプリですが、今回 WEB アプリを実装する予定なので javascript を選択する
Please tell us about your project
? What javascript framework are you using
  angular
  ember
  ionic
  react
  react-native
> vue
  none
framework も聞いてくれるので、 vue を選択する
Please tell us about your project
? What javascript framework are you using vue
? Source Directory Path:  src
? Distribution Directory Path: dist
? Build Command:  npm.cmd run-script build
? Start Command: npm.cmd run-script serve
Using default provider  awscloudformation
ソースの Path 、配布用ディレクトリの Path 、ビルドコマンドを対話形式で設定する
For more information on AWS Profiles, see:
https://docs.aws.amazon.com/cli/latest/userguide/cli-multiple-profiles.html

? Do you want to use an AWS profile? (Y/n)
先ほど Profile を作成しているので、Y を選択し作成した Profile を選択します
Your project has been successfully initialized and connected to the cloud!
こちらが出力されるとセットアップ完了のようです
さいごに
記事の量が多めになったので今回はセットアップまでとしています
次はできた環境を用いて WEB アプリの実装に挑戦したいと思います
【次の記事】
AWS Amplify を使って WEB アプリを実装してみた(プロジェクト作成編)
参考サイト
- Windowsでnodeのバージョン切り替え -nodlist の使い方
-
AWS Amplify CLIの使い方〜インストールから初期セットアップまで〜
- この手順を利用してセットアップが出来ました