Firecrackerがバージョン1.0になったとのことです。おめでとうございます。
同じタイミングでRaspberry Pi OSの64-bit版が正式版になったとのことです。おめでとうございます。
64-bit版のRaspberry Pi OSを使って、Firecrackerを試してみました。Raspberry Pi 4を使っています。(3ではうまく動かなそうです)
Raspberry Pi OSの準備
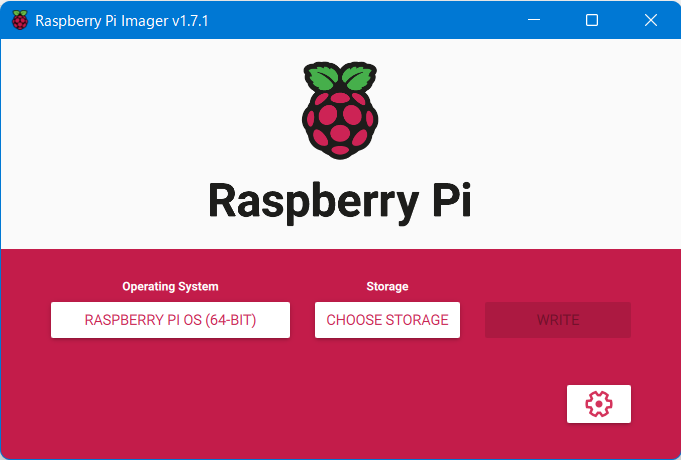
Raspberry Pi Imagerを使ってOSをmicroSDカードに書き込みます。
Raspberry Pi OS (other)からRaspberry Pi OS (64-bit)が選択できるようになっています。

また、OSを選択したあと、画面右下に設定ボタンが追加されていて、SSHの設定やホスト名の設定が簡単に出来るようになっています。

Firecrackerの準備
GitHub上のGetting Started with Firecrackerに沿って実施するだけです。
- KVMの読み取り/書き込み権限の付与
sudo setfacl -m u:${USER}:rw /dev/kvm
- Firecrackerバイナリの取得
release_url="https://github.com/firecracker-microvm/firecracker/releases"
latest=$(basename $(curl -fsSLI -o /dev/null -w  %{url_effective} ${release_url}/latest))
arch=`uname -m`
curl -L ${release_url}/download/${latest}/firecracker-${latest}-${arch}.tgz \
| tar -xz
- 実行ファイルをリネーム
mv release-${latest}-$(uname -m)/firecracker-${latest}-$(uname -m) firecracker
注:Getting Startedのガイドとちょっとパスが違います
準備はここまでです。
Firecrackerの実行
シェルを2つ立ち上げて実施します。
まずは1つ目のシェルで、
- Firecrackerの起動
1st-shell
rm -f /tmp/firecracker.socket
./firecracker --api-sock /tmp/firecracker.socket
待受状態になります。
続いて2つ目のシェルで、
- kernelとrootfsの取得
2nd-shell
arch=`uname -m`
dest_kernel="hello-vmlinux.bin"
dest_rootfs="hello-rootfs.ext4"
image_bucket_url="https://s3.amazonaws.com/spec.ccfc.min/img/quickstart_guide/$arch"

if [ ${arch} = "x86_64" ]; then
    kernel="${image_bucket_url}/kernels/vmlinux.bin"
    rootfs="${image_bucket_url}/rootfs/bionic.rootfs.ext4"
elif [ ${arch} = "aarch64" ]; then
    kernel="${image_bucket_url}/kernels/vmlinux.bin"
    rootfs="${image_bucket_url}/rootfs/bionic.rootfs.ext4"
else
    echo "Cannot run firecracker on $arch architecture!"
    exit 1
fi

echo "Downloading $kernel..."
curl -fsSL -o $dest_kernel $kernel

echo "Downloading $rootfs..."
curl -fsSL -o $dest_rootfs $rootfs

echo "Saved kernel file to $dest_kernel and root block device to $dest_rootfs."
- ゲストkernelのセット
2nd-shell
arch=`uname -m`
kernel_path=$(pwd)"/hello-vmlinux.bin"

if [ ${arch} = "x86_64" ]; then
    curl --unix-socket /tmp/firecracker.socket -i \
      -X PUT 'http://localhost/boot-source'   \
      -H 'Accept: application/json'           \
      -H 'Content-Type: application/json'     \
      -d "{
            \"kernel_image_path\": \"${kernel_path}\",
            \"boot_args\": \"console=ttyS0 reboot=k panic=1 pci=off\"
       }"
elif [ ${arch} = "aarch64" ]; then
    curl --unix-socket /tmp/firecracker.socket -i \
      -X PUT 'http://localhost/boot-source'   \
      -H 'Accept: application/json'           \
      -H 'Content-Type: application/json'     \
      -d "{
            \"kernel_image_path\": \"${kernel_path}\",
            \"boot_args\": \"keep_bootcon console=ttyS0 reboot=k panic=1 pci=off\"
       }"
else
    echo "Cannot run firecracker on $arch architecture!"
    exit 1
fi
- ゲストrootfsのセット
2nd-shell
rootfs_path=$(pwd)"/hello-rootfs.ext4"
curl --unix-socket /tmp/firecracker.socket -i \
  -X PUT 'http://localhost/drives/rootfs' \
  -H 'Accept: application/json'           \
  -H 'Content-Type: application/json'     \
  -d "{
        \"drive_id\": \"rootfs\",
        \"path_on_host\": \"${rootfs_path}\",
        \"is_root_device\": true,
        \"is_read_only\": false
   }"
- ゲストマシンの起動
2nd-shell
curl --unix-socket /tmp/firecracker.socket -i \
  -X PUT 'http://localhost/actions'       \
  -H  'Accept: application/json'          \
  -H  'Content-Type: application/json'    \
  -d '{
      "action_type": "InstanceStart"
   }'
ゲストマシンの起動リクエストを受けて、1つ目のシェルでゲストマシンが起動します。
こんな感じです。
