1. はじめに
記事の目的と概要
本記事では MCP(Model Context Protocol) を活用し、 ClaudeDesktop と LINE を連携させる方法をご紹介します。
MCP は AI アシスタントとデータが保存されているシステムを繋ぐ新しい標準プロトコルであり、これを利用することで、Claude から LINE にボットを介してメッセージを送信できる仕組みを実現します。
本記事を通じて、以下を学ぶことができます:
- MCP の基本的な理解
- MCP を用いた実際の実装手順
- LINE との連携を活用したプロモーションやメッセージ送信の実例
2. MCP とは何か
基本概要
MCP(Model Context Protocol) とは、AI アシスタントをデータが存在するシステム(コンテンツリポジトリ、ビジネスツール、開発環境など)と接続するための 新しい標準プロトコル です。
このプロトコルの主な目的は、AI アシスタントが より正確で関連性の高い応答 を生成するために必要なデータへ、安全かつ効率的にアクセスできるようにすることです。
従来、AI モデルは情報のサイロ化やレガシーシステムの制約によりデータへのアクセスが制限されていましたが、MCP はこれらの課題を解決し、データソースの分断を統一されたプロトコルで橋渡しします。
以下の記事にて分かりやすく解説されています:
3. Claude Desktop と LINEの連携手順
事前準備
MCP サーバーの新規作成し、環境のセットアップす:
-
新しいサーバーを作成する
以下のコマンドを使い、新しいサーバーディレクトリを作成します:npx @modelcontextprotocol/create-server my-server -
サーバーディレクトリに移動し、依存関係をインストール
作成したサーバーディレクトリに移動し、必要な依存関係をインストールします:cd my-server npm install -
サーバーをビルドする
サーバーを一度ビルドする場合は以下を実行します:npm run buildまた、開発中にリアルタイムで変更を反映させたい場合は以下を使用します:
npm run watch -
サーバーバイナリをグローバルで利用可能にする(オプション)
必要に応じて、以下のコマンドでサーバーをグローバルバイナリとしてリンクします:npm link
MCP サーバーの実装
path/to/my-server/src/index.ts を以下の内容に変更
#!/usr/bin/env node
// 必要なMCPのSDKモジュールをインポート
import { Server } from "@modelcontextprotocol/sdk/server/index.js";
import { StdioServerTransport } from "@modelcontextprotocol/sdk/server/stdio.js";
import {
  CallToolRequest,
  CallToolRequestSchema,
  ListToolsRequestSchema,
  Tool,
} from "@modelcontextprotocol/sdk/types.js";

// メッセージ送信に必要な引数の型定義
// user_id: メッセージを送信する対象のLINEユーザーID
// message: 送信するメッセージの内容
interface SendMessageArgs {
  user_id: string;
  message: string;
}

// ユーザープロフィール取得に必要な引数の型定義
// user_id: プロフィールを取得したいLINEユーザーID
interface GetUserProfileArgs {
  user_id: string;
}

// LINE MessagingAPIで利用可能なツールの定義
// メッセージ送信機能の定義
const sendMessageTool: Tool = {
  name: "line_send_message",
  description: "Send a message to a LINE user",
  inputSchema: {
    type: "object",
    properties: {
      user_id: {
        type: "string",
        description: "The ID of the user to send to",
      },
      message: {
        type: "string",
        description: "The message content",
      },
    },
    required: ["user_id", "message"],
  },
};

// ユーザープロフィール取得機能の定義
const getUserProfileTool: Tool = {
  name: "line_get_profile",
  description: "Get profile information of a LINE user",
  inputSchema: {
    type: "object",
    properties: {
      user_id: {
        type: "string",
        description: "The ID of the user",
      },
    },
    required: ["user_id"],
  },
};

// LINE APIとの通信を管理するクライアントクラス
class LINEClient {
  private channelAccessToken: string;
  private headers: { Authorization: string; "Content-Type": string };
  private baseUrl = "https://api.line.me/v2/bot";

  // チャネルアクセストークンを使用して初期化
  constructor(channelAccessToken: string) {
    this.channelAccessToken = channelAccessToken;
    this.headers = {
      Authorization: `Bearer ${channelAccessToken}`,
      "Content-Type": "application/json",
    };
  }

  // メッセージを送信するメソッド
  // LINEのPush Message APIを使用
  async sendMessage(userId: string, message: string): Promise<any> {
    const response = await fetch(`${this.baseUrl}/message/push`, {
      method: "POST",
      headers: this.headers,
      body: JSON.stringify({
        to: userId,
        messages: [
          {
            type: "text",
            text: message,
          },
        ],
      }),
    });

    return response.json();
  }

  // ユーザープロフィールを取得するメソッド
  // LINE Profile APIを使用
  async getProfile(userId: string): Promise<any> {
    const response = await fetch(`${this.baseUrl}/profile/${userId}`, {
      headers: this.headers,
    });

    return response.json();
  }
}

// メインの実行関数
async function main() {
  // 環境変数からLINEのチャネルアクセストークンを取得
  const channelAccessToken = process.env.LINE_CHANNEL_ACCESS_TOKEN;

  // アクセストークンが設定されていない場合はエラーで終了
  if (!channelAccessToken) {
    console.error("Please set LINE_CHANNEL_ACCESS_TOKEN environment variable");
    process.exit(1);
  }

  console.error("Starting LINE MCP Server...");
  // MCPサーバーの初期化
  const server = new Server(
    {
      name: "LINE MCP Server",
      version: "1.0.0",
    },
    {
      capabilities: {
        tools: {},
      },
    }
  );

  // LINEクライアントのインスタンスを作成
  const lineClient = new LINEClient(channelAccessToken);

  // ツールリクエストのハンドラーを設定
  // 各ツールの実行ロジックを定義
  server.setRequestHandler(
    CallToolRequestSchema,
    async (request: CallToolRequest) => {
      console.error("Received CallToolRequest:", request);
      try {
        if (!request.params.arguments) {
          throw new Error("No arguments provided");
        }

        // リクエストされたツール名に応じて処理を分岐
        switch (request.params.name) {
          case "line_send_message": {
            const args = request.params.arguments as unknown as SendMessageArgs;
            if (!args.user_id || !args.message) {
              throw new Error("Missing required arguments: user_id and message");
            }
            const response = await lineClient.sendMessage(
              args.user_id,
              args.message
            );
            return {
              content: [{ type: "text", text: JSON.stringify(response) }],
            };
          }

          case "line_get_profile": {
            const args = request.params.arguments as unknown as GetUserProfileArgs;
            if (!args.user_id) {
              throw new Error("Missing required argument: user_id");
            }
            const response = await lineClient.getProfile(args.user_id);
            return {
              content: [{ type: "text", text: JSON.stringify(response) }],
            };
          }

          default:
            throw new Error(`Unknown tool: ${request.params.name}`);
        }
      } catch (error) {
        console.error("Error executing tool:", error);
        return {
          content: [
            {
              type: "text",
              text: JSON.stringify({
                error: error instanceof Error ? error.message : String(error),
              }),
            },
          ],
        };
      }
    }
  );

  // 利用可能なツール一覧を返すハンドラーを設定
  server.setRequestHandler(ListToolsRequestSchema, async () => {
    console.error("Received ListToolsRequest");
    return {
      tools: [sendMessageTool, getUserProfileTool],
    };
  });

  // 標準入出力を使用してMCPサーバーを開始
  const transport = new StdioServerTransport();
  console.error("Connecting server to transport...");
  await server.connect(transport);

  console.error("LINE MCP Server running on stdio");
}

// メイン処理の実行とエラーハンドリング
main().catch((error) => {
  console.error("Fatal error in main():", error);
  process.exit(1);
});
LINE APIの設定
LINE API の設定については、以下の公式ドキュメントを参考にしてください。
Claude Desktop との統合
Claude Desktop アプリとの連携は自動的に行われますが、以下の条件と手順を確認してください:
-
Claude Desktop アプリをインストール
前提として、Claude Desktop beta が正しくインストールされている必要があります.
NG: こちらはサードパーティアプリと思われる -
MCPサーバーと連携
npx @modelcontextprotocol/create-serverコマンドで MCP サーバーを作成すると、以下のディレクトリのclaude_desktop_config.jsonが更新されます。
Windows:%APPDATA%/Claude/claude_desktop_config.json
macOS:~/Library/Application Support/Claude/claude_desktop_config.json -
ラインボットのチャネルアクセストークンをenvに追加
"my-server": {
  "command": "node",
  "args": [
    "path/to/your/build/index.js"
  ],
  "env": {
    "LINE_CHANNEL_ACCESS_TOKEN": "your_access_token"
  }
}
-
アプリの再起動が必要
MCP サーバーと Claude Desktop アプリが確実に連携するためには、Claude Desktop アプリを一度再起動してください。
より詳細な手順や注意点については、以下の記事をご参照ください:
4. 実際の連携結果
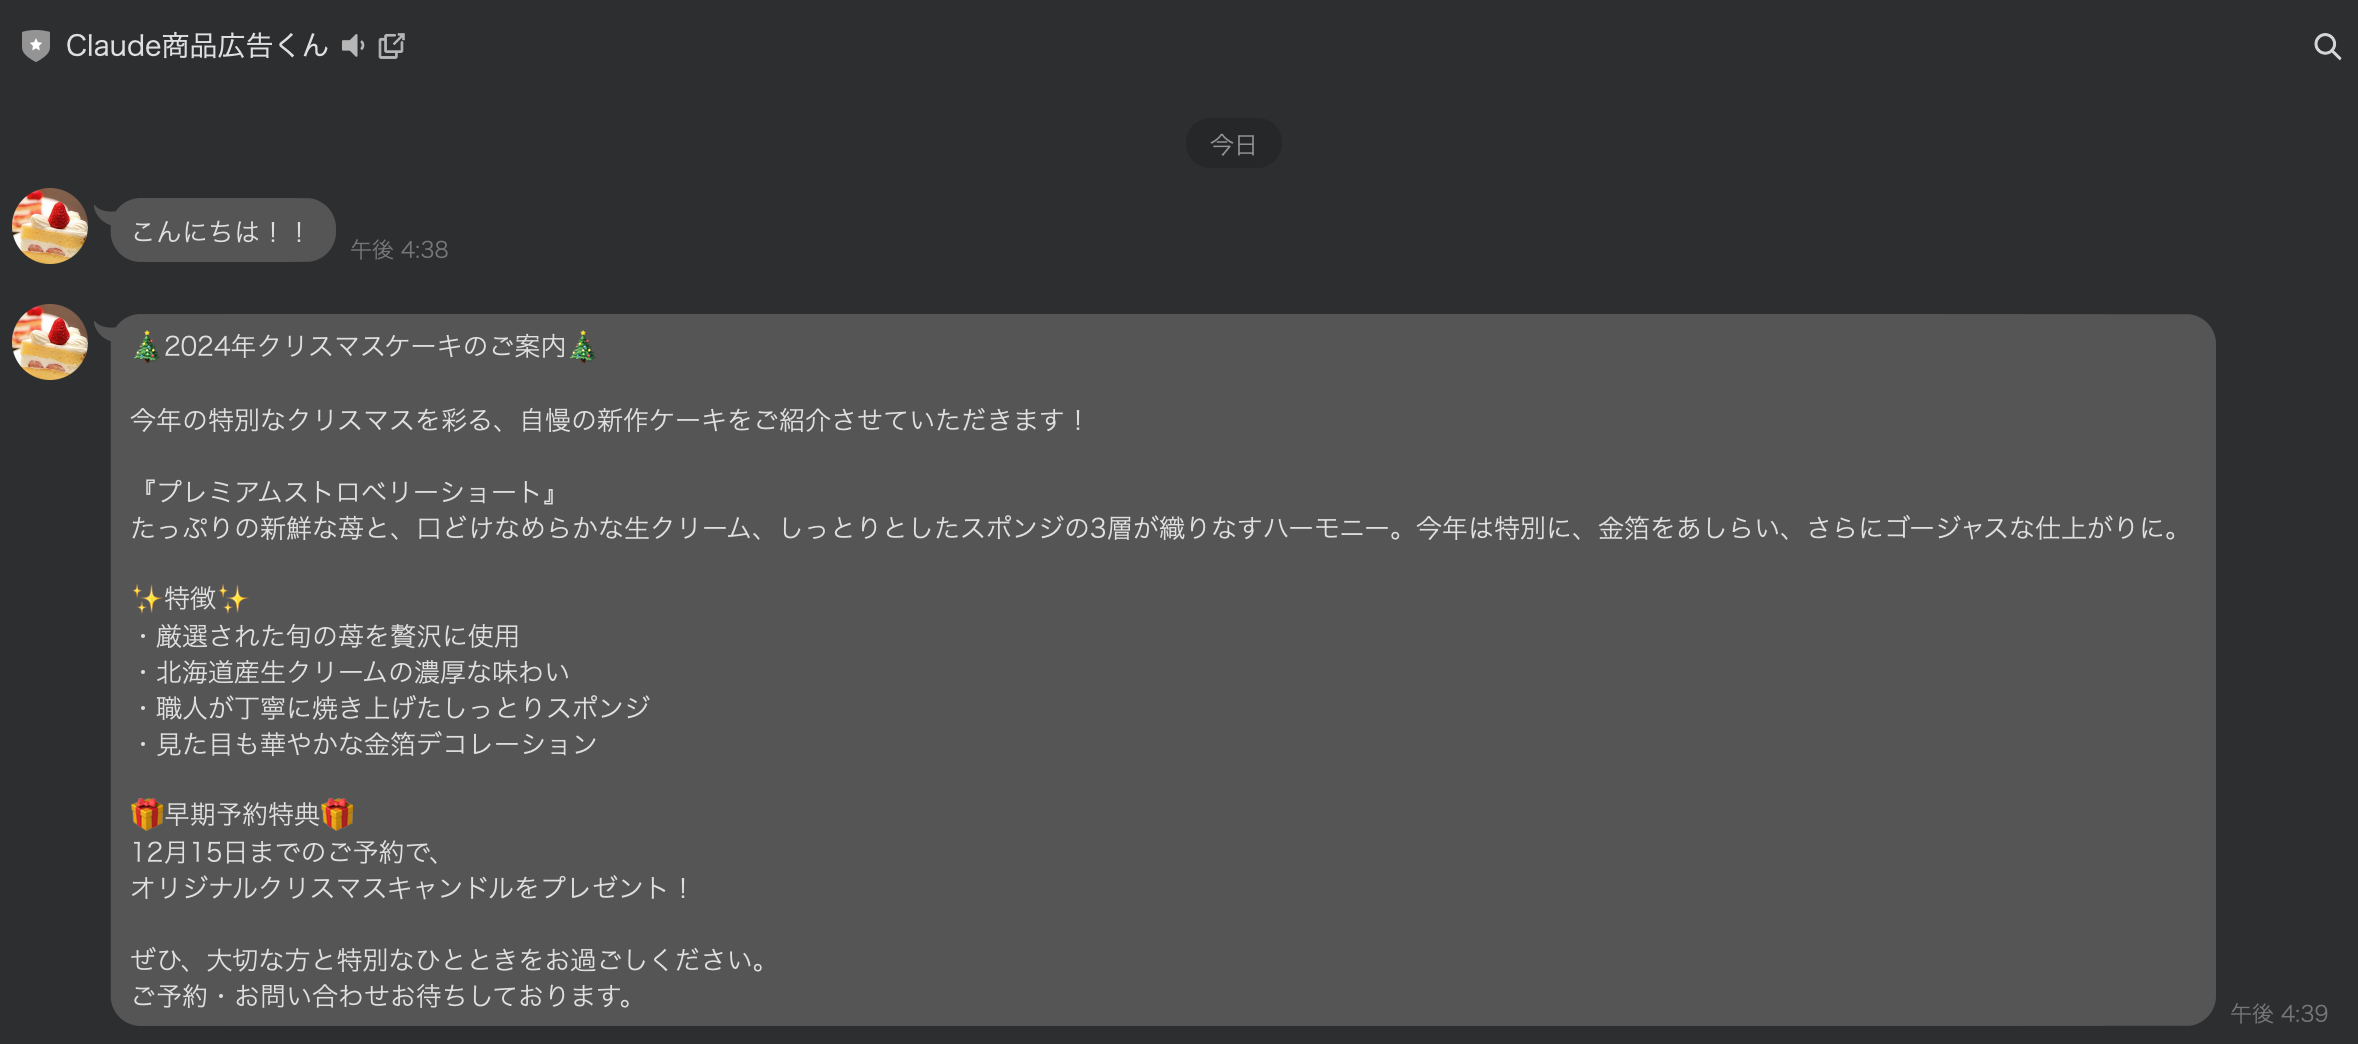
MCP を活用した Claude Desktop アプリと LINE の連携の実際の動作例をスクリーンショット付きで紹介します。
ユーザープロフィールの取得
Claude Desktop アプリを使用して、LINE のユーザーIDに対応するプロフィール情報を取得します。この操作により、ユーザー名やその他の関連情報をLINE Messaging APIから取得し、Claude で確認することができます。
メッセージの送信
- Claude Desktop:
商品のリコメンドメッセージを送信
このように、MCPを活用することで、ユーザーごとにパーソナライズされたメッセージの生成・送信が非常に簡単に行えることが確認できます。
5. まとめ
本記事では、MCPを活用してClaude DesktopアプリとLINEを連携させる方法を解説しました。
本記事で紹介したコードや設定は以下のGitHubで公開していますので、ぜひ参考にしてください


