たとえば、Docker for Mac のドキュメント を読むと、すぐに nginx のサンプルに出会います。
docker run -d -p 80:80 --name webserver nginx
これで、localhost にアクセスすれば、Welcome to nginx ページが表示されわけですが、
ところで、nginx の設定ファイルとか何処にあって、何が書かれているんだろう? と初心者は思います。 ![]()
ですので、設定ファイルを確認しつつ、piyo.html といったサンプルページを表示させる 『docker + nginx 簡単サンプル』をお届けします。
コンテナ内の設定ファイルを確認
# コンテナを立ち上げます
$ docker run -d -p 80:80 --name webserver nginx

# コンテナ内に入ります。
$ docker exec -it webserver /bin/bash
あとは、cat とかで見れます。![]()
user  nginx;
worker_processes  1;

error_log  /var/log/nginx/error.log warn;
pid        /var/run/nginx.pid;


events {
    worker_connections  1024;
}


http {
    include       /etc/nginx/mime.types;
    default_type  application/octet-stream;

    log_format  main  '$remote_addr - $remote_user [$time_local] "$request" '
                      '$status $body_bytes_sent "$http_referer" '
                      '"$http_user_agent" "$http_x_forwarded_for"';

    access_log  /var/log/nginx/access.log  main;

    sendfile        on;
    #tcp_nopush     on;

    keepalive_timeout  65;

    #gzip  on;

    include /etc/nginx/conf.d/*.conf;
}
server {
    listen       80;
    server_name  localhost;

    location / {
        root   /usr/share/nginx/html;
        index  index.html index.htm;
    }

    error_page   500 502 503 504  /50x.html;
    location = /50x.html {
        root   /usr/share/nginx/html;
    }
}
独自のページを表示してみる
上の設定ファイルから、location が /usr/share/nginx/html で設定されていることがわかりますので、ここに html を配置したいと思います。
参考: https://hub.docker.com/_/nginx/
ファイルの用意
# 作業
$ mkdir workspace; cd $_
$ touch Dockerfile
$ mkdir html; cd $_
$ touch index.html piyo.html
$ cd ..


# 確認
mochizuki ~/workspace
$ tree
.
├── Dockerfile
└── html
    ├── index.html
    └── piyo.html

1 directory, 3 files
FROM nginx
COPY ./html /usr/share/nginx/html
<html>
<body>
<h1>Piyo</h1>
</body>
</html>
Dockerfile に COPY 行を追加しているだけです。![]()
コマンド実行
$ cd ~/workspace

# ------------------------
# まずは、イメージの作成
# ------------------------

$ docker build --tag simple-nginx .
# Sending build context to Docker daemon 4.096 kB
# Step 1/2 : FROM nginx
#  ---> cc1b61406712
# Step 2/2 : COPY ./html /usr/share/nginx/html
#  ---> 68e7ceff0e0a
# Removing intermediate container 82d84fb20caf
# Successfully built 68e7ceff0e0a

# ------------------------
# イメージの確認
# ------------------------

$ docker images -a simple-nginx
# REPOSITORY          TAG                 IMAGE ID            CREATED             SIZE
# simple-nginx        latest              68e7ceff0e0a        56 seconds ago      182 MB

# ------------------------
# コンテナ立ち上げ & 確認
# ------------------------

$ docker run -d --name simple-nginx-container -p 80:80 simple-nginx
# d2f9613a55cf8c39628f319f0e23777ecd1e1a69554c094bf765a1a7c0c5015a

$ docker ps
# CONTAINER ID        IMAGE               COMMAND                  CREATED             STATUS              PORTS                         NAMES
# d2f9613a55cf        simple-nginx        "nginx -g 'daemon ..."   5 seconds ago       Up 4 seconds         0.0.0.0:80->80/tcp, 443/tcp   simple-nginx-container
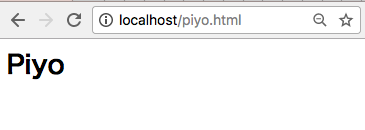
これで、localhost/piyo.html にアクセスすると、ページが表示されます。![]()
以上です。同じことを実現するのに、コンテナ立ち上げ時に -v とかで処理するなど、他にも方法はあるとおもいますが、ひとつのサンプルとしてお届けさせて頂きました。
ありがとうございました。![]()
おまけ
同じことを、docker-compose をつかってやってみました。
$ tree
.
├── containers
│   └── nginx
│       └── Dockerfile
├── docker-compose.yml
└── public
    ├── index.html
    └── piyo.html
version: '3'
services:
  nginx:
    build: ./containers/nginx
    ports:
      - "80:80"
    volumes:
      - ./public:/usr/share/nginx/html
FROM nginx
$ docker-compose up
これから、ここに、php-fpm をいれたり、mysql を入れたりしていくので、docker-compose を使って組み立てていくことになりそうです。
