要件
外出時、LINEで部屋の温度が知りたい
→ node.jsを使ってラズパイから部屋の温度を取得し、LINEBotで返信する
前提条件
- LINE BOTが使えるようになっていること
- ラズパイが初期設定済
- ngrokが使えるようになっていること
上記は前回参照
Node.jsで LINE BOT作ってみる のメモ【1時間でできる!】
今回の作業概要
- ラズパイに最新版のnodeとnpmをインストールする
- 温湿度センサー DHT11をnode.jsで使えるようにする
- 温湿度を聞く(Botで返信)
所要時間 うまくいけば2時間
1.ラズパイに最新版のnodeとnpmをインストールする
最新バージョンの RASBIAN には nodejs が収容されているが,現行のものと比べてかなり古いバージョンなのでアンインストールし新しいバージョンをインストールします
参照記事
https://make.kosakalab.com/make/electronic-work/nodejs_raspi/
2.温湿度センサーをnode.jsを使って使えるようにする
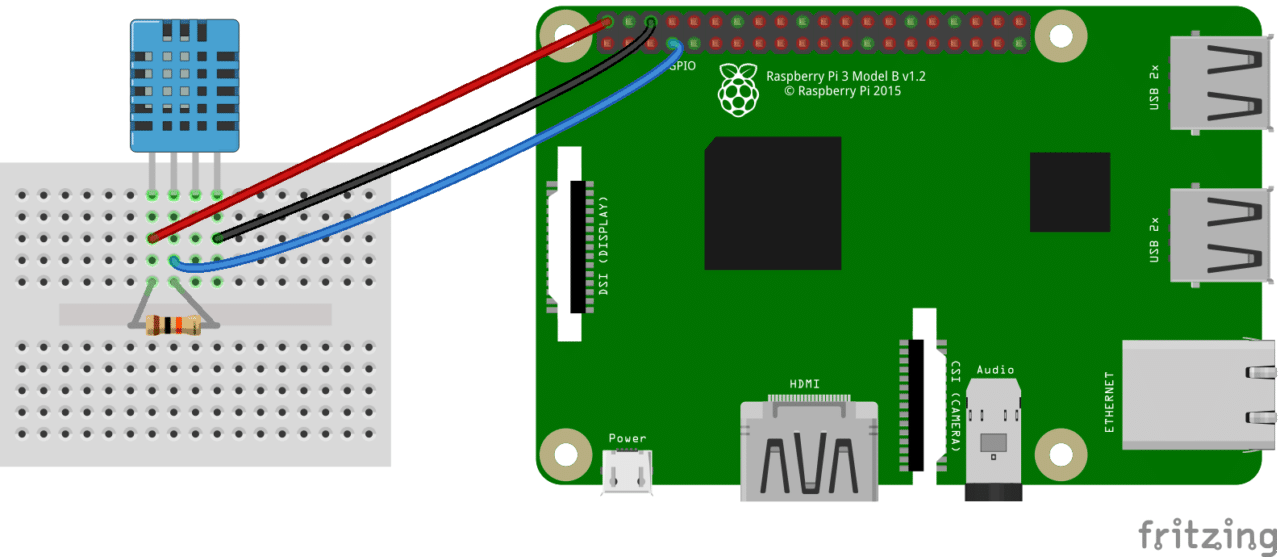
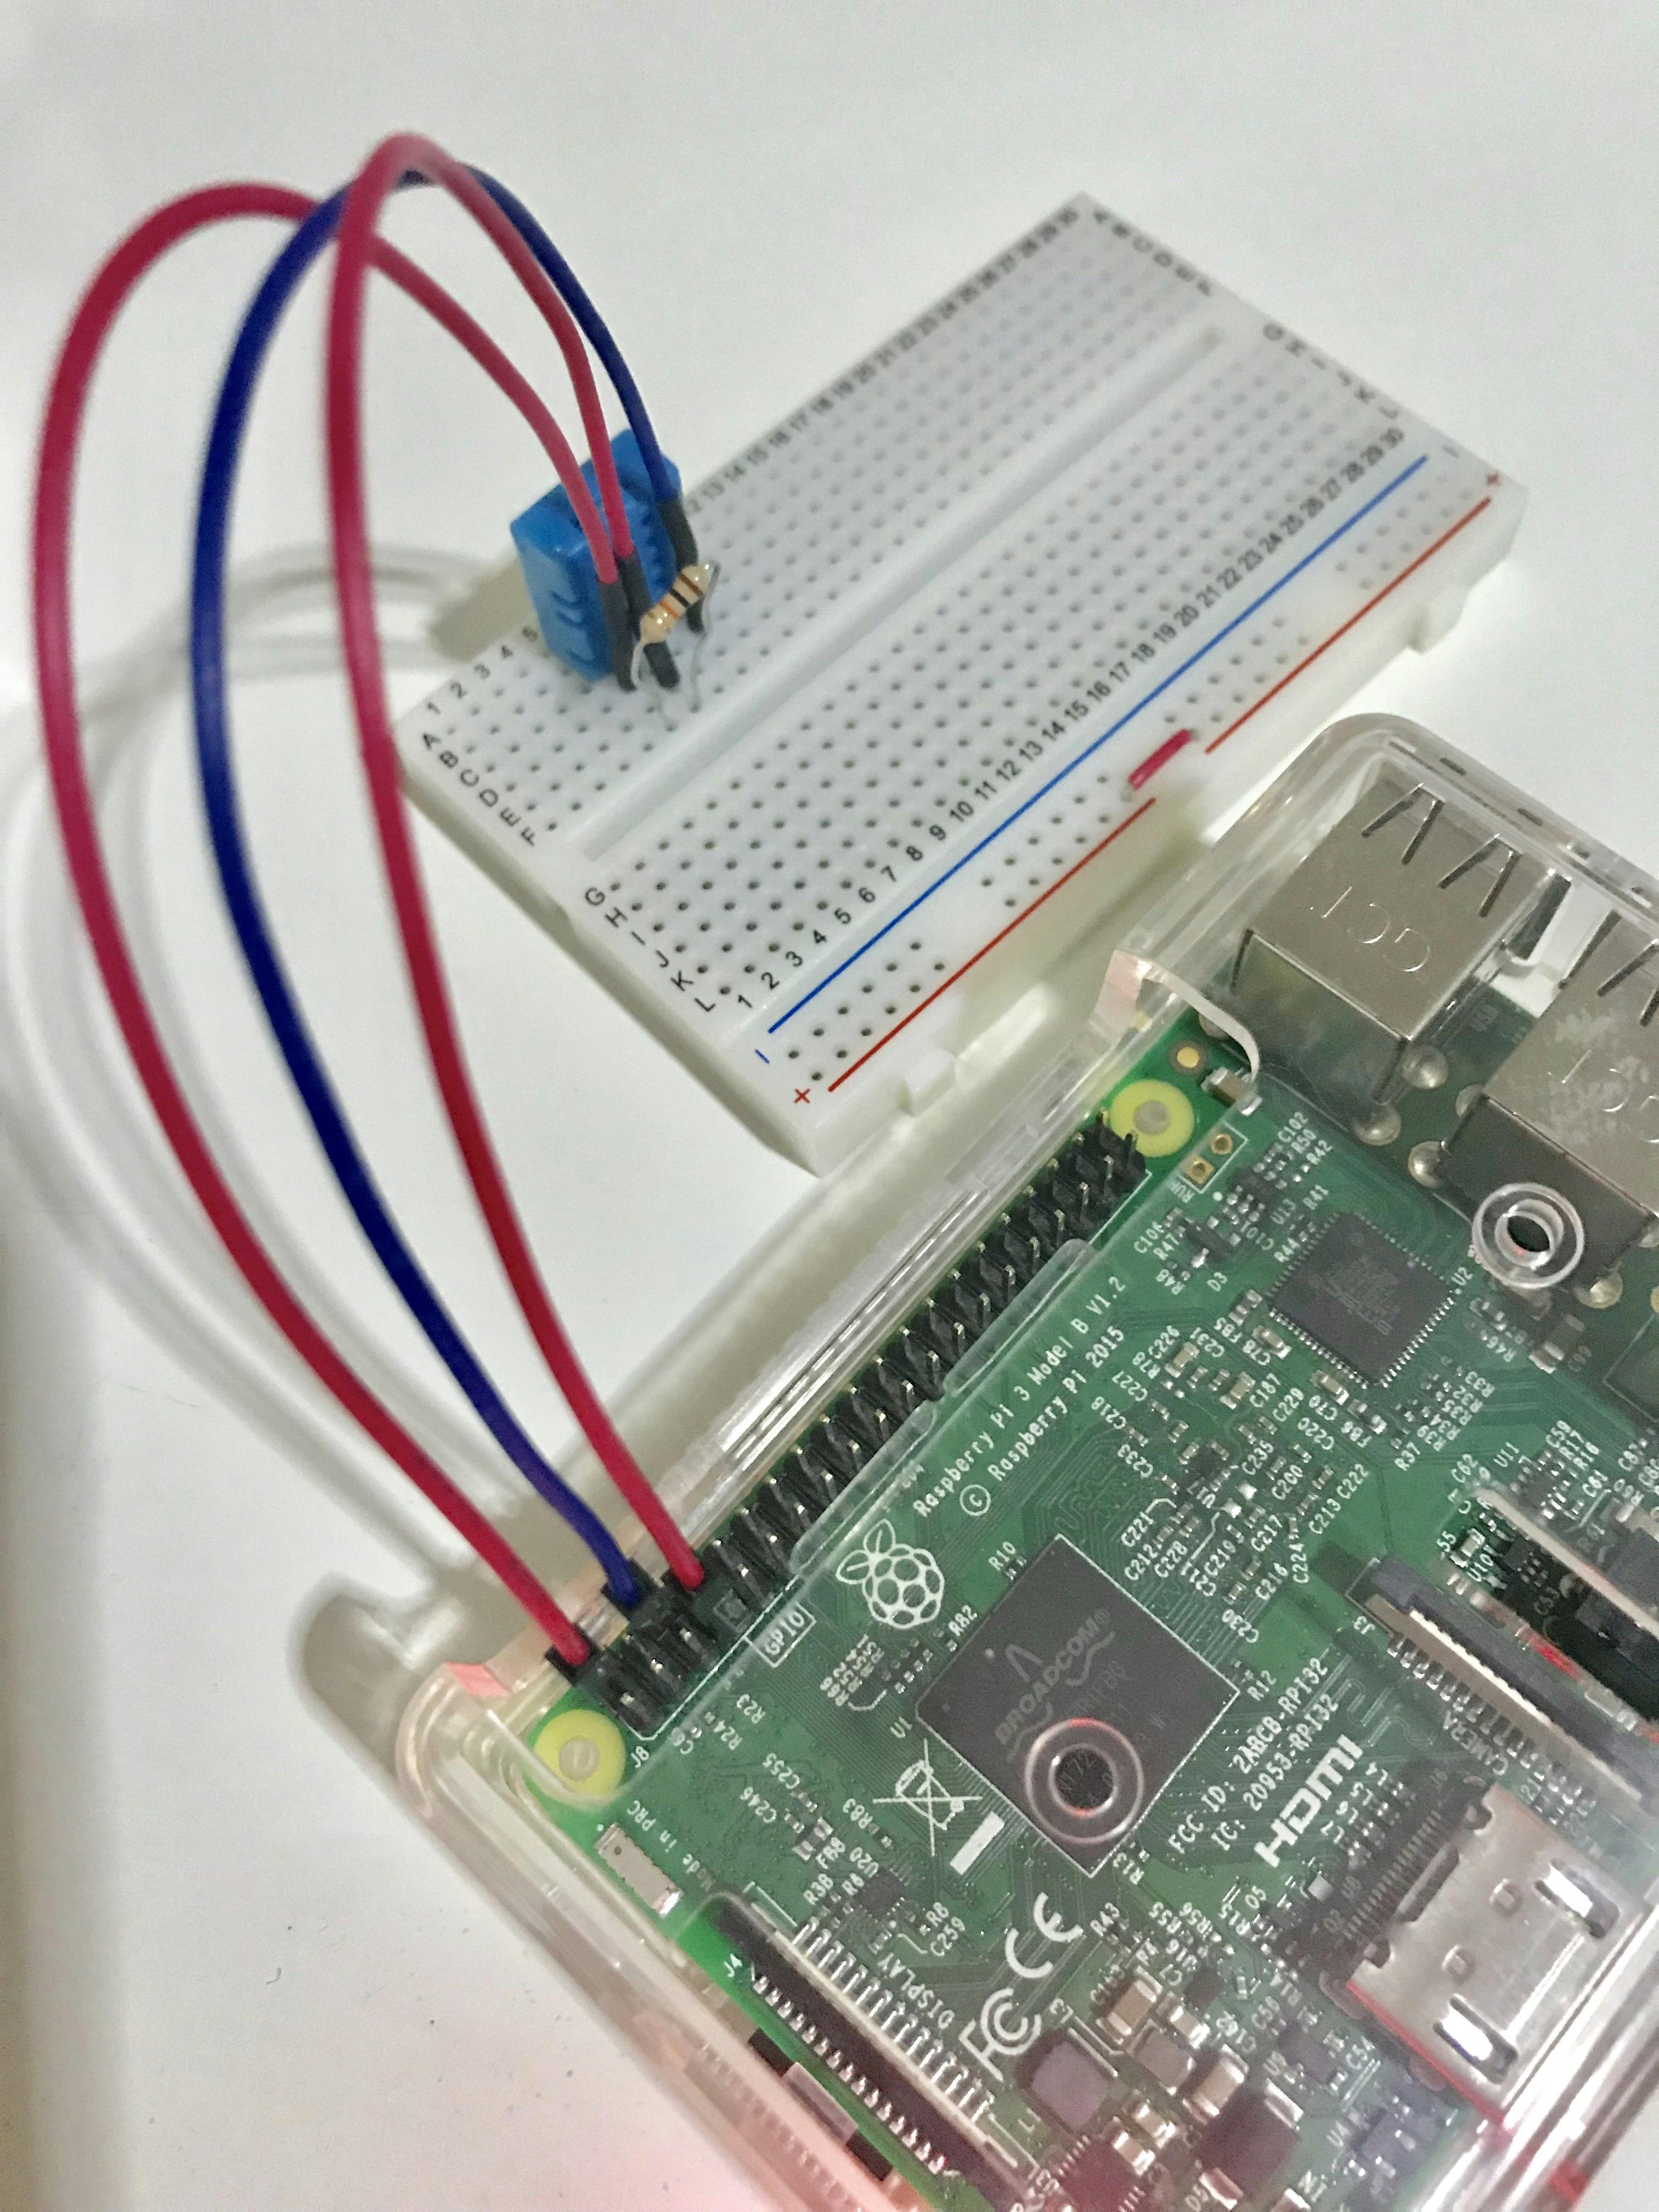
センサー・DHT11の接続(ラズパイをシャットダウンし、電源を切ってから配線しましょう!)

参照 http://www.circuitbasics.com/how-to-set-up-the-dht11-humidity-sensor-on-the-raspberry-pi/
ラズパイの起動
ディレクトリ構成の確認
server.js     node_modules      package-lock.json package.json```


今回はnode.jsを利用するので
node-dht-sensorというライブラリをインストールしよう!

## bcm2835をraspbianにインストールする
bcm2835というライブラリが必要(依存ライブラリ)
http://www.airspayce.com/mikem/bcm2835/

ディレクトリ構成はこうなる予定
```/mylinebot
server.js     dht.js   plugins    node_modules      package-lock.json package.json
ディレクトリ作成
$ mkdir plugins
$ cd plugins
下記のコマンドを実行
$ tar zxvf bcm2835-1.55.tar.gz
$ cd bcm2835-1.55/
$ ./configure
$ make
$ sudo make check
$ sudo make install
sudo make checkを実行した際に画面に「# PASS: 1」と表示されれば、bcmのインストールは正常に完了
うまくいかない時は
参照記事
https://github.com/bpmurray/node-red-contrib-dht-sensor/issues/13
https://www.niandc.co.jp/sol/tech/date20160513_545.php
本命・node-dht-sensorのインストール
$ sudo npm install —save-dev node-dht-sensor --dht_verbose=true --unsafe-perm
node-gypを使って、ダウンロードしたnode-dht-sensorをビルド
$ cd ~/workspace/mylinebot/node_modules/node-dht-sensor
$ sudo node-gyp configure
$ sudo node-gyp build
「node-gyp configure」・「node-gyp build」を実行した際に「gyp info ok」と表示されれば正常に完了
プログラムを作成
dht.jsを作成
$ touch dht.js
まずはconsole.logで確認するプログラム
var sensor = require('node-dht-sensor');

sensor.read(11, 4, function(err, temperature, humidity) {
    if (!err) {
        console.log('temp: ' + temperature.toFixed(1) + '°C, ' +
        'humidity: ' + humidity.toFixed(1) + '%'
        );
    }
});
nodeで起動し確認
$ node dht.js
temp: 21.0°C, humidity: 41.0%
取得できた!(゚∀゚)
3.温湿度を聞く(LINE Botで返信)
dht.jsの編集
const sensorLib = require('node-dht-sensor');

const sensor = {
    sensors: [ {
        name: "DHT11",
        type: 11,
        pin: 4
    } ],
    read: function() {
        const readout = sensorLib.read(this.sensors[0].type, this.sensors[0].pin);
        return '室内の温度は'+readout.temperature.toFixed(1)+'℃、'+'湿度は'+readout.humidity.toFixed(1)+'%です。';
    }
}

exports.getData = function() {
    try {
        return sensor.read();
    } catch (error) {
        return ‘不明です’;
    }
}
server.jsの編集
以下を追加
const dht = require(‘./dht’);


if(event.message.text === 'いまなんど') {
    mes = dht.getData();
} else {
    mes = event.message.text;
}
サーバーを起動しngrokでトンネリング。WebHook URLを編集→この辺は前回参照
「いまなんど」と聞いたら返事が来ますよ!ヽ(・∀・)ノ
おつかれさまでした!ヽ(・∀・)ノ
参照させていただいた記事
https://qiita.com/kohbis/items/feeb91727e1bcbd4f092
次回はPush API!
LINE BOTでラズパイから温度を通知【Push API】【Node.js】
