※ 追記 : 2023年3月2日 ChatGPTのAPI公開されました🎉 ということでChatGPT APIの内容を追記しました!
こんにちは、もっちゃんと申します。
この記事はMicrosoft Power Automate Advent Calendar 2022 カレンダー2の7日目です。
Microsoftのテクノロジーが今、とても熱いです!
Microsoftは巨大で優れた製品群を複数有しており、世界でも類を見ない状態となっています。
古くからある製品群はもちろんのこと、Microsoft Azureのクラウドを始め、GitHub, VS Code, OS, ハードウェアに至るまで、そして今回のキーワードでもあるOpenAIもですね。
さらにそれらをしっかり連携させてシナジーを生み出していく構想まであります。とても熱い展開が期待できそうですね^^
この記事ではそんな熱いテクノロジーのうち、Power AutomateとOpenAIが出している各種AIモデルの機能、さらにrinna社のJapanese Stable Diffusionも含めて、簡単に高機能なアプリを実現していきます。アプリ化するにあたってLINEを活用すると便利なのでこちらも組み込んでいきますね!
Microsoft Power Platform の Power Automateとは

Microsoft が提供するプロセスオートメーションサービスです。
Microsoftが発信する最新のメッセージからは年々、より本質に注力できるように支援していくという内容が色濃くなっているように感じます。
そういった状況を作り出すため、革新的なツール・サービスがMicrosoftから続々と出てきている状態です。
Power Automateもその1つで、専門的な知識がない方でも開発(プロセスの自動化)を行うことができます。
OpenAIとは

OpenAI は、AI の研究と展開を行う会社です。私たちの使命は、汎用人工知能が人類全体に利益をもたらすことを保証することです。
いま世間を賑わせているChatGPT(対話型AI)やGPT-3(大規模言語モデル)、DALL-E(画像生成AI)といった優れたAIを研究・開発しており、業界のトップを走っている組織です。
OpenAIとMicrosoftはパートナーシップを結んでいます。Microsoftファミリーの一員ですね。
AI界隈は革新的な技術の出現により、加速度的に進化していっています。また、言語分野、画像分野と一見違う分野に見えてもコア技術はお互いに応用していたりと、やはり根底のところでは無関係ではない様子がうかがえ、人間の脳が行っている汎用的な能力に類似する技術が確立・発展されてきているのではないかと感じています。AGI(汎用人工知能)の活躍が実現される日も近いかもしれませんね。
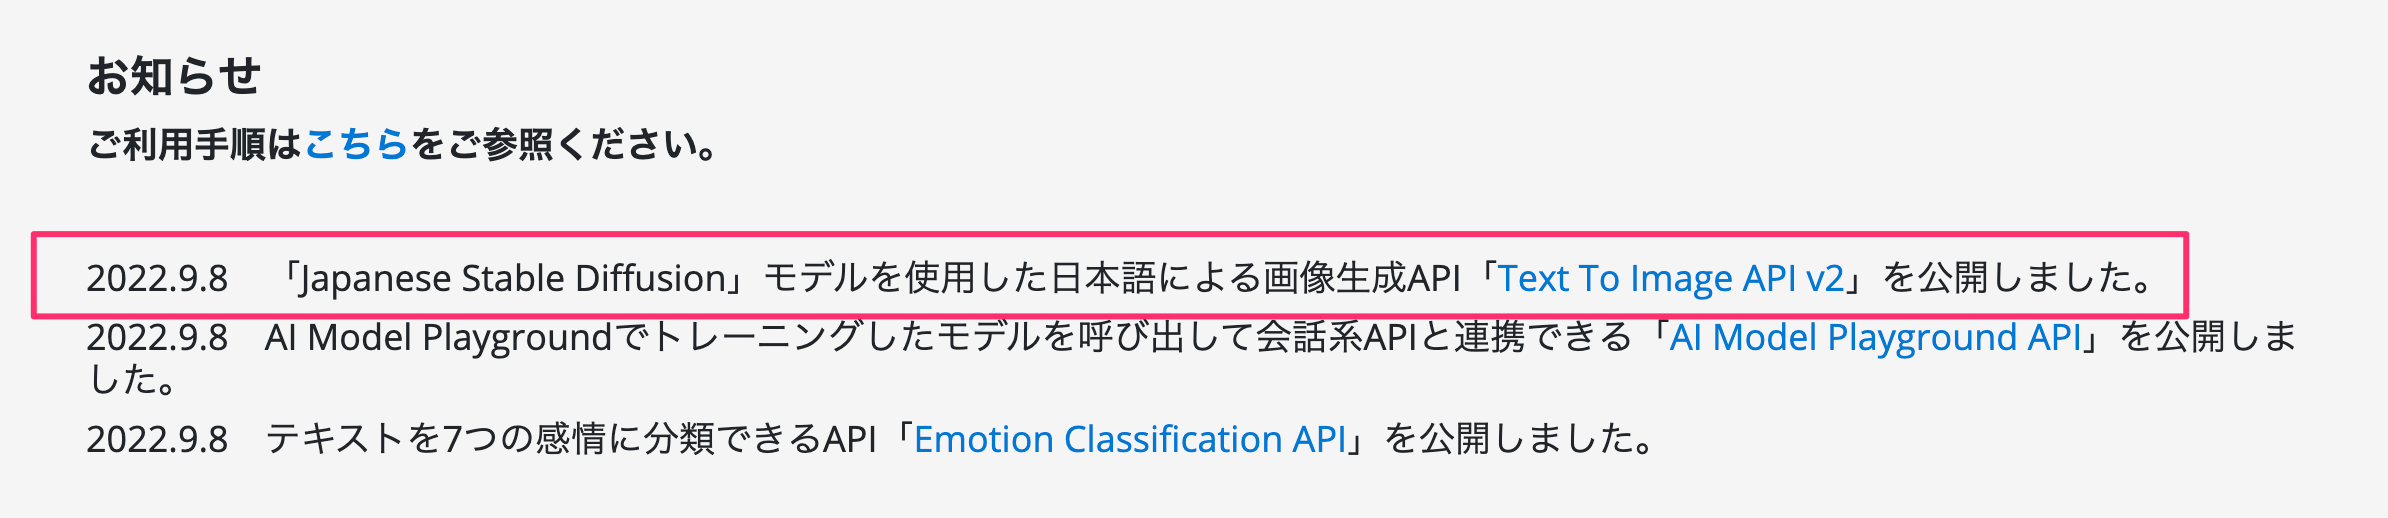
rinna社が公開した「Japanese Stable Diffusion」とは
公式サイト↓
画像生成AIとして大変注目を浴びている「Stable Diffusion」ですが、rinna社より日本語に特化した画像生成モデル「Japanese Stable Diffusion」が開発されました、Hugging Faceやgithubにも公開されていますね!
詳しくは下記の記事を参考に見ていただくと良いと思います!
https://qiita.com/joohounsong/items/fdbb783a9467478c6479
※ rinna社の「Japanese Stable Diffusion」も試しに使ってみましたので今回の記事に追加で盛り込んでみました!
作り方
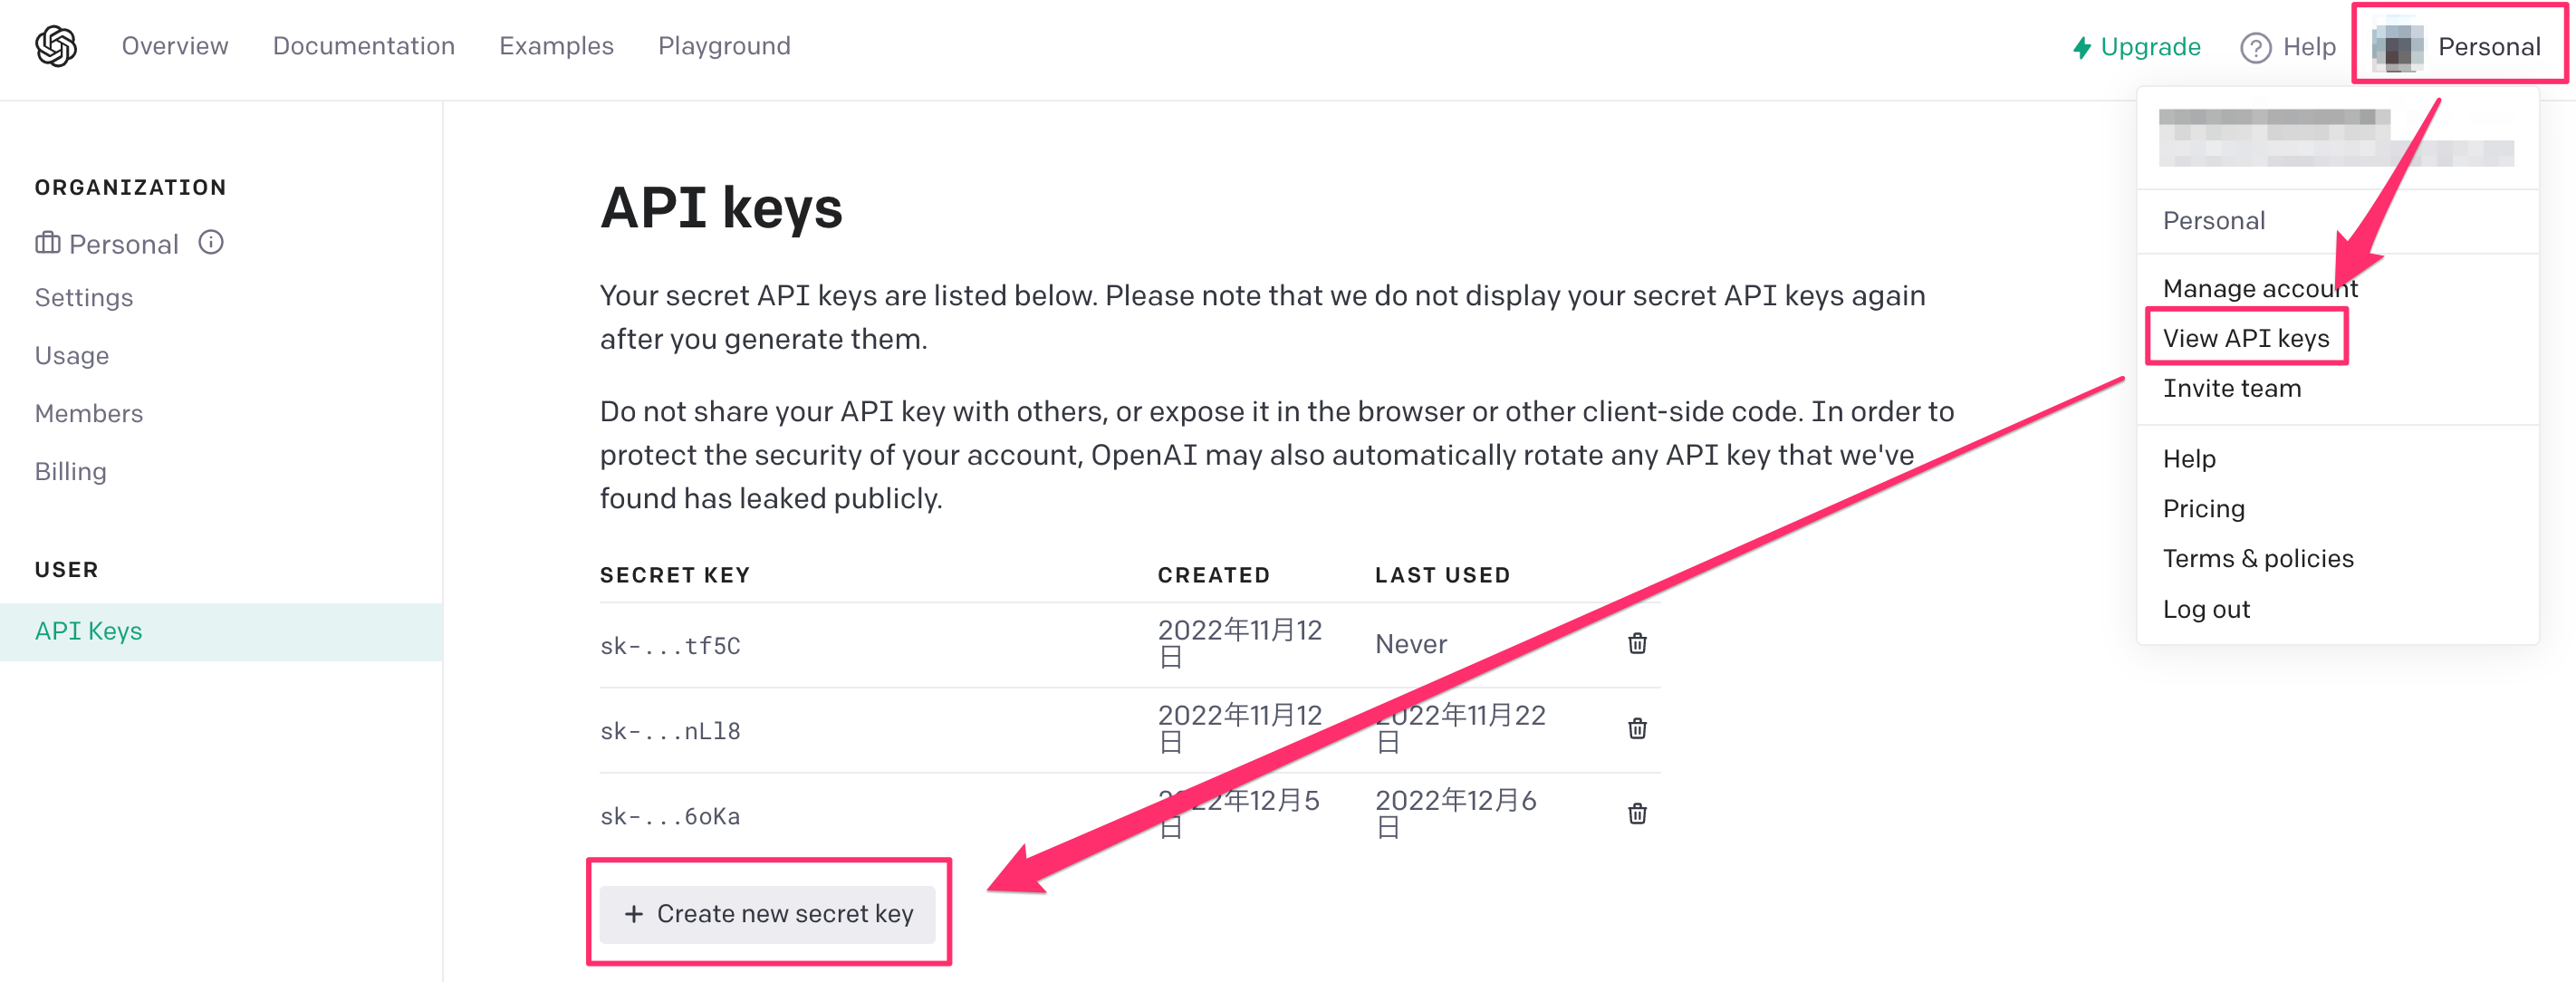
OpenAI のAPI Key取得
まずは下記からアカウントを登録します。
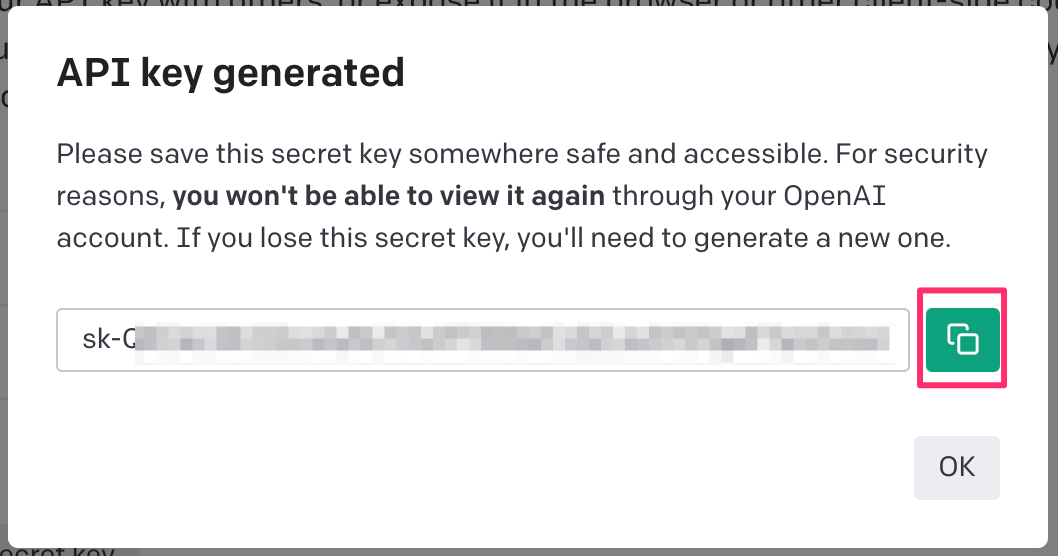
API Key取得し、メモします。
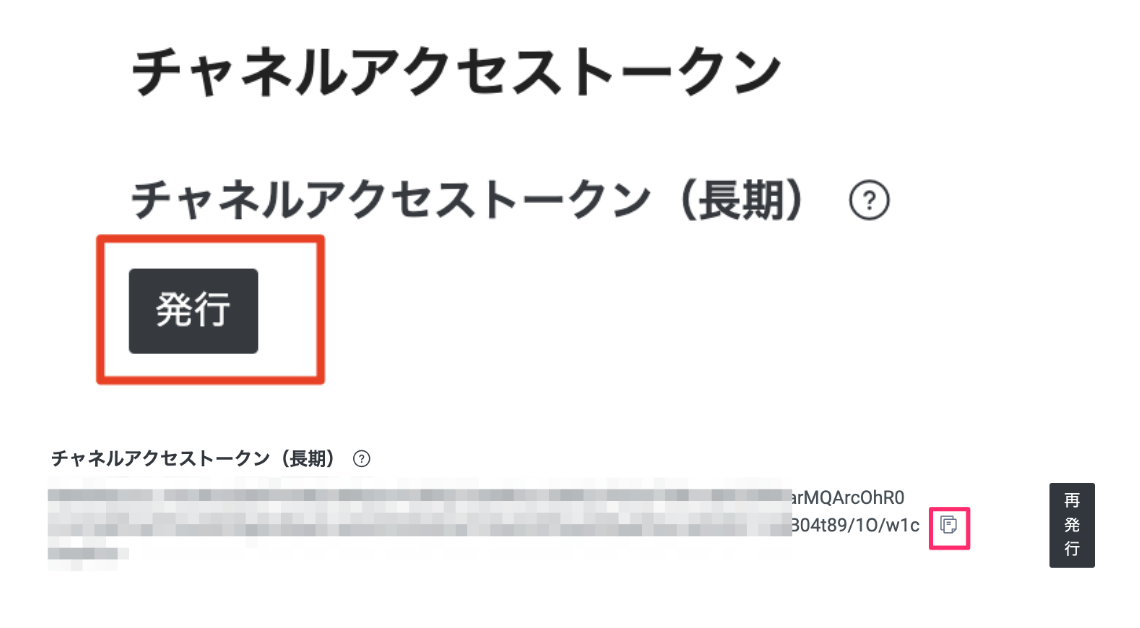
LINE DevelopersでMessaging API チャネルを作成
下記を参考に作成します。
https://developers.line.biz/ja/docs/messaging-api/getting-started/#using-console
https://developers.line.biz/ja/docs/messaging-api/building-bot/#page-title
チャネルアクセストークンをメモします。
Power AutomateでDALL-E2のフロー作成
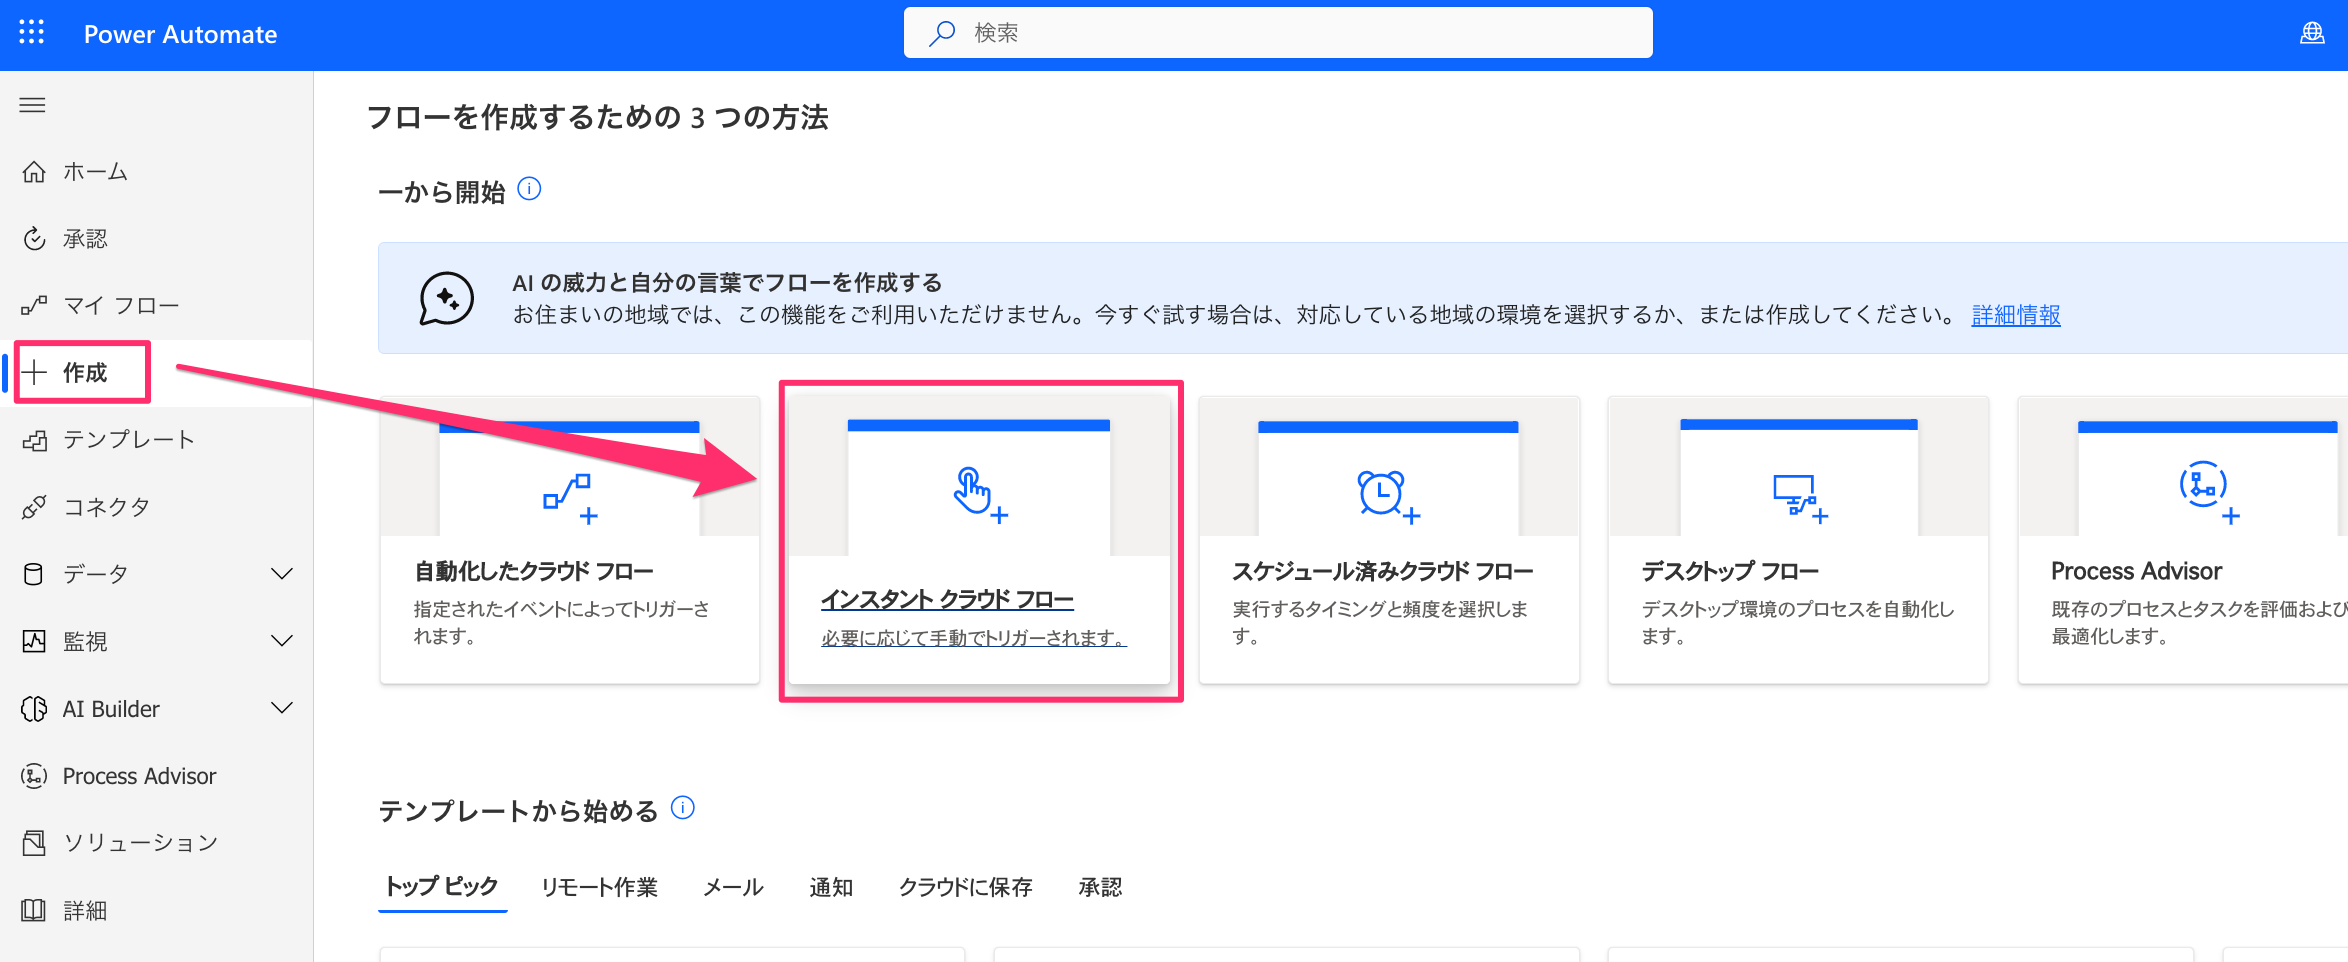
左にある「作成」から「インスタントクラウドフロー」をクリックします。
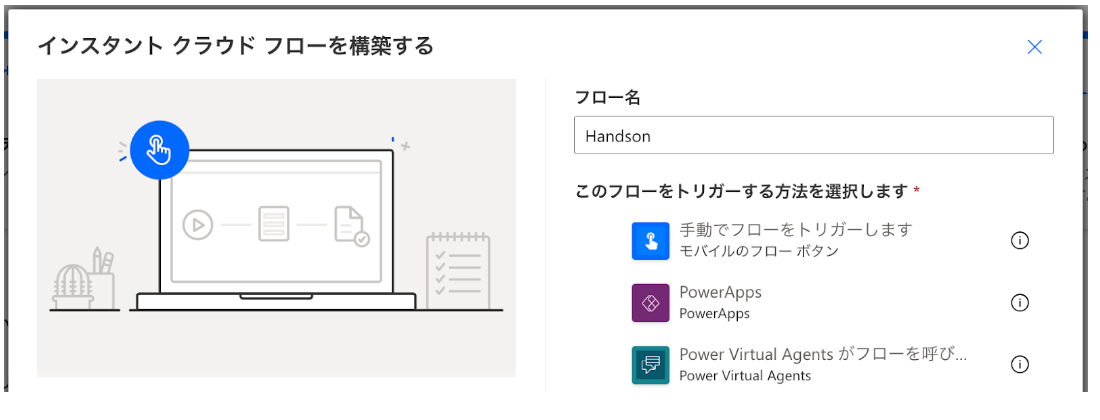
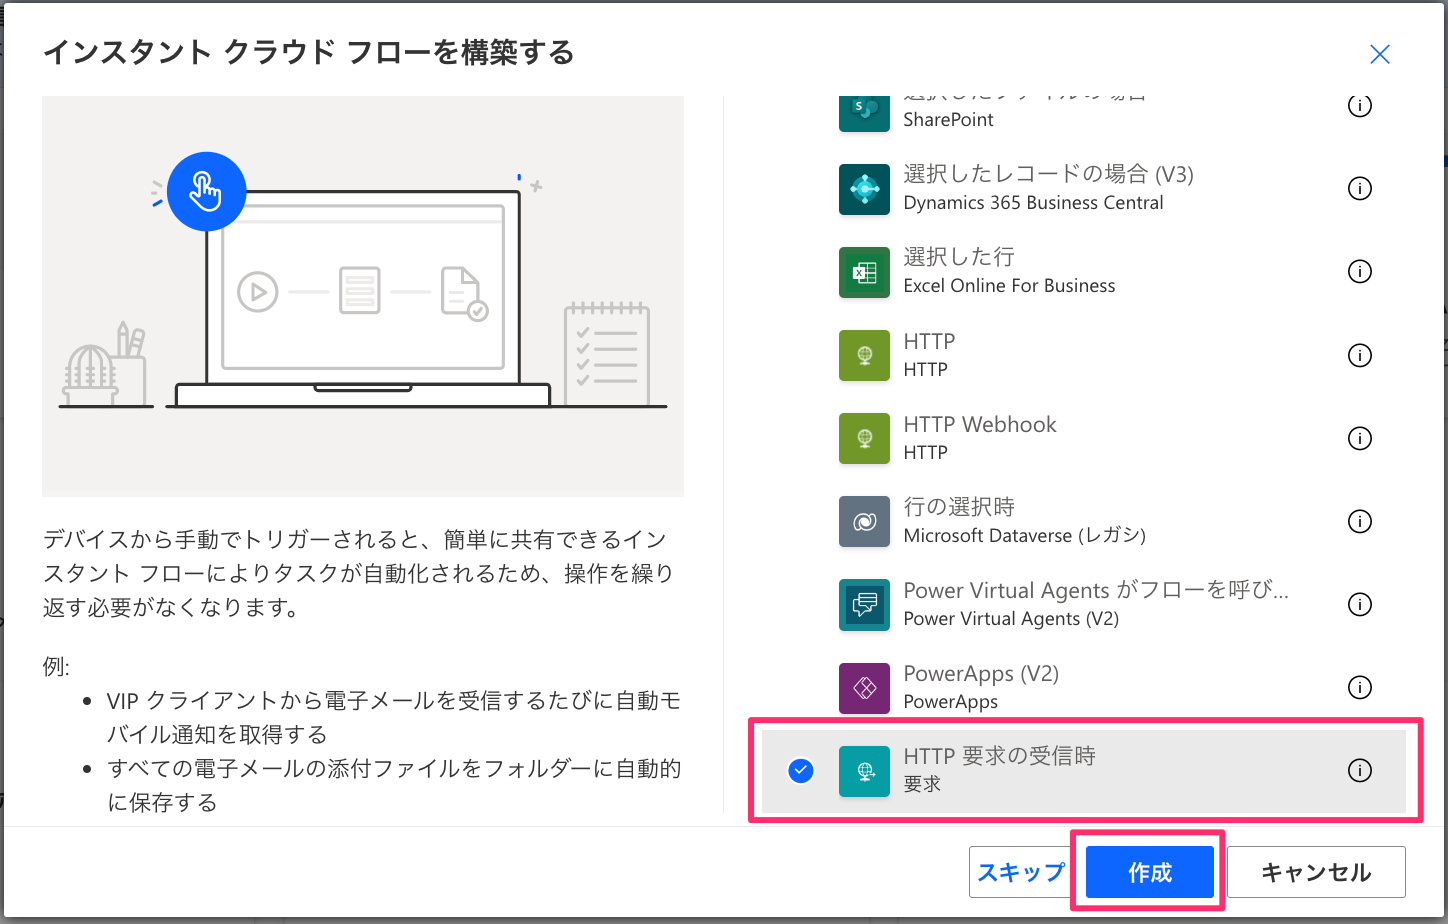
フロー名を入力、HTTP要求の受信時を選択し、「作成」をクリックします。
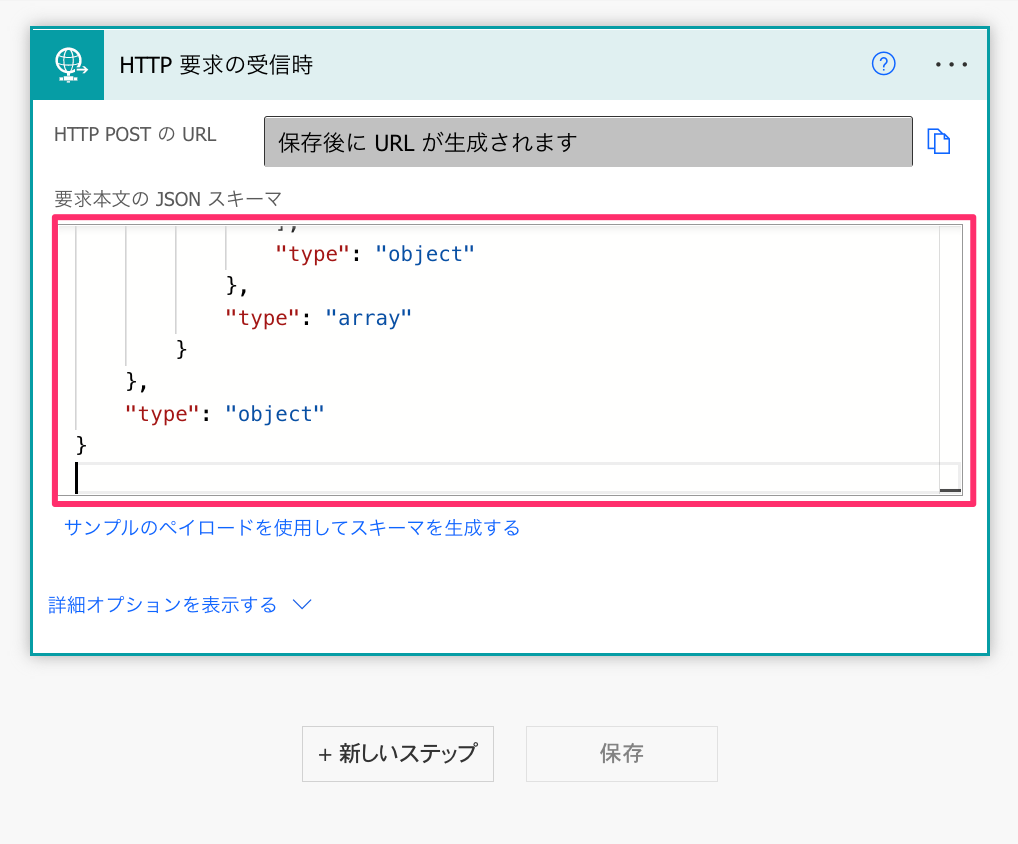
下記をコピーして、「HTTP要求の受信時」のJSONスキーマに入力します。
JSONコード
{
    "properties": {
        "events": {
            "items": {
                "properties": {
                    "source": {
                        "type": "object",
                        "properties": {
                            "userId": {
                                "type": "string"
                            }
                        }
                    },
                    "message": {
                        "properties": {
                            "id": {
                                "type": "string"
                            },
                            "text": {
                                "type": "string"
                            },
                            "address": {
                                "type": "string"
                            },
                            "latitude": {
                                "type": "string"
                            },
                            "longitude": {
                                "type": "string"
                            },
                            "type": {
                                "type": "string"
                            }
                        },
                        "type": "object"
                    },
                    "postback": {
                        "properties": {
                            "data": {
                                "type": "string"
                            }
                        },
                        "type": "object"
                    },
                    "replyToken": {
                        "type": "string"
                    },
                    "type": {
                        "type": "string"
                    }
                },
                "required": [
                    "replyToken",
                    "type"
                ],
                "type": "object"
            },
            "type": "array"
        }
    },
    "type": "object"
}
「新しいステップ」をクリックします。

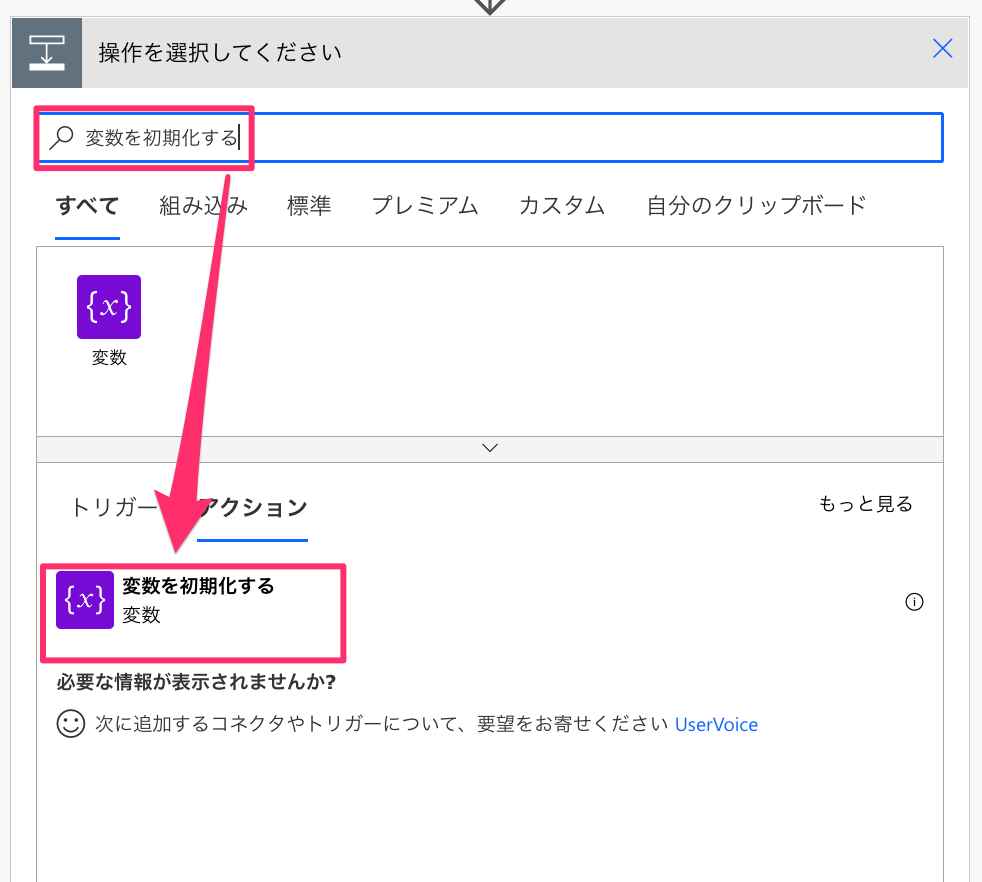
「変数を初期化する」と検索し、「変数を初期化する」をクリックします。
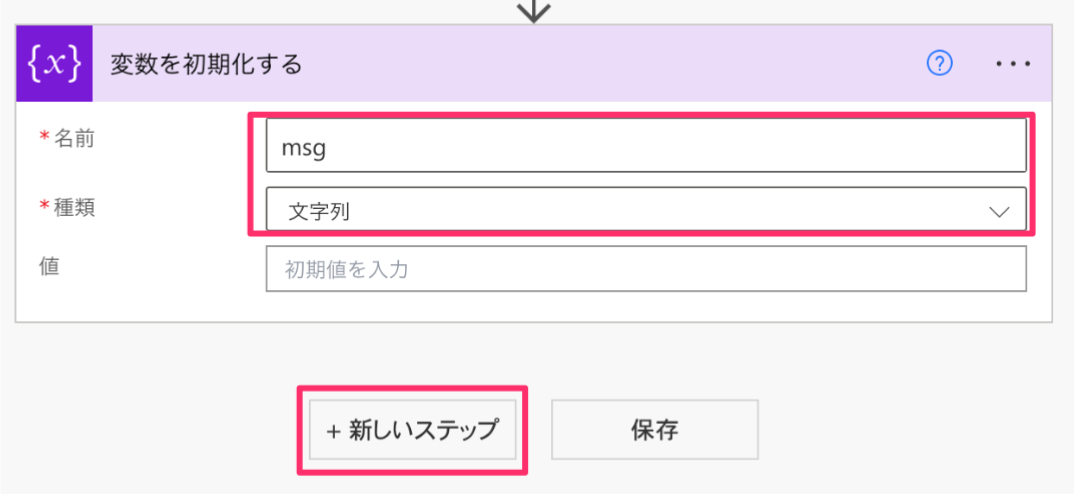
下記のように設定し、「新しいステップ」をクリックします。
同じように、「変数を初期化する」と検索し、「変数を初期化する」をクリックします。
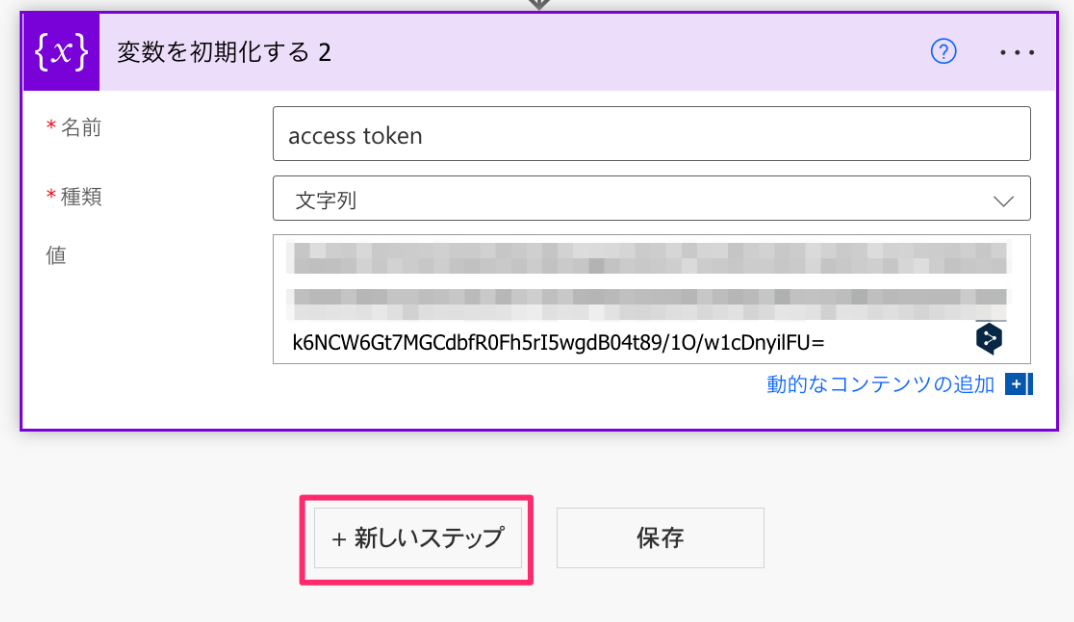
下記のように設定し、「新しいステップ」をクリックします。
| 設定値 | |
|---|---|
| 名前 | access token |
| 種類 | 文字列 |
| 値 | {LINE側でメモしたアクセストークン} |
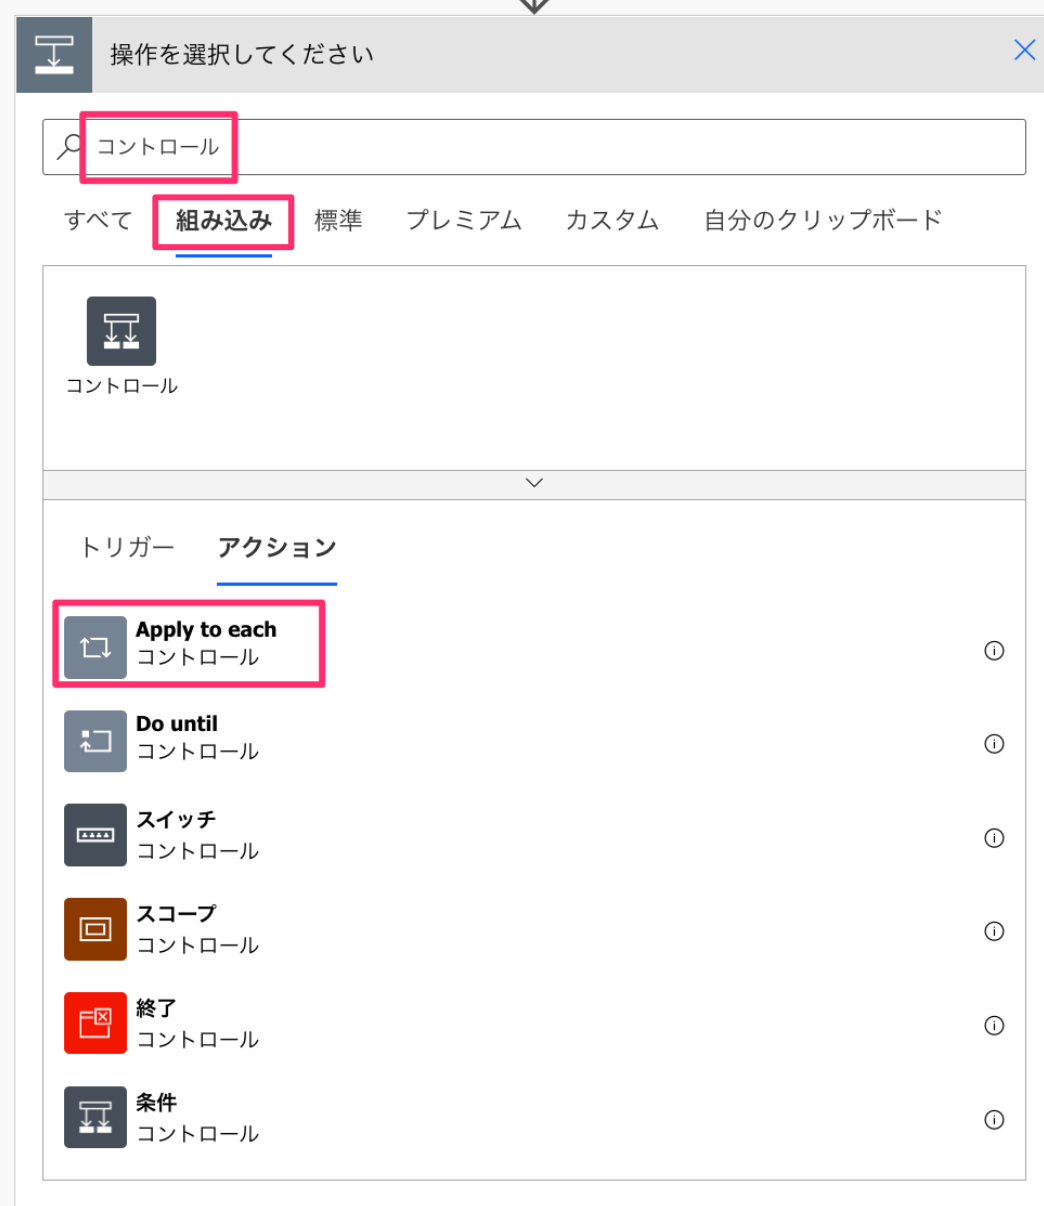
「コントロール」と検索し、組み込みタブ、「Apply to each」をクリックします。
以前の手順から出力を選択に「@{triggerBody()?['events']}」を入力し、「アクションの追加」をクリックします。
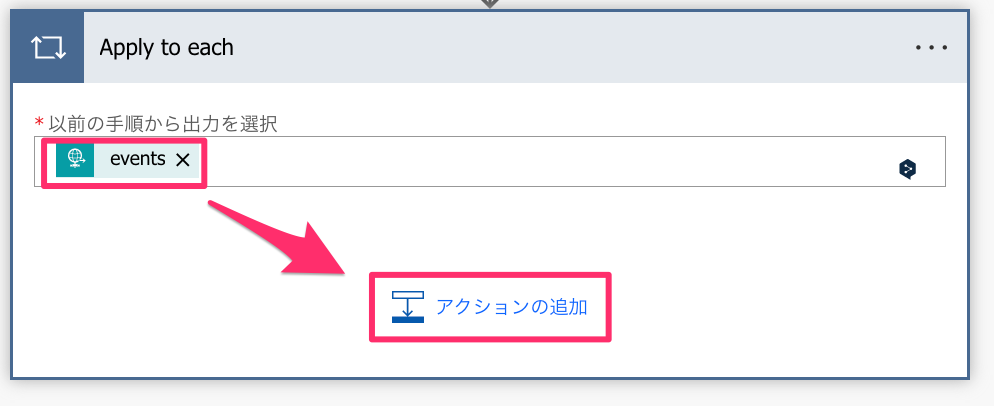
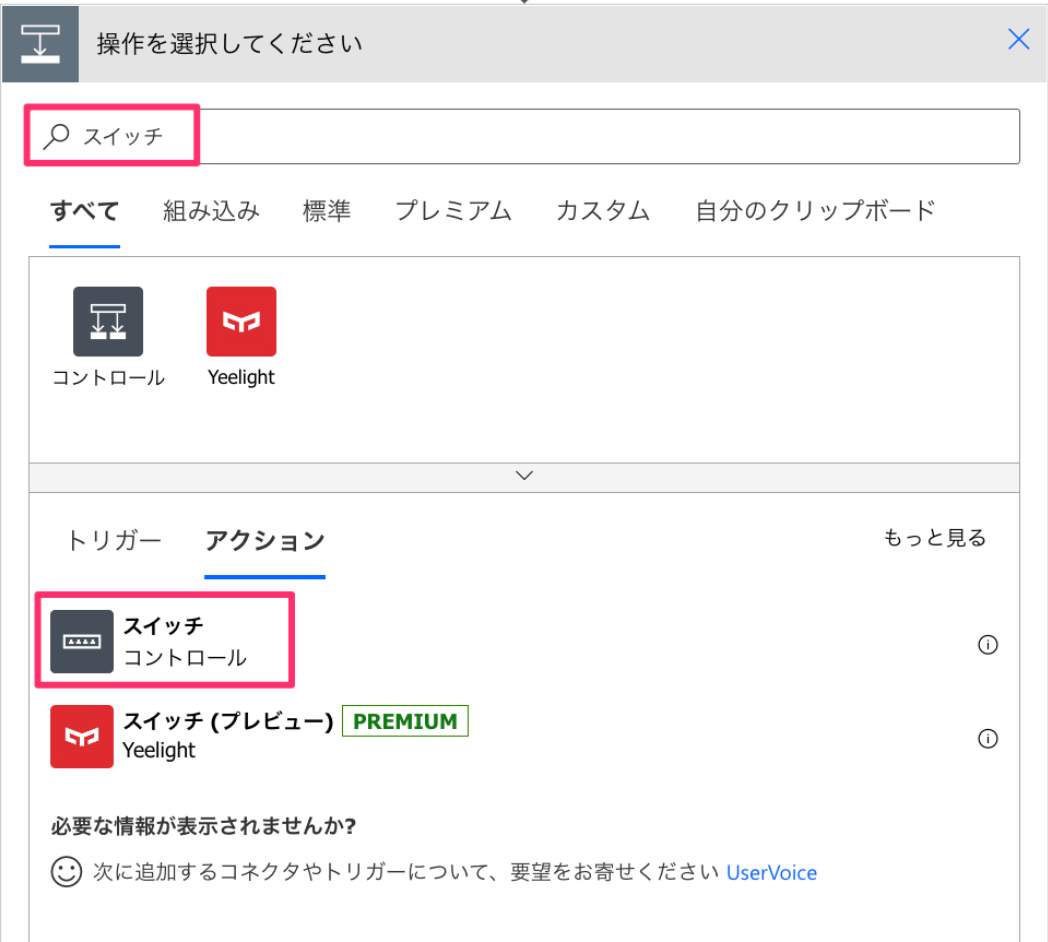
「スイッチ」と検索し、「スイッチ」をクリックします。
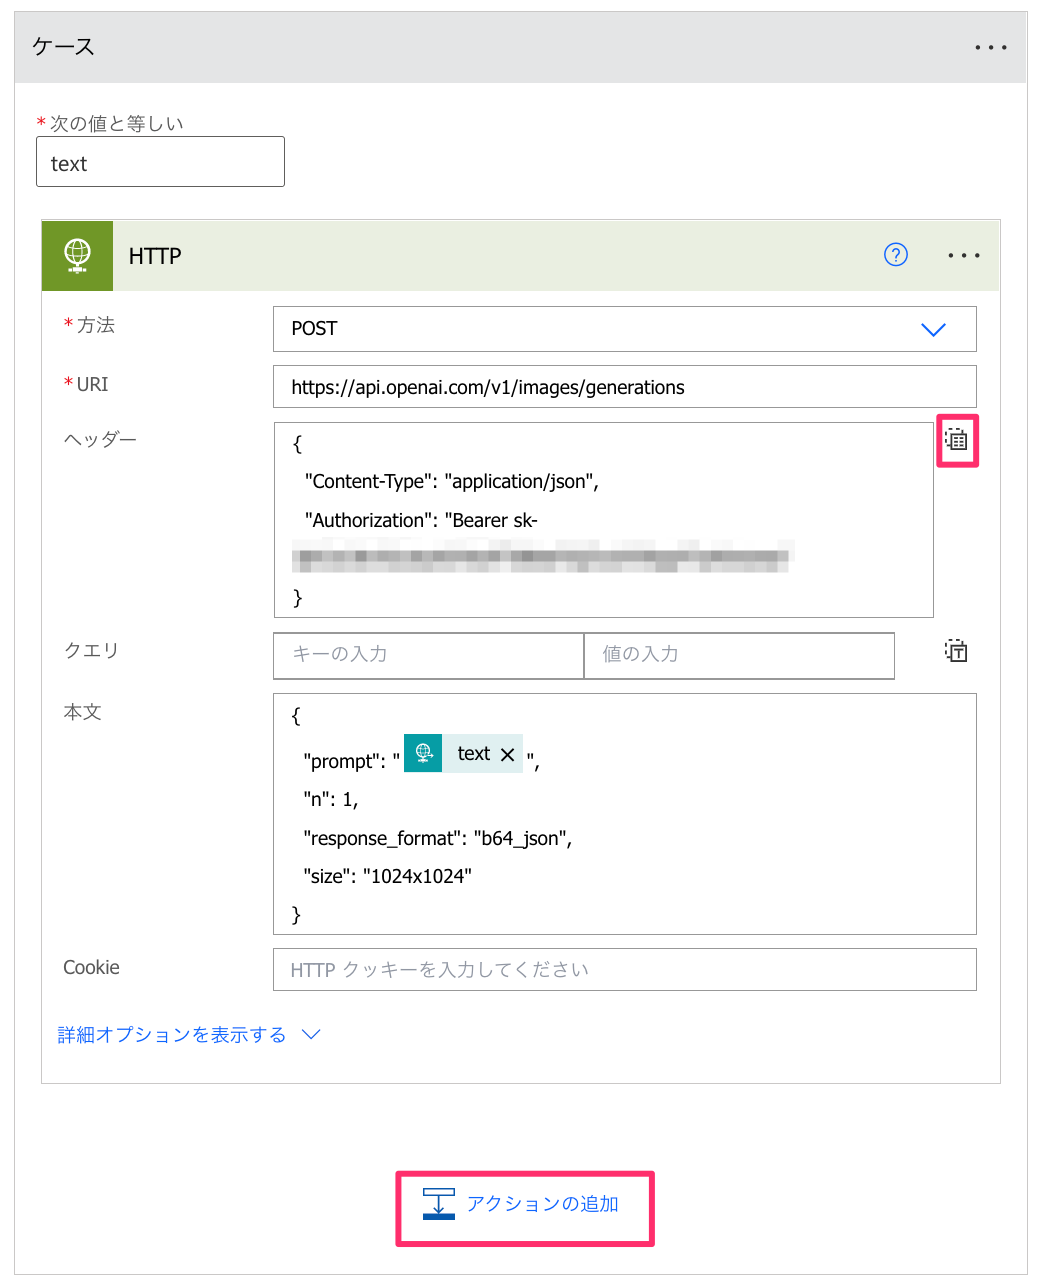
スイッチのオンに、「@{items('Apply_to_each')?['message']['type']}」を、ケースに「text」を入力し、「アクションの追加」をクリックします。
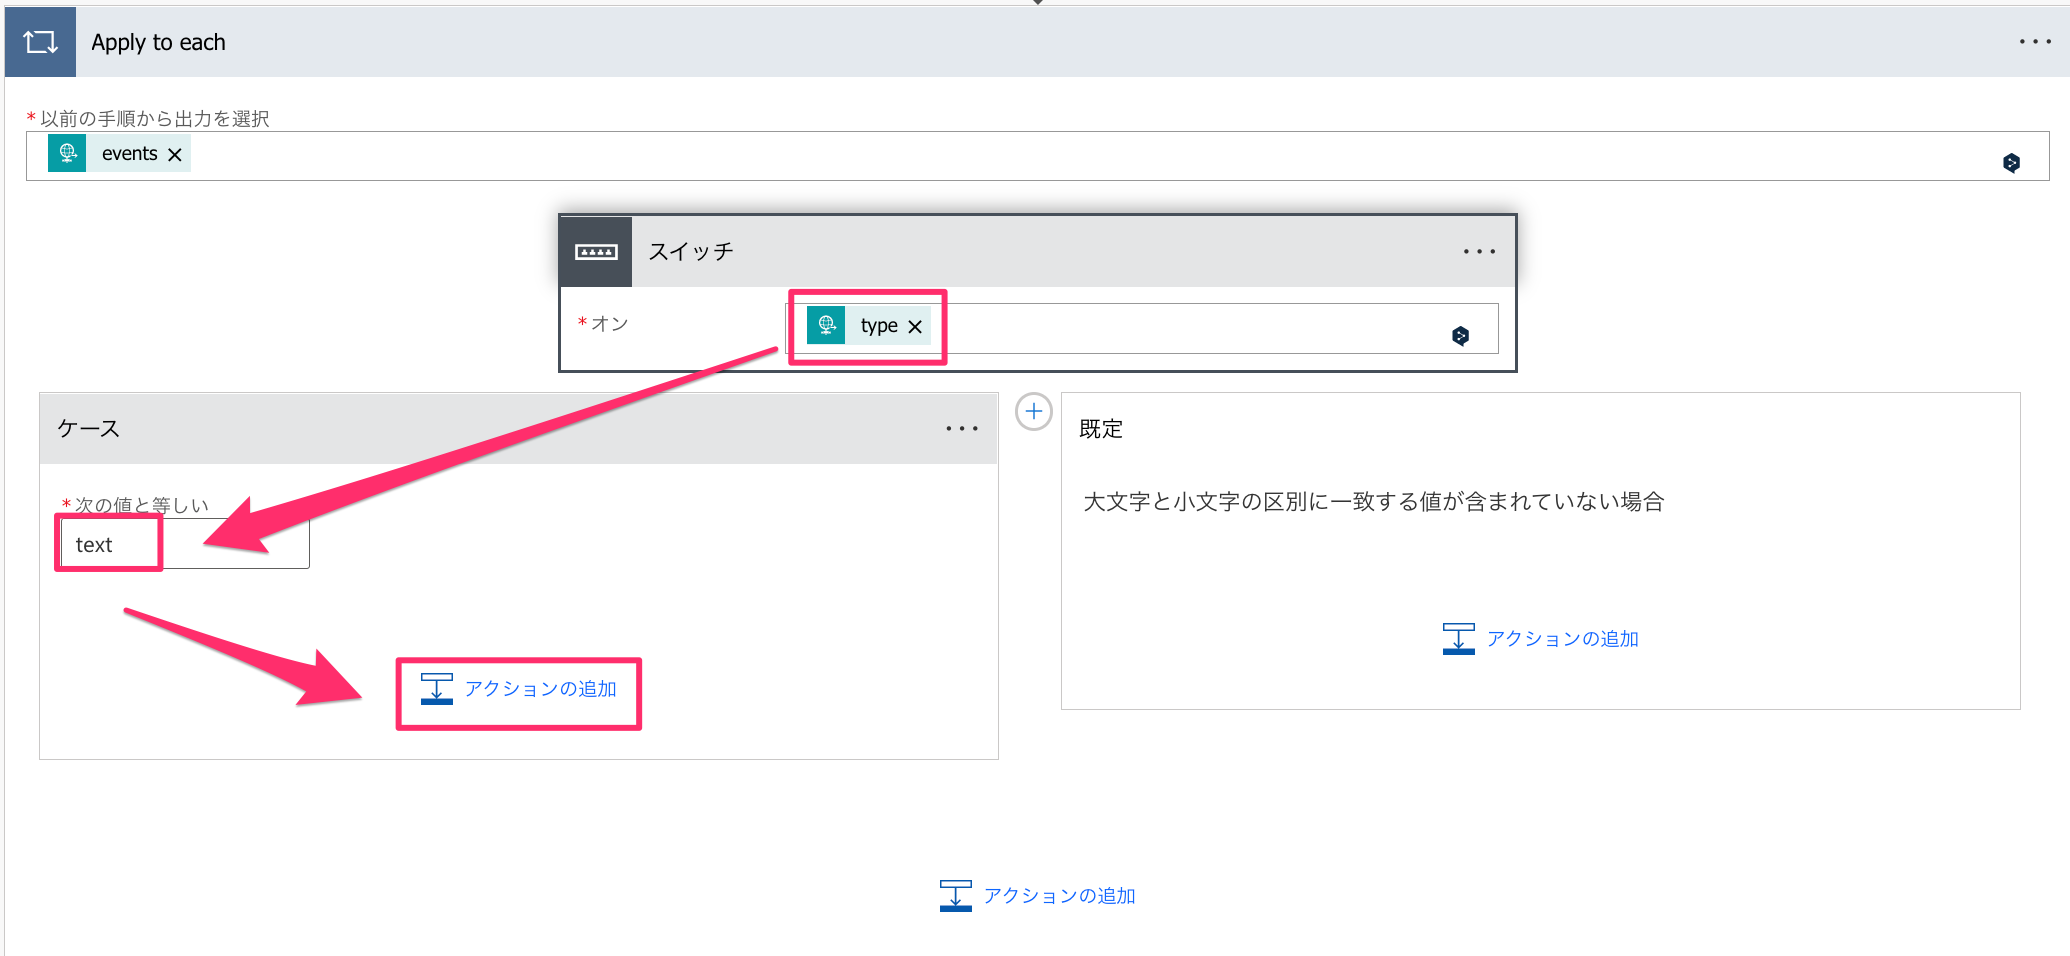
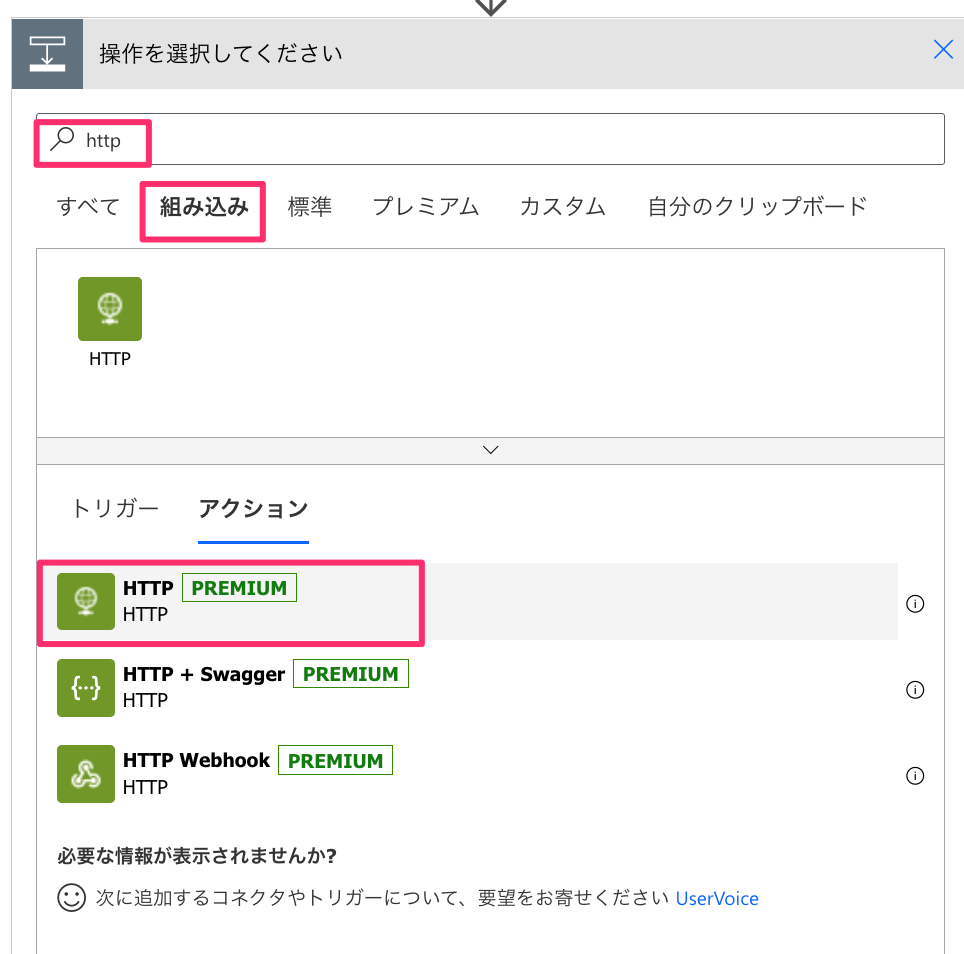
HTTPと検索し、組み込みタブ、「HTTP」を選択します。
下記のように設定し、アクションの追加をクリックします。
| 設定値 | |
|---|---|
| 方法 | POST |
| URI | https://api.openai.com/v1/images/generations |
| ヘッダー | { "Content-Type": "application/json", "Authorization": "Bearer {メモしたOpenAIのAPI Key}" } |
| 本文 | { "prompt": "@{items('Apply_to_each')?['message']?['text']}", "n": 1, "response_format": "b64_json", "size": "1024x1024" } |
ヘッダーは赤枠をクリックしてテキストモードに切り替えます。
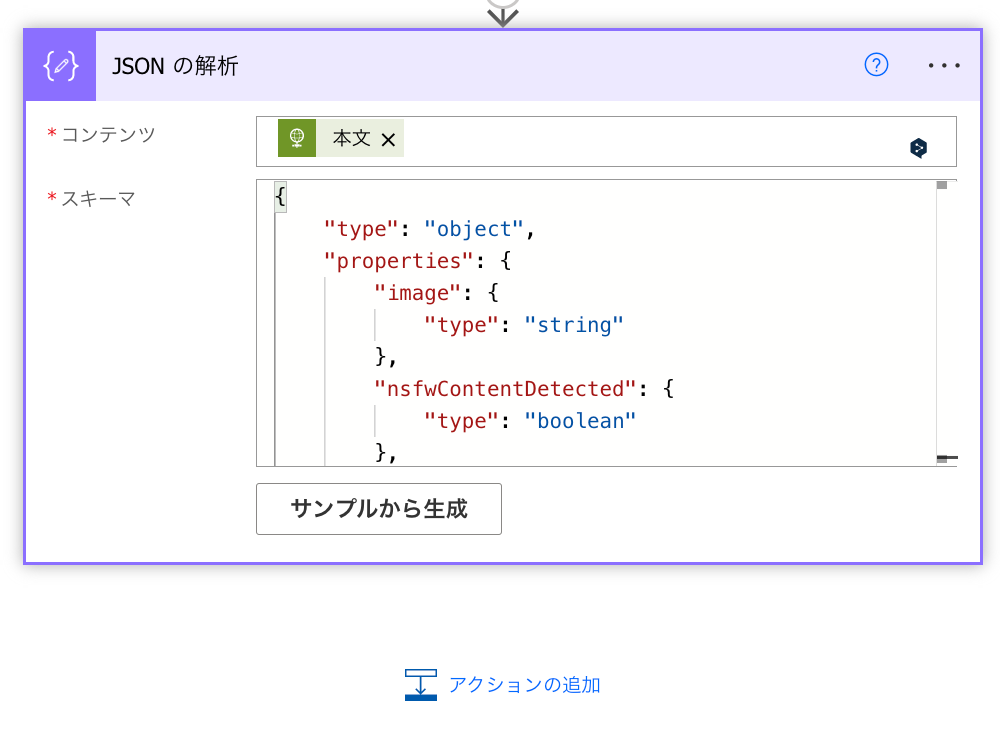
「json」と検索し、組み込みタブ、「JSONの解析」をクリックします。

下記のように設定し、アクションの追加をクリックします。
| 設定値 | |
|---|---|
| コンテンツ | @{body('HTTP')} |
| スキーマー | 下記JSON |
jsonコード
{
    "type": "object",
    "properties": {
        "statusCode": {
            "type": "integer"
        },
        "headers": {
            "type": "object",
            "properties": {
                "Connection": {
                    "type": "string"
                },
                "OpenAI-Version": {
                    "type": "string"
                },
                "OpenAI-Organization": {
                    "type": "string"
                },
                "X-Request-ID": {
                    "type": "string"
                },
                "OpenAI-Processing-Ms": {
                    "type": "string"
                },
                "Access-Control-Allow-Origin": {
                    "type": "string"
                },
                "Strict-Transport-Security": {
                    "type": "string"
                },
                "Date": {
                    "type": "string"
                },
                "Content-Length": {
                    "type": "string"
                },
                "Content-Type": {
                    "type": "string"
                }
            }
        },
        "body": {
            "type": "object",
            "properties": {
                "created": {
                    "type": "integer"
                },
                "data": {
                    "type": "array",
                    "items": {
                        "type": "object",
                        "properties": {
                            "b64_json": {
                                "type": "string"
                            }
                        },
                        "required": [
                            "b64_json"
                        ]
                    }
                }
            }
        }
    }
}
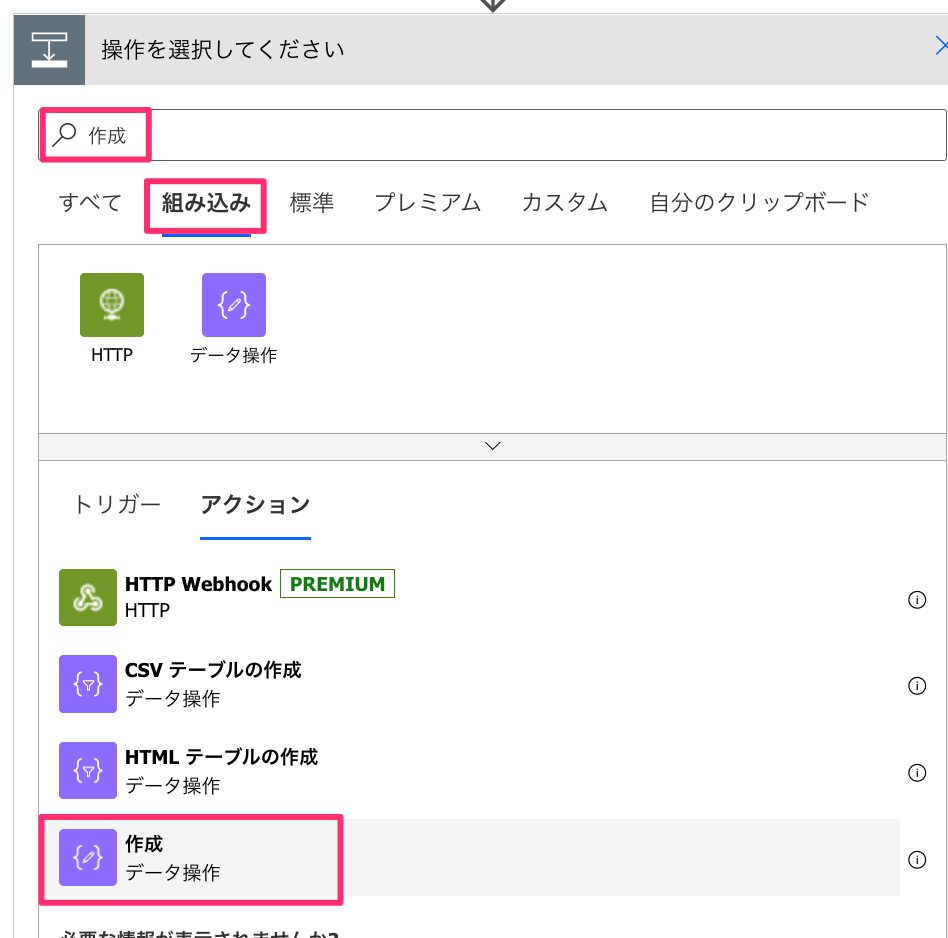
「作成」と検索し、組み込みタブ、「作成」をクリックします。
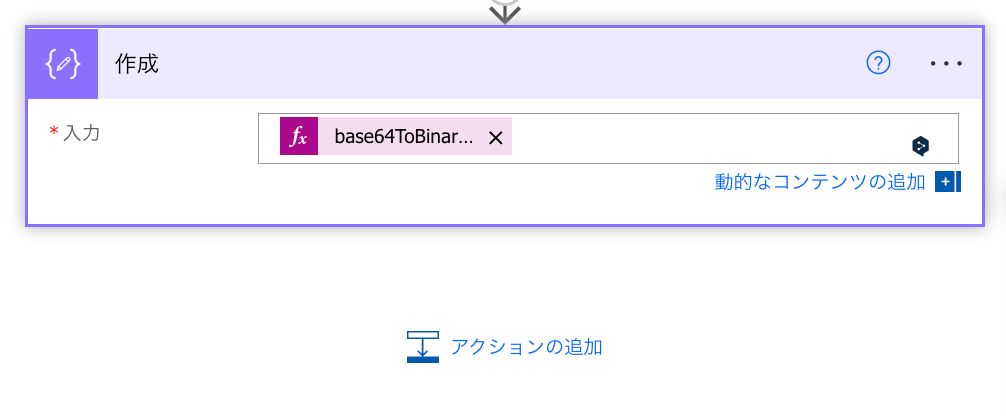
下記のように設定し、アクションの追加をクリックします。
| 設定値 | |
|---|---|
| 入力 | @{base64ToBinary(body('JSON_の解析')?['data'][0]['b64_json'])} |
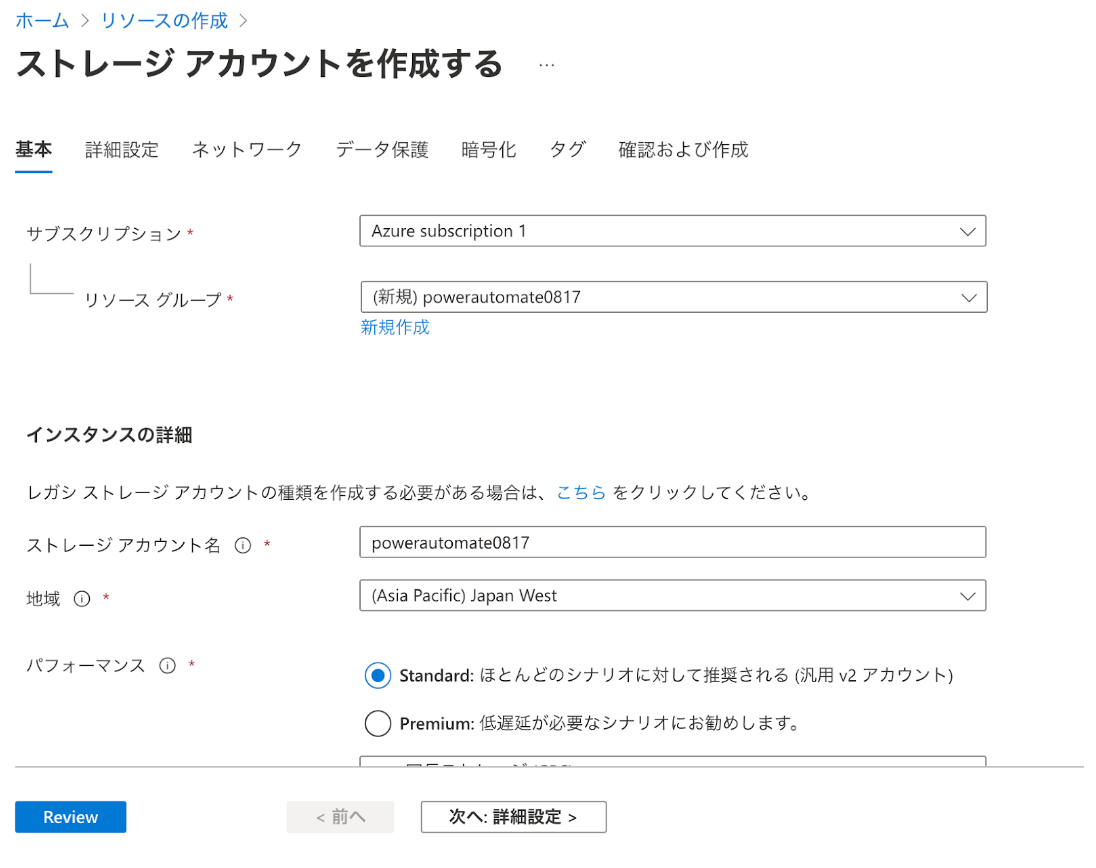
ここから先の手順はMicrosoft Azureのアカウントが必要になります。
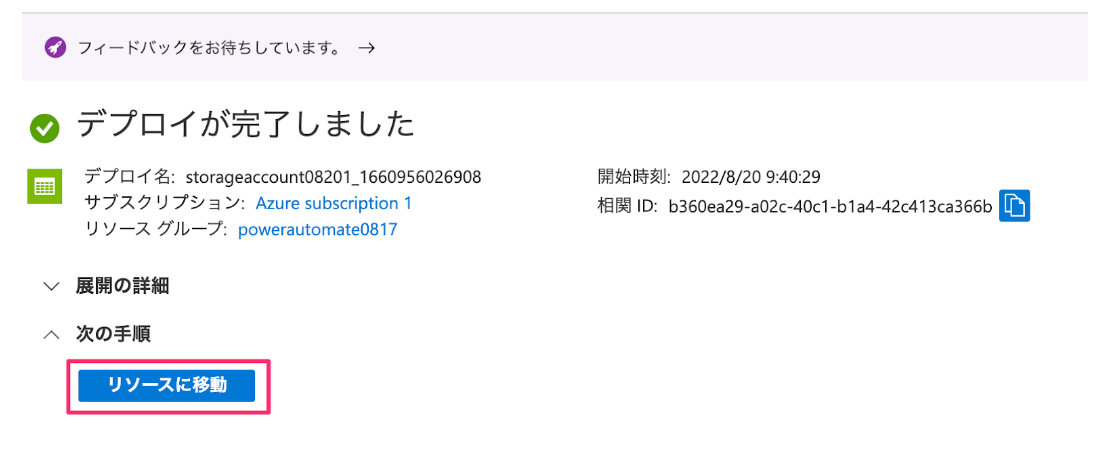
Azureアカウントに接続し、ストレージアカウントを作成します。
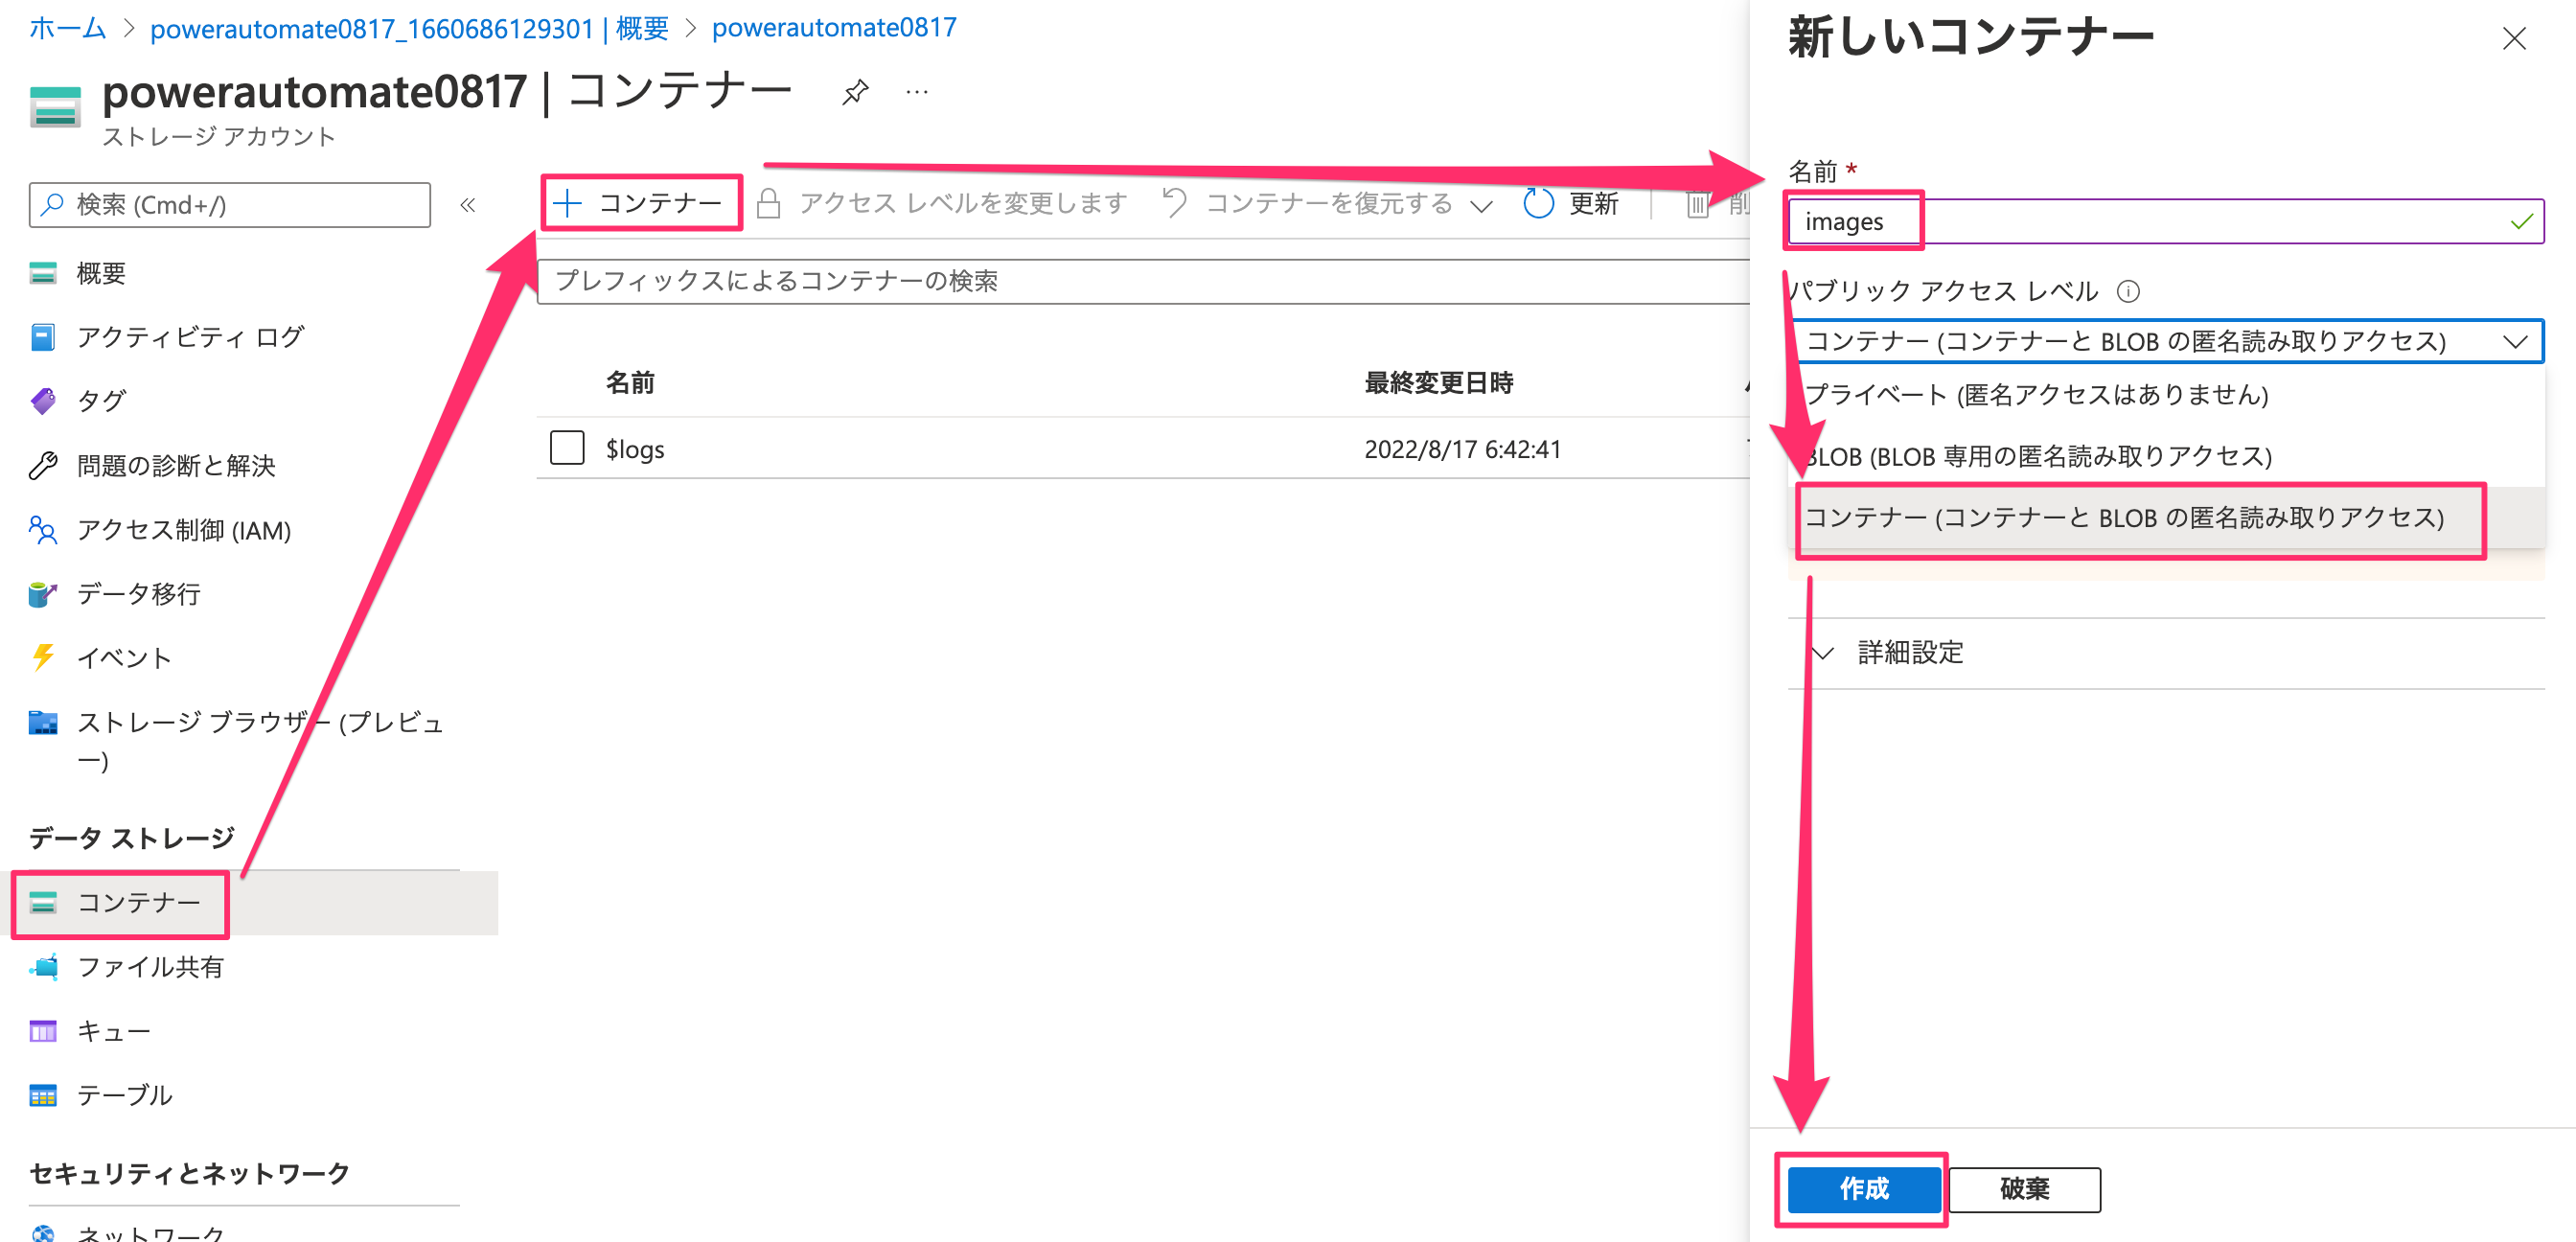
「images」でコンテナを作成します。
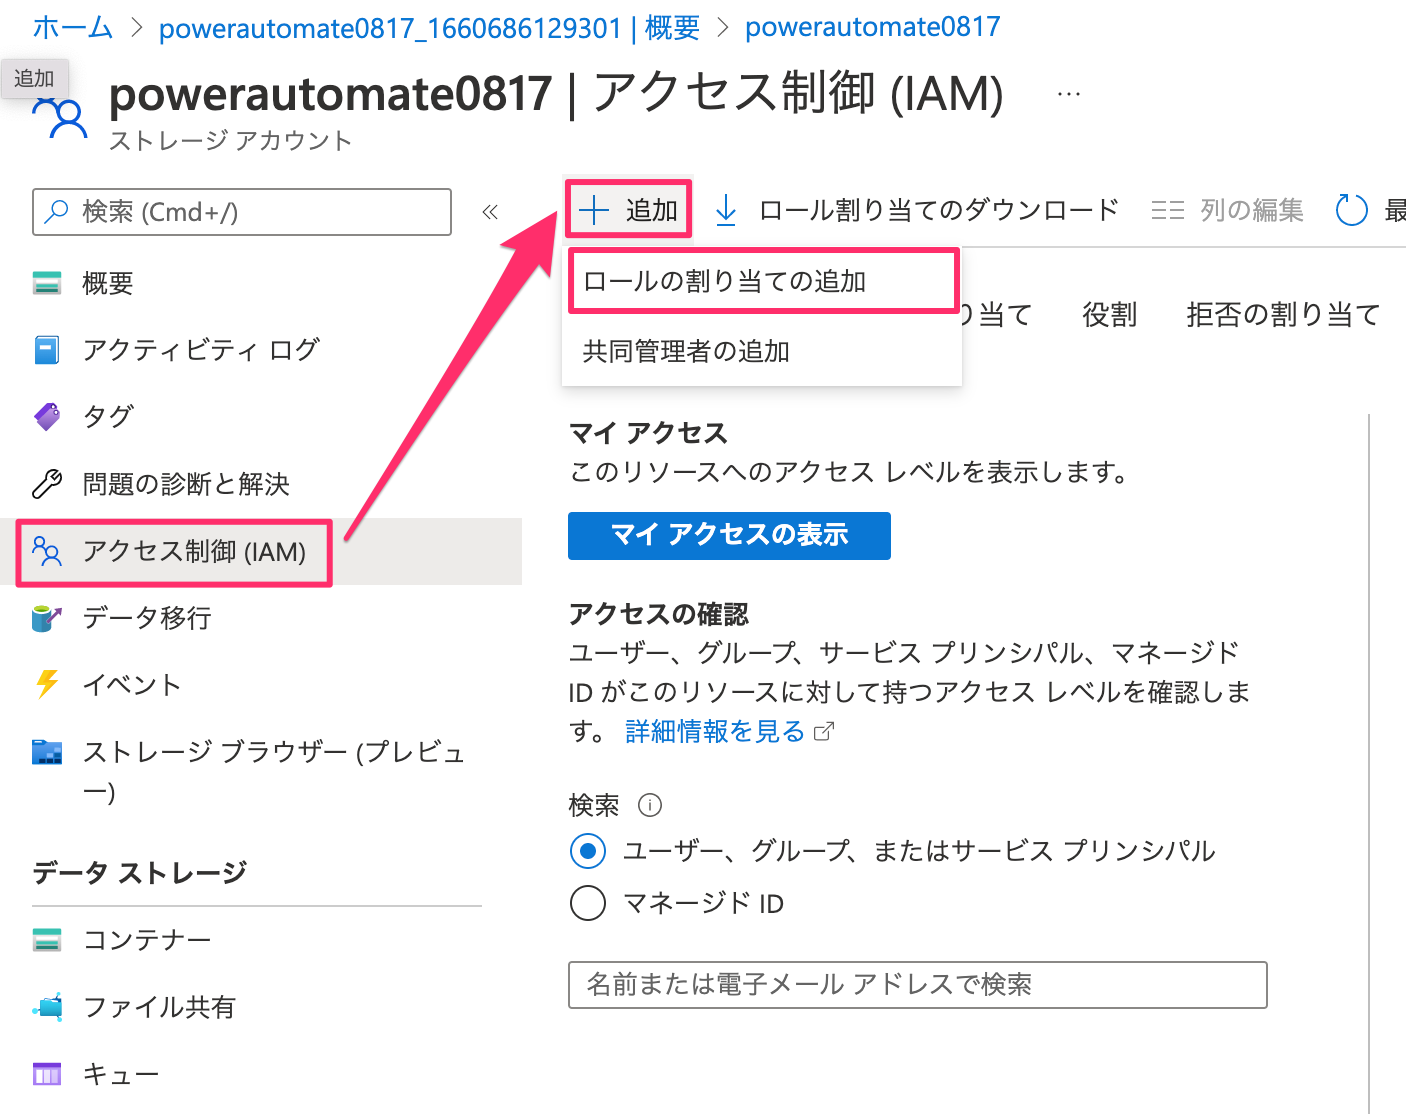
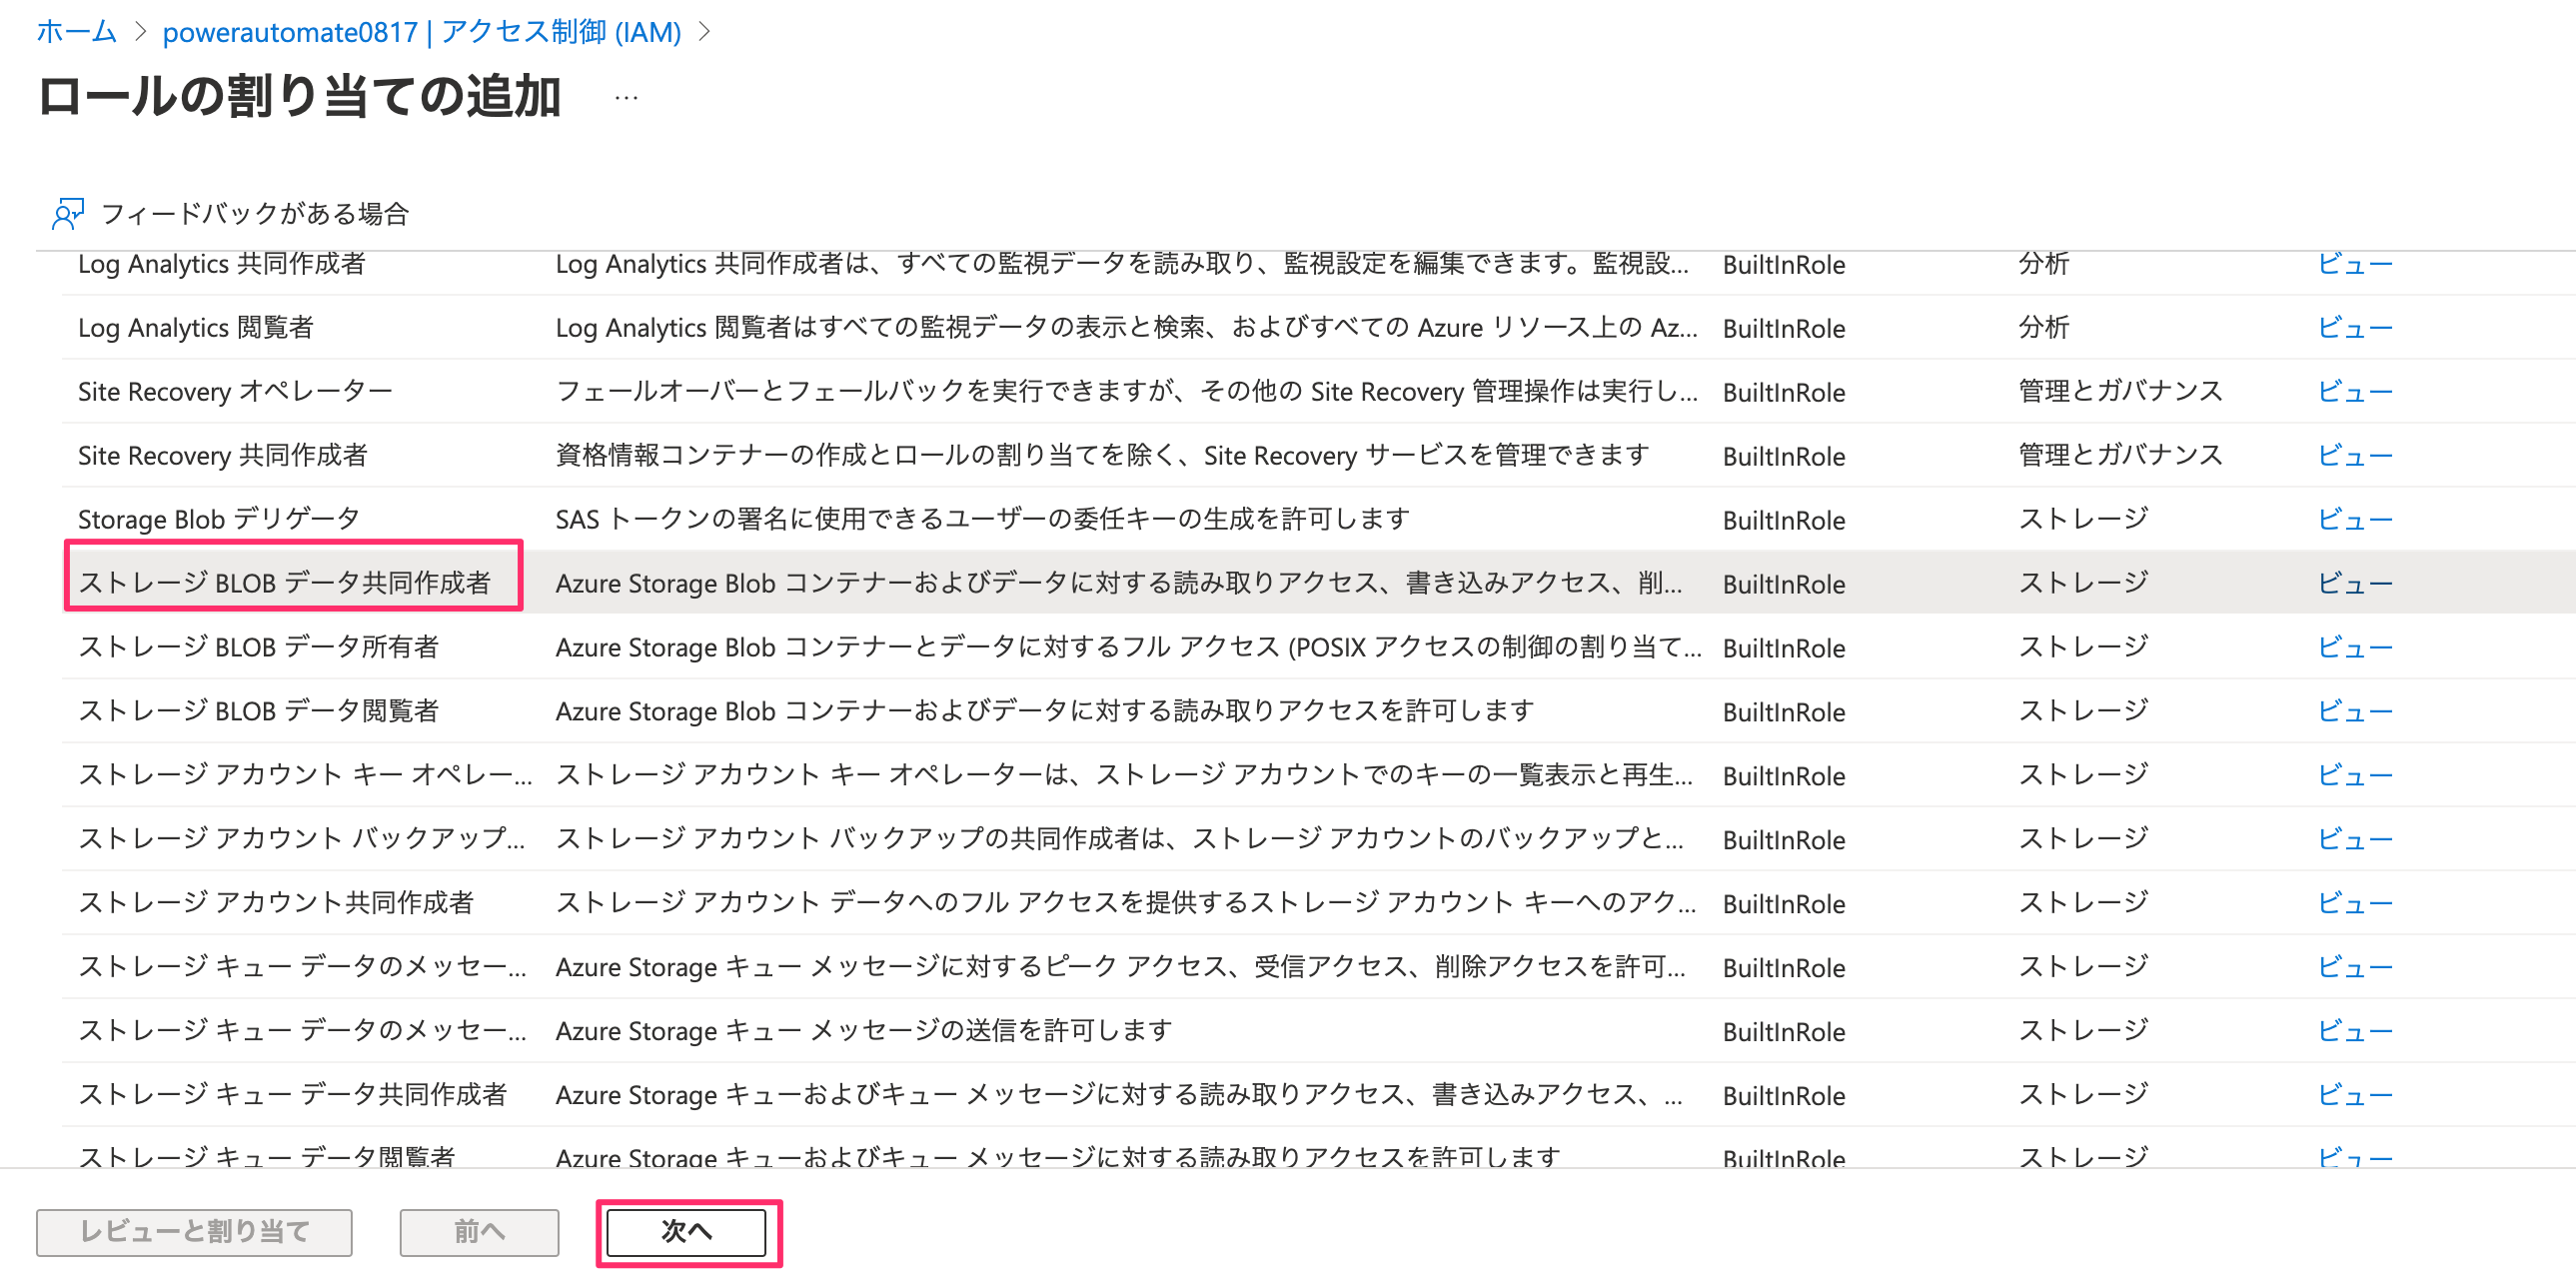
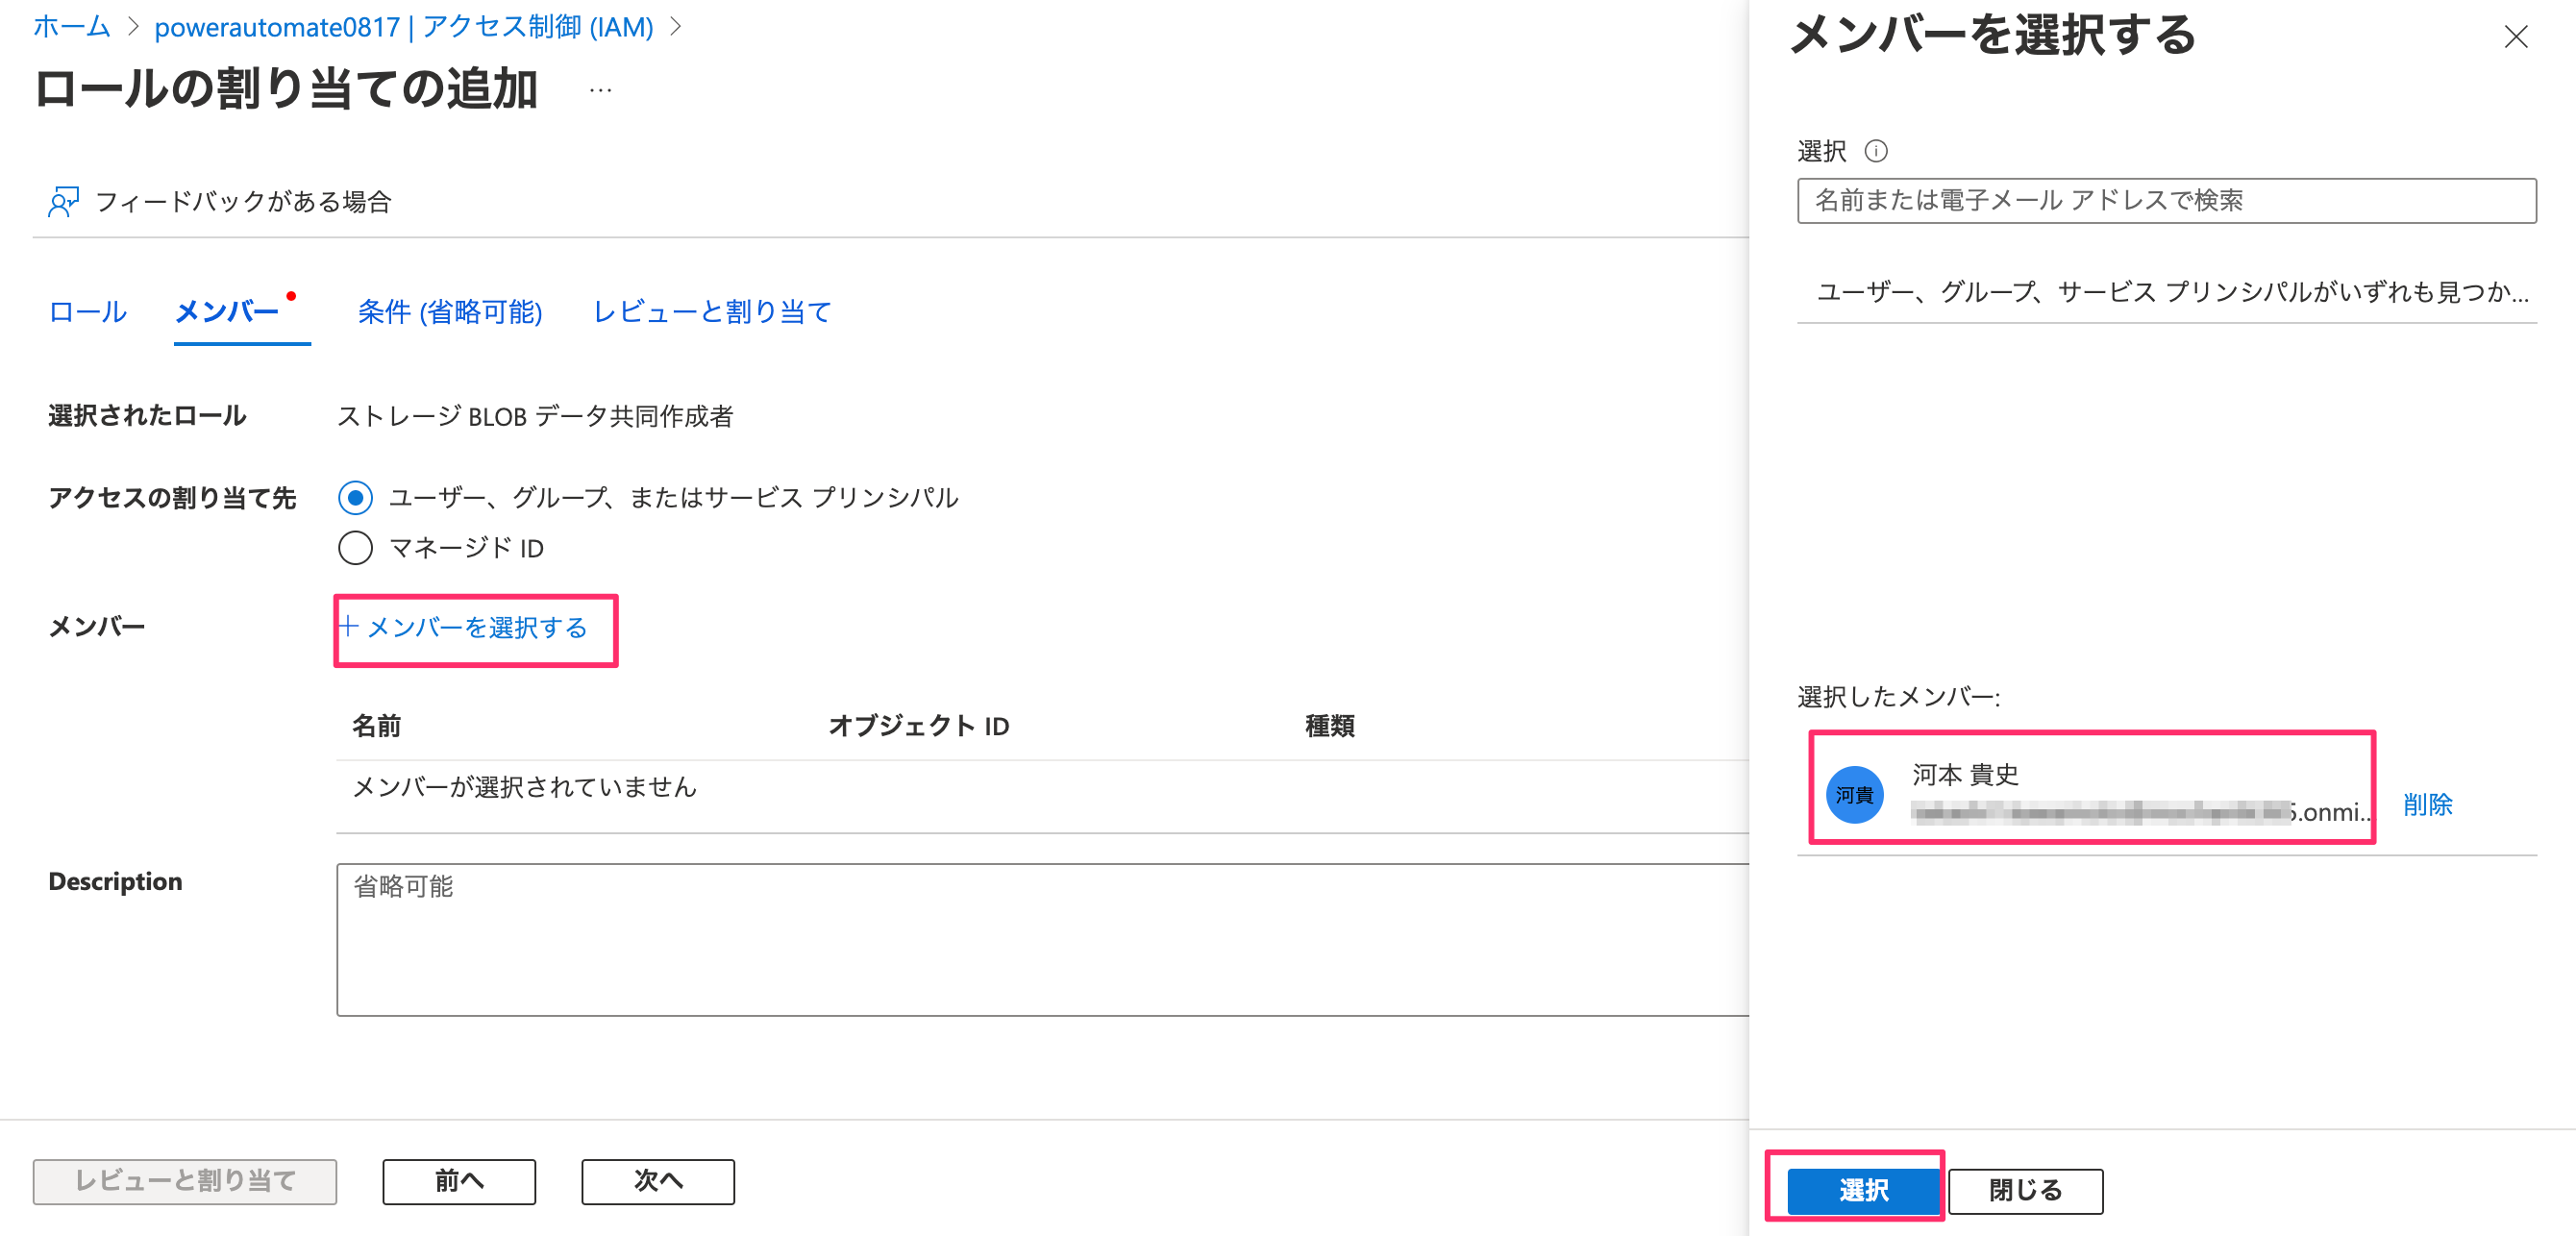
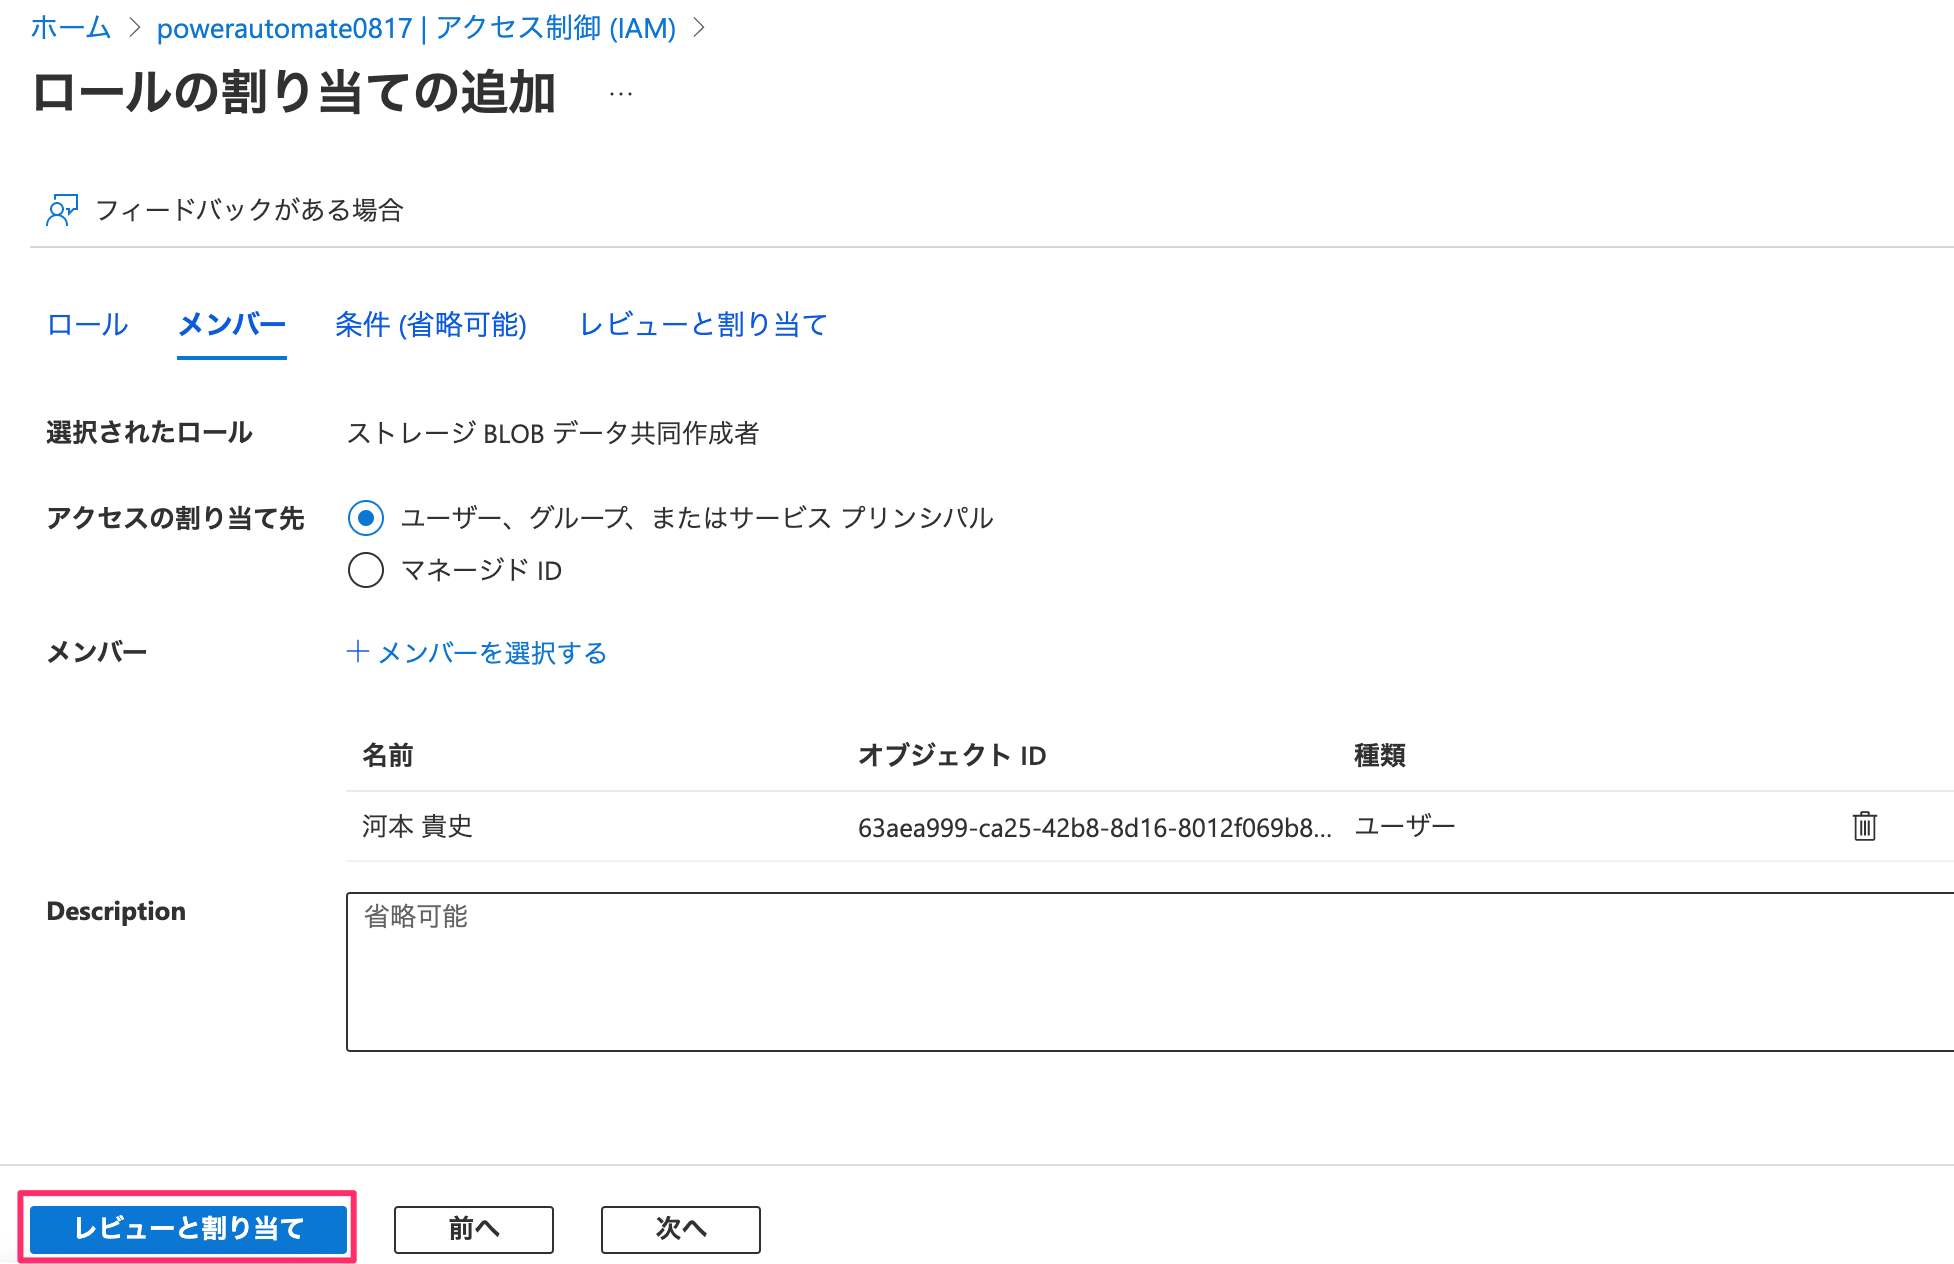
送った画像を保存するために下記のロールを追加します。
・ストレージ BLOB データ共同作成者
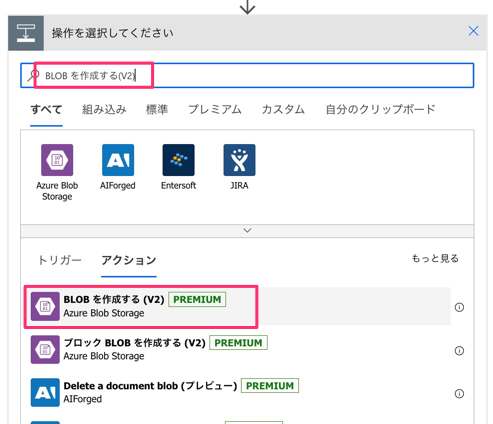
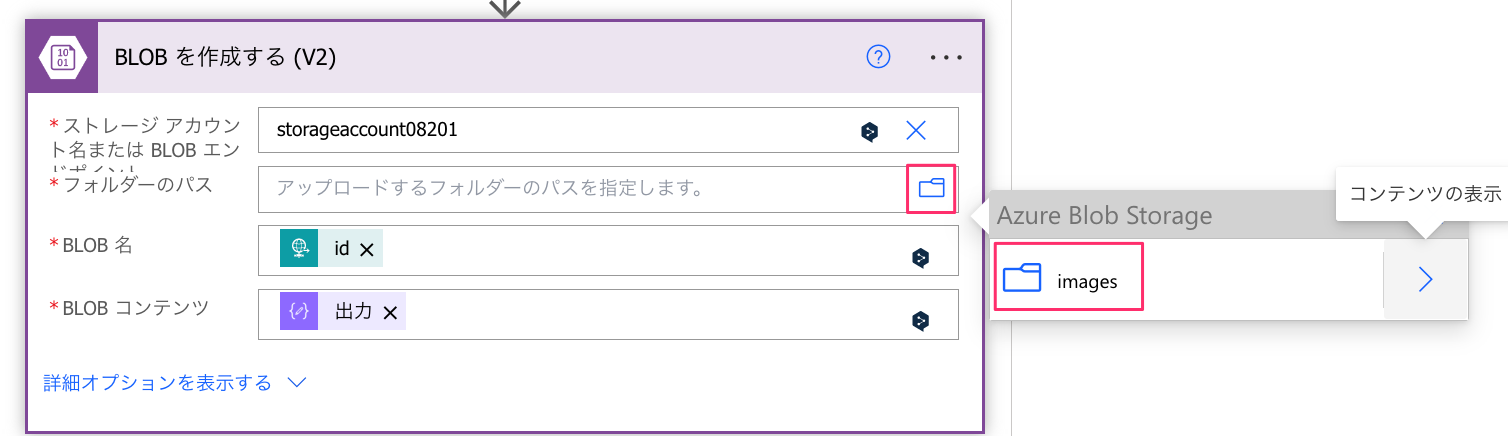
Power Automate画面に戻り、「作成」アクションの下に「BLOB を作成する(V2)」アクションを追加します。
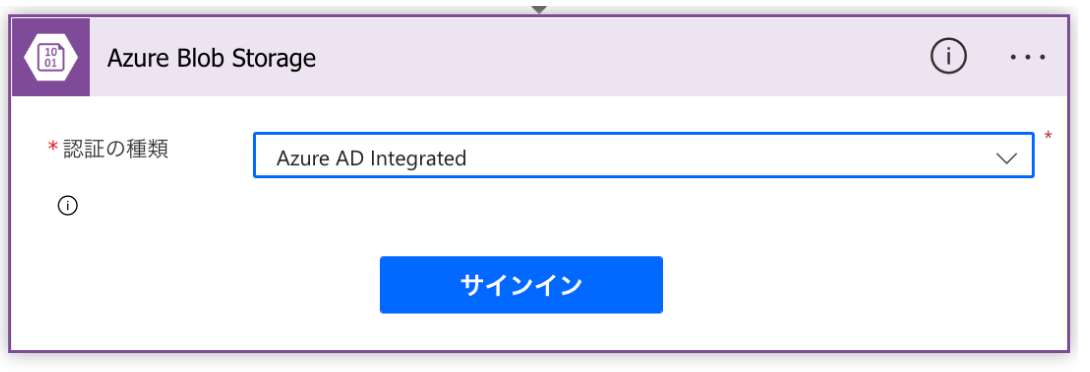
サインインをします。
下記のように設定し、アクションの追加をクリックします。
| 設定値 | |
|---|---|
| ストレージアカウント名 | 「カスタム値の入力」を選択してから、Azureで作成したアカウント名を入力 |
| フォルダパス | 右にあるフォルダマークを押して選択 |
| BLOB名 | @{items('Apply_to_each')?['message']?['id']} |
| BLOBコンテンツ | @{outputs('作成')} |
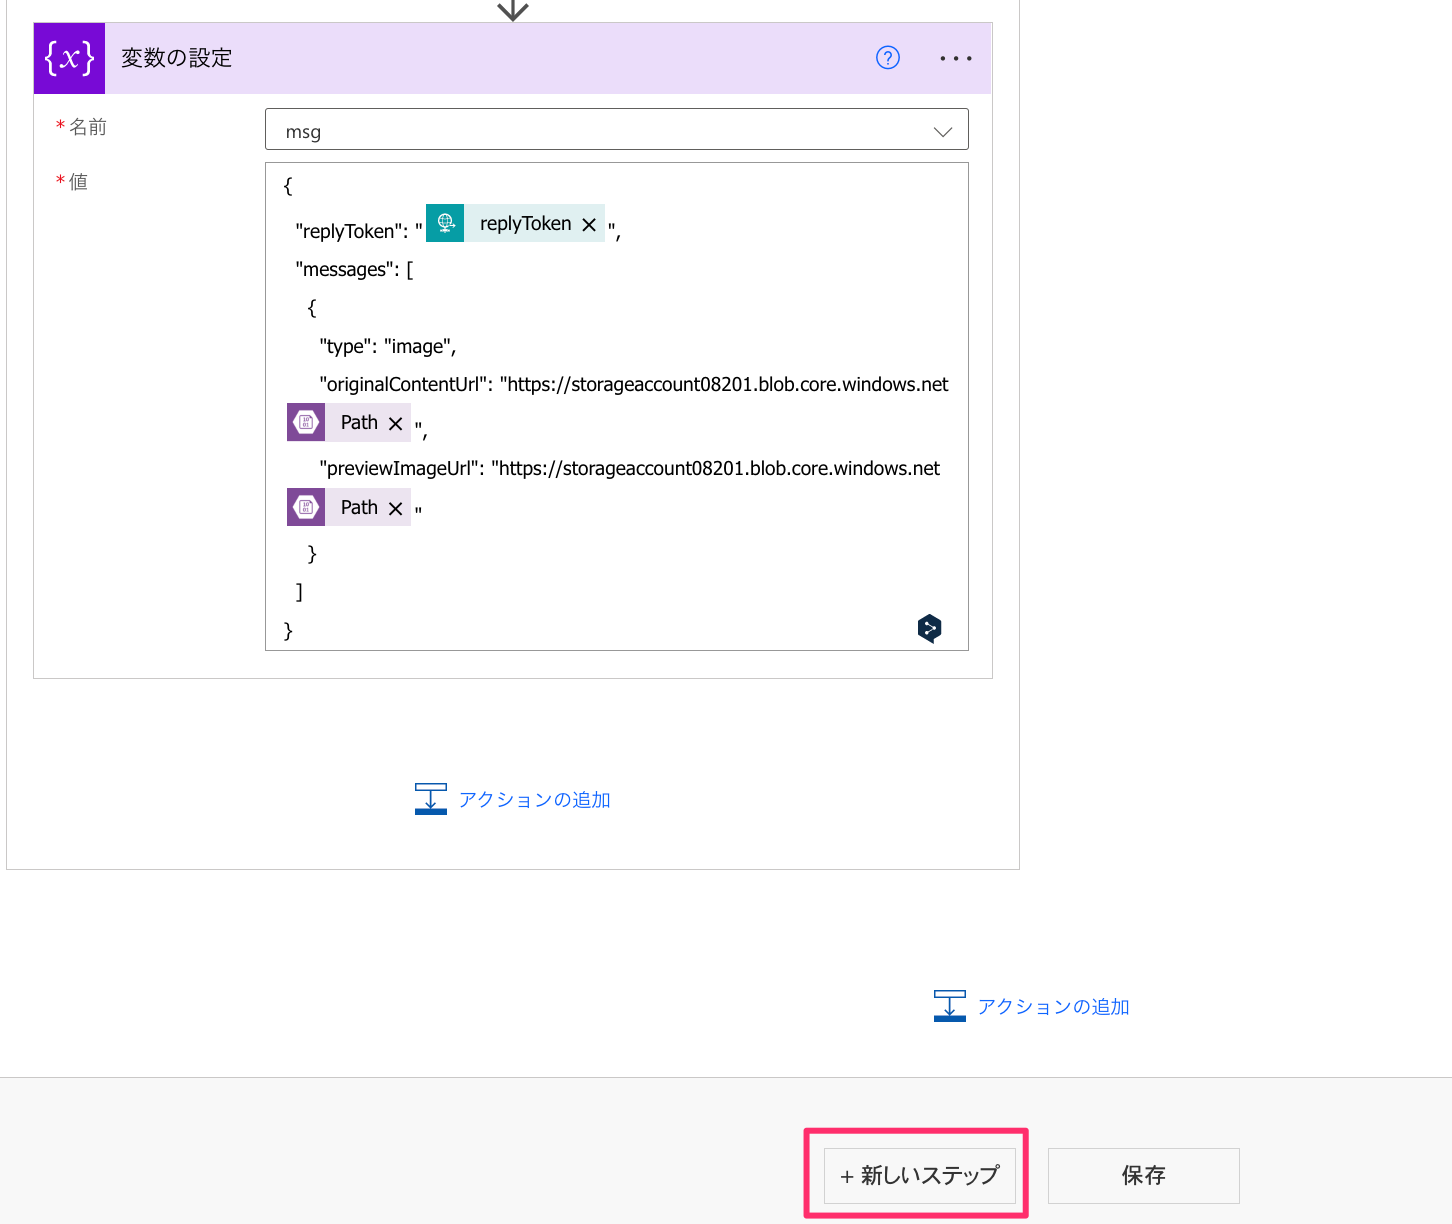
変数の設定を追加し、下記のように設定し、新しいステップをクリックします。
| 設定値 | |
|---|---|
| 名前 | msg |
| 値 | 下記のjSON |
jsonコード
{
  "replyToken": "@{items('Apply_to_each')?['replyToken']}",
  "messages": [
    {
      "type": "image",
      "originalContentUrl": "https://{Azureで作成したアカウント名}.blob.core.windows.net@{outputs('BLOB_を作成する_(V2)')?['body/Path']}",
      "previewImageUrl": "https://{Azureで作成したアカウント名}.blob.core.windows.net@{outputs('BLOB_を作成する_(V2)')?['body/Path']}"
    }
  ]
}
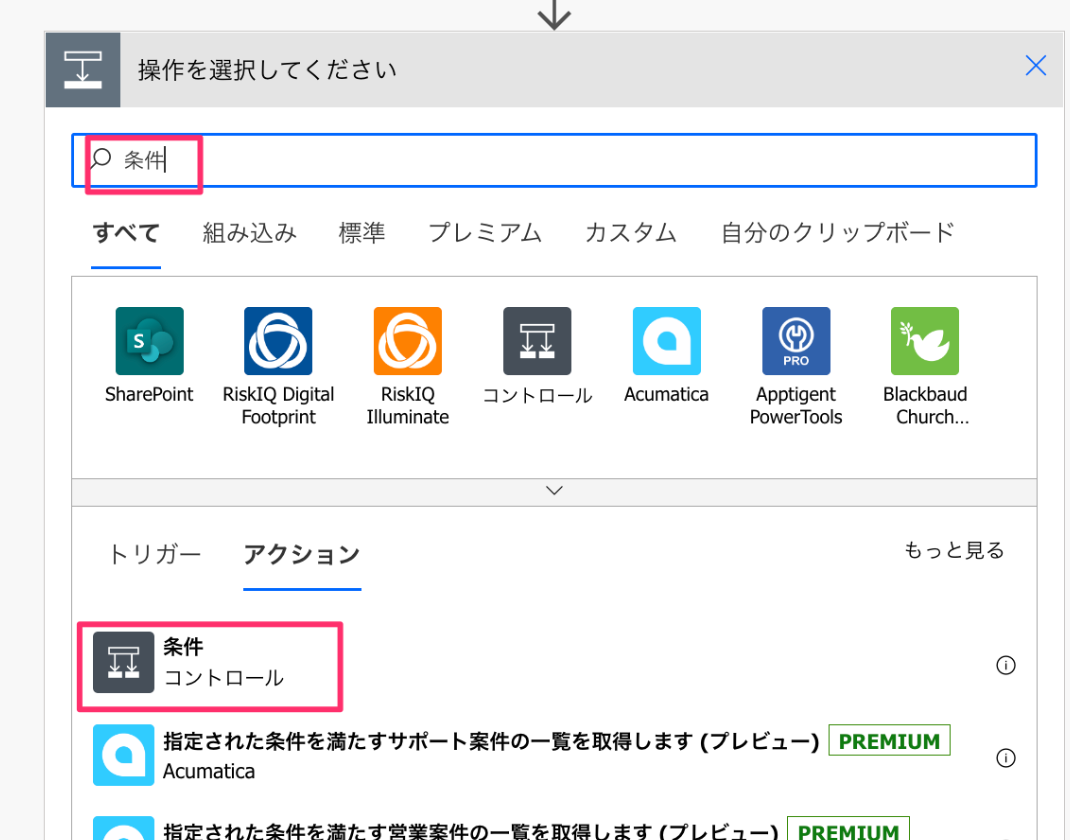
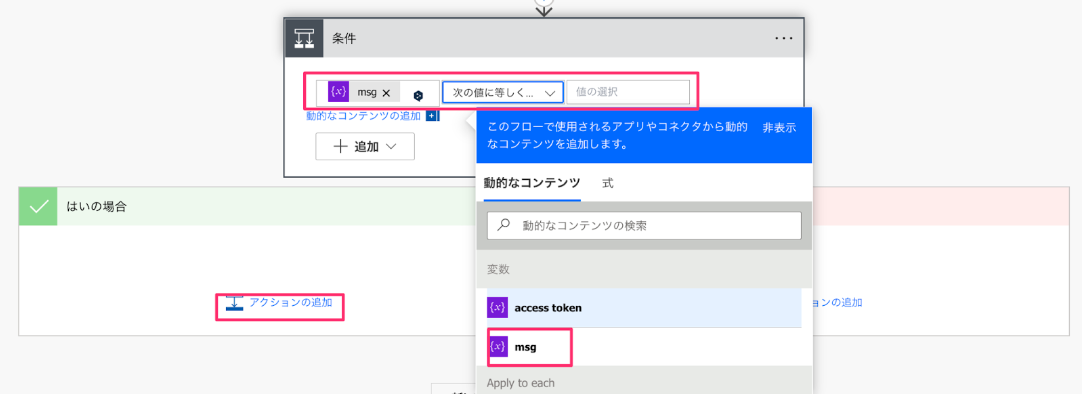
「条件」と検索し、条件をクリックします。
以下を設定します。
| 設定値 | |
|---|---|
| 左側 | 動的コンテンツから「msg」 |
| 中央 | 次の値に等しくない |
| 右側 | 空 |
「はい」の方にアクションの追加をクリックします。
HTTPと検索し、「HTTP」を選択します。
下記のように設定し、保存をクリックします。
| 設定値 | |
|---|---|
| 方法 | POST |
| URI | https://api.line.me/v2/bot/message/reply |
| ヘッダー | { "Content-Type": "application/json", "Authorization": "Bearer @{variables('access token')}" } |
| 本文 | @{variables('msg')} |

「HTTP要求の受信時」にあるURLをコピーします。
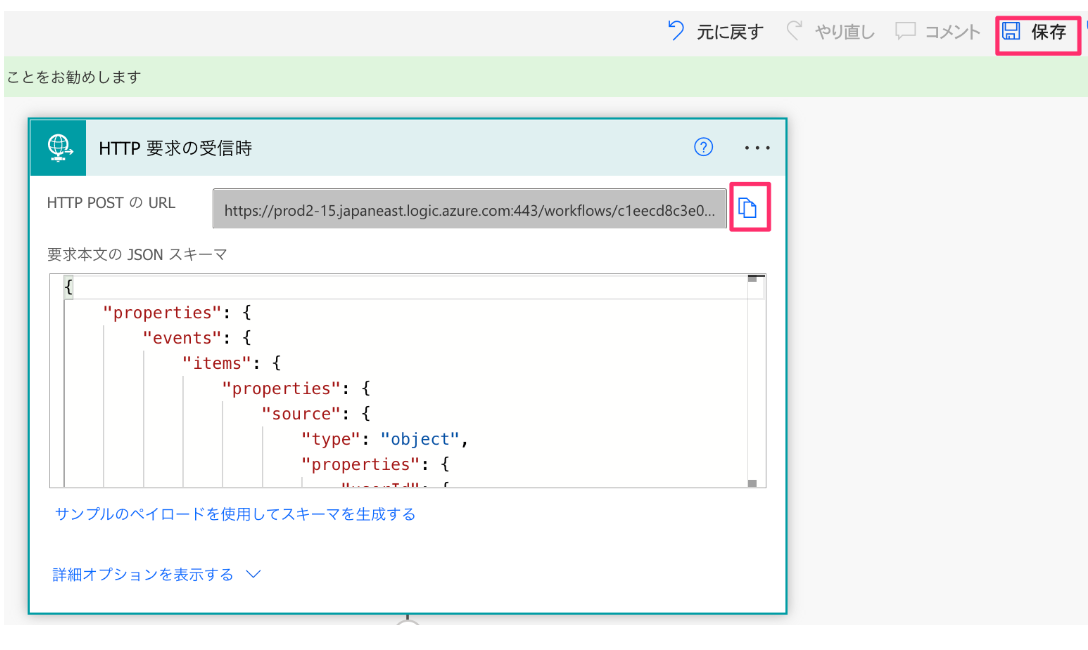
LINE側のMessaging APIのWebhook URLに保存し、Webhookの利用をオンにします。

GPT-3(text-davinci-003)とJapanese Stable Diffusionは下記を参考に行なってください。
GPT-3(text-davinci-003)のフローを作成
ChatGPTのAPIは現在のところありませんが、大規模言語モデルという共通点をもつGPT-3(text-davinci-003)のAPIを今回使用しております。
GPT-3(text-davinci-003)のAPIは下記を参考
https://beta.openai.com/docs/api-reference/completions/create
DALL-E2のフローで下記の赤枠三箇所を変更し、❌は削除します。
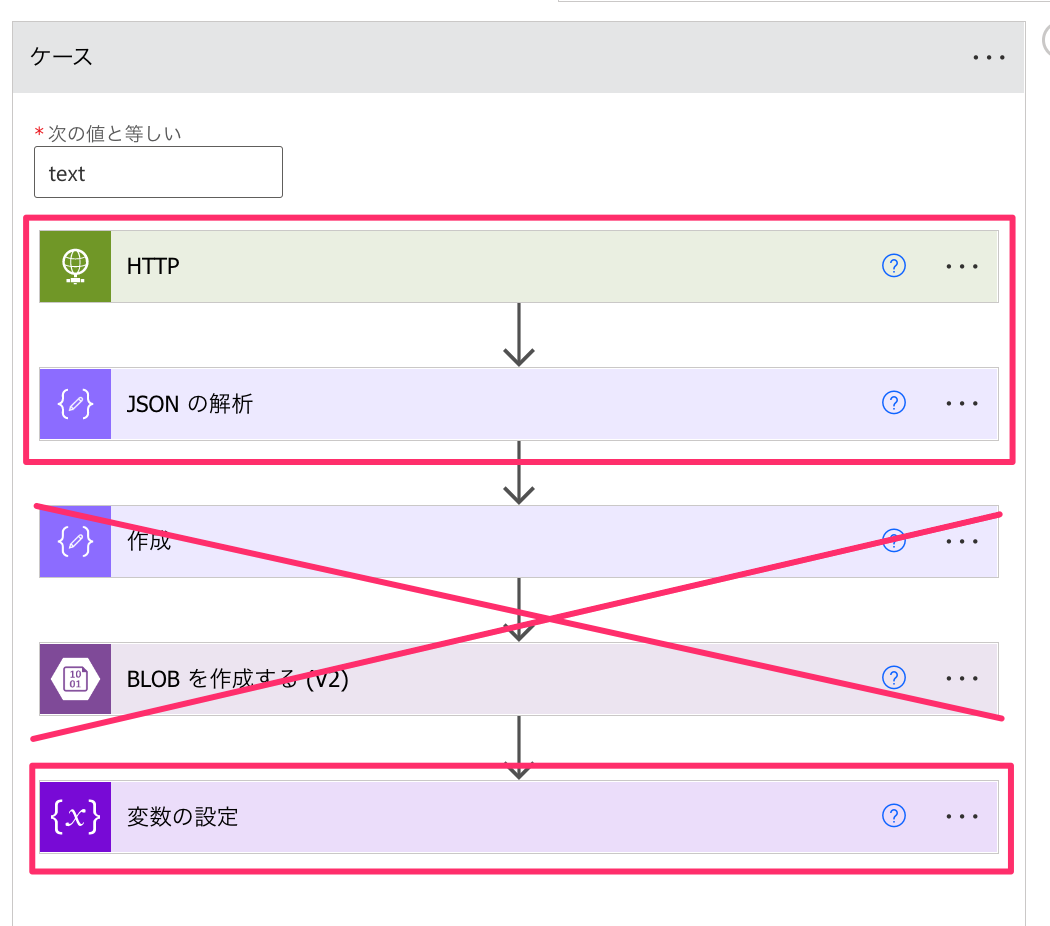
HTTPの変更
| 設定値 | |
|---|---|
| 方法 | POST |
| URI | https://api.openai.com/v1/completions |
| ヘッダー | { "Content-Type": "application/json", "Authorization": "Bearer {メモしたOpenAIのAPI Key}" } |
| 本文 | { "model": "text-davinci-003", "prompt": "@{items('Apply_to_each')?['message']?['text']}", "max_tokens": 2048, "temperature": 0 } |
JSONの解析の変更
下記のように設定し、アクションの追加をクリックします。
| 設定値 | |
|---|---|
| コンテンツ | @{body('HTTP')} |
| スキーマー | 下記JSON |
jsonコード
{
    "type": "object",
    "properties": {
        "id": {
            "type": "string"
        },
        "object": {
            "type": "string"
        },
        "created": {
            "type": "integer"
        },
        "model": {
            "type": "string"
        },
        "choices": {
            "type": "array",
            "items": {
                "type": "object",
                "properties": {
                    "text": {
                        "type": "string"
                    },
                    "index": {
                        "type": "integer"
                    },
                    "logprobs": {},
                    "finish_reason": {
                        "type": "string"
                    }
                },
                "required": [
                    "text",
                    "index",
                    "logprobs",
                    "finish_reason"
                ]
            }
        },
        "usage": {
            "type": "object",
            "properties": {
                "prompt_tokens": {
                    "type": "integer"
                },
                "completion_tokens": {
                    "type": "integer"
                },
                "total_tokens": {
                    "type": "integer"
                }
            }
        }
    }
}
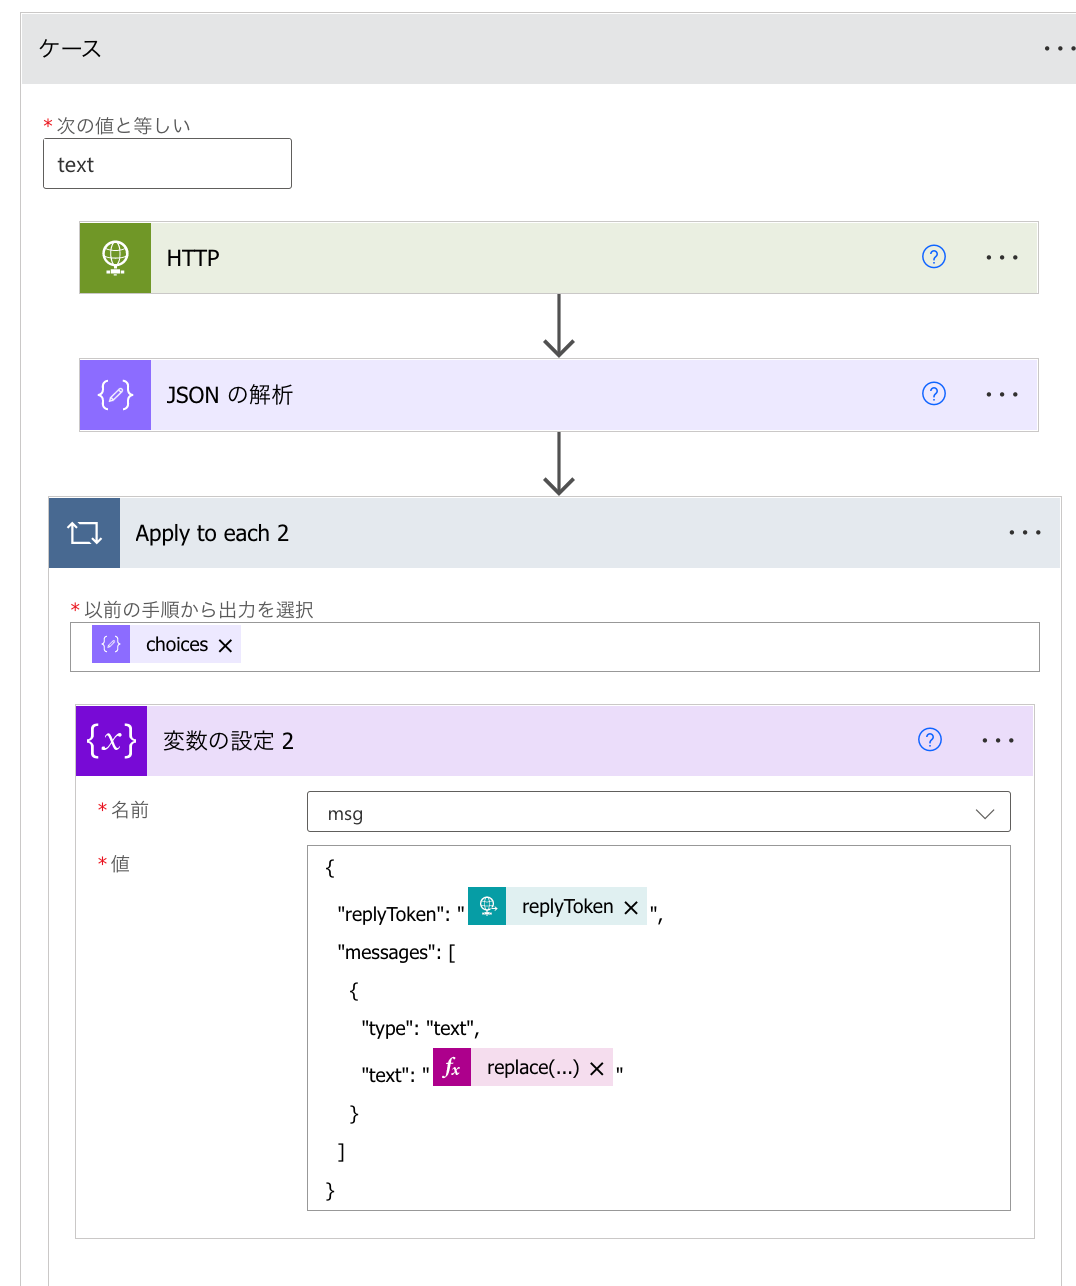
「コントロール」と検索し、組み込みタブ、「Apply to each」をクリックします。
以前の手順から出力を選択に「@{body('JSON_の解析')?['choices']}」を入力し、「変数の設定」アクションを追加し、下記のように設定しします。
| 設定値 | |
|---|---|
| 名前 | msg |
| 値 | 下記のjSON |
{
  "replyToken": "@{items('Apply_to_each')?['replyToken']}",
  "messages": [
    {
      "type": "text",
      "text": "@{replace(replace(items('Apply_to_each_2')?['text'],decodeUriComponent('%0D'),'\n'),decodeUriComponent('%0A'),'\n')}"
    }
  ]
}
Japanese Stable Diffusionのフローを作成
Japanese Stable Diffusion のAPI Key取得
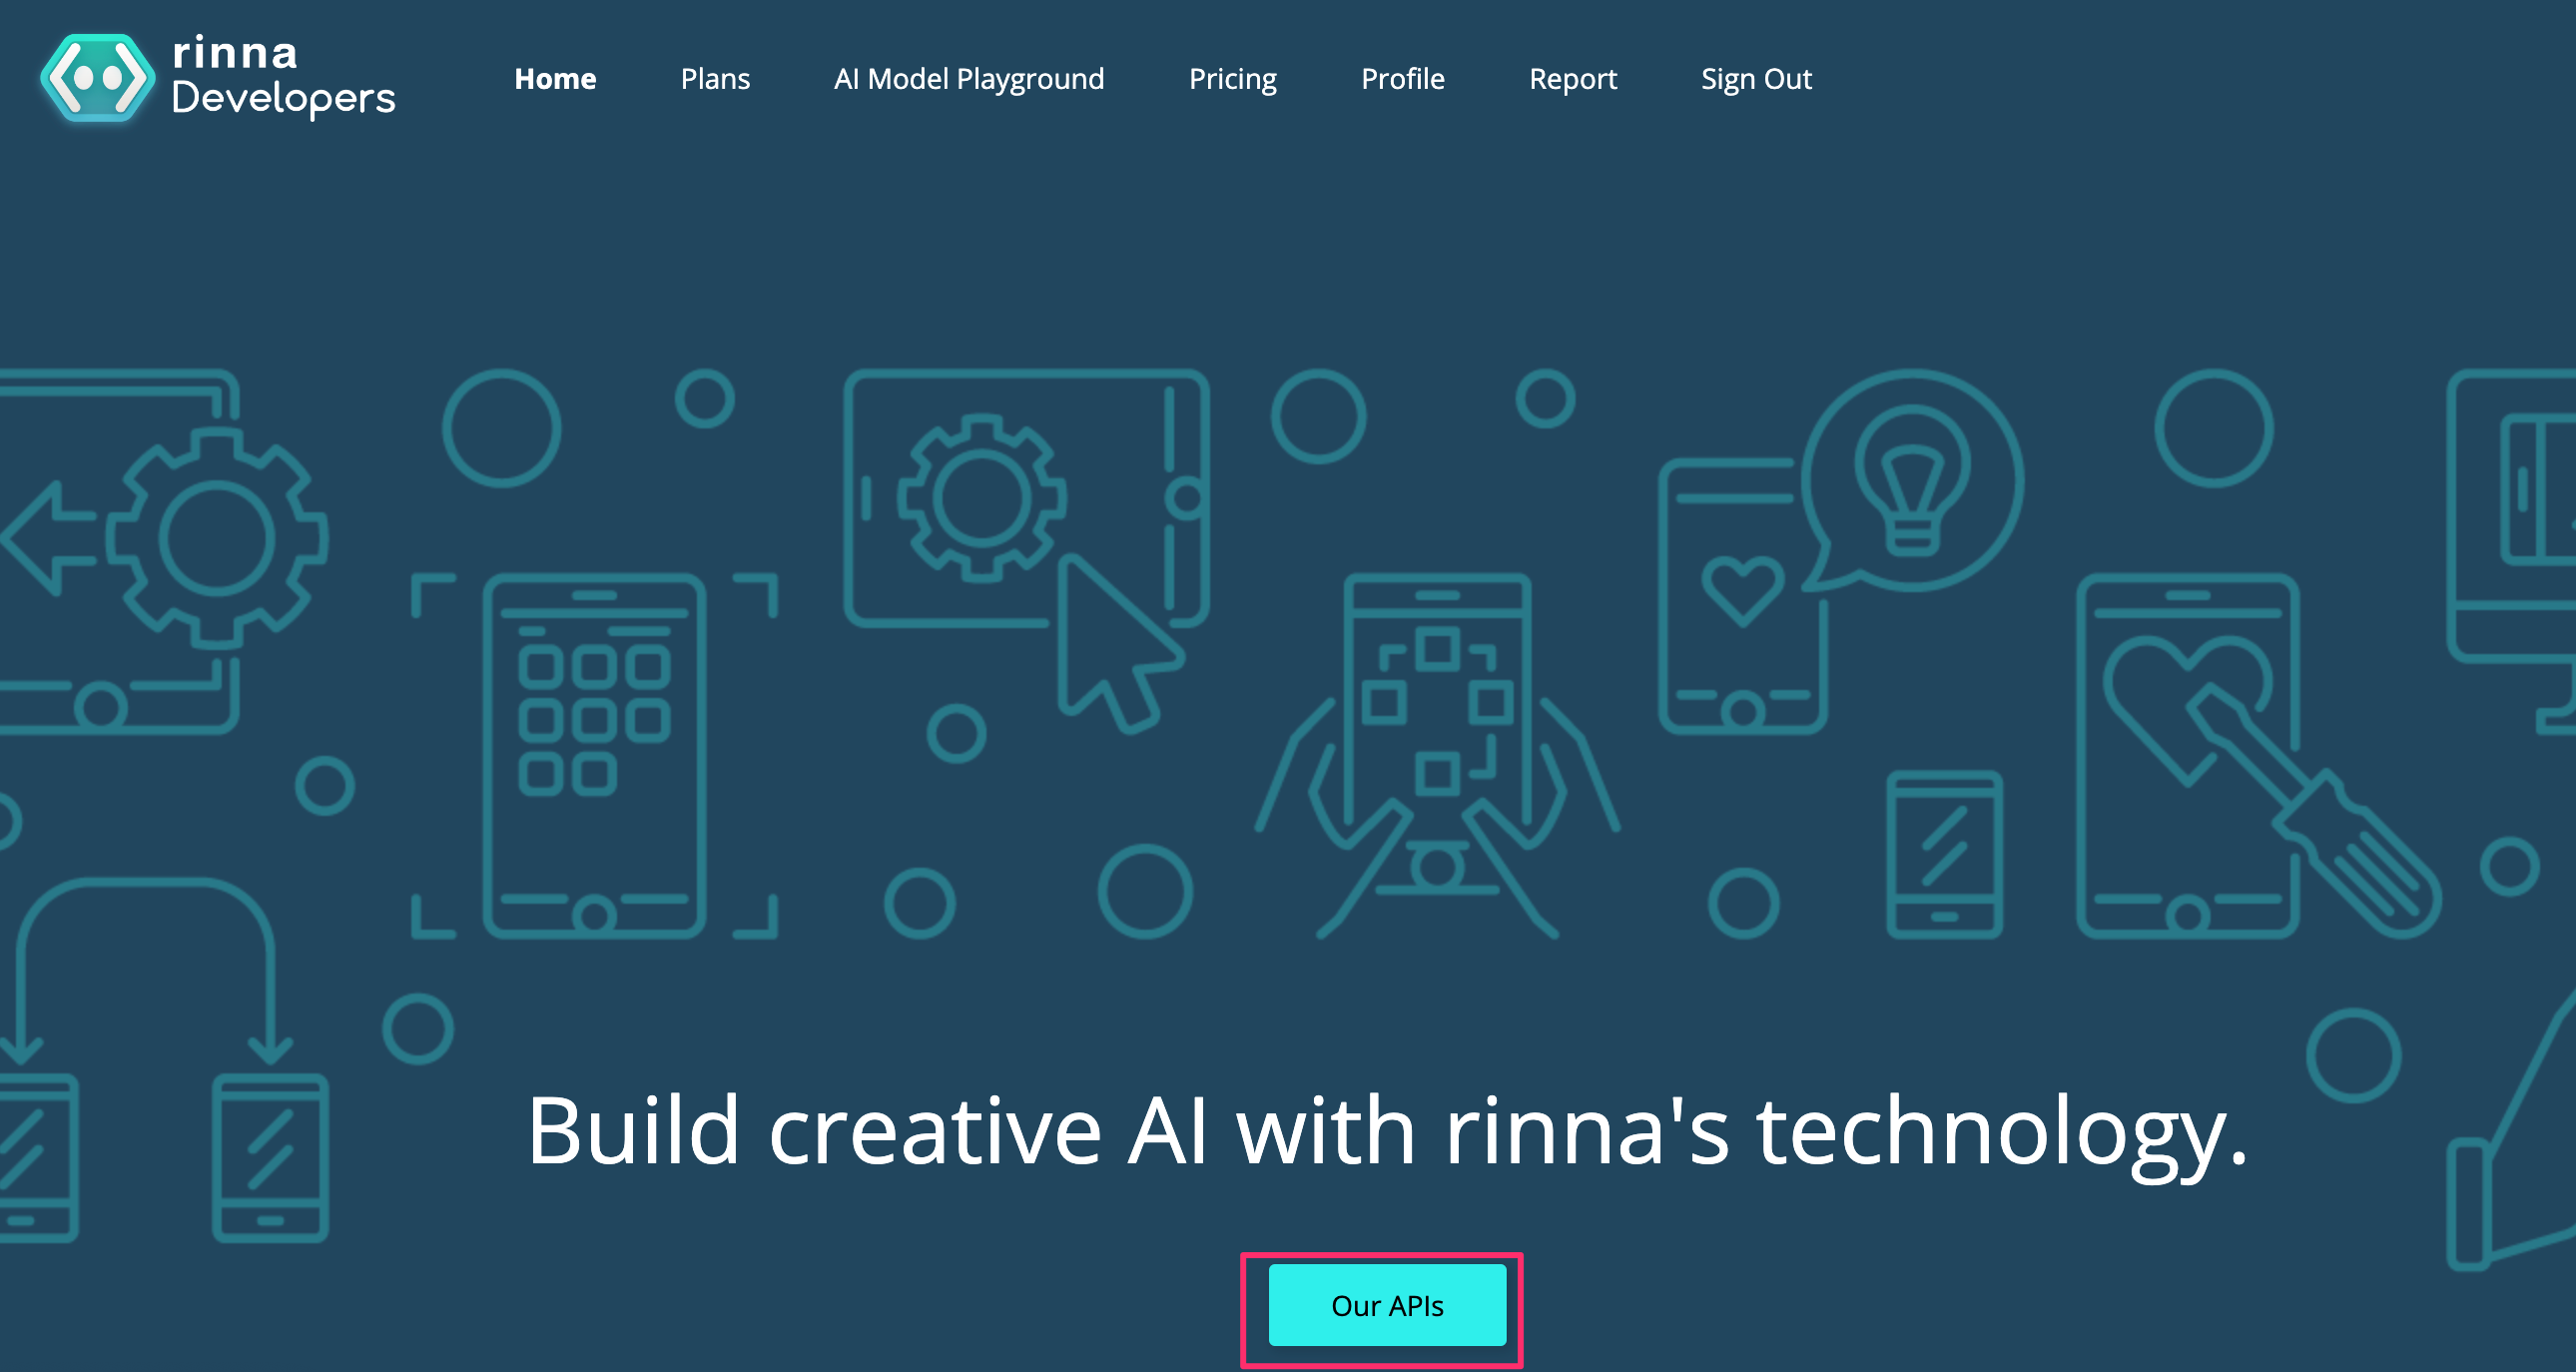
まずは下記からアカウントを登録します。
https://developers.rinna.co.jp/signin
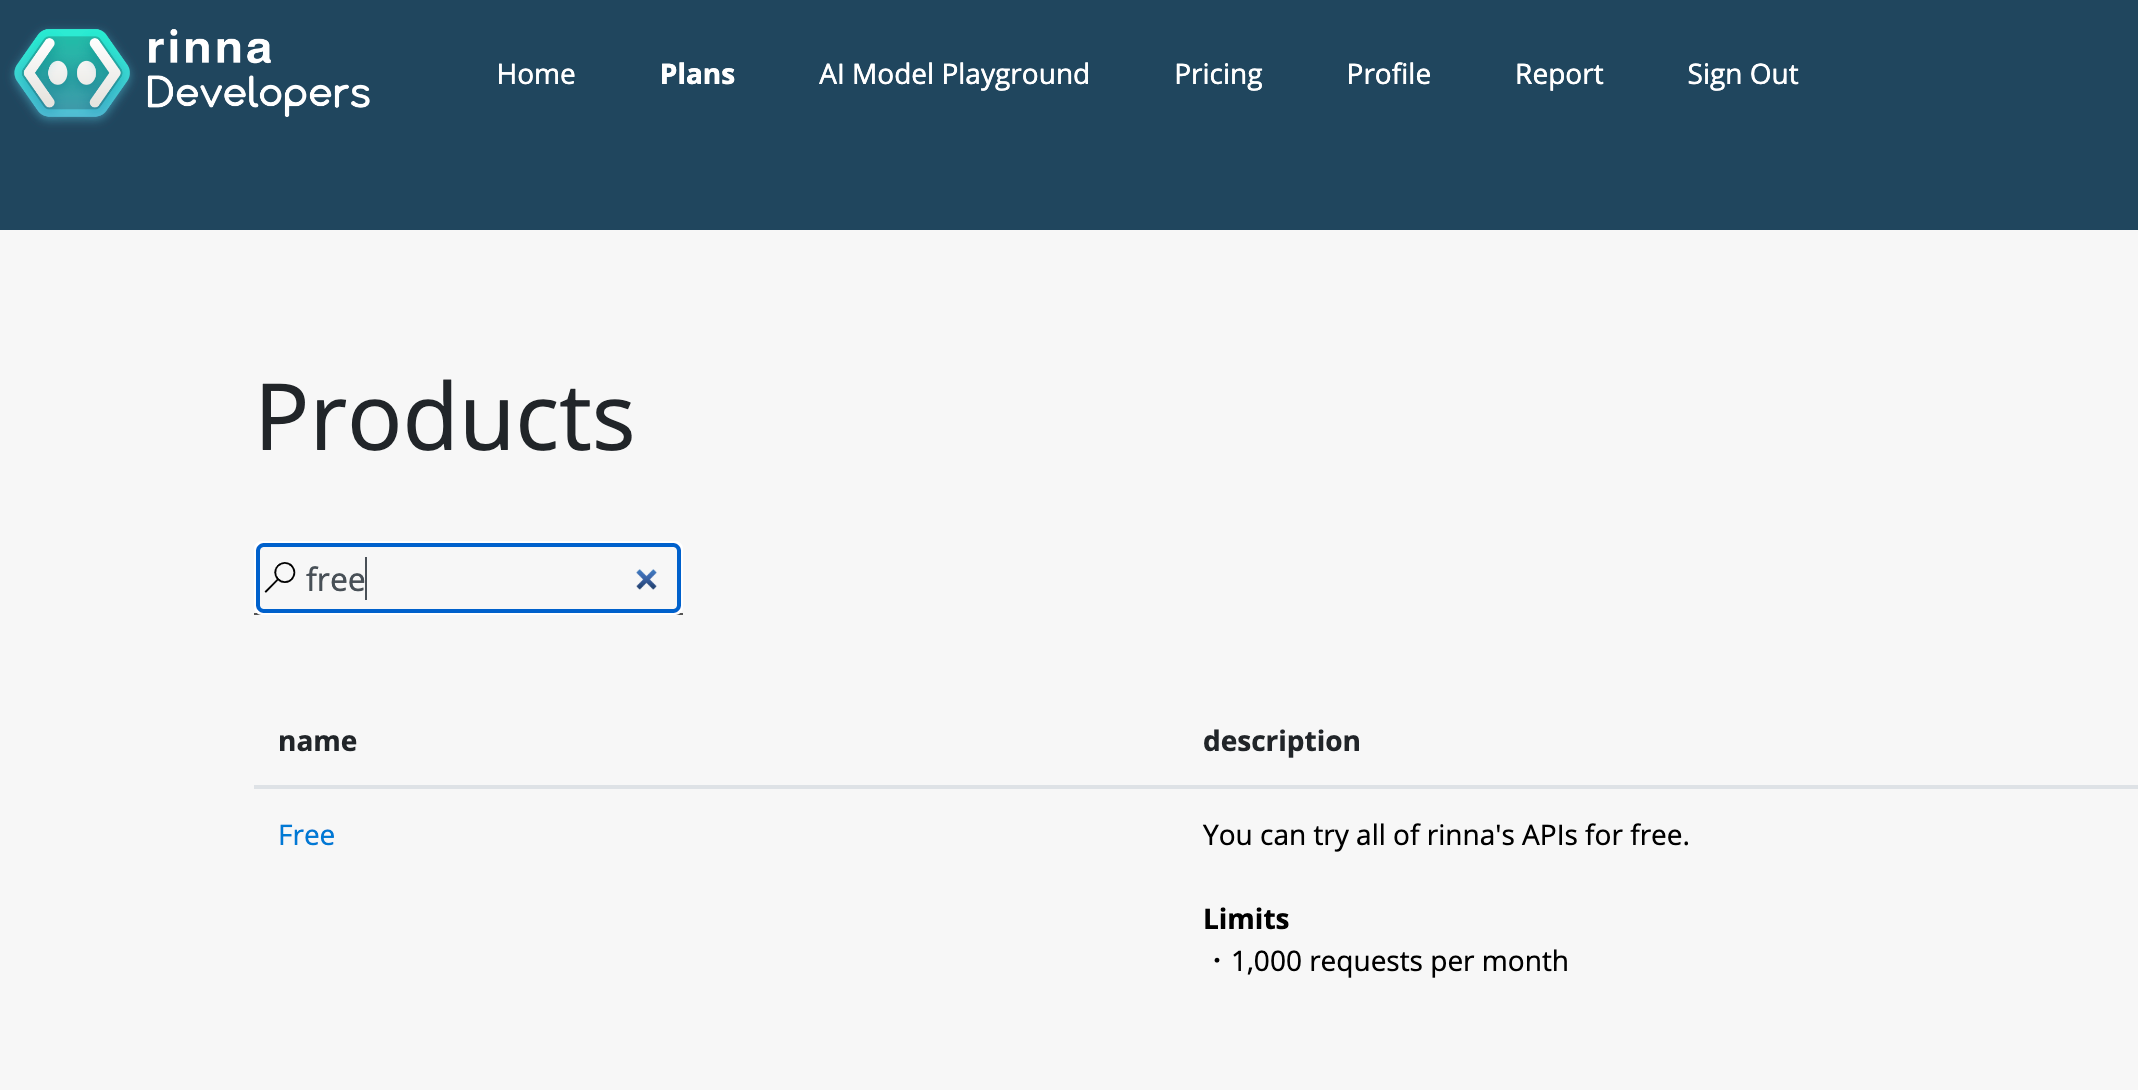
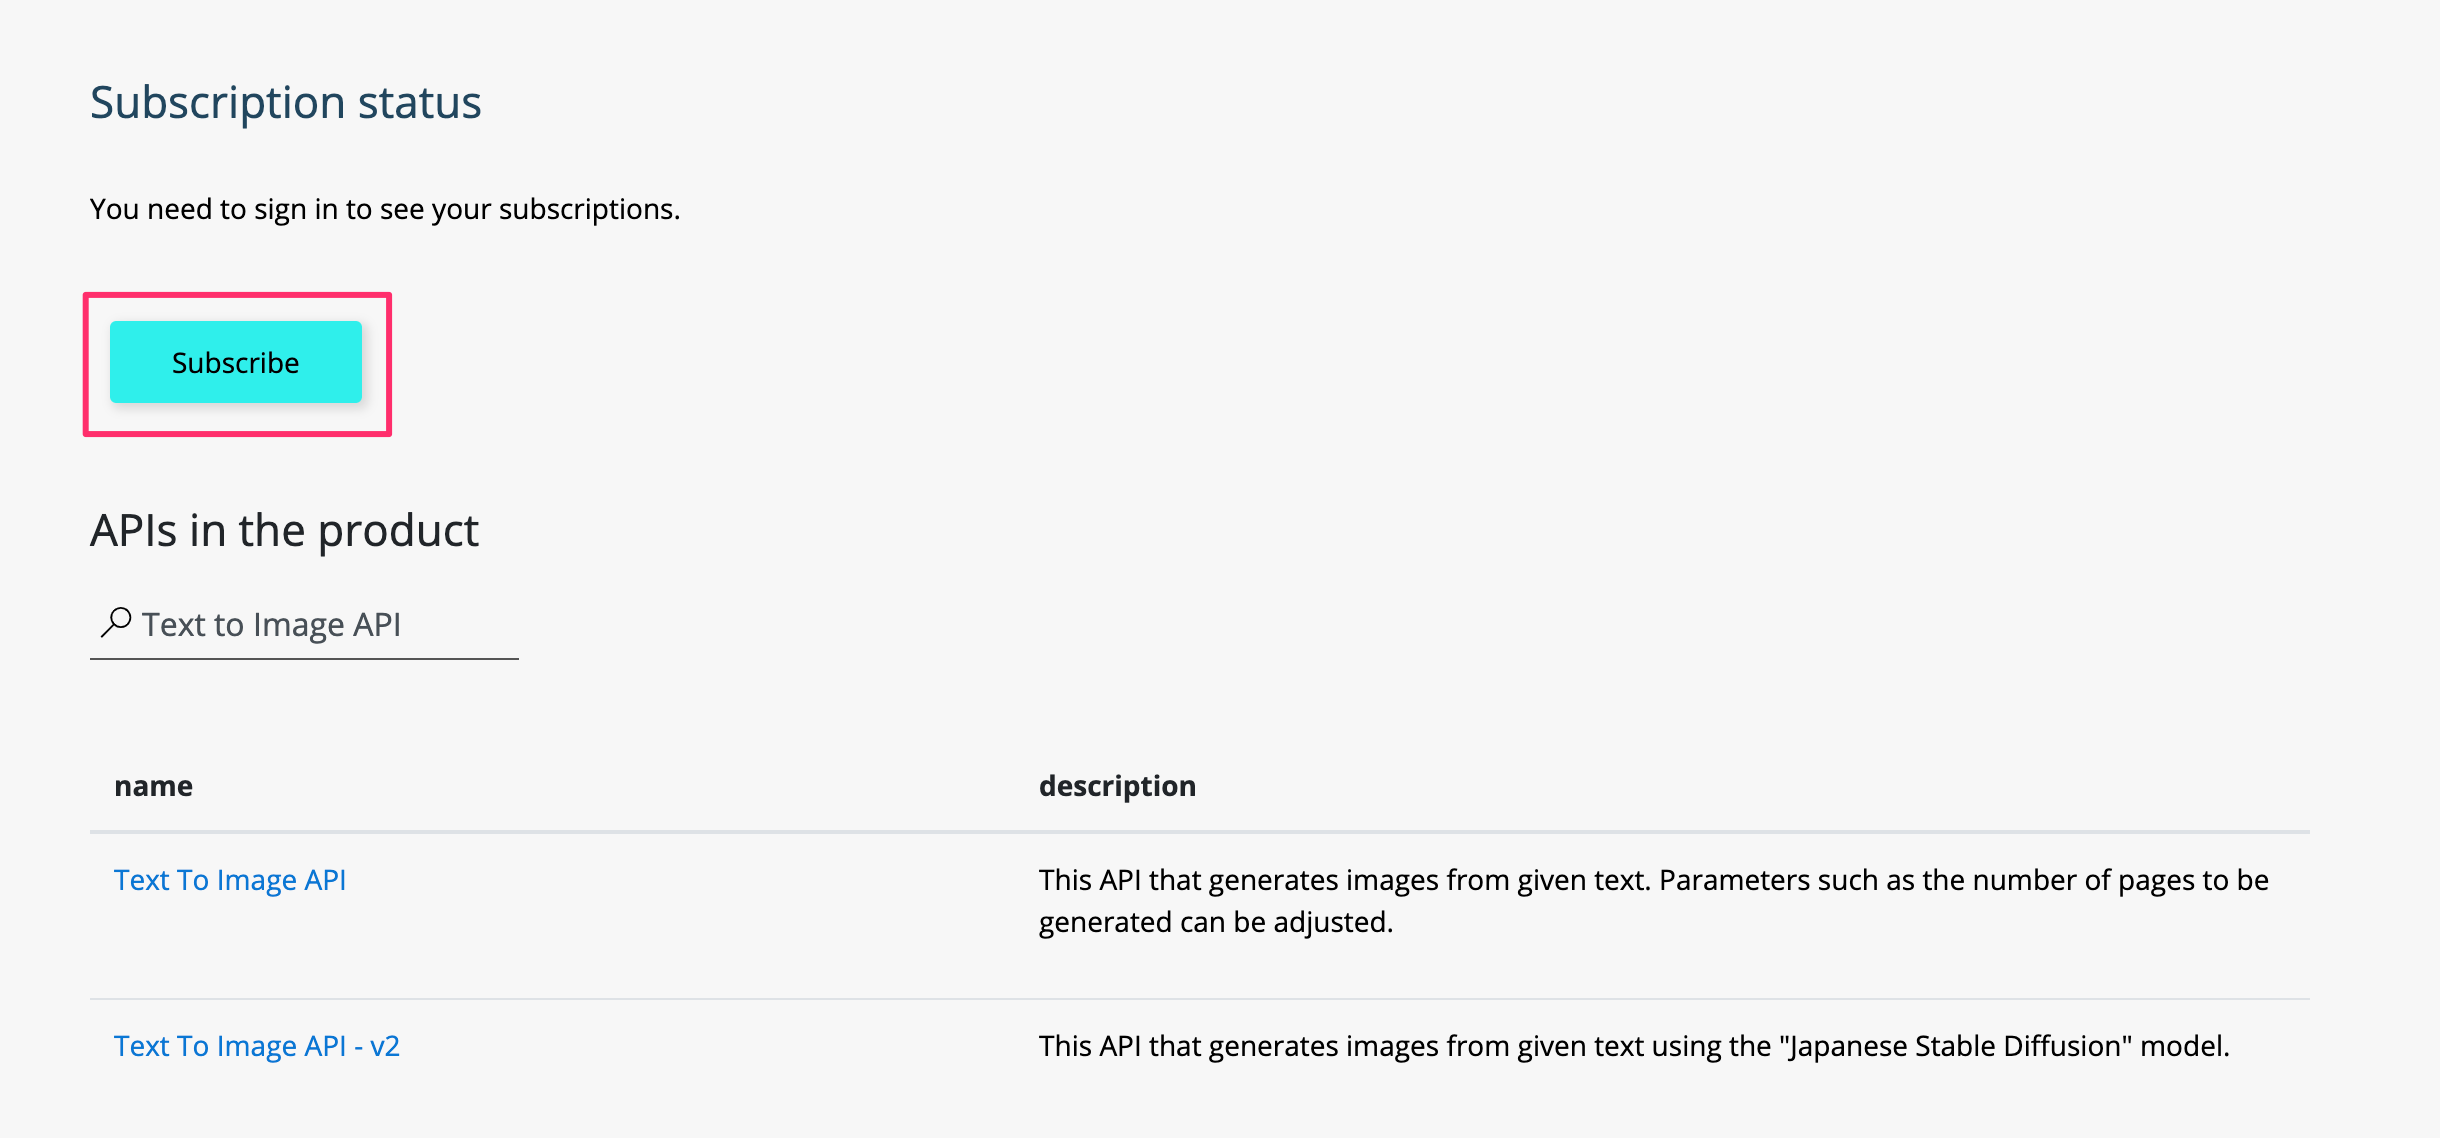
使用する「Text to Image API」を含む「Free」を検索します。
「Subscribe」をクリックします。
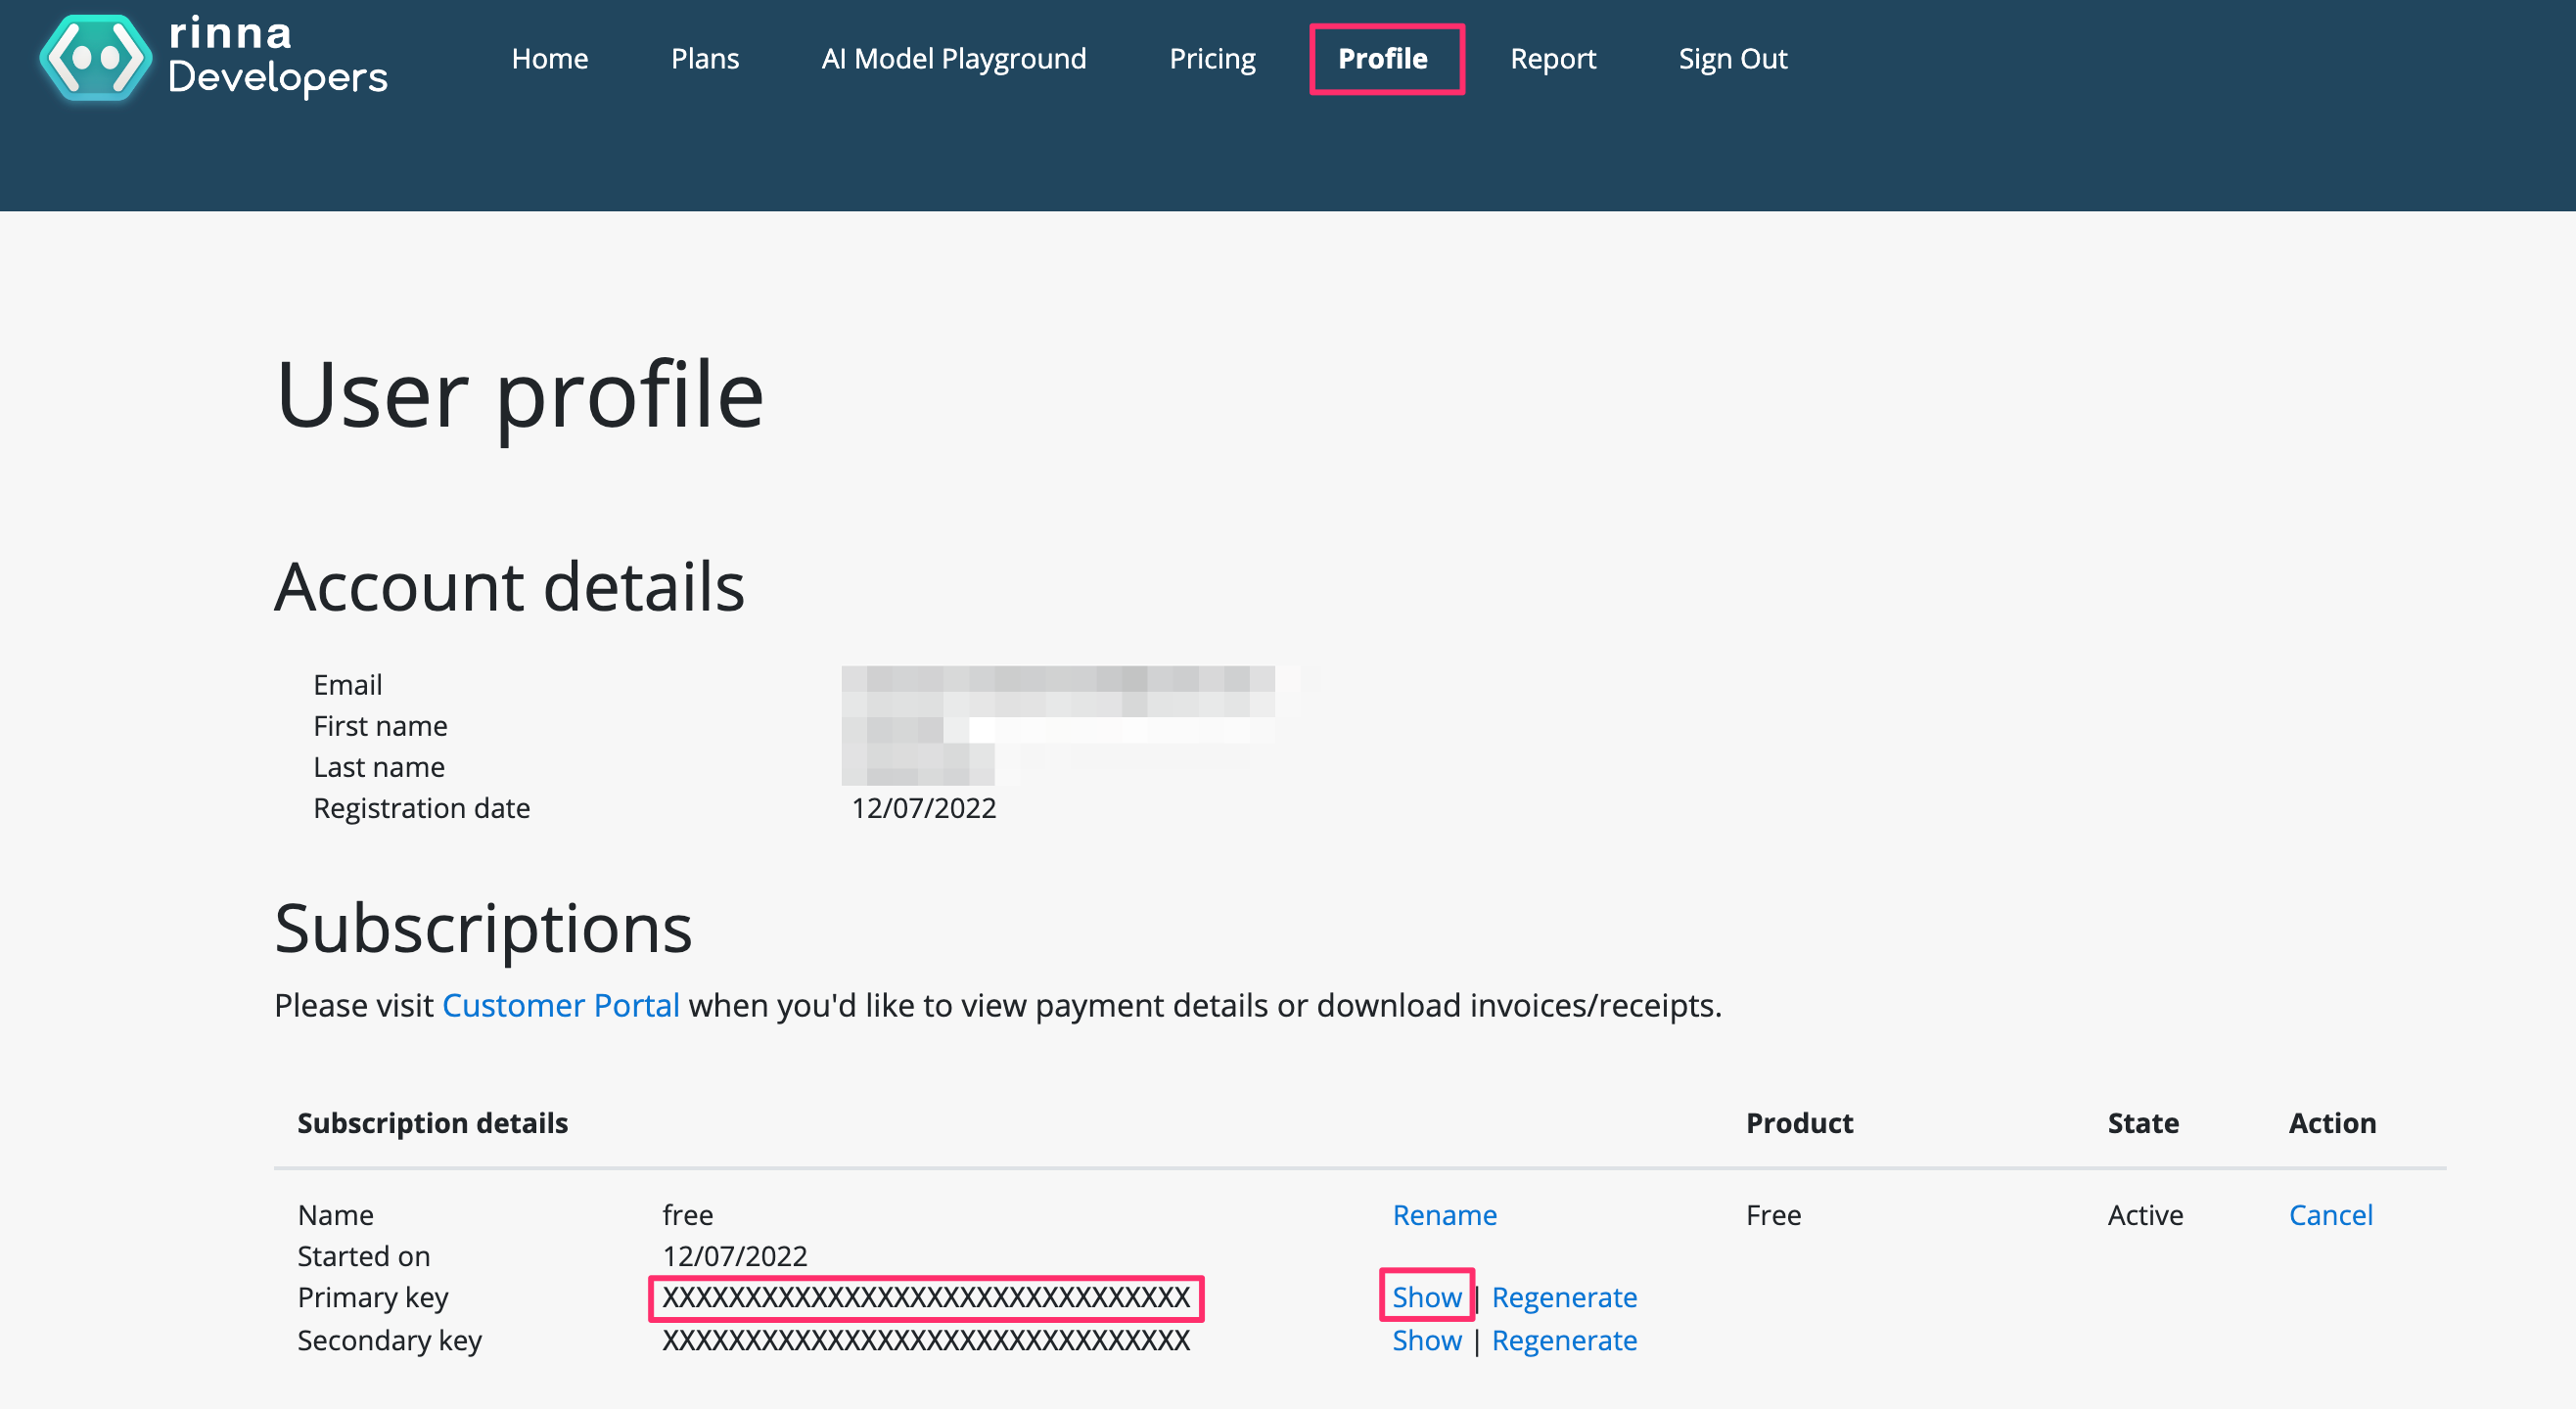
Profileに移動し、showをクリックし、Primary key をメモします。
Japanese Stable DiffusionのAPIは下記を参考
https://developers.rinna.co.jp/api-details#api=z05-text2image-jsd&operation=prediction
DALL-E2のフローで下記の三箇所を変更します。
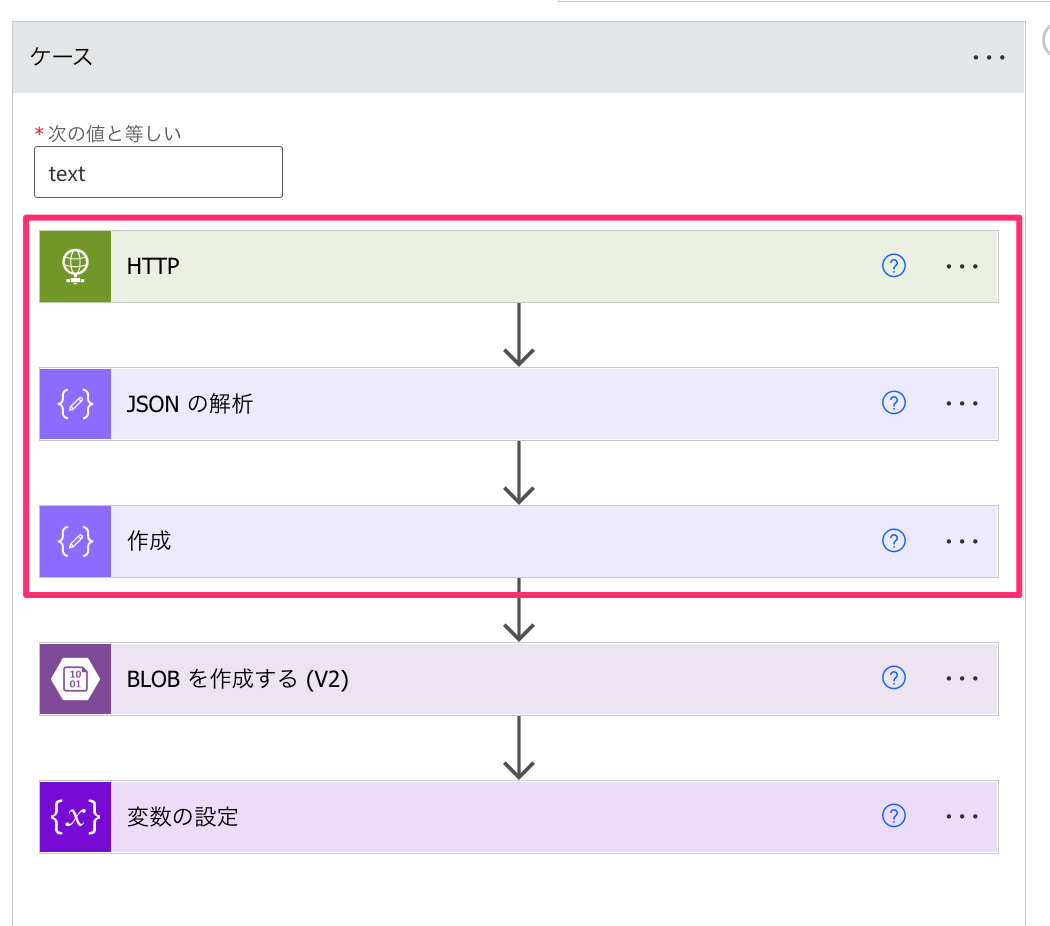
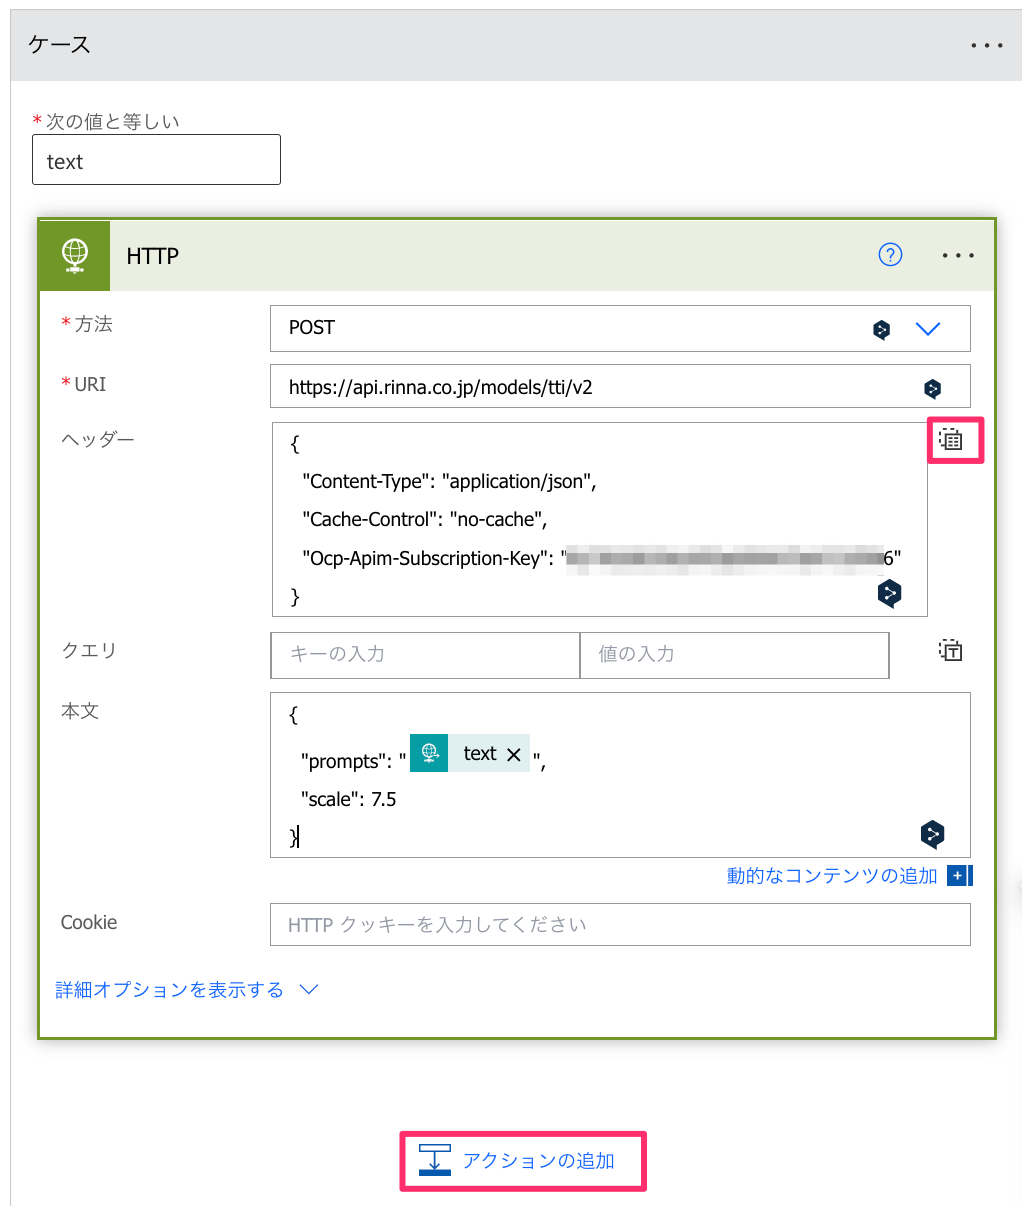
下記のように設定し、アクションの追加をクリックします。
| 設定値 | |
|---|---|
| 方法 | POST |
| URI | https://api.rinna.co.jp/models/tti/v2 |
| ヘッダー | { "Content-Type": "application/json", "Cache-Control": "no-cache", "Ocp-Apim-Subscription-Key": "{メモしたPrimary Key}" } |
| 本文 | { "prompts": "@{items('Apply_to_each')?['message']?['text']}", "scale": 7.5 } |
ヘッダーは赤枠をクリックしてテキストモードに切り替えます。
JSONの解析の変更
下記のように設定し、アクションの追加をクリックします。
| 設定値 | |
|---|---|
| コンテンツ | @{body('HTTP')} |
| スキーマー | 下記JSON |
jsonコード
{
    "type": "object",
    "properties": {
        "image": {
            "type": "string"
        },
        "nsfwContentDetected": {
            "type": "boolean"
        },
        "type": {
            "type": "string"
        },
        "requestMetadata": {
            "type": "object",
            "properties": {
                "engine": {
                    "type": "object",
                    "properties": {
                        "module": {
                            "type": "object",
                            "properties": {
                                "id": {
                                    "type": "string"
                                },
                                "version": {
                                    "type": "string"
                                }
                            }
                        },
                        "model": {
                            "type": "object",
                            "properties": {
                                "id": {
                                    "type": "string"
                                }
                            }
                        },
                        "instance": {
                            "type": "object",
                            "properties": {
                                "id": {
                                    "type": "string"
                                }
                            }
                        }
                    }
                }
            }
        }
    }
}
作成の変更
下記のように設定します。
| 設定値 | |
|---|---|
| 入力 | @{base64ToBinary(replace(body('JSON_の解析')?['image'], 'data:image/png;base64,', ''))} |
【3月2日追記】 ChatGPT APIを組み込み
ChatGPTのフローを作成
GPT-3(text-davinci-003)のAPIは下記を参考
https://platform.openai.com/docs/api-reference/chat
https://platform.openai.com/docs/guides/chat/introduction
DALL-E2のフローで下記の赤枠三箇所を変更し、❌は削除します。
HTTPの変更
| 設定値 | |
|---|---|
| 方法 | POST |
| URI | https://api.openai.com/v1/chat/completions |
| ヘッダー | { "Content-Type": "application/json", "Authorization": "Bearer {メモしたOpenAIのAPI Key}" } |
| 本文 | { "model": "gpt-3.5-turbo", "messages": [{ "role": "user", "content": "@{items('Apply_to_each')?['message']?['text']}" }] } |
JSONの解析の変更
下記のように設定し、アクションの追加をクリックします。
| 設定値 | |
|---|---|
| コンテンツ | @{body('HTTP')} |
| スキーマー | 下記JSON |
jsonコード
{
    "type": "object",
    "properties": {
        "statusCode": {
            "type": "integer"
        },
        "headers": {
            "type": "object",
            "properties": {
                "Transfer-Encoding": {
                    "type": "string"
                },
                "Connection": {
                    "type": "string"
                },
                "Access-Control-Allow-Origin": {
                    "type": "string"
                },
                "Openai-Model": {
                    "type": "string"
                },
                "Openai-Organization": {
                    "type": "string"
                },
                "Openai-Processing-Ms": {
                    "type": "string"
                },
                "Openai-Version": {
                    "type": "string"
                },
                "Strict-Transport-Security": {
                    "type": "string"
                },
                "X-Request-Id": {
                    "type": "string"
                },
                "Cache-Control": {
                    "type": "string"
                },
                "Date": {
                    "type": "string"
                },
                "Content-Type": {
                    "type": "string"
                },
                "Content-Length": {
                    "type": "string"
                }
            }
        },
        "body": {
            "type": "object",
            "properties": {
                "id": {
                    "type": "string"
                },
                "object": {
                    "type": "string"
                },
                "created": {
                    "type": "integer"
                },
                "model": {
                    "type": "string"
                },
                "usage": {
                    "type": "object",
                    "properties": {
                        "prompt_tokens": {
                            "type": "integer"
                        },
                        "completion_tokens": {
                            "type": "integer"
                        },
                        "total_tokens": {
                            "type": "integer"
                        }
                    }
                },
                "choices": {
                    "type": "array",
                    "items": {
                        "type": "object",
                        "properties": {
                            "message": {
                                "type": "object",
                                "properties": {
                                    "role": {
                                        "type": "string"
                                    },
                                    "content": {
                                        "type": "string"
                                    }
                                }
                            },
                            "finish_reason": {
                                "type": "string"
                            },
                            "index": {
                                "type": "integer"
                            }
                        },
                        "required": [
                            "message",
                            "finish_reason",
                            "index"
                        ]
                    }
                }
            }
        }
    }
}
「コントロール」と検索し、組み込みタブ、「Apply to each」をクリックします。
以前の手順から出力を選択に「@{body('JSON_の解析')?['choices']}」を入力し、「変数の設定」アクションを追加し、下記のように設定しします。
| 設定値 | |
|---|---|
| 名前 | msg |
| 値 | 下記のjSON |
{
  "replyToken": "@{items('Apply_to_each')?['replyToken']}",
  "messages": [
    {
      "type": "text",
      "text": "@{replace(replace(items('Apply_to_each_2')?['message']['content'],decodeUriComponent('%0D'),'\n'),decodeUriComponent('%0A'),'\n')}"
    }
  ]
}
動作確認
- 【3月2日追記】 ChatGPT
DALL-E2

GPT-3(text-davinci-003)

Japanese Stable Diffusion

まとめ
Microsoftのテクノロジーを使うと、最先端技術の恩恵にあずかることができますね。
さらにそれが、限られた専門家だけでなく多くの方が活用できる環境を提供しているのが良いですね!色々な分野の民主化が進んでいきそうな気配も感じます!
新しい展開、イノベーションが巻き起こる日も近そうですね。
参考
https://make.powerautomate.com/
https://openai.com/about/
https://developers.rinna.co.jp/
https://qiita.com/joohounsong/items/fdbb783a9467478c6479
https://developers.line.biz/ja/docs/messaging-api/getting-started/#using-console
https://developers.line.biz/ja/docs/messaging-api/building-bot/#page-title
https://openai.com/blog/dall-e-api-now-available-in-public-beta/
https://beta.openai.com/docs/api-reference/images/create#images/create-response_format
https://beta.openai.com/docs/api-reference/completions/create
https://developers.rinna.co.jp/api-details#api=z05-text2image-jsd&operation=prediction
https://platform.openai.com/docs/guides/chat
https://platform.openai.com/docs/api-reference/chat